Page 1 of 4500
LS430 SPECIFICATIONS INDEX
SystemSpecification/Procedure
Air Conditioning
ServiceSERVICE DATA
TorqueTORQUE SPECIFICATION
Axle Nut/Hub Nut
Front69 N.m (700 kgf.cm, 51 ft.lbf)
Rear290 N.m (2,960 kgf.cm, 214 ft.lbf)
BatteryNA
Brakes
Bleeding
SequenceBLEEDING
Disc BrakesSERVICE DATA
TorqueTORQUE SPECIFICATION
Charging
GeneratorSERVICE DATA
TorqueTORQUE SPECIFICATION
Drive Belts
AdjustmentREPLACEMENT
Belt RoutingDRIVE BELT
Engine Cooling
General Service
SpecificationsSERVICE DATA
Radiator Cap
PressureStandard Value
93 to 123 kPa (0.95 to 1.25 kgf/cm
2 , 13.5 to 17.8 psi)
Minimum Standard Value
78 kPa (0.8 kgf/cm
2 , 11.4 psi)
Thermostat R & ITHERMOSTAT
Water Pump R &
IWATER PUMP
Engine Mechanical
CompressionSERVICE DATA
Oil Pressureat idle, 29 kPa (0.3 kgf.cm2 , 43 psi) or more
at 3,000 rpm, 294 to 588 kPa (3.0 to 6.0 kgf.cm
2 , 43 to 85 psi)
OverhaulSERVICE DATA
TorqueTORQUE SPECIFICATION
Page 82 of 4500
OK: REPLACE ABS & TRACTION ACTUATOR ASSY (SEE REPLACEMENT )
7.INSPECT REAR SPEED SENSOR INSTALLATION
Fig. 59: Inspecting Rear Speed Sensor Gap
Courtesy of TOYOTA MOTOR SALES, U.S.A., INC.
a. Check the sensor installation.
OK: Go to next step
There is no clearance between the sensor and rear axle carrier.
The installation bolt is tightened properly.
Torque: 8.0 N.m (82 kgf.cm, 71 in..lbf)
Page 121 of 4500
OK: PROCEED TO NEXT CIRCUIT INSPECTION SHOWN ON PROBLEM SYMPTOMS
TABLE
4.INSPECT SPEED SENSOR TIP
a. Remove the front and rear speed sensor.
b. Check the sensor tip.
OK: Go to next step
No scratches or foreign matter on the sensor tip.
NG: CLEAN OR REPLACE SPEED SENSOR
OK: Go to next step
5.INSPECT SPEED SENSOR ROTOR
a. Remove the front axle hub and front speed sensor rotor.
b. Check the sensor rotor serrations.
OK: Go to next step
No scratches, missing teeth or foreign matter on the rotors.
HINT:
If there is foreign matter in the rotor, remove it and check the output waveform after reassembly.
NG: CLEAN OR REPLACE SPEED SENSOR ROTOR
OK: REPLACE SPEED SENSOR
Page 1067 of 4500
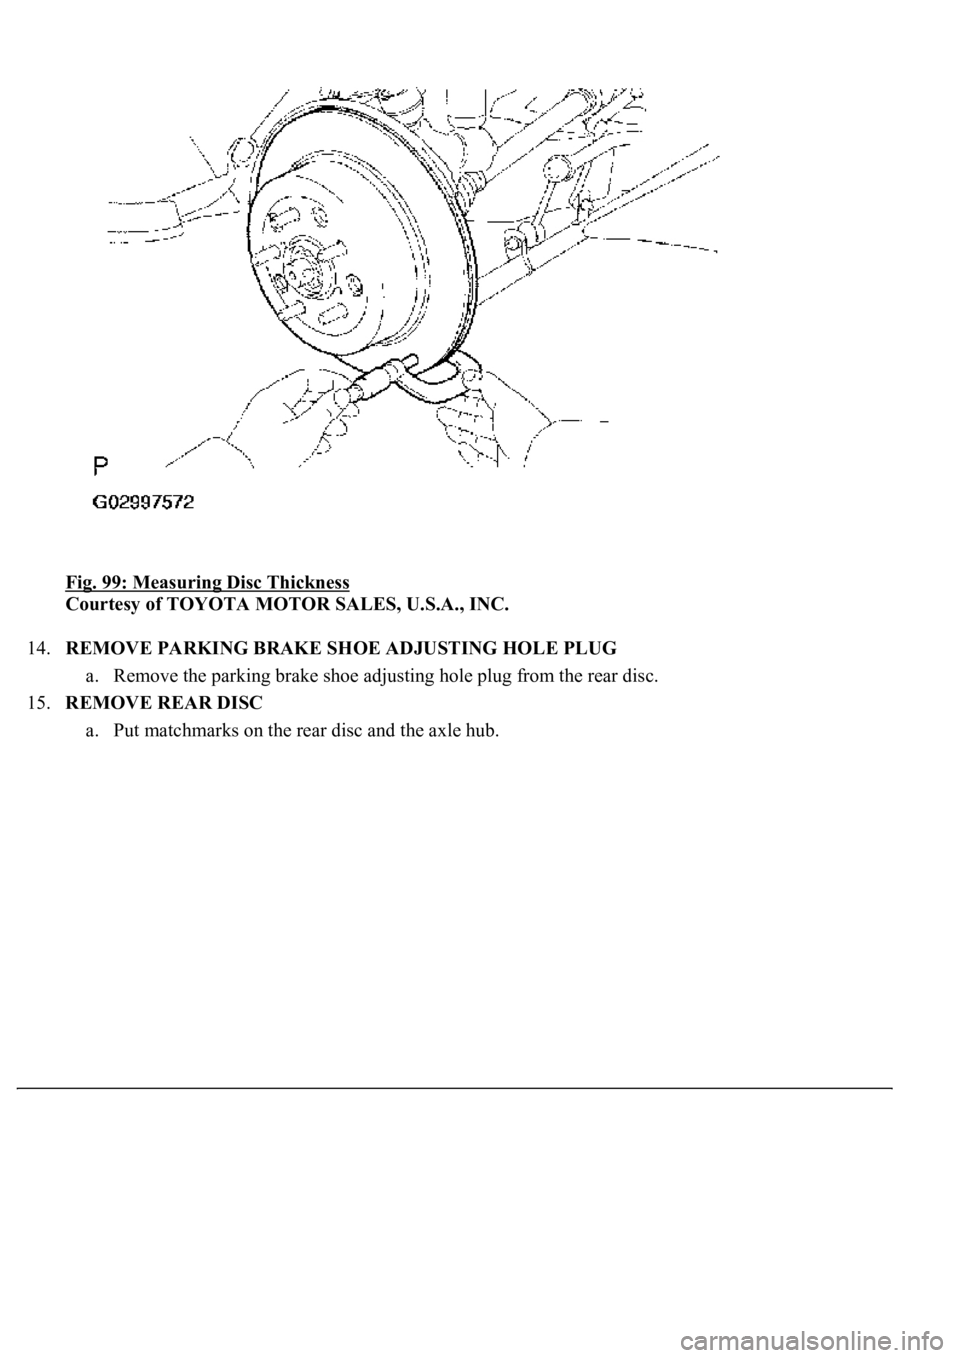
Fig. 99: Measuring Disc Thickness
Courtesy of TOYOTA MOTOR SALES, U.S.A., INC.
14.REMOVE PARKING BRAKE SHOE ADJUSTING HOLE PLUG
a. Remove the parking brake shoe adjusting hole plug from the rear disc.
15.REMOVE REAR DISC
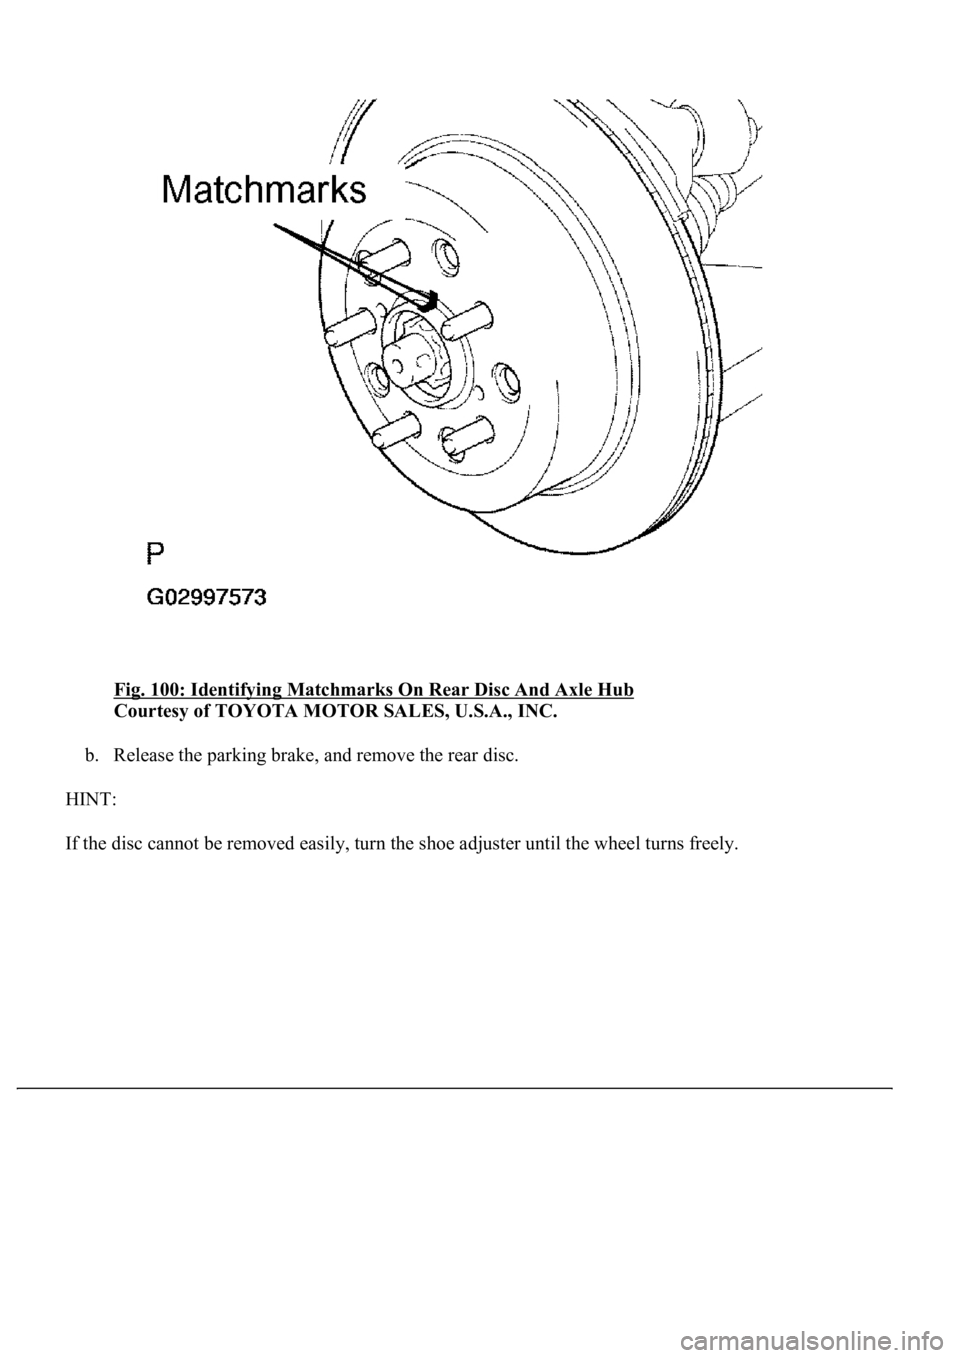
a. Put matchmarks on the rear disc and the axle hub.
Page 1068 of 4500
Fig. 100: Identifying Matchmarks On Rear Disc And Axle Hub
Courtesy of TOYOTA MOTOR SALES, U.S.A., INC.
b. Release the parking brake, and remove the rear disc.
HINT:
If the disc cannot be removed easil
y, turn the shoe adjuster until the wheel turns freely.
Page 1150 of 4500
Use the same procedures for the parking brake cable assy No.2 and No.3.
The procedures listed below are for the parking brake cable assy No.3.
1.REMOVE REAR WHEEL
2.SEPARATE REAR DISC BRAKE CALIPER ASSY LH
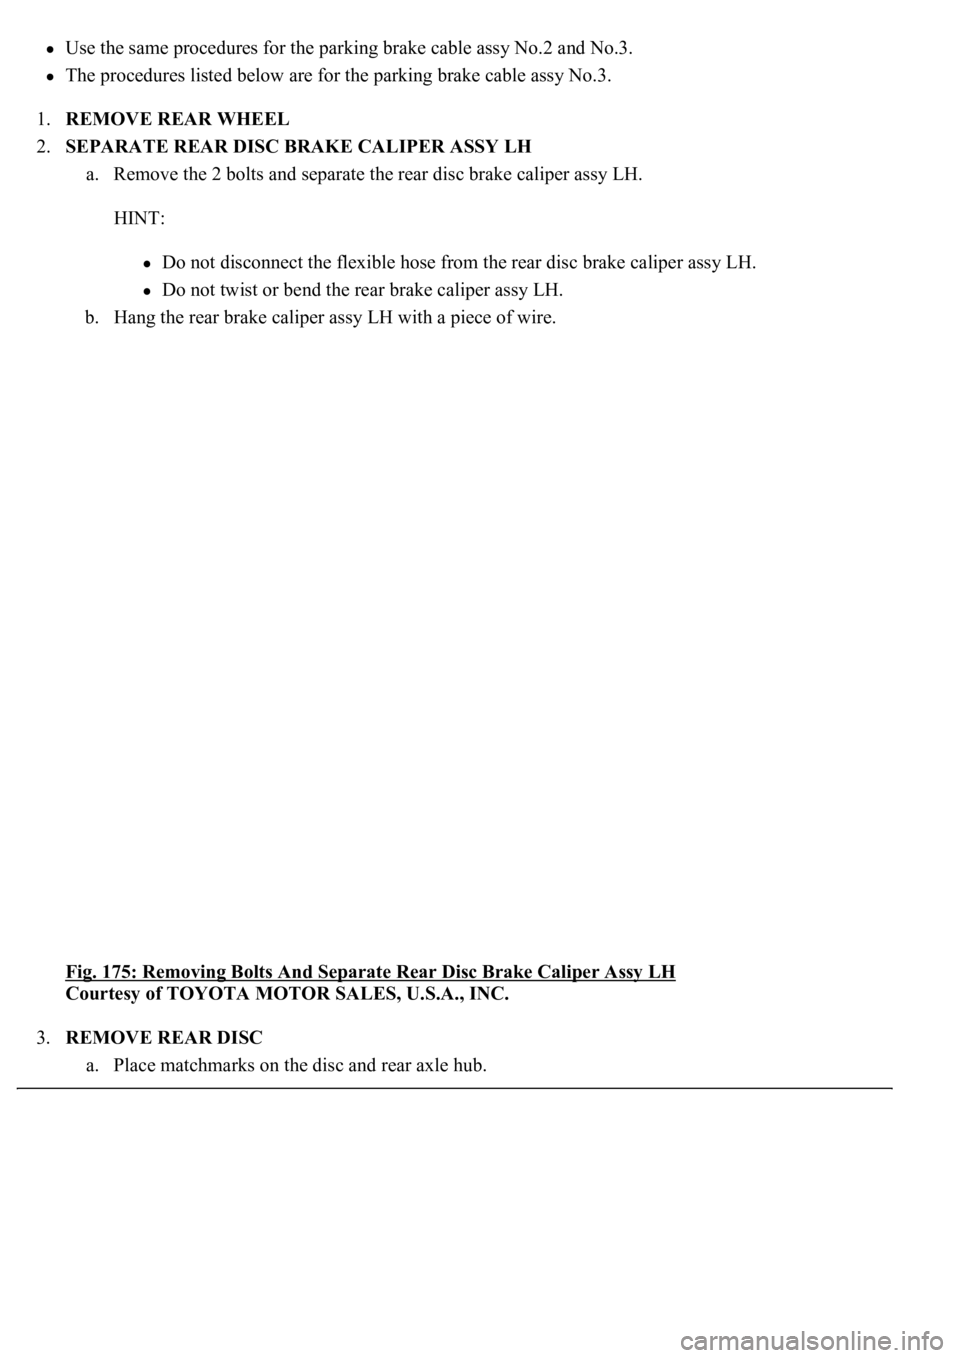
a. Remove the 2 bolts and separate the rear disc brake caliper assy LH.
HINT:
Do not disconnect the flexible hose from the rear disc brake caliper assy LH.
Do not twist or bend the rear brake caliper assy LH.
b. Hang the rear brake caliper assy LH with a piece of wire.
Fig. 175: Removing Bolts And Separate Rear Disc Brake Caliper Assy LH
Courtesy of TOYOTA MOTOR SALES, U.S.A., INC.
3.REMOVE REAR DISC
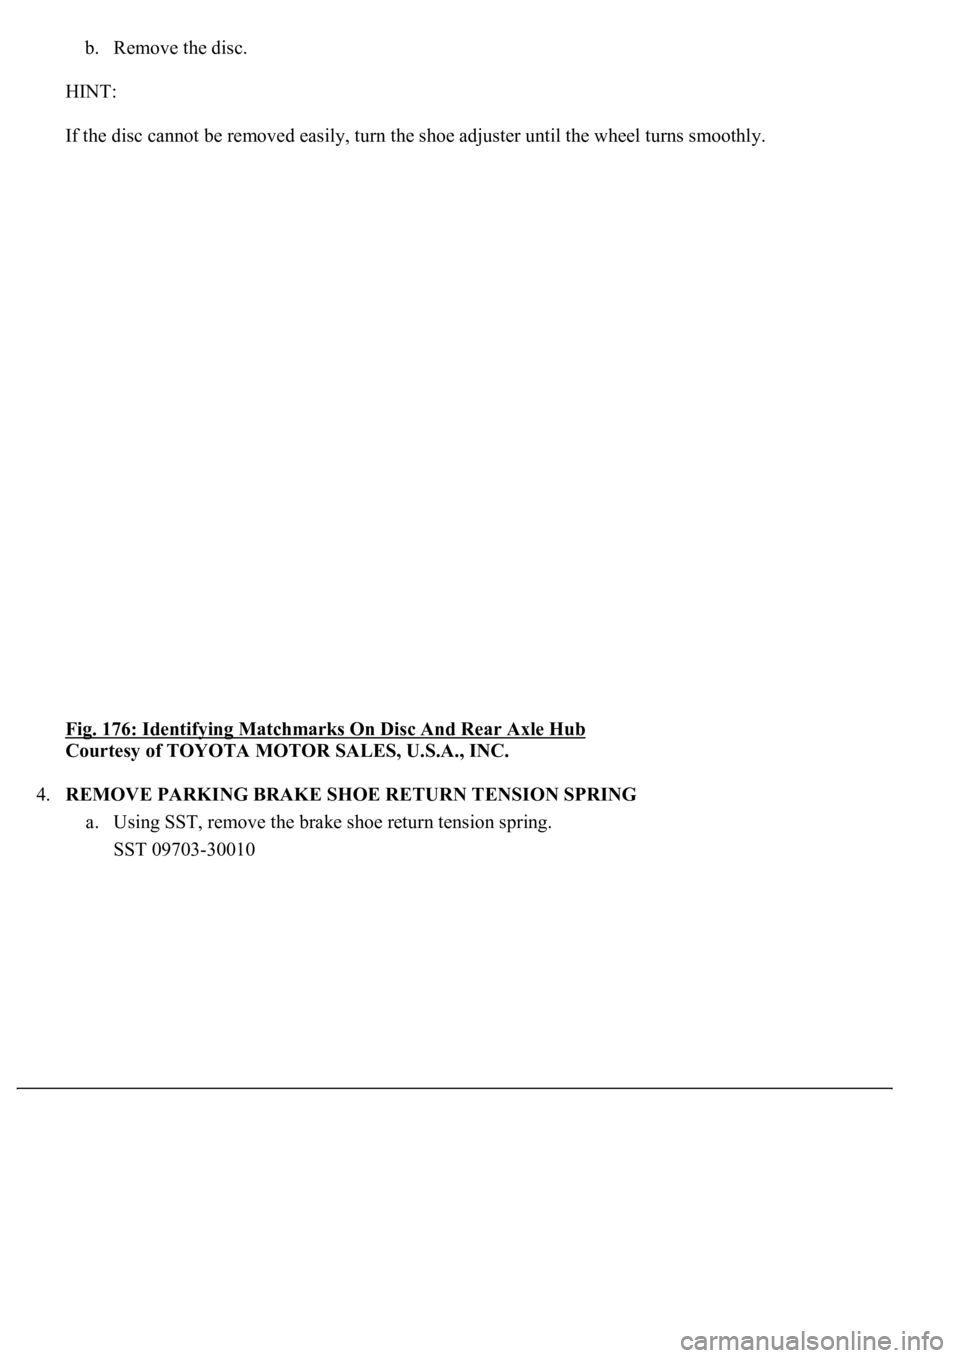
a. Place matchmarks on the disc and rear axle hub.
Page 1151 of 4500
b. Remove the disc.
HINT:
If the disc cannot be removed easily, turn the shoe adjuster until the wheel turns smoothly.
Fig. 176: Identifying Matchmarks On Disc And Rear Axle Hub
Courtesy of TOYOTA MOTOR SALES, U.S.A., INC.
4.REMOVE PARKING BRAKE SHOE RETURN TENSION SPRING
a. Using SST, remove the brake shoe return tension spring.
SST 09703-30010
Page 1155 of 4500
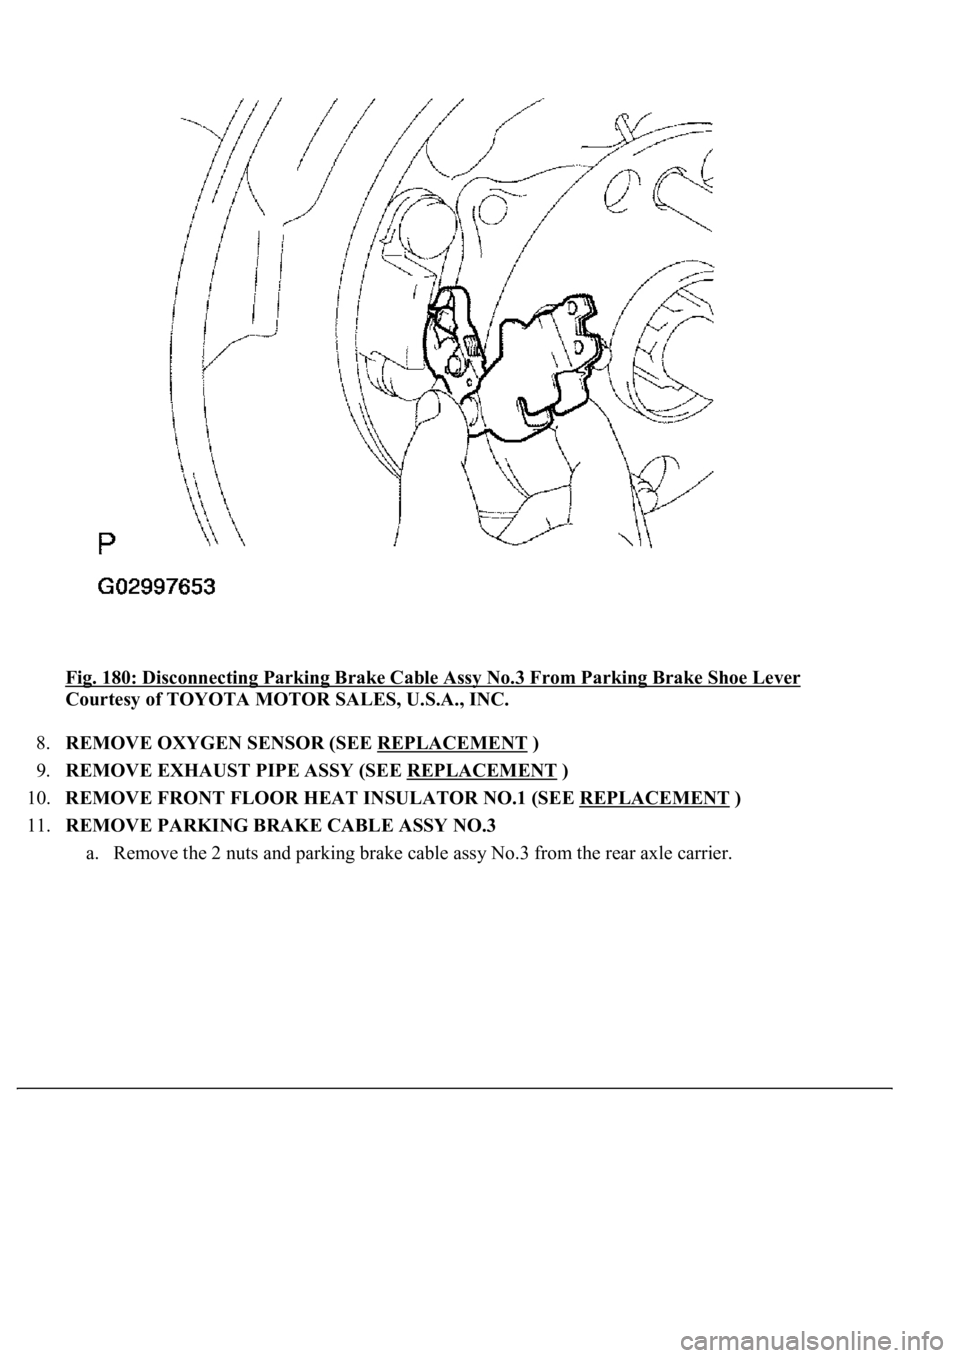
Fig. 180: Disconnecting Parking Brake Cable Assy No.3 From Parking Brake Shoe Lever
Courtesy of TOYOTA MOTOR SALES, U.S.A., INC.
8.REMOVE OXYGEN SENSOR (SEE REPLACEMENT
)
9.REMOVE EXHAUST PIPE ASSY (SEE REPLACEMENT
)
10.REMOVE FRONT FLOOR HEAT INSULATOR NO.1 (SEE REPLACEMENT
)
11.REMOVE PARKING BRAKE CABLE ASSY NO.3
a. Remove the 2 nuts and parking brake cable assy No.3 from the rear axle carrier.