Page 1517 of 4378
25. Remove the fuel charging wiring harness bracket bolt.
26. Disconnect the crankshaft position (CKP) sensor electrical connector.
27. Disconnect the A/C compressor electrical connector.
28. Unclip the harness from the bracket. �K�l�j . 8 �b�a
232003 Mustang Workshop Manual
17. 11. 2011file:///C:/Ford/2000 - 2004/tsocache/SHEF_4464/S3B~us~en~ ...
Page 1544 of 4378
DISASSEMBLY AND ASSEMBLY OF SUBASSEMBLIES
Piston
Disassembly
1. Remove the clips.
2. Remove the piston pin (6135) from the piston (6108) and connecting rod assembly.
3. Remove the connecting rod (6200) from the piston.
SECTION 303-
01C: Engine — Cobra 4.6L (4V) 2003 Mustang Workshop Manual Material
Item Specification
Super Premium SAE 5W-20
Motor Oil
XO- 5W20- QSP WSS-
M2C153-
H �K�l�j . 1 �b�a
32003 Mustang Workshop Manual
17. 11. 2011file:///C:/Ford/2000 - 2004/tsocache/SHEF_4464/S3B~us~en~ ...
Page 1546 of 4378
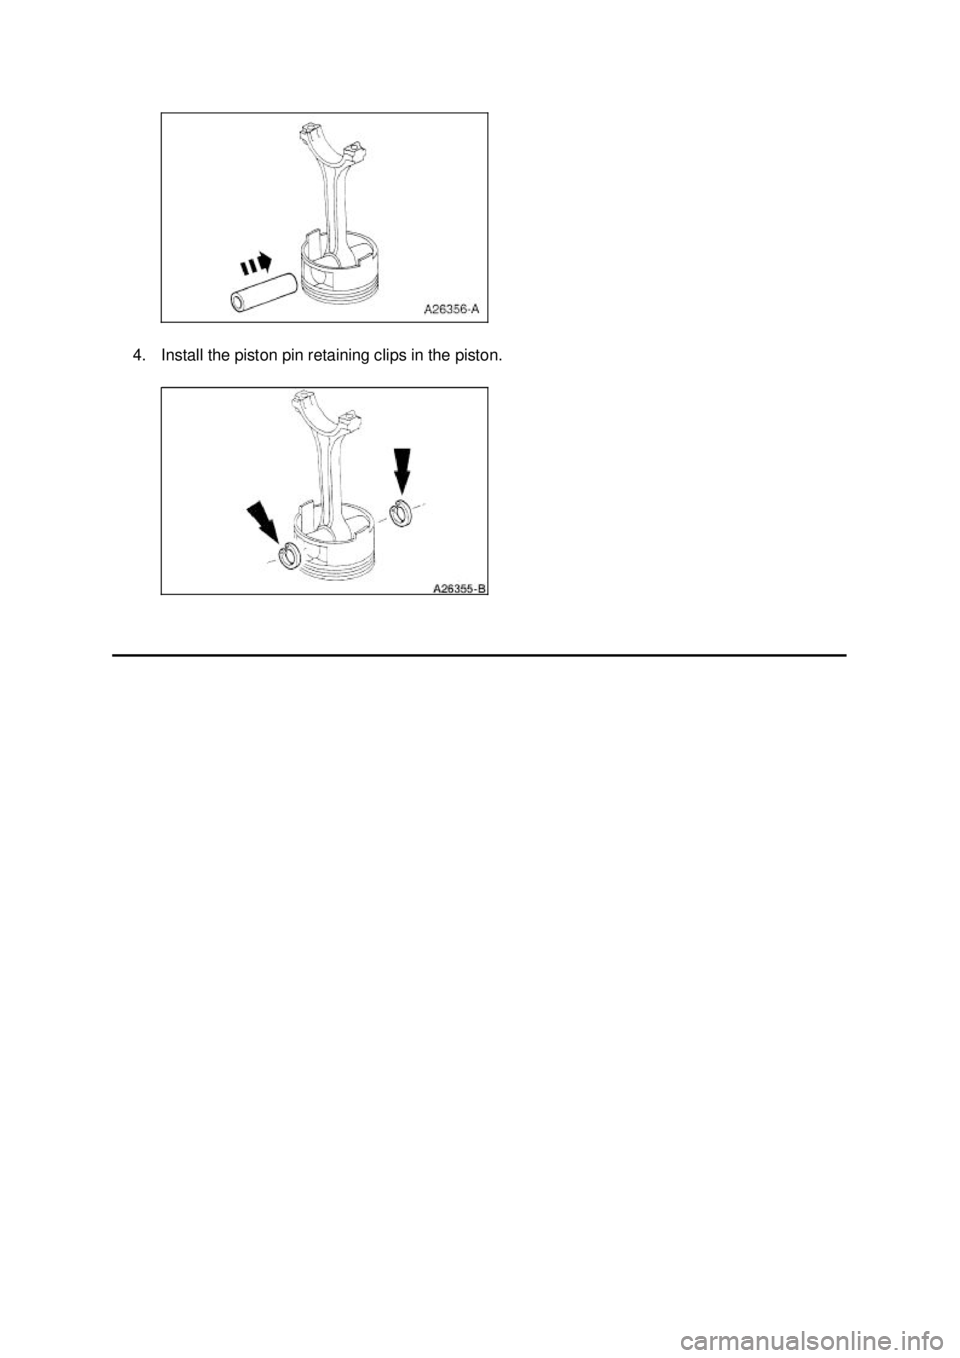
4. Install the piston pin retaining clips in the piston. �K�l�j . 3 �b�a
32003 Mustang Workshop Manual
17. 11. 2011file:///C:/Ford/2000 - 2004/tsocache/SHEF_4464/S3B~us~en~ ...
Page 1560 of 4378
Compress the tensioner plunger, using a vise.
24. Install a retaining clip on the tensioner to hold the plunger in during installation.
25. Remove the tensioner from the vise.
26. If the copper links are not visible, mark two links on one end and one link on the other end, and use as timing marks.
27. Install the timing chain guides. �K�l�j . 11 �b�a
352003 Mustang Workshop Manual
17. 11. 2011file:///C:/Ford/2000 - 2004/tsocache/SHEF_4464/S3B~us~en~ ...
Page 1563 of 4378
33. Install the LH timing chain on the camshaft sprocket, aligning the copper (marked) link with the
timing marks on the sprocket.
34. NOTE: The LH timing chain tensioner arm has a bump near the dowel hole for identification.
Position the LH timing chain tensioner arm on the dowel pin and install the LH timing chain
tensioner.
35. Remove the retaining clip from the LH timing chain tensioner. �K�l�j . 14 �b�a
352003 Mustang Workshop Manual
17. 11. 2011file:///C:/Ford/2000 - 2004/tsocache/SHEF_4464/S3B~us~en~ ...
Page 1564 of 4378
36. Position the RH (outer) timing chain on the crankshaft sprocket, aligning the copper (marked)
link with the timing marks on the sprocket.
37. Install the RH timing chain on the camshaft sprocket, aligning the copper (marked) link with the timing marks on the sprocket.
38. Position the RH timing chain tensioner arm on the dowel pin and install the RH timing chain tensioner.
39. Remove the retaining clip from the RH timing chain tensioner. �K�l�j . 15 �b�a
352003 Mustang Workshop Manual
17. 11. 2011file:///C:/Ford/2000 - 2004/tsocache/SHEF_4464/S3B~us~en~ ...
Page 1576 of 4378
75. Clip the harness to the bracket.
76. Connect the A/C compressor electrical connector.
77. Connect the crankshaft position (CKP) sensor electrical connector.
78. Install the fuel charging wiring harness bracket bolt. �K�l�j . 27 �b�a
352003 Mustang Workshop Manual
17. 11. 2011file:///C:/Ford/2000 - 2004/tsocache/SHEF_4464/S3B~us~en~ ...
Page 1624 of 4378
IN-
VEHICLE REPAIR
Intake Manifold — Upper
Removal 1. Remove the air intake scoop bracket. For additonal information, refer to Section 303 - 12 .
2. Remove the air cleaner outlet tube. For additional information, refer to Section 303 - 12 .
3. Disconnect the accelerator cable, the speed control actuator cable and the return spring.
4. Remove the bolts, disconnect the clip and position the cables out of the way.
5. Disconnect the throttle position (TP) sensor. 6. Disconnect the evaporative emissions (EVAP) return hose. SECTION 303-
01D: Engine — Mach I 4.6L (4V) 2003 Mustang Workshop Manual �K�l�j . 1 �b�a
72003 Mustang Workshop Manual
17. 11. 2011file:///C:/Ford/2000 - 2004/tsocache/SHEF_4464/S3B~us~en~ ...
 sensor electrical connector.
27. Disconnect the A/C compressor electrical connector.
28. Uncli")
 from the piston (6108) and connecting rod assembly.
3. Remove the connecting rod")

 link with the
timing marks on the sprocket.
34. NOTE: The LH timing chain tensioner arm has a bump near the do")
 timing chain on the crankshaft sprocket, aligning the copper (marked)
link with the timing marks on the sprocket.
37. Install the RH timing chain on the camshaft sprocket")
 sensor electrical connector.
78. Install the fuel charging wiring")
