Page 57 of 132
AUDIO SYSTEM
4-16
4
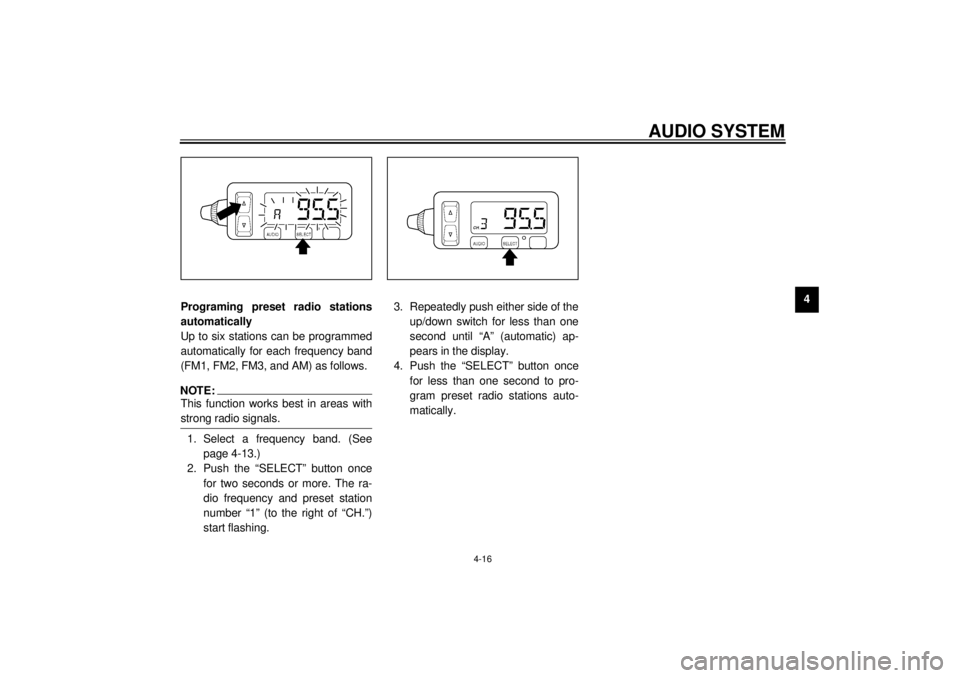
Programing preset radio stations
automatically
Up to six stations can be programmed
automatically for each frequency band
(FM1, FM2, FM3, and AM) as follows.
NOTE:_ This function works best in areas with
strong radio signals. _1. Select a frequency band. (See
page 4-13.)
2. Push the “SELECT” button once
for two seconds or more. The ra-
dio frequency and preset station
number “1” (to the right of “CH.”)
start flashing.3. Repeatedly push either side of the
up/down switch for less than one
second until “A” (automatic) ap-
pears in the display.
4. Push the “SELECT” button once
for less than one second to pro-
gram preset radio stations auto-
matically.
E_5jc.book Page 16 Monday, January 22, 2001 12:12 PM
Page 58 of 132

AUDIO SYSTEM
4-17
4
Optional CD changer
operation
WARNING
_ l
It is dangerous to operate the
CD changer while riding. Never
take your hands off the handle-
bars while riding.
l
Keep the volume at a low
enough level to be aware of traf-
fic conditions and ensure safe-
ty.
_An optional six-disc CD changer can be
mounted in the travel trunk. Ask a
Yamaha dealer to install the genuine
Clarion CDC635 model.Playing a CD
1. Insert up to six CDs into the CD
changer. Follow the manufactur-
er’s directions.
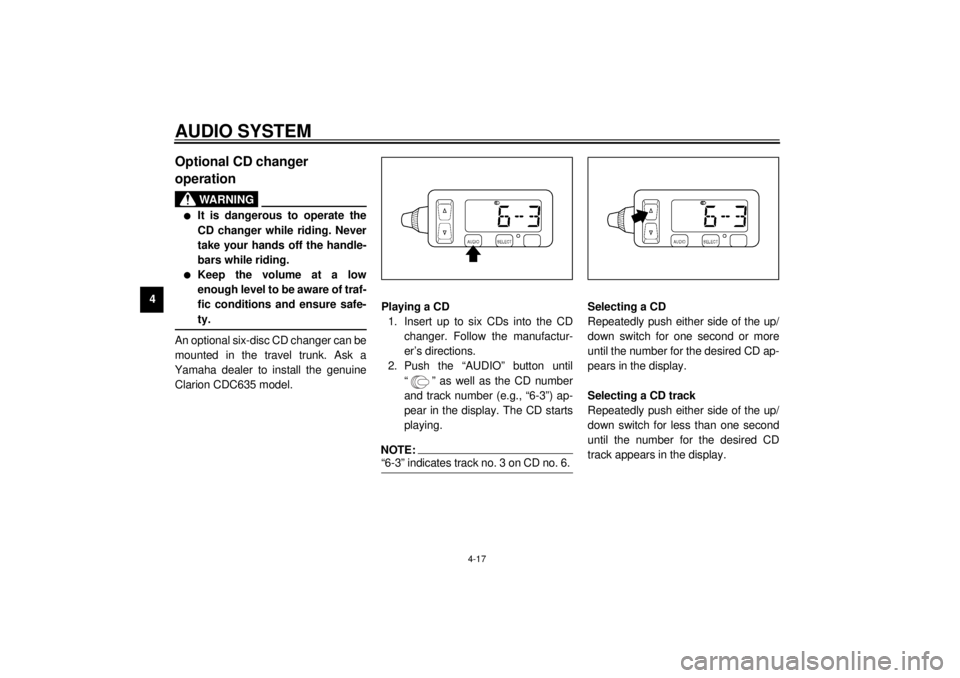
2. Push the “AUDIO” button until
“ ” as well as the CD number
and track number (e.g., “6-3”) ap-
pear in the display. The CD starts
playing.
NOTE:_ “6-3” indicates track no. 3 on CD no. 6. _
Selecting a CD
Repeatedly push either side of the up/
down switch for one second or more
until the number for the desired CD ap-
pears in the display.
Selecting a CD track
Repeatedly push either side of the up/
down switch for less than one second
until the number for the desired CD
track appears in the display.
E_5jc.book Page 17 Monday, January 22, 2001 12:12 PM
Page 59 of 132
AUDIO SYSTEM
4-18
4
Auxiliary audio source
operation Auxiliary audio equipment can be con-
nected to, and played through, the au-
dio system.
1. Insert the output plug of the auxil-
iary equipment into the jack locat-
ed at the right of the cassette
deck.2. Repeatedly push the “AUDIO” but-
ton for less than one second until
“AUX” appears in the display. The
auxiliary equipment can now be
played through the audio system.1. Auxiliary audio input jack
E_5jc.book Page 18 Monday, January 22, 2001 12:12 PM
Page 60 of 132
E_5jc.book Page 19 Monday, January 22, 2001 12:12 PM
Page 61 of 132
PRE-OPERATION CHECKS
5
Pre-operation check list ..................................................................... 5-1
E_5jc.book Page 1 Monday, January 22, 2001 12:12 PM
Page 62 of 132

5-1
5
EAU01114
5-PRE-OPERATION CHECKSThe condition of a vehicle is the owner’s responsibility. Vital components can start to deteriorate quickly and unexpectedly,
even if the vehicle remains unused (for example, as a result of exposure to the elements). Any damage, fluid leakage or loss
of tire air pressure could have serious consequences. Therefore, it is very important, in addition to a thorough visual inspec-
tion, to check the following points before each ride.
EAU03439
Pre-operation check list
ITEM CHECKS PAGE
Fuel• Check fuel level in fuel tank.
• Refuel if necessary.
• Check fuel line for leakage.3-12
Engine oil• Check oil level in engine.
• If necessary, add recommended oil to specified level.
• Check vehicle for oil leakage.7-12
Final gear oil• Check vehicle for oil leakage. 7-15
Coolant• Check coolant level in reservoir.
• If necessary, add recommended coolant to specified level.
• Check cooling system for leakage.7-15–7-16
Front brake• Check operation.
• If soft or spongy, have Yamaha dealer bleed hydraulic system.
• Check lever free play.
• Adjust if necessary.
• Check fluid level in reservoir.
• If necessary, add recommended brake fluid to specified level.
• Check hydraulic system for leakage.7-25, 7-27–7-29
Rear brake• Check operation.
• If soft or spongy, have Yamaha dealer bleed hydraulic system.
• Check fluid level in reservoir.
• If necessary, add recommended brake fluid to specified level.
• Check hydraulic system for leakage.7-26–7-29
E_5jc.book Page 1 Monday, January 22, 2001 12:12 PM
Page 63 of 132

PRE-OPERATION CHECKS
5-2
5
Clutch• Check operation.
• If soft or spongy, have Yamaha dealer bleed hydraulic system.
• Check fluid level in reservoir.
• If necessary, add recommended fluid to specified level.
• Check hydraulic system for leakage.7-25, 7-28
Throttle grip• Make sure that operation is smooth.
• Lubricate throttle grip, housing and cables if necessary.
• Check free play.
• If necessary, have Yamaha dealer make adjustment.7-21
Control cables• Make sure that operation is smooth.
• Lubricate if necessary.—
Wheels and tires• Check for damage.
• Check tire condition and tread depth.
• Check air pressure.
• Correct if necessary.7-21–7-24
Brake and shift pedals• Make sure that operation is smooth.
• Lubricate pedal pivoting points if necessary.7-29
Brake and clutch levers• Make sure that operation is smooth.
• Lubricate lever pivoting points if necessary.7-30
Sidestand• Make sure that operation is smooth.
• Lubricate pivot if necessary.7-30
Chassis fasteners• Make sure that all nuts, bolts and screws are properly tightened.
• Tighten if necessary.—
Instruments, lights, signals
and switches• Check operation.
• Correct if necessary.—
Sidestand switch• Check operation of ignition circuit cut-off system.
• If system is defective, have Yamaha dealer check vehicle.3-21 ITEM CHECKS PAGE
E_5jc.book Page 2 Monday, January 22, 2001 12:12 PM
Page 64 of 132
PRE-OPERATION CHECKS
5-3
5
NOTE:@ Pre-operation checks should be made each time the motorcycle is used. Such an inspection can be accomplished in a very
short time; and the added safety it assures is more than worth the time involved. @
EWA00033
WARNING
@ If any item in the Pre-operation check list is not working properly, have it inspected and repaired before operating
the motorcycle. @E_5jc.book Page 3 Monday, January 22, 2001 12:12 PM