Page 17 of 128
.
When the engine is switched off, information on fuel consumption is stored and re")
This value indicates fuel consumption since the last time the trip computer was reset (by pressing RESET, button C).
When the engine is switched off, information on fuel consumption is stored and remains in system memory until the
RESET (button C) is pressed again.
Current fuel consumption
This value indicates the current fuel consumption, based on readings taken once per second. When the car is not
moving, "----" will be displayed.
Average speed
This value indicates average speed since the last time the trip computer was reset (by pressing RESET, button C).
When the engine is switched off, information on average speed is stored and remains in system memory until the
RESET (button C) is pressed again.
pg. 44 Cruise control
Cruise control
The cruise control panel is located on the left side of the steering wheel hub.
Engaging cruise control/ setting speed
Press the CRUISE button
Press + or - to set the current speed
Increase or decrease speed as desired
NOTE: Cruise control will not function at speeds below 22 mph (35 km/ h).
Braking
Cruise control is automatically disengaged when the brake pedal is depressed. The currently set speed is stored in
memory. Quickly pressing resume
will return the car to the previously set speed.
Acceleration
Momentary acceleration, such as when passing another car, does not affect cruise control operation. The car will
automati- cally return to the previously set speed when you release the accelerator pedal.
When the cruise control is already engaged, the car's speed can be increased or decreased by holding down + or -
until the car reaches the desired speed. One short press on either symbol corresponds to a speed change of
approximately 1 mph (1.6 km/ h).
Disengaging cruise control
Cruise control can also be disengaged by:
Pressing the CRUISE button.
Putting the gear selector in (N) eutral.
NOTE: Cruise control is automatically disen- gaged if the engine is switched off, if the gear selector is placed in (N)
eutral, if the car's speed drops to under 70% of the currently set speed or if the wheels start to spin.
ProCarManuals.com
Page 18 of 128

Temporarily disengaging cruise control
Press 0 to temporarily disengage cruise control. Press "resume" to return to the previously set speed.
Press the brake pedal. Press "resume" to return to the previously set speed..
WARNING!
Cruise control should not be used in heavy traffic or when driving on wet or slippery roads. Cruise control may not
maintain set speed on steep downgrades.
pg. 45 Parking brake, electric socket/ cigarette lighter
Parking brake (hand brake)
The lever is situated between the front seats. The brake is applied to the rear wheels. The indicator light in the
instrument panel will light up to indicate when the parking brake is applied. Apply the parking brake by pulling up
firmly on the lever. Release the parking brake by depressing the button at the end of the lever and lowering the lever
completely.
WARNING!
Always use the parking brake (hand brake) when parking. On hills, also turn the front wheels toward the curb. The
indicator light in the instrument panel will light up even if the parking brake is applied only slightly. Be sure to pull
the lever up sufficiently
Auxiliary sockets
These 12 volt sockets can be used to plug in certain accessories such as cellular telephones, etc. The key must be in
position I (or higher) for the auxiliary socket to function.
The auxiliary sockets can also be used for cigarette lighters, which are available at your Volvo retailer.
NOTE: The cover should be kept on when the auxiliary socket is not in use.
ProCarManuals.com
Page 19 of 128

Ashtrays
Volvo cars in North America do not have an ashtray in the front seat as standard equipment. If you want to have an
ashtray in the front seat, please contact your Volvo retailer.
pg. 46 Electrically operated windows
Electrically operated windows
The electrically operated windows are controlled by buttons in the arm rests. The ignition switch must be ON *
(ignition key in position I, II or the engine running) for the electrically operated windows to function.
To lower: Press down the front edge of the button to the first detent (" stop").
To raise: Lightly pull up the front edge of the button to the first detent (" stop").
* The electrically operated windows will also function after the ignition has been switched off as long as neither of
the front doors has been opened.
Auto up/ down function (front doors only):
Either front door window can be opened or closed automatically.
Auto down: Press the front part of the button as far down as possible and release it immediately. To stop the window
at any time, pull the button up.
Auto up: Pull the front part of the button up as far as possible and release it immediately. To stop the window at any
time, press the button down.
NOTE: The electrically operated windows in the front seat have an overload protecting circuit breaker which reverses
movement of the electrically operated windows to their starting points if they are obstructed in any way. There- after
the windows will operate normally again.
WARNING!
Always remove the ignition key when the vehicle is unattended.
Make sure that childrens' hands are clear before raising the windows.
Never leave children unattended in the car.
ProCarManuals.com
Page 20 of 128
.
If the LED in the switch is OFF: The rear d")
Cutout switch for rear windows
The electrically operated rear door windows can be disabled by a switch located on the driver's door (see illustration).
If the LED in the switch is OFF: The rear door windows can be raised or lowered with the buttons on the rear door
armrests or with the buttons on the driver's door armrest.
If the LED in the switch is ON: The rear door windows can only be raised or lowered with the buttons on the
driver's door armrest.
pg. 47 Electrically operated windows
Electrically operated window in the front passenger's seat
The control for the electrically operated window in the front passenger's seat operates that window only.
Electrically operated windows in the rear doors.
The rear door windows can be operated with the control on each door and the switch on the driver's door. If the LED
in the switch for blocking electrically operated windows in the rear doors (located in the driver's door control panel) is
on, the rear door windows can only be operated from the driver's door.
pg. 48 Rearview mirror/ sideview mirrors
ProCarManuals.com
Page 21 of 128

The autodim function reacts to headlights from following traffic and automatic")
Rearview mirror
A Normal position
B Night position, reduces glare from following headlights
Autodim function (option)
The autodim function reacts to headlights from following traffic and automatically reduces glare.
NOTE: This function is automatically switched off when the gear selector is placed in the Reverse position.
Electrically operated sideview mirrors
The mirror control switches are located on the driver's door armrest.
Driver's side: Press the L switch (an LED in the switch will light up) to activate the adjustment control and then use
this control to adjust the driver's door mirror.
Passenger's door: Press the R switch (an LED in the switch will light up) and then use the adjustment control to
adjust the passenger's door mirror.
After you have adjusted the mirror( s), press the L or R switch again (the LED will go out) to deactivate the
adjustment control.
WARNING!
The mirrors should always be adjusted prior to driving. Objects seen in the passenger's side wide - angle sideview
mirror are closer than they appear to be.
Remote control (central locking system) - option
If you lock the car and later unlock it with the same remote control and open the driver's door, the sideview mirrors
(and the driver's seat) will automatically move to the position they were in when you left the car.
pg. 49 Electrically operated sun roof
ProCarManuals.com
Page 22 of 128
.
To slide open the sun")
Electrically operated sun roof
To operate the sun roof, the ignition key must first be turned to the intermediate or drive position (position I, II or the
engine running).
To slide open the sun roof: Pull the switch back to the first detent (" stop") and hold it until the sun roof has
opened to the position you prefer. The sun roof will initially open to the "comfort" 1 position. Pull and hold the switch
again to open the sun roof completely.
1. A position where the sun roof is not quite fully open which helps alleviate "rumbling" wind noise.
AUTO open: Pull the switch as far back as possible and release it to automatically slide open the sun roof to the
"comfort" position. Pull the switch again to open the sun roof completely.
To close the sun roof: Push the switch forward to the first detent (" stop") and hold it until the sun roof has closed
completely.
AUTO close: Push the switch forward as far as possible and release it to automati- cally close the sun roof.
NOTE: If the sun roof is impeded during AUTO close, it will reverse direction, reopen and stop.
Ventilation position (opening the rear edge of the sun roof): With the sun roof closed, push up the rear section of
the switch. To close, pull the front section of the switch straight down until the sun roof has closed completely.
pg. 50 Electrically operated sun roof
Sun visor:
The sun roof also features a sliding sun visor. The visor slides open automatically when the sun roof is opened. The
visor must be closed manually.
CAUTION:
ProCarManuals.com
Page 23 of 128
Do not attempt to fully close the sun visor when the sun roof is in the ventilation position as this could damage the
mechanism.
WARNING!
The sun roof must never be obstructed in any way when in operation.
Contents | Top of Page
ProCarManuals.com
Page 24 of 128

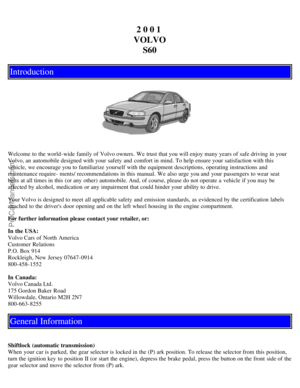
2 0 0 1
VOLVO S60
Introduction
Welcome to the world-wide family of Volvo owners. We trust that you will enjoy many years of safe driving in your
Volvo, an automobile designed with your safety and comfort in mind. To help ensure your satisfaction with this
vehicle, we encourage you to familiarize yourself with the equipment descriptions, operating instructions and
maintenance require- ments/ recommendations in this manual. We also urge you and your passengers to wear seat
belts at all times in this (or any other) automobile. And, of course, please do not operate a vehicle if you may be
affected by alcohol, medication or any impairment that could hinder your ability to drive.
Your Volvo is designed to meet all applicable safety and emission standards, as evidenced by the certification labels
attached to the driver's door opening and on the left wheel housing in the engine compartment.
For further information please contact your retailer, or:
In the USA:
Volvo Cars of North America
Customer Relations
P.O. Box 914
Rockleigh, New Jersey 07647-0914
800-458-1552
In Canada:
Volvo Canada Ltd.
175 Gordon Baker Road
Willowdale, Ontario M2H 2N7
800-663-8255
General Information
Shiftlock (automatic transmission)
When your car is parked, the gear selector is locked in the (P) ark position. To release the selector from this position,
turn the ignition key to position II (or start the engine), depress the brake pedal, press the button on the front side of the
gear selector and move the selector from (P) ark.
ProCarManuals.com
 1
1 2
2 3
3 4
4 5
5 6
6 7
7 8
8 9
9 10
10 11
11 12
12 13
13 14
14 15
15 16
16 17
17 18
18 19
19 20
20 21
21 22
22 23
23 24
24 25
25 26
26 27
27 28
28 29
29 30
30 31
31 32
32 33
33 34
34 35
35 36
36 37
37 38
38 39
39 40
40 41
41 42
42 43
43 44
44 45
45 46
46 47
47 48
48 49
49 50
50 51
51 52
52 53
53 54
54 55
55 56
56 57
57 58
58 59
59 60
60 61
61 62
62 63
63 64
64 65
65 66
66 67
67 68
68 69
69 70
70 71
71 72
72 73
73 74
74 75
75 76
76 77
77 78
78 79
79 80
80 81
81 82
82 83
83 84
84 85
85 86
86 87
87 88
88 89
89 90
90 91
91 92
92 93
93 94
94 95
95 96
96 97
97 98
98 99
99 100
100 101
101 102
102 103
103 104
104 105
105 106
106 107
107 108
108 109
109 110
110 111
111 112
112 113
113 114
114 115
115 116
116 117
117 118
118 119
119 120
120 121
121 122
122 123
123 124
124 125
125 126
126 127
127