Page 3545 of 4323
BE0G4±01
± BODY ELECTRICALGARAGE DOOR OPENER SYSTEM
BE±133
3537 Author�: Date�:
2005 SEQUOIA (RM1146U)
REMOVAL
1. REMOVE FRONT PERSONAL LIGHT LENS
2. REMOVE FRONT PERSONAL LIGHT
(a) Remove the 3 screws.
(b) Disconnect the 2 connectors.
3. REMOVE GARAGE DOOR OPENER SWITCH
Page 3546 of 4323

I18597
BE26F±03
I18598
I18599
BE±134
± BODY ELECTRICALGARAGE DOOR OPENER SYSTEM
3538 Author�: Date�:
2005 SEQUOIA (RM1146U)
INSPECTION
1. INSPECT GARAGE DOOR OPENER SWITCH
(a) Press the switch and check that each garage door indica-
tor (green) comes on.
(b) Even if only one switch does not come on, replace it.
2. INSPECT GARAGE DOOR OPENER REGISTRATION
AND TRANSMITTING
HINT:
Use the home link tester made by KENT MORE for this test.
As it is necessary to record the code of the hand held transmit-
ter, customer's code will be erased. When the inspection is
complete, please register the customer's again.
(a) Check that the inspection code of the hand held transmit-
ter can be recorded (See page BE±129).
If the code can not be registered, replace the garage door open-
er.
(b) Press the switch which an inspection code has been reg-
istered for and check that garage door indicator (green)
of the home link tester comes on.
If the garage door indicator (green) does not come on, replace
the garage door opener.
Page 3547 of 4323
I21538
Wire Harness Side:
I21537
Wire Harness Side:
± BODY ELECTRICALGARAGE DOOR OPENER SYSTEM
BE±135
3539 Author�: Date�:
2005 SEQUOIA (RM1146U)
3. w/ Sliding Roof:
INSPECT GARAGE DOOR OPENER SWITCH CIRCUIT
Disconnect the connector from the switch and inspect the con-
nector on the wire harness side, as shown.
Tester connectionConditionSpecified condition
1 ± GroundAlwaysContinuity
3 ± GroundAlwaysBattery positive voltage
If the circuit is not as specified, inspect the power source or wire
harness.
4. w/o Sliding Roof:
INSPECT GARAGE DOOR OPENER SWITCH CIRCUIT
Disconnect the connector from the switch and inspect the con-
nector on the wire harness side, as shown.
Tester connectionConditionSpecified condition
9 ± GroundAlwaysBattery positive voltage
13 ± GroundAlwaysContinuity
If the circuit is not as specified, inspect the power source or wire
harness.
Page 3548 of 4323
BE0G6±01
BE±136
± BODY ELECTRICALGARAGE DOOR OPENER SYSTEM
3540 Author�: Date�:
2005 SEQUOIA (RM1146U)
INSTALLATION
1. INSTALL GARAGE DOOR OPENER
2. INSTALL FRONT PERSONAL LIGHT
(a) Connect the 2 connectors.
(b) Install the 3 screws.
3. INSTALL FRONT PERSONAL LIGHT LENS
Page 3861 of 4323
05_SEQUOIA_U (L/O 0408)
2
2005 SEQUOIA from Aug. '04 Prod. (OM34424U)
1. Side vents
2. Instrument cluster
3. Center vents
4. Multi±information display
5. Personal lights
6. Garage door opener box or auxiliary
box
7. Electric moon roof switches
8. Side defroster outlet
9. Glove box
10. Power door lock switches
11. Power window switches
12. Power outlets
13. Seat heater switches
14. Rear console box
15. Rear air conditioning controls
16. Headphone input jacks and headphone
volume control dials
17. Input terminal adapter
18. Cup holders
19. Power rear view mirror control switches
20. Lower vent
Instrument panel overview
�View A
Page 4160 of 4323

05_SEQUOIA_U (L/O 0408)
301
2005 SEQUOIA from Aug. '04 Prod. (OM34424U)
OPERATION OF INSTRUMENTS AND
CONTROLS
Other equipment
Multi±information display302 . . . . . . . . . . . . . . . . . . . . . . . . . . . . . . . . . . . .
Clock313 . . . . . . . . . . . . . . . . . . . . . . . . . . . . . . . . . . . . . . . . . . . . . . . . . . . . . .
Cigarette lighter and ashtrays313 . . . . . . . . . . . . . . . . . . . . . . . . . . . . . . . .
Power outlets314 . . . . . . . . . . . . . . . . . . . . . . . . . . . . . . . . . . . . . . . . . . . . . .
Power outlet315 . . . . . . . . . . . . . . . . . . . . . . . . . . . . . . . . . . . . . . . . . . . . . . .
Glove box316 . . . . . . . . . . . . . . . . . . . . . . . . . . . . . . . . . . . . . . . . . . . . . . . . . .
Garage door opener box317 . . . . . . . . . . . . . . . . . . . . . . . . . . . . . . . . . . . .
Auxiliary boxes319 . . . . . . . . . . . . . . . . . . . . . . . . . . . . . . . . . . . . . . . . . . . . .
Rear console box322 . . . . . . . . . . . . . . . . . . . . . . . . . . . . . . . . . . . . . . . . . . .
Note pad holder323 . . . . . . . . . . . . . . . . . . . . . . . . . . . . . . . . . . . . . . . . . . . .
Coin holder324 . . . . . . . . . . . . . . . . . . . . . . . . . . . . . . . . . . . . . . . . . . . . . . . .
Compact disc and cassette tape holder325 . . . . . . . . . . . . . . . . . . . . . . .
Removable console box326 . . . . . . . . . . . . . . . . . . . . . . . . . . . . . . . . . . . . .
Cup holders328 . . . . . . . . . . . . . . . . . . . . . . . . . . . . . . . . . . . . . . . . . . . . . . . .
Tie±down hooks329 . . . . . . . . . . . . . . . . . . . . . . . . . . . . . . . . . . . . . . . . . . . .
Grocery bag hooks330 . . . . . . . . . . . . . . . . . . . . . . . . . . . . . . . . . . . . . . . . .
Cargo net hooks330 . . . . . . . . . . . . . . . . . . . . . . . . . . . . . . . . . . . . . . . . . . . .
Roof luggage carrier330 . . . . . . . . . . . . . . . . . . . . . . . . . . . . . . . . . . . . . . . .
Floor mat331 . . . . . . . . . . . . . . . . . . . . . . . . . . . . . . . . . . . . . . . . . . . . . . . . . .
SECTION 1± 10
Page 4161 of 4323
05_SEQUOIA_U (L/O 0408)
302
2005 SEQUOIA from Aug. '04 Prod. (OM34424U)
1. ªE/Mº button
2. Garage door opener buttons
3. ªMODEº button
4. Garage door opener indicator
5. Outside temperature and cruise
information display
6. Compass
Multi±information displayÐ
Page 4163 of 4323

05_SEQUOIA_U (L/O 0408)
304
2005 SEQUOIA from Aug. '04 Prod. (OM34424U)
ªMODEº button
This button is used to select the item.
Every time you push the ªMODEº button,
the display toggles.
For more details, see ªÐOutside tempera-
ture and cruise information displayº on
page 307 in this Section.
CAUTION
Do not adjust the display while the
vehicle is moving. Be sure to adjust
the display only when the vehicle is
stopped.
The garage door opener (�
Universal Transceiver) is manufactured
under license from HomeLink� and can
be programmed to operate garage
doors, gates, entry doors, door locks,
home lighting systems, and security
systems, etc.
(a) Programming the HomeLink
�
The HomeLink� in your vehicle has 3
buttons and you can store one program
for each button.
To ensure correct programming into the
HomeLink
�, install a new battery in the
hand±held transmitter prior to program-
ming.
The battery side of the hand±held trans-
mitter must be pointed away from the
HomeLink
� during the programming pro-
cess.
For Canadian users, follow the procedure
in ªProgramming an entrance gate/pro-
gramming all devices in the Canadian
marketº.
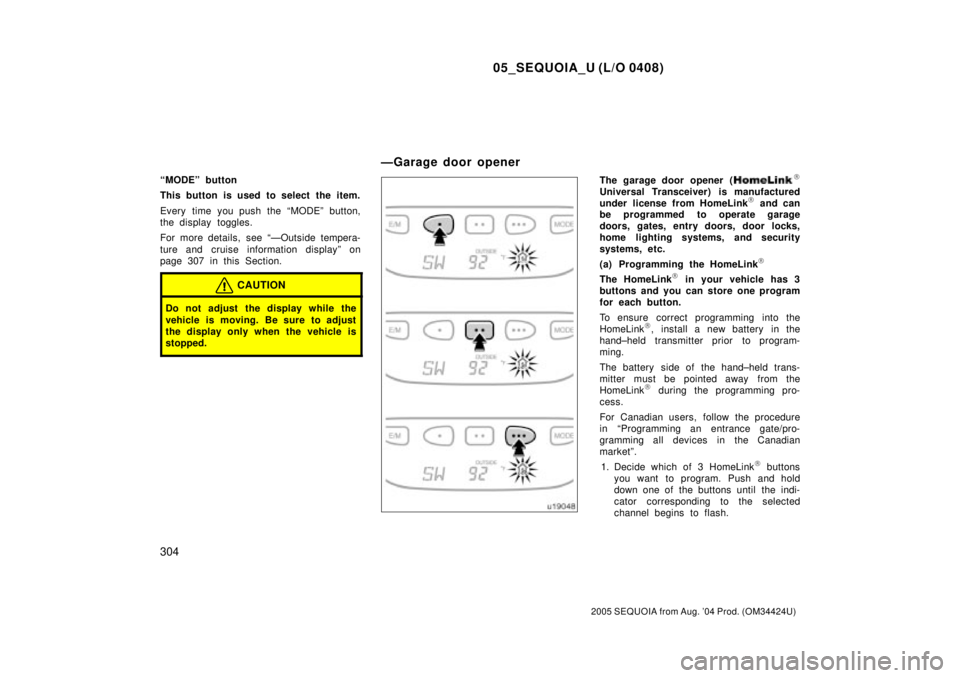
1. Decide which of 3 HomeLink
� buttons
you want to program. Push and hold
down one of the buttons until the indi-
cator corresponding to the selected
channel begins to flash.
ÐGarage door opener