2001 CHRYSLER VOYAGER sensor
[x] Cancel search: sensorPage 3913 of 4284
TEST ACTION APPLICABILITY
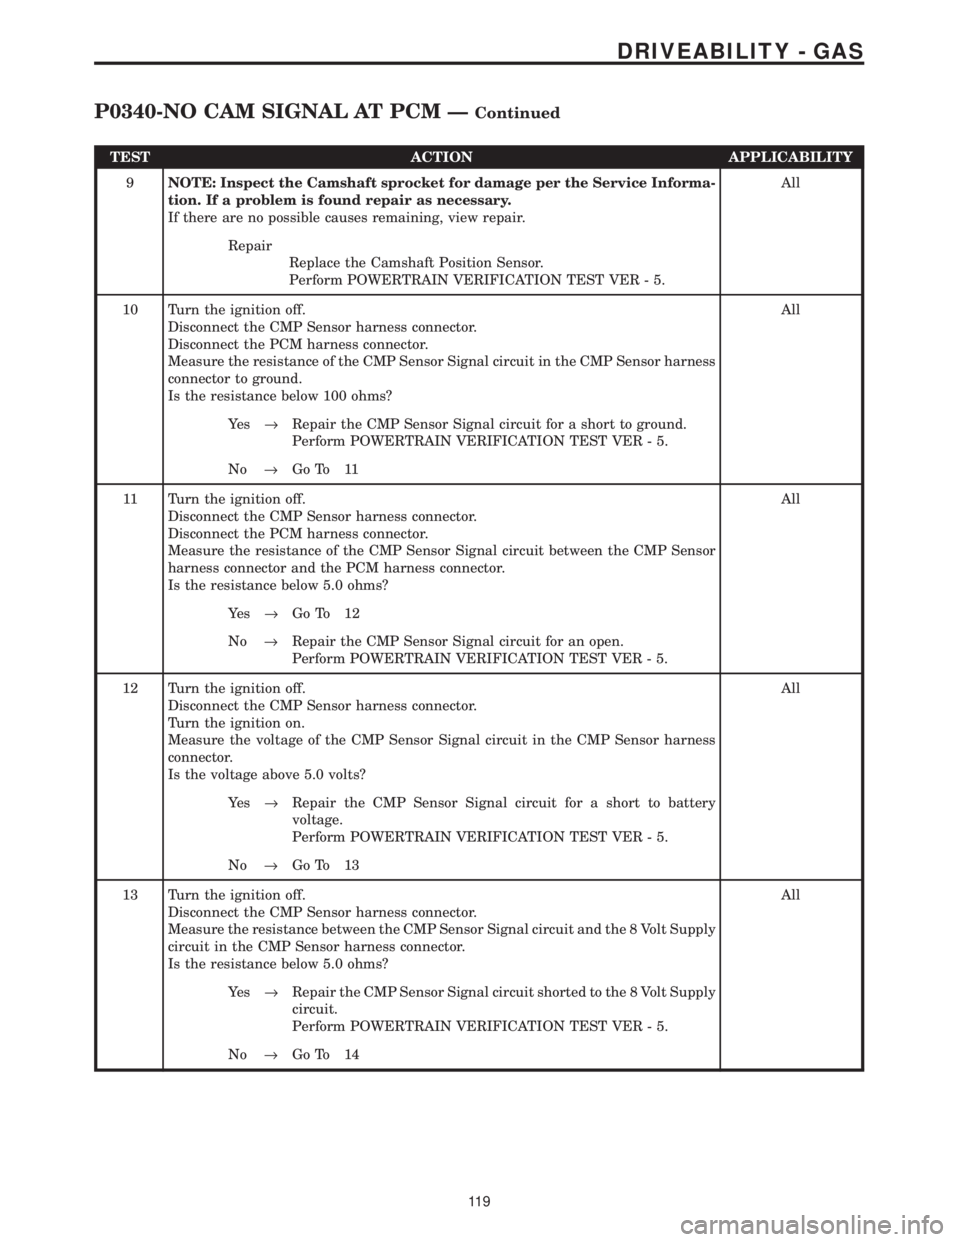
9NOTE: Inspect the Camshaft sprocket for damage per the Service Informa-
tion. If a problem is found repair as necessary.
If there are no possible causes remaining, view repair.All
Repair
Replace the Camshaft Position Sensor.
Perform POWERTRAIN VERIFICATION TEST VER - 5.
10 Turn the ignition off.
Disconnect the CMP Sensor harness connector.
Disconnect the PCM harness connector.
Measure the resistance of the CMP Sensor Signal circuit in the CMP Sensor harness
connector to ground.
Is the resistance below 100 ohms?All
Ye s®Repair the CMP Sensor Signal circuit for a short to ground.
Perform POWERTRAIN VERIFICATION TEST VER - 5.
No®Go To 11
11 Turn the ignition off.
Disconnect the CMP Sensor harness connector.
Disconnect the PCM harness connector.
Measure the resistance of the CMP Sensor Signal circuit between the CMP Sensor
harness connector and the PCM harness connector.
Is the resistance below 5.0 ohms?All
Ye s®Go To 12
No®Repair the CMP Sensor Signal circuit for an open.
Perform POWERTRAIN VERIFICATION TEST VER - 5.
12 Turn the ignition off.
Disconnect the CMP Sensor harness connector.
Turn the ignition on.
Measure the voltage of the CMP Sensor Signal circuit in the CMP Sensor harness
connector.
Is the voltage above 5.0 volts?All
Ye s®Repair the CMP Sensor Signal circuit for a short to battery
voltage.
Perform POWERTRAIN VERIFICATION TEST VER - 5.
No®Go To 13
13 Turn the ignition off.
Disconnect the CMP Sensor harness connector.
Measure the resistance between the CMP Sensor Signal circuit and the 8 Volt Supply
circuit in the CMP Sensor harness connector.
Is the resistance below 5.0 ohms?All
Ye s®Repair the CMP Sensor Signal circuit shorted to the 8 Volt Supply
circuit.
Perform POWERTRAIN VERIFICATION TEST VER - 5.
No®Go To 14
11 9
DRIVEABILITY - GAS
P0340-NO CAM SIGNAL AT PCM ÐContinued
Page 3914 of 4284
TEST ACTION APPLICABILITY
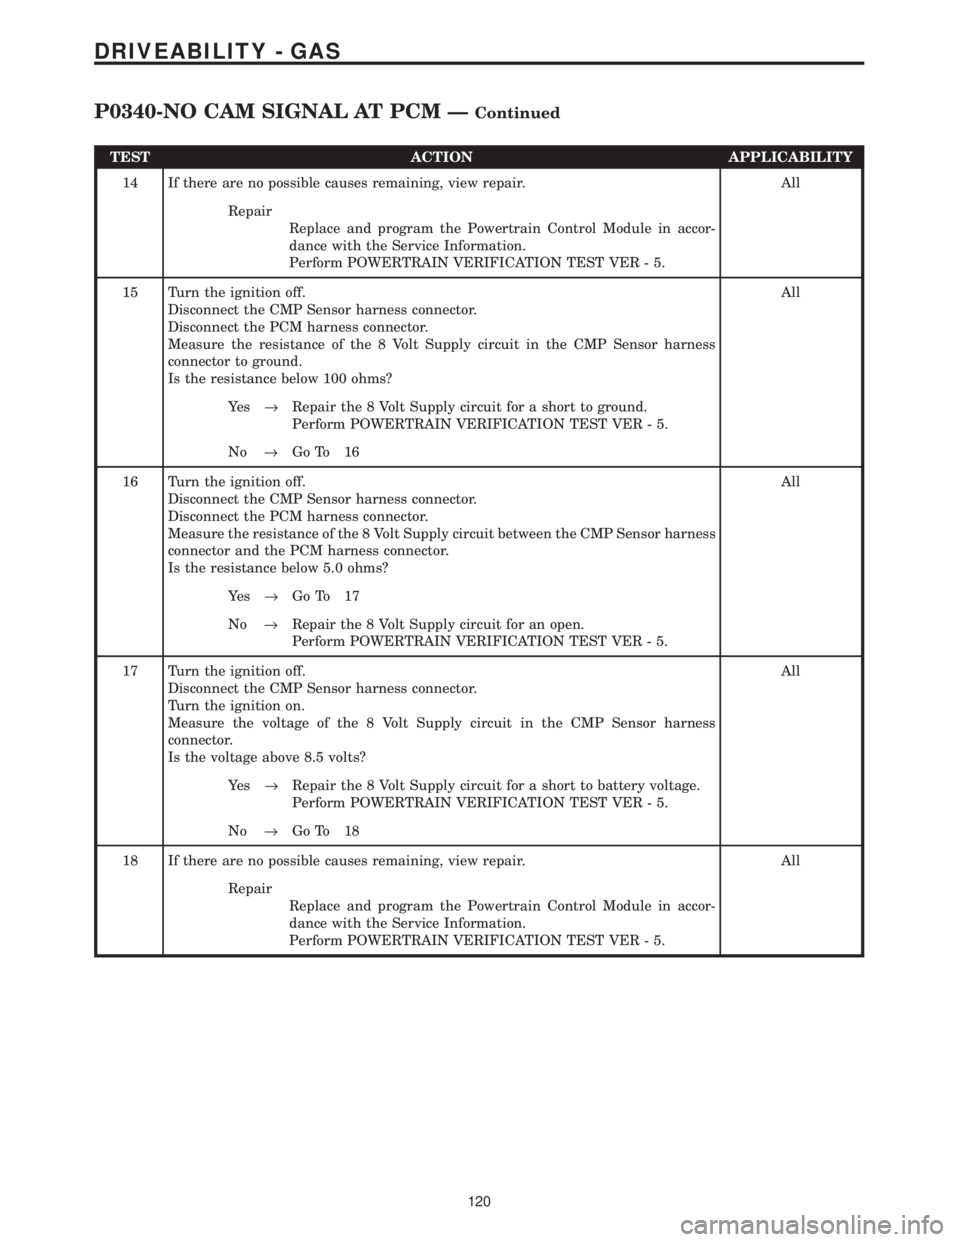
14 If there are no possible causes remaining, view repair. All
Repair
Replace and program the Powertrain Control Module in accor-
dance with the Service Information.
Perform POWERTRAIN VERIFICATION TEST VER - 5.
15 Turn the ignition off.
Disconnect the CMP Sensor harness connector.
Disconnect the PCM harness connector.
Measure the resistance of the 8 Volt Supply circuit in the CMP Sensor harness
connector to ground.
Is the resistance below 100 ohms?All
Ye s®Repair the 8 Volt Supply circuit for a short to ground.
Perform POWERTRAIN VERIFICATION TEST VER - 5.
No®Go To 16
16 Turn the ignition off.
Disconnect the CMP Sensor harness connector.
Disconnect the PCM harness connector.
Measure the resistance of the 8 Volt Supply circuit between the CMP Sensor harness
connector and the PCM harness connector.
Is the resistance below 5.0 ohms?All
Ye s®Go To 17
No®Repair the 8 Volt Supply circuit for an open.
Perform POWERTRAIN VERIFICATION TEST VER - 5.
17 Turn the ignition off.
Disconnect the CMP Sensor harness connector.
Turn the ignition on.
Measure the voltage of the 8 Volt Supply circuit in the CMP Sensor harness
connector.
Is the voltage above 8.5 volts?All
Ye s®Repair the 8 Volt Supply circuit for a short to battery voltage.
Perform POWERTRAIN VERIFICATION TEST VER - 5.
No®Go To 18
18 If there are no possible causes remaining, view repair. All
Repair
Replace and program the Powertrain Control Module in accor-
dance with the Service Information.
Perform POWERTRAIN VERIFICATION TEST VER - 5.
120
DRIVEABILITY - GAS
P0340-NO CAM SIGNAL AT PCM ÐContinued
Page 3918 of 4284
Symptom:
P0401 - EGR SYSTEM FAILURE
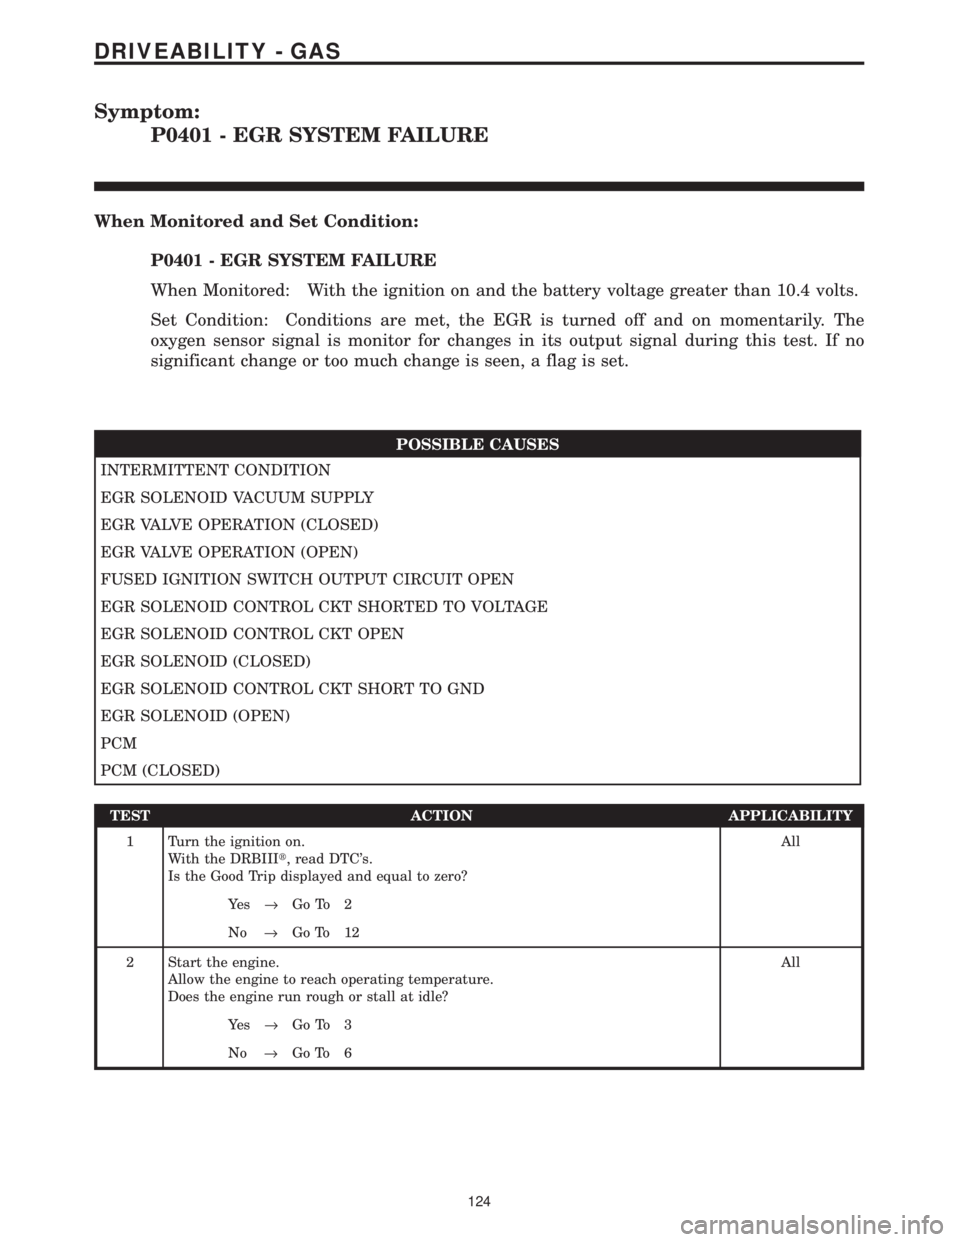
When Monitored and Set Condition:
P0401 - EGR SYSTEM FAILURE
When Monitored: With the ignition on and the battery voltage greater than 10.4 volts.
Set Condition: Conditions are met, the EGR is turned off and on momentarily. The
oxygen sensor signal is monitor for changes in its output signal during this test. If no
significant change or too much change is seen, a flag is set.
POSSIBLE CAUSES
INTERMITTENT CONDITION
EGR SOLENOID VACUUM SUPPLY
EGR VALVE OPERATION (CLOSED)
EGR VALVE OPERATION (OPEN)
FUSED IGNITION SWITCH OUTPUT CIRCUIT OPEN
EGR SOLENOID CONTROL CKT SHORTED TO VOLTAGE
EGR SOLENOID CONTROL CKT OPEN
EGR SOLENOID (CLOSED)
EGR SOLENOID CONTROL CKT SHORT TO GND
EGR SOLENOID (OPEN)
PCM
PCM (CLOSED)
TEST ACTION APPLICABILITY
1 Turn the ignition on.
With the DRBIIIt, read DTC's.
Is the Good Trip displayed and equal to zero?All
Ye s®Go To 2
No®Go To 12
2 Start the engine.
Allow the engine to reach operating temperature.
Does the engine run rough or stall at idle?All
Ye s®Go To 3
No®Go To 6
124
DRIVEABILITY - GAS
Page 3925 of 4284
Symptom:
P0420-1/1 CATALYTIC CONVERTER EFFICIENCY
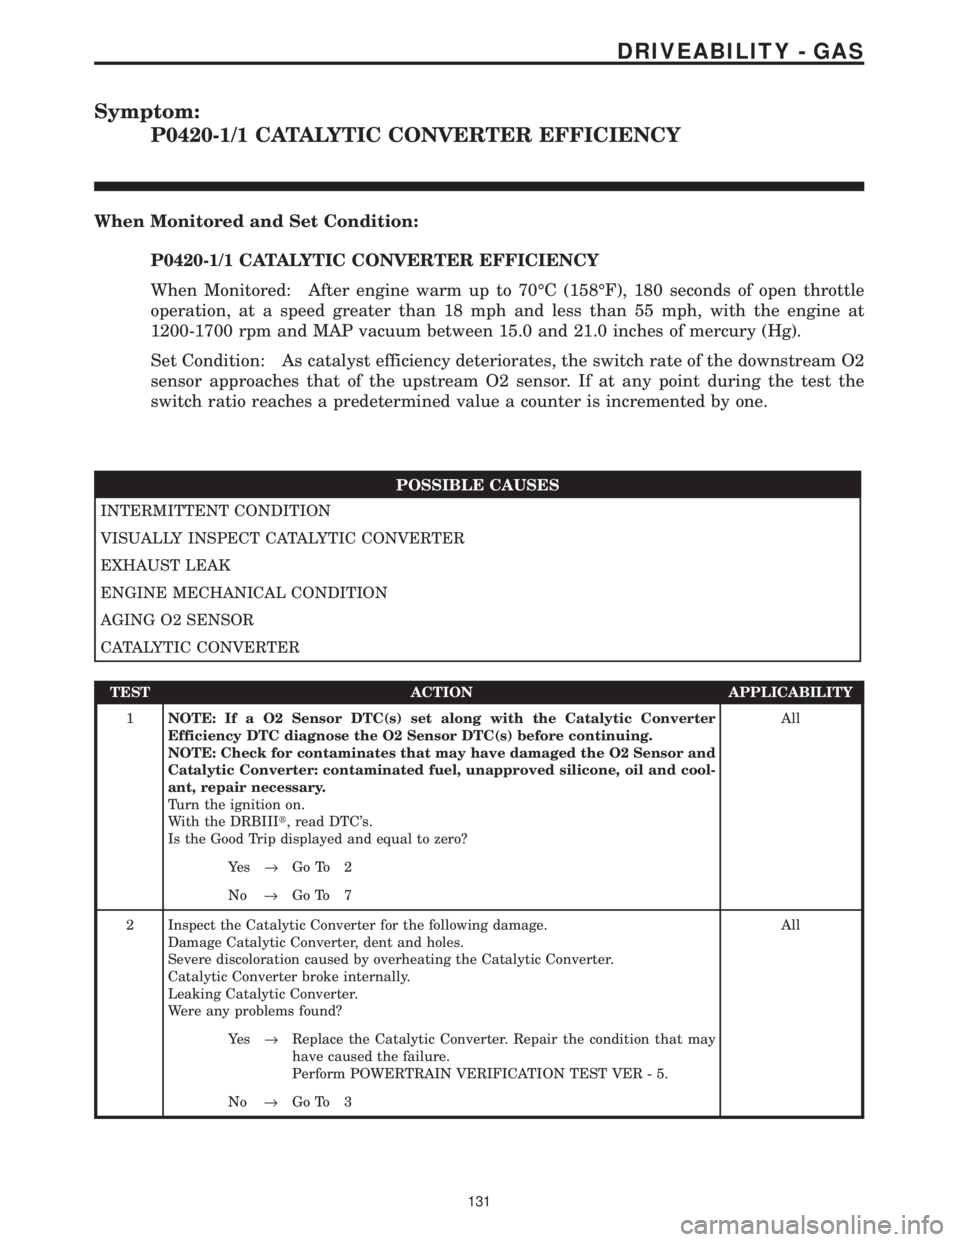
When Monitored and Set Condition:
P0420-1/1 CATALYTIC CONVERTER EFFICIENCY
When Monitored: After engine warm up to 70ÉC (158ÉF), 180 seconds of open throttle
operation, at a speed greater than 18 mph and less than 55 mph, with the engine at
1200-1700 rpm and MAP vacuum between 15.0 and 21.0 inches of mercury (Hg).
Set Condition: As catalyst efficiency deteriorates, the switch rate of the downstream O2
sensor approaches that of the upstream O2 sensor. If at any point during the test the
switch ratio reaches a predetermined value a counter is incremented by one.
POSSIBLE CAUSES
INTERMITTENT CONDITION
VISUALLY INSPECT CATALYTIC CONVERTER
EXHAUST LEAK
ENGINE MECHANICAL CONDITION
AGING O2 SENSOR
CATALYTIC CONVERTER
TEST ACTION APPLICABILITY
1NOTE: If a O2 Sensor DTC(s) set along with the Catalytic Converter
Efficiency DTC diagnose the O2 Sensor DTC(s) before continuing.
NOTE: Check for contaminates that may have damaged the O2 Sensor and
Catalytic Converter: contaminated fuel, unapproved silicone, oil and cool-
ant, repair necessary.
Turn the ignition on.
With the DRBIIIt, read DTC's.
Is the Good Trip displayed and equal to zero?All
Ye s®Go To 2
No®Go To 7
2 Inspect the Catalytic Converter for the following damage.
Damage Catalytic Converter, dent and holes.
Severe discoloration caused by overheating the Catalytic Converter.
Catalytic Converter broke internally.
Leaking Catalytic Converter.
Were any problems found?All
Ye s®Replace the Catalytic Converter. Repair the condition that may
have caused the failure.
Perform POWERTRAIN VERIFICATION TEST VER - 5.
No®Go To 3
131
DRIVEABILITY - GAS
Page 3926 of 4284
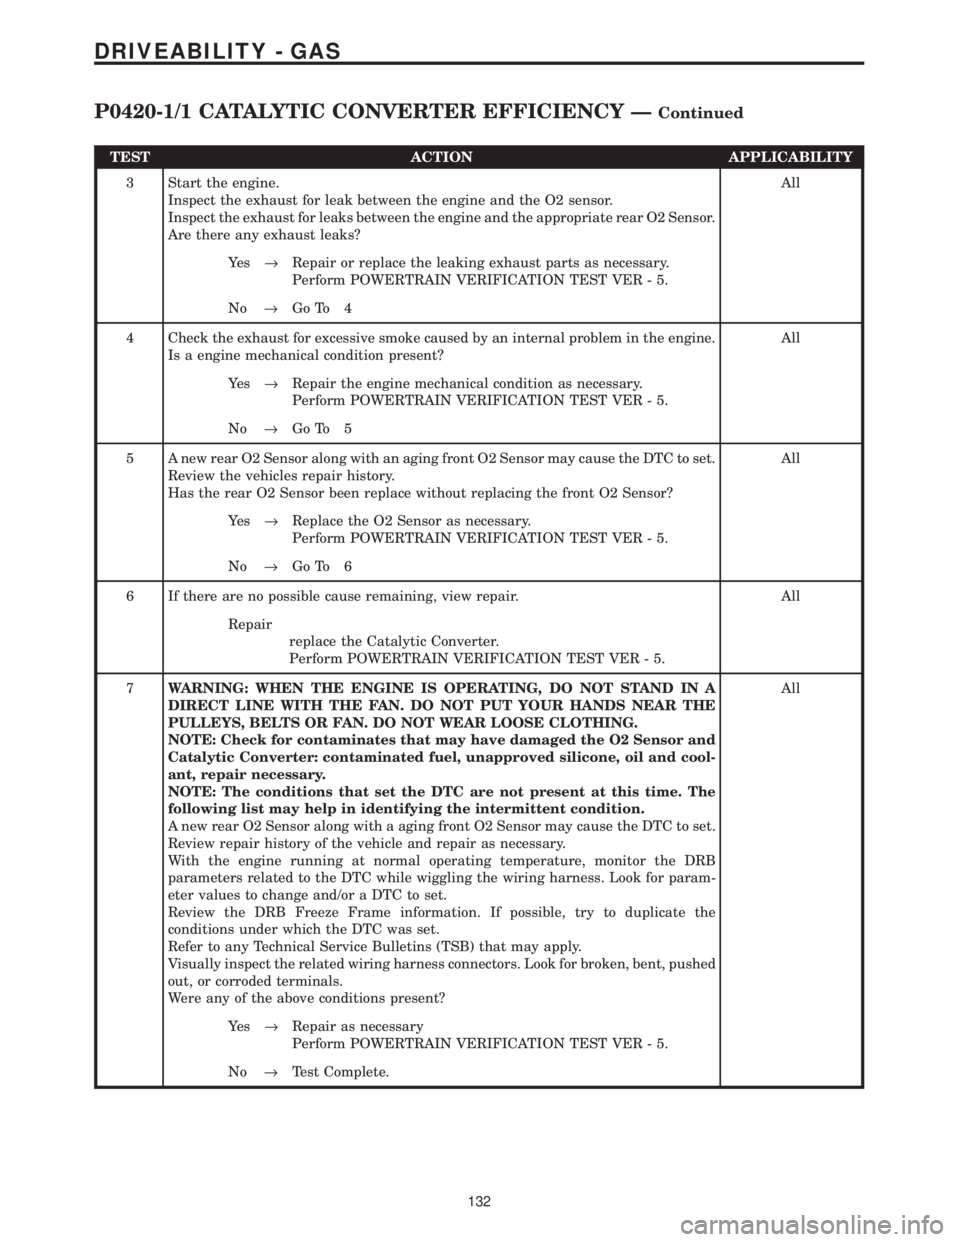
TEST ACTION APPLICABILITY
3 Start the engine.
Inspect the exhaust for leak between the engine and the O2 sensor.
Inspect the exhaust for leaks between the engine and the appropriate rear O2 Sensor.
Are there any exhaust leaks?All
Ye s®Repair or replace the leaking exhaust parts as necessary.
Perform POWERTRAIN VERIFICATION TEST VER - 5.
No®Go To 4
4 Check the exhaust for excessive smoke caused by an internal problem in the engine.
Is a engine mechanical condition present?All
Ye s®Repair the engine mechanical condition as necessary.
Perform POWERTRAIN VERIFICATION TEST VER - 5.
No®Go To 5
5 A new rear O2 Sensor along with an aging front O2 Sensor may cause the DTC to set.
Review the vehicles repair history.
Has the rear O2 Sensor been replace without replacing the front O2 Sensor?All
Ye s®Replace the O2 Sensor as necessary.
Perform POWERTRAIN VERIFICATION TEST VER - 5.
No®Go To 6
6 If there are no possible cause remaining, view repair. All
Repair
replace the Catalytic Converter.
Perform POWERTRAIN VERIFICATION TEST VER - 5.
7WARNING: WHEN THE ENGINE IS OPERATING, DO NOT STAND IN A
DIRECT LINE WITH THE FAN. DO NOT PUT YOUR HANDS NEAR THE
PULLEYS, BELTS OR FAN. DO NOT WEAR LOOSE CLOTHING.
NOTE: Check for contaminates that may have damaged the O2 Sensor and
Catalytic Converter: contaminated fuel, unapproved silicone, oil and cool-
ant, repair necessary.
NOTE: The conditions that set the DTC are not present at this time. The
following list may help in identifying the intermittent condition.
A new rear O2 Sensor along with a aging front O2 Sensor may cause the DTC to set.
Review repair history of the vehicle and repair as necessary.
With the engine running at normal operating temperature, monitor the DRB
parameters related to the DTC while wiggling the wiring harness. Look for param-
eter values to change and/or a DTC to set.
Review the DRB Freeze Frame information. If possible, try to duplicate the
conditions under which the DTC was set.
Refer to any Technical Service Bulletins (TSB) that may apply.
Visually inspect the related wiring harness connectors. Look for broken, bent, pushed
out, or corroded terminals.
Were any of the above conditions present?All
Ye s®Repair as necessary
Perform POWERTRAIN VERIFICATION TEST VER - 5.
No®Test Complete.
132
DRIVEABILITY - GAS
P0420-1/1 CATALYTIC CONVERTER EFFICIENCY ÐContinued
Page 3936 of 4284
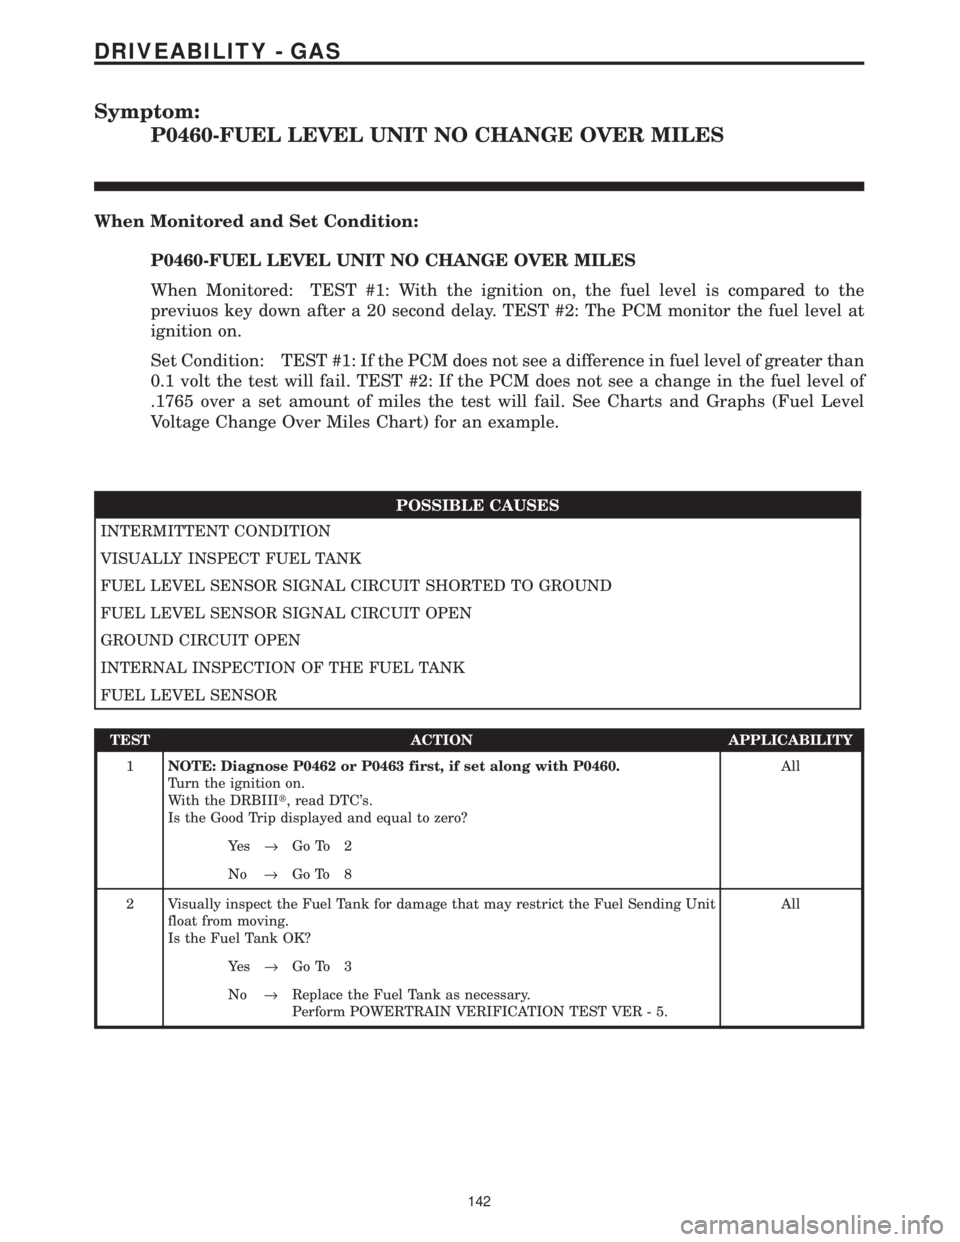
Symptom:
P0460-FUEL LEVEL UNIT NO CHANGE OVER MILES
When Monitored and Set Condition:
P0460-FUEL LEVEL UNIT NO CHANGE OVER MILES
When Monitored: TEST #1: With the ignition on, the fuel level is compared to the
previuos key down after a 20 second delay. TEST #2: The PCM monitor the fuel level at
ignition on.
Set Condition: TEST #1: If the PCM does not see a difference in fuel level of greater than
0.1 volt the test will fail. TEST #2: If the PCM does not see a change in the fuel level of
.1765 over a set amount of miles the test will fail. See Charts and Graphs (Fuel Level
Voltage Change Over Miles Chart) for an example.
POSSIBLE CAUSES
INTERMITTENT CONDITION
VISUALLY INSPECT FUEL TANK
FUEL LEVEL SENSOR SIGNAL CIRCUIT SHORTED TO GROUND
FUEL LEVEL SENSOR SIGNAL CIRCUIT OPEN
GROUND CIRCUIT OPEN
INTERNAL INSPECTION OF THE FUEL TANK
FUEL LEVEL SENSOR
TEST ACTION APPLICABILITY
1NOTE: Diagnose P0462 or P0463 first, if set along with P0460.
Turn the ignition on.
With the DRBIIIt, read DTC's.
Is the Good Trip displayed and equal to zero?All
Ye s®Go To 2
No®Go To 8
2 Visually inspect the Fuel Tank for damage that may restrict the Fuel Sending Unit
float from moving.
Is the Fuel Tank OK?All
Ye s®Go To 3
No®Replace the Fuel Tank as necessary.
Perform POWERTRAIN VERIFICATION TEST VER - 5.
142
DRIVEABILITY - GAS
Page 3937 of 4284
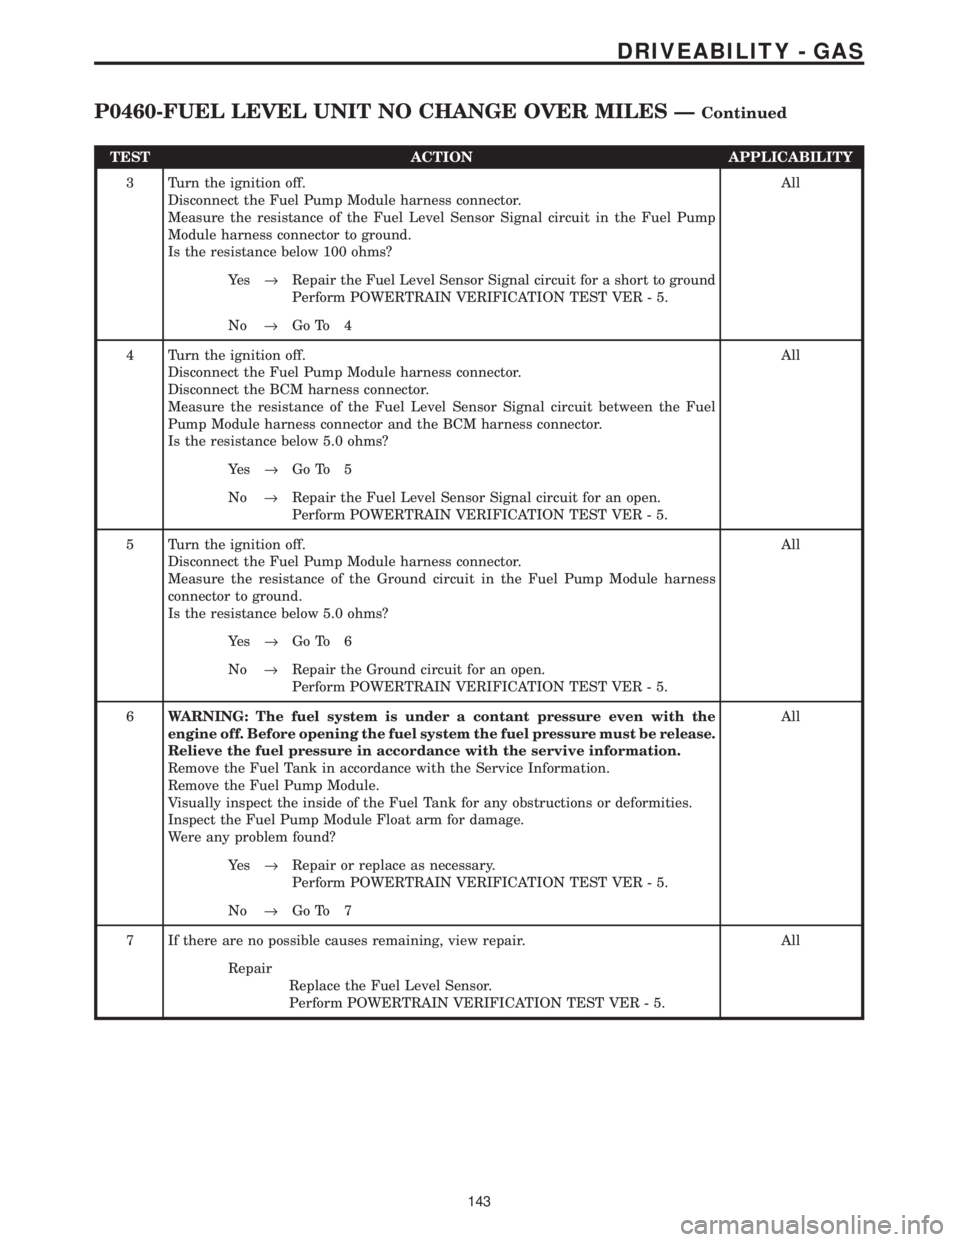
TEST ACTION APPLICABILITY
3 Turn the ignition off.
Disconnect the Fuel Pump Module harness connector.
Measure the resistance of the Fuel Level Sensor Signal circuit in the Fuel Pump
Module harness connector to ground.
Is the resistance below 100 ohms?All
Ye s®Repair the Fuel Level Sensor Signal circuit for a short to ground
Perform POWERTRAIN VERIFICATION TEST VER - 5.
No®Go To 4
4 Turn the ignition off.
Disconnect the Fuel Pump Module harness connector.
Disconnect the BCM harness connector.
Measure the resistance of the Fuel Level Sensor Signal circuit between the Fuel
Pump Module harness connector and the BCM harness connector.
Is the resistance below 5.0 ohms?All
Ye s®Go To 5
No®Repair the Fuel Level Sensor Signal circuit for an open.
Perform POWERTRAIN VERIFICATION TEST VER - 5.
5 Turn the ignition off.
Disconnect the Fuel Pump Module harness connector.
Measure the resistance of the Ground circuit in the Fuel Pump Module harness
connector to ground.
Is the resistance below 5.0 ohms?All
Ye s®Go To 6
No®Repair the Ground circuit for an open.
Perform POWERTRAIN VERIFICATION TEST VER - 5.
6WARNING: The fuel system is under a contant pressure even with the
engine off. Before opening the fuel system the fuel pressure must be release.
Relieve the fuel pressure in accordance with the servive information.
Remove the Fuel Tank in accordance with the Service Information.
Remove the Fuel Pump Module.
Visually inspect the inside of the Fuel Tank for any obstructions or deformities.
Inspect the Fuel Pump Module Float arm for damage.
Were any problem found?All
Ye s®Repair or replace as necessary.
Perform POWERTRAIN VERIFICATION TEST VER - 5.
No®Go To 7
7 If there are no possible causes remaining, view repair. All
Repair
Replace the Fuel Level Sensor.
Perform POWERTRAIN VERIFICATION TEST VER - 5.
143
DRIVEABILITY - GAS
P0460-FUEL LEVEL UNIT NO CHANGE OVER MILES ÐContinued
Page 3939 of 4284
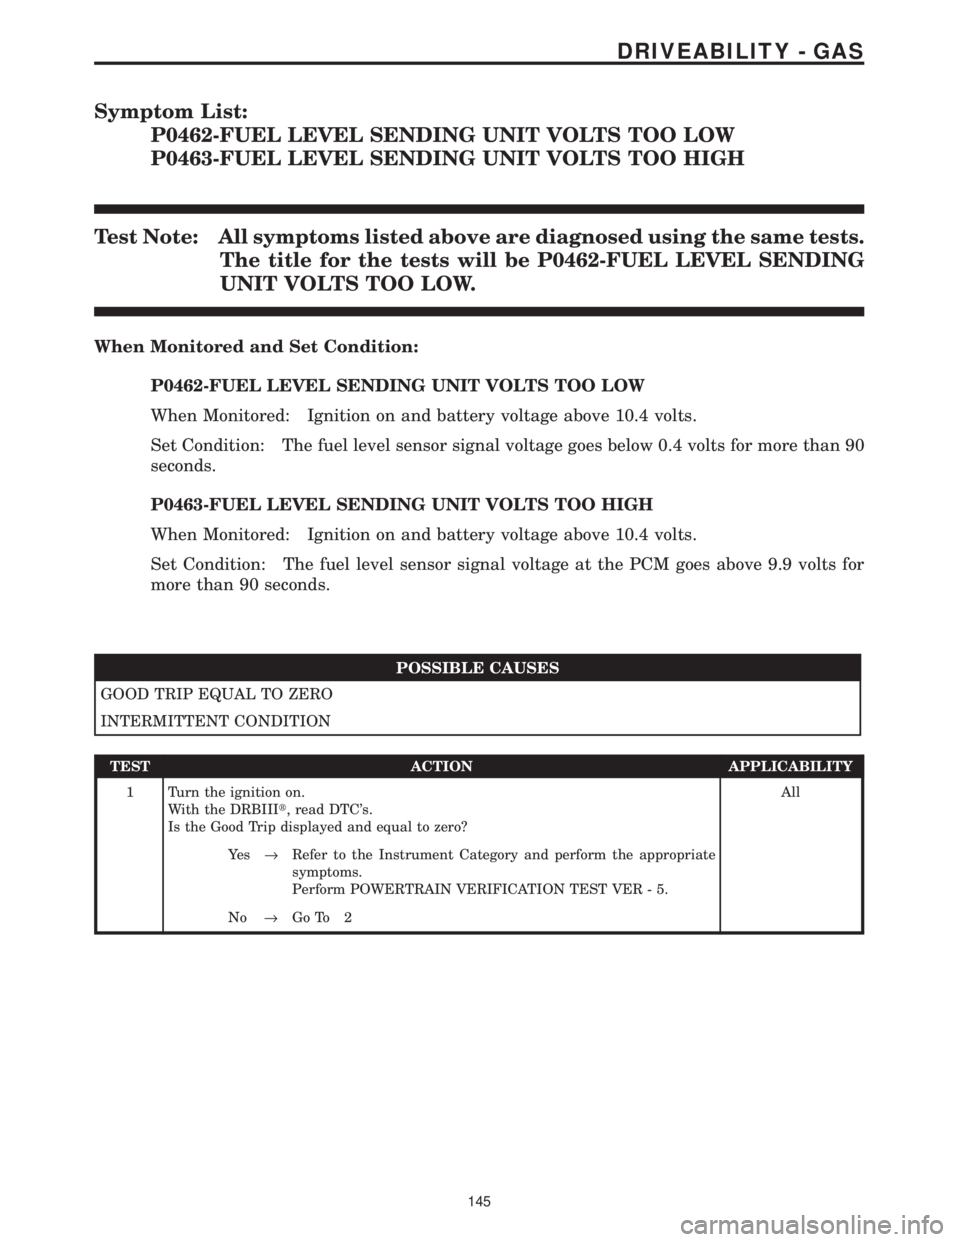
Symptom List:
P0462-FUEL LEVEL SENDING UNIT VOLTS TOO LOW
P0463-FUEL LEVEL SENDING UNIT VOLTS TOO HIGH
Test Note: All symptoms listed above are diagnosed using the same tests.
The title for the tests will be P0462-FUEL LEVEL SENDING
UNIT VOLTS TOO LOW.
When Monitored and Set Condition:
P0462-FUEL LEVEL SENDING UNIT VOLTS TOO LOW
When Monitored: Ignition on and battery voltage above 10.4 volts.
Set Condition: The fuel level sensor signal voltage goes below 0.4 volts for more than 90
seconds.
P0463-FUEL LEVEL SENDING UNIT VOLTS TOO HIGH
When Monitored: Ignition on and battery voltage above 10.4 volts.
Set Condition: The fuel level sensor signal voltage at the PCM goes above 9.9 volts for
more than 90 seconds.
POSSIBLE CAUSES
GOOD TRIP EQUAL TO ZERO
INTERMITTENT CONDITION
TEST ACTION APPLICABILITY
1 Turn the ignition on.
With the DRBIIIt, read DTC's.
Is the Good Trip displayed and equal to zero?All
Ye s®Refer to the Instrument Category and perform the appropriate
symptoms.
Perform POWERTRAIN VERIFICATION TEST VER - 5.
No®Go To 2
145
DRIVEABILITY - GAS