Page 769 of 4770
'99camry U
3
1. Power rear view mirror control switch
2. Headlight and turn signal switch
3. Wiper and washer switches
4. Clock
5. Emergency flasher switch
6. Car audio
7. Rear window and outside rear view
mirror defoggers switch
8. Air conditioning controls
9. Front ashtray
10. Power outlet
11. Cigarette lighter
12. Ignition switch
13. Cruise control switch
14. Tilt steering lock release lever
15. Traction control system off switch
16. Instrument panel light control knob
Page 785 of 4770
'99camry U
19
Trunk lidÐ
To open the trunk lid from the outside,
insert the master key and turn it clock-
wise.
See ºLuggage stowage precautionsº in
Part 2 for precautions to observe for load-
ing luggage.
To close the trunk lid, lower it and press
down on it. After closing the trunk lid, try
pulling it up to make sure it is securely
closed.
CAUTION
Keep the trunk lid closed while driv-
ing. This not only keeps the luggage
from being thrown out but also pre-
vents exhaust gases from entering
the vehicle.
ÐLock release lever
To open the trunk lid from the driver's
seat, pull up on the lock release lever.
Page 786 of 4770
'99camry U
20
ÐLuggage security system
This system deactivates the lock re-
lease lever so that things locked in the
trunk can be protected.
1. Push down the security lock levers
to lock the rear seatbacks.
On vehicles with built±in child restraint,
only the left seatback has a lock lever
and can be lowered. The right seatback
cannot be folded down.
After locking the rear seatbacks, try fold-
ing them down to make sure they are
securely locked, otherwise someone could
get into the trunk by folding down a rear
seat.2. After closing the trunk lid, insert the
master key and turn it counterclock-
wise to deactivate the lock release
lever.
After closing the trunk lid, try pulling it up
to make sure it is securely locked.
Hood
To open the hood:
1. Pull the hood lock release lever. The
hood will spring up slightly.
CAUTION
Before driving, be sure that the hood
is closed and securely locked. Other-
wise, the hood may open unexpected-
ly while driving and an accident may
occur.
Page 789 of 4770

'99camry U
23
TESTING THE SYSTEM
1. Open all the windows.
2. Set the system as described above.
The doors should be locked with the
key or wireless remote control transmit-
ter. Be sure to wait until the indicator
light goes off or starts flashing.
3. Unlock any door from the inside. The
system should activate the alarm.
4. Stopping the alarm as described above.
5. Repeat this operation for the other
doors, trunk and hood. When testing on
the hood, also check that the system
is activated when the battery terminal
is disconnected and then reconnected.
If the system does not work properly,
have it checked by your Toyota dealer.
Fuel tank cap
1. To open the fuel filler door, pull the
lever up.
When refueling, turn off the engine.
CAUTION
�Do not smoke, cause sparks or al-
low open flames when refueling.
The fumes are flammable.
�When opening the cap, do not re-
move the cap quickly. In hot weath-
er, fuel under pressure could cause
injury by spraying out of the filler
neck if the cap is suddenly re-
moved.
2. To remove the fuel tank cap, turn
the cap slowly counterclockwise,
then pause slightly before removing
it. After removing the cap, hang it
on the cap hanger.
It is not unusual to hear a slight swoosh
when the cap is opened. When installing,
turn the cap clockwise till you hear a
click.
If the cap is not tightened securely, the
malfunction indicator lamp comes on.
Make sure the cap is tightened securely.
Page 913 of 4770
'99camry U
147
Part 1
OPERATION OF
INSTRUMENTS AND
CONTROLSÐ
Chapter 1±8
Other equipment
�Clock
�Cigarette lighter and ashtrays
�Power outlet
�G lov e box
�Garage door opener box
�Miscellaneous box
�Auxiliary box
�Cup holder
�Traction control system
�Floor mat
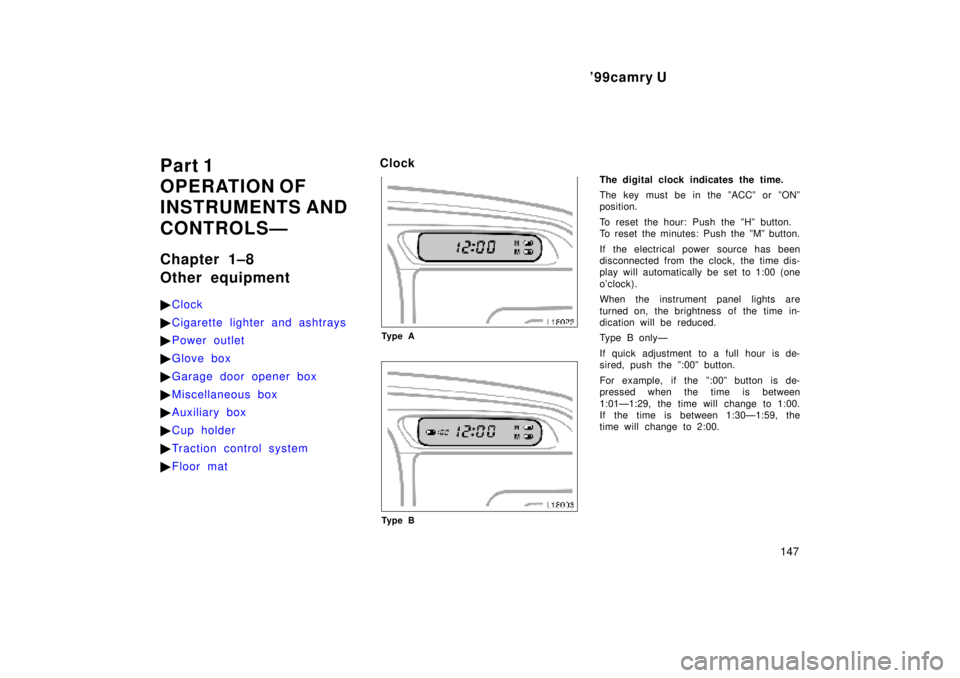
Clock
Ty p e A
Ty p e B
The digital clock indicates the time.
The key must be in the ºACCº or ºONº
position.
To reset the hour: Push the ºHº button.
To reset the minutes: Push the ºMº button.
If the electrical power source has been
disconnected from the clock, the time dis-
play will automatically be set to 1:00 (one
o'clock).
When the instrument panel lights are
turned on, the brightness of the time in-
dication will be reduced.
Type B onlyÐ
If quick adjustment to a full hour is de-
sired, push the º:00º button.
For example, if the º:00º button is de-
pressed when the time is between
1:01Ð1:29, the time will change to 1:00.
If the time is between 1:30Ð1:59, the
time will change to 2:00.
Page 915 of 4770
'99camry U
149
�Close the power outlet lid when the
power outlet is not in use. Inserting
a foreign object other than the ap-
propriate plug that fits the outlet,
or allowing any liquid into the out-
let may cause electrical failure or
short circuits.
Glove box
To use the glove box, do this.
To open: Pull the lever.
With the instrument panel lights on, the
glove box light will come on when the
glove box is open.
To lock: Insert the master key and turn it
clockwise.
CAUTION
To reduce the chance of injury in
case of an accident or a sudden stop,
always keep the glove box door
closed while driving.
Garage door opener box
The box is designed to store a garage
door opener transmitter.
Open the cover and remove the Velcro
loop.
Page 935 of 4770

'99camry U
221
Clean all dirt from outside of the reservoir
tank and look at the fluid level. If the fluid
is cold, the level should be in the ºCOLDº
range. Similarly, if it is hot, the fluid level
should be in the ºHOTº range. If the level
is at the low side of either range, add
automatic transmission fluid DEXRON�II
or III to bring the level within the range.
To remove the filler cap, turn it counter-
clockwise and lift up. To reinstall it, turn
it clockwise. After replacing the filler
cap,visually check the steering box case,
vane pump and hose connections for
leaks or damage.
CAUTION
The reservoir tank may be hot so be
careful not to burn yourself.
NOTICE
Avoid overfilling, or the power steer-
ing could be damaged.
Checking tire pressure
Keep your tire pressures at the proper
level.
The recommended cold tire pressures, tire
size and the vehicle capacity weight are
given in Part 8. They are also on the tire
pressure label as shown.
You should check the tire pressures every
two weeks, or at least once a month. And
don't forget the spare!
Incorrect tire pressure can reduce tire
life and make your vehicle less safe to
drive.Low tire pressure results in excessive
wear, poor handling, reduced fuel econo-
my, and the possibility of blowouts from
overheated tires. Also, low tire pressure
can cause poor sealing of the tire bead.
If the tire pressure is excessively low,
there is the possibility of wheel deforma-
tion and/or tire separation.
High tire pressure produces a harsh ride,
handling problems,excessive wear at the
center of the tire tread, and a greater
possibility of tire damage from road haz-
ards.
If a tire frequently needs refilling, have it
checked by your Toyota dealer.
The following instructions for checking
tire pressure should be observed:
�The pressure should be checked only
when the tires are cold. If your ve-
hicle has been parked for at least 3
hours and has not been driven for
more than 1.5 km or 1 mile since, you
will get an accurate cold tire pressure
reading.
�Always use a tire pressure gauge.
The appearance of a tire can be mis-
leading. Besides, tire pressures that
are even just a few pounds off can
degrade handling and ride.
Page 985 of 4770

'99camry U
189
ÐLoosening wheel nuts
4. Loosen all the wheel nuts.
Always loosen the wheel nuts before rais-
ing the vehicle.
The nuts turn counterclockwise to loosen.
To get maximum leverage, fit the wrench
to the nut so that the handle is on the
right side, as shown above. Grab the
wrench near the end of the handle and
pull up on the handle. Be careful that the
wrench does not slip off the nut.
Do not remove the nuts yetÐjust unscrew
them about one±half turn.
ÐPositioning the jack
5. Position the jack at the correct jack
point as shown.
Make sure the jack is positioned on a
level and solid place.
ÐRaising your vehicle
6. After making sure that no one is in
the vehicle, raise it high enough so
that the spare tire can be installed.
Remember you will need more ground
clearance when putting on the spare tire
than when removing the flat tire.
To raise the vehicle, insert the jack handle
into the jack (it is a loose fit) and turn it
clockwise. As the jack touches the vehicle
and begins to lift, double±check that it is
properly positioned.