Page 1007 of 4770
'99camry U
241
ENGINE LUBRICATION
Oil capacity (drain and refill), L (qt., Imp.
qt.):
5S±FE engine
With filter 3.6 (3.8, 3.2)
Without filter 3.4 (3.6, 3.0)
1MZ±FE engine
With filter 4.7 (5.0, 4.1)
Without filter 4.5 (4.8, 4.0)
Oil grade:
API grade SJ, ºEnergy±Conservingº or
ILSAC multigrade engine oil is recom-
mended.
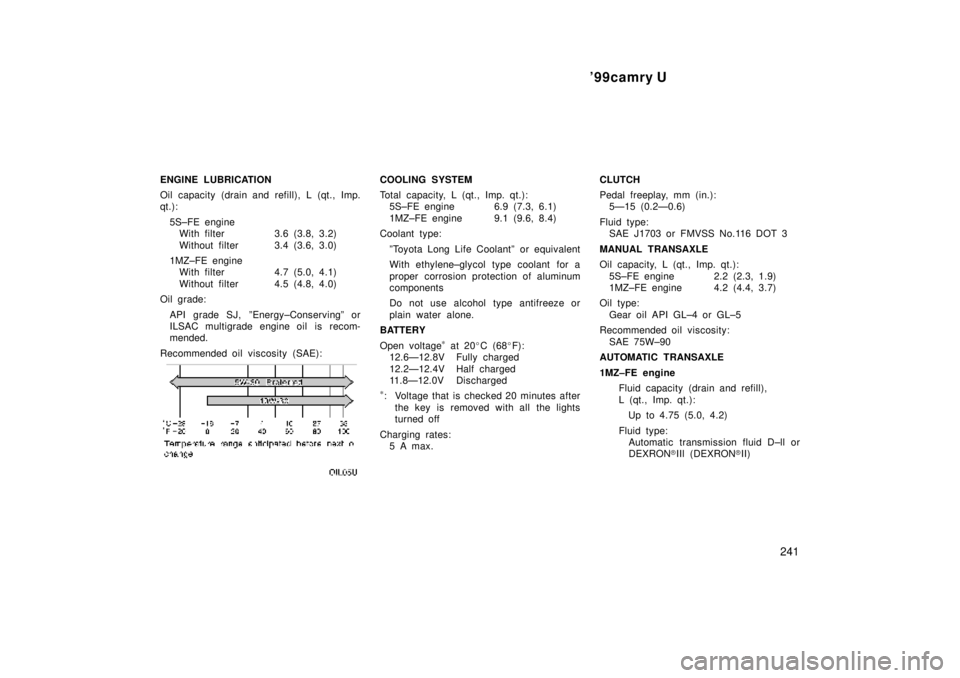
Recommended oil viscosity (SAE):COOLING SYSTEM
Total capacity, L (qt., Imp. qt.):
5S±FE engine 6.9 (7.3, 6.1)
1MZ±FE engine 9.1 (9.6, 8.4)
Coolant type:
ºToyota Long Life Coolantº or equivalent
With ethylene±glycol type coolant for a
proper corrosion protection of aluminum
components
Do not use alcohol type antifreeze or
plain water alone.
BATTERY
Open voltage
* at 20�C (68�F):
12.6Ð12.8V Fully charged
12.2Ð12.4V Half charged
11.8Ð12.0V Discharged
*: Voltage that is checked 20 minutes after
the key is removed with all the lights
turned off
Charging rates:
5 A max.CLUTCH
Pedal freeplay, mm (in.):
5Ð15 (0.2Ð0.6)
Fluid type:
SAE J1703 or FMVSS No.116 DOT 3
MANUAL TRANSAXLE
Oil capacity, L (qt., Imp. qt.):
5S±FE engine 2.2 (2.3, 1.9)
1MZ±FE engine 4.2 (4.4, 3.7)
Oil type:
Gear oil API GL±4 or GL±5
Recommended oil viscosity:
SAE 75W±90
AUTOMATIC TRANSAXLE
1MZ±FE engine
Fluid capacity (drain and refill),
L (qt., Imp. qt.):
Up to 4.75 (5.0, 4.2)
Fluid type:
Automatic transmission fluid D±ll or
DEXRON�IIl (DEXRON�II)
Page 1113 of 4770
SCHEDULED MAINTENANCE LOGS21 Brake Linings/Drums and Brake Pads/Discs
Check the brake linings (shoes) and drums for scoring, burning,
fluid leakage, broken parts and excessive wear. Check the pads for
excessive wear and the discs for runout, excessive wear and fluid
leakage. A qualified technician should perform these inspections.
Charcoal Canister (CA, MA and NY vehicles)
Check for internal damage and clogging. If necessary, clean
with compressed air or replace. A qualified technician should
perform these operations.
Differential Oil
Inspect each component for signs of leakage. If you discover any
leakage, have it repaired by a qualified technician immediately.
Drive Belts
Inspect for cracks, excessive wear and oiliness. Check the belt ten-
sion and adjust if necessary. Replace the belts if they are damaged.
Drive Shaft Boots
Check the drive shaft boots and clamps for cracks, deteriora-
tion and damage. Replace any damaged parts and, if necessary,
repack the grease. Selected models also require periodic inspec-
tion of the flange bolts for proper torque. A qualified technician
should perform these operations.
Engine Air Filter
Check for damage, excessive wear and oiliness. Replace if necessary.
Engine Coolant
Drain and flush the cooling system and refill with an ethylene-
glycol type coolant. A qualified technician should perform
this operation.
Engine Oil and Oil Filter
Change the oil filter and replace the engine oil with API SH,
Energy- Conserving II multigrade or ILSAC multigrade oil.
For recommended viscosity, refer to your
Owner’s Manual.
Explanation of Maintenance Items
Page 3715 of 4770
B00319
Recommended Viscosity (SAE) :
TEMPERATURE RANGE ANTICIPATED BEFORE NEXT OIL CHANGE 10W ± 30
5W ± 30 PREFERRED
±20
°C °F020406080
±29 ±18 ±7 4 16 27100
38
LU03H±03
S05317
Curved
Tip
Insert
S05298
Oil Pressure Gauge
P13638
Adhesive
± LUBRICATION (5S±FE)OIL AND FILTER
LU±1
1647 Author�: Date�:
OIL AND FILTER
INSPECTION
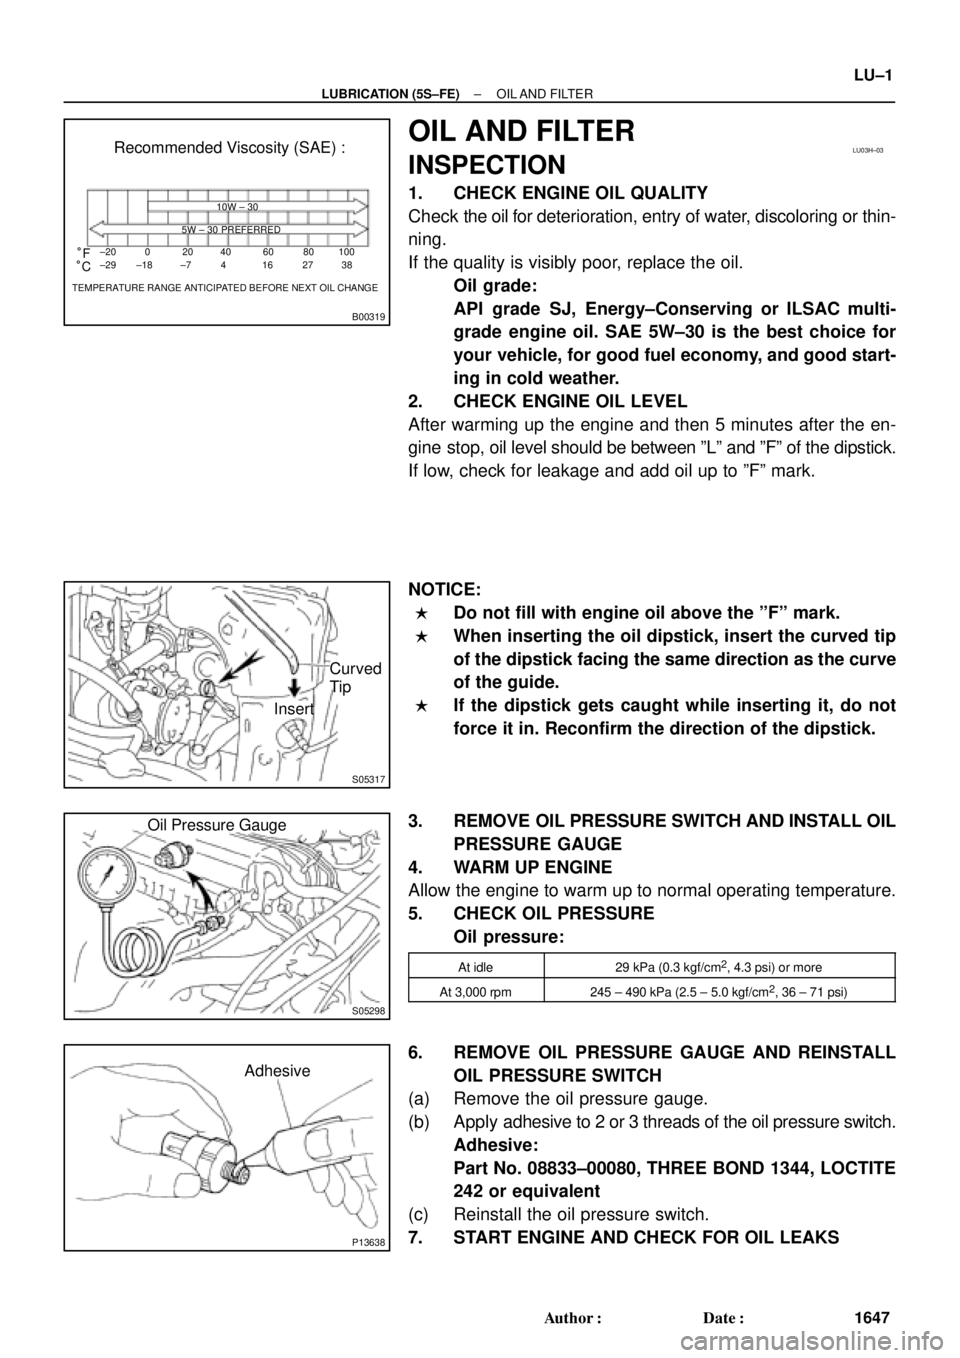
1. CHECK ENGINE OIL QUALITY
Check the oil for deterioration, entry of water, discoloring or thin-
ning.
If the quality is visibly poor, replace the oil.
Oil grade:
API grade SJ, Energy±Conserving or ILSAC multi-
grade engine oil. SAE 5W±30 is the best choice for
your vehicle, for good fuel economy, and good start-
ing in cold weather.
2. CHECK ENGINE OIL LEVEL
After warming up the engine and then 5 minutes after the en-
gine stop, oil level should be between ºLº and ºFº of the dipstick.
If low, check for leakage and add oil up to ºFº mark.
NOTICE:
�Do not fill with engine oil above the ºFº mark.
�When inserting the oil dipstick, insert the curved tip
of the dipstick facing the same direction as the curve
of the guide.
�If the dipstick gets caught while inserting it, do not
force it in. Reconfirm the direction of the dipstick.
3. REMOVE OIL PRESSURE SWITCH AND INSTALL OIL
PRESSURE GAUGE
4. WARM UP ENGINE
Allow the engine to warm up to normal operating temperature.
5. CHECK OIL PRESSURE
Oil pressure:
At idle29 kPa (0.3 kgf/cm2, 4.3 psi) or more
At 3,000 rpm245 ± 490 kPa (2.5 ± 5.0 kgf/cm2, 36 ± 71 psi)
6. REMOVE OIL PRESSURE GAUGE AND REINSTALL
OIL PRESSURE SWITCH
(a) Remove the oil pressure gauge.
(b) Apply adhesive to 2 or 3 threads of the oil pressure switch.
Adhesive:
Part No. 08833±00080, THREE BOND 1344, LOCTITE
242 or equivalent
(c) Reinstall the oil pressure switch.
7. START ENGINE AND CHECK FOR OIL LEAKS
Page 3733 of 4770
B00319
Recommended Viscosity (SAE):
TEMPERATURE RANGE ANTICIPATED BEFORE NEXT OIL CHANGE10W±30
5W±30 PREFERRED°C °F
±20
±290
±1820
±740
460
1680
27100
38
LU0FR±01
P25173SST
P25171
Oil Pressure Gauge
± LUBRICATION (1MZ±FE)OIL AND FILTER
LU±1
1665 Author�: Date�:
OIL AND FILTER
INSPECTION
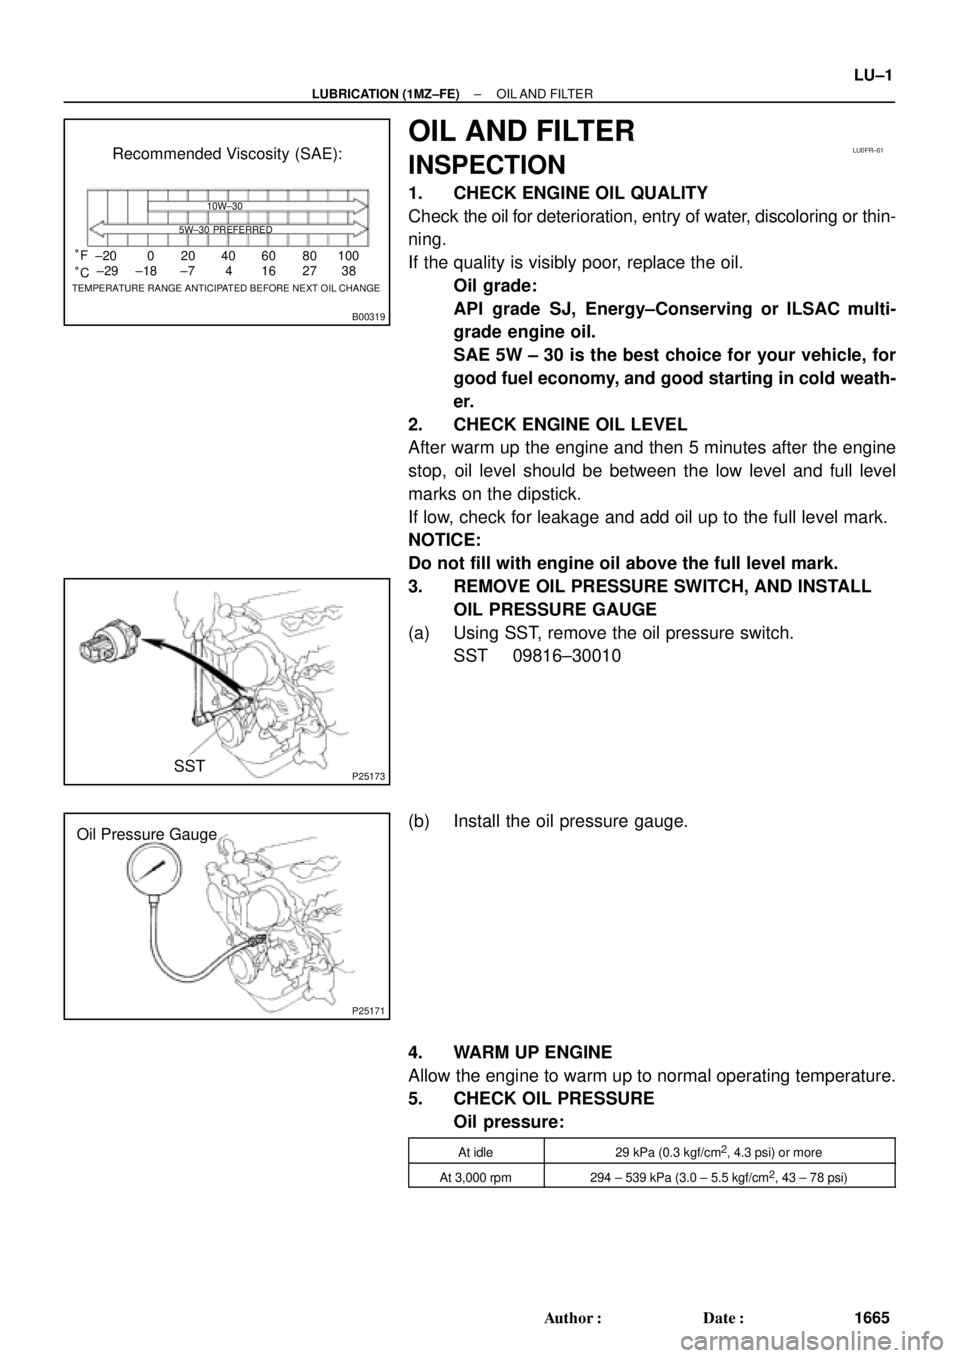
1. CHECK ENGINE OIL QUALITY
Check the oil for deterioration, entry of water, discoloring or thin-
ning.
If the quality is visibly poor, replace the oil.
Oil grade:
API grade SJ, Energy±Conserving or ILSAC multi-
grade engine oil.
SAE 5W ± 30 is the best choice for your vehicle, for
good fuel economy, and good starting in cold weath-
er.
2. CHECK ENGINE OIL LEVEL
After warm up the engine and then 5 minutes after the engine
stop, oil level should be between the low level and full level
marks on the dipstick.
If low, check for leakage and add oil up to the full level mark.
NOTICE:
Do not fill with engine oil above the full level mark.
3. REMOVE OIL PRESSURE SWITCH, AND INSTALL
OIL PRESSURE GAUGE
(a) Using SST, remove the oil pressure switch.
SST 09816±30010
(b) Install the oil pressure gauge.
4. WARM UP ENGINE
Allow the engine to warm up to normal operating temperature.
5. CHECK OIL PRESSURE
Oil pressure:
At idle29 kPa (0.3 kgf/cm2, 4.3 psi) or more
At 3,000 rpm294 ± 539 kPa (3.0 ± 5.5 kgf/cm2, 43 ± 78 psi)
Page 3764 of 4770
Q10002
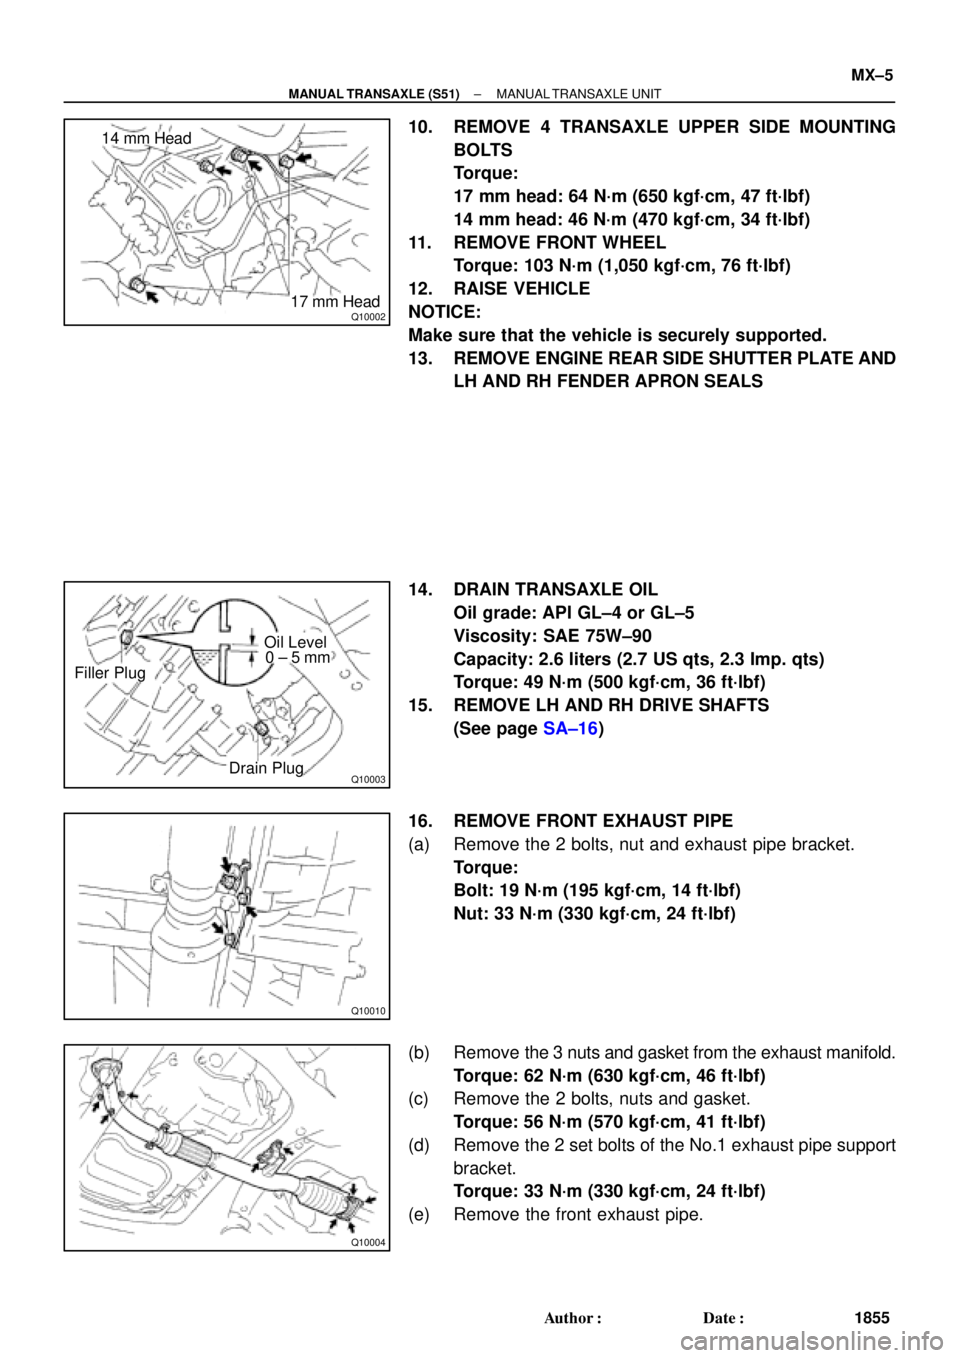
14 mm Head
17 mm Head
Q10003
Oil Level
Filler Plug
Drain Plug0 ± 5 mm
Q10010
Q10004
± MANUAL TRANSAXLE (S51)MANUAL TRANSAXLE UNIT
MX±5
1855 Author�: Date�:
10. REMOVE 4 TRANSAXLE UPPER SIDE MOUNTING
BOLTS
Torque:
17 mm head: 64 N´m (650 kgf´cm, 47 ft´lbf)
14 mm head: 46 N´m (470 kgf´cm, 34 ft´lbf)
11. REMOVE FRONT WHEEL
Torque: 103 N´m (1,050 kgf´cm, 76 ft´lbf)
12. RAISE VEHICLE
NOTICE:
Make sure that the vehicle is securely supported.
13. REMOVE ENGINE REAR SIDE SHUTTER PLATE AND
LH AND RH FENDER APRON SEALS
14. DRAIN TRANSAXLE OIL
Oil grade: API GL±4 or GL±5
Viscosity: SAE 75W±90
Capacity: 2.6 liters (2.7 US qts, 2.3 Imp. qts)
Torque: 49 N´m (500 kgf´cm, 36 ft´lbf)
15. REMOVE LH AND RH DRIVE SHAFTS
(See page SA±16)
16. REMOVE FRONT EXHAUST PIPE
(a) Remove the 2 bolts, nut and exhaust pipe bracket.
Torque:
Bolt: 19 N´m (195 kgf´cm, 14 ft´lbf)
Nut: 33 N´m (330 kgf´cm, 24 ft´lbf)
(b) Remove the 3 nuts and gasket from the exhaust manifold.
Torque: 62 N´m (630 kgf´cm, 46 ft´lbf)
(c) Remove the 2 bolts, nuts and gasket.
Torque: 56 N´m (570 kgf´cm, 41 ft´lbf)
(d) Remove the 2 set bolts of the No.1 exhaust pipe support
bracket.
Torque: 33 N´m (330 kgf´cm, 24 ft´lbf)
(e) Remove the front exhaust pipe.
Page 3807 of 4770
Q09986
Q09987
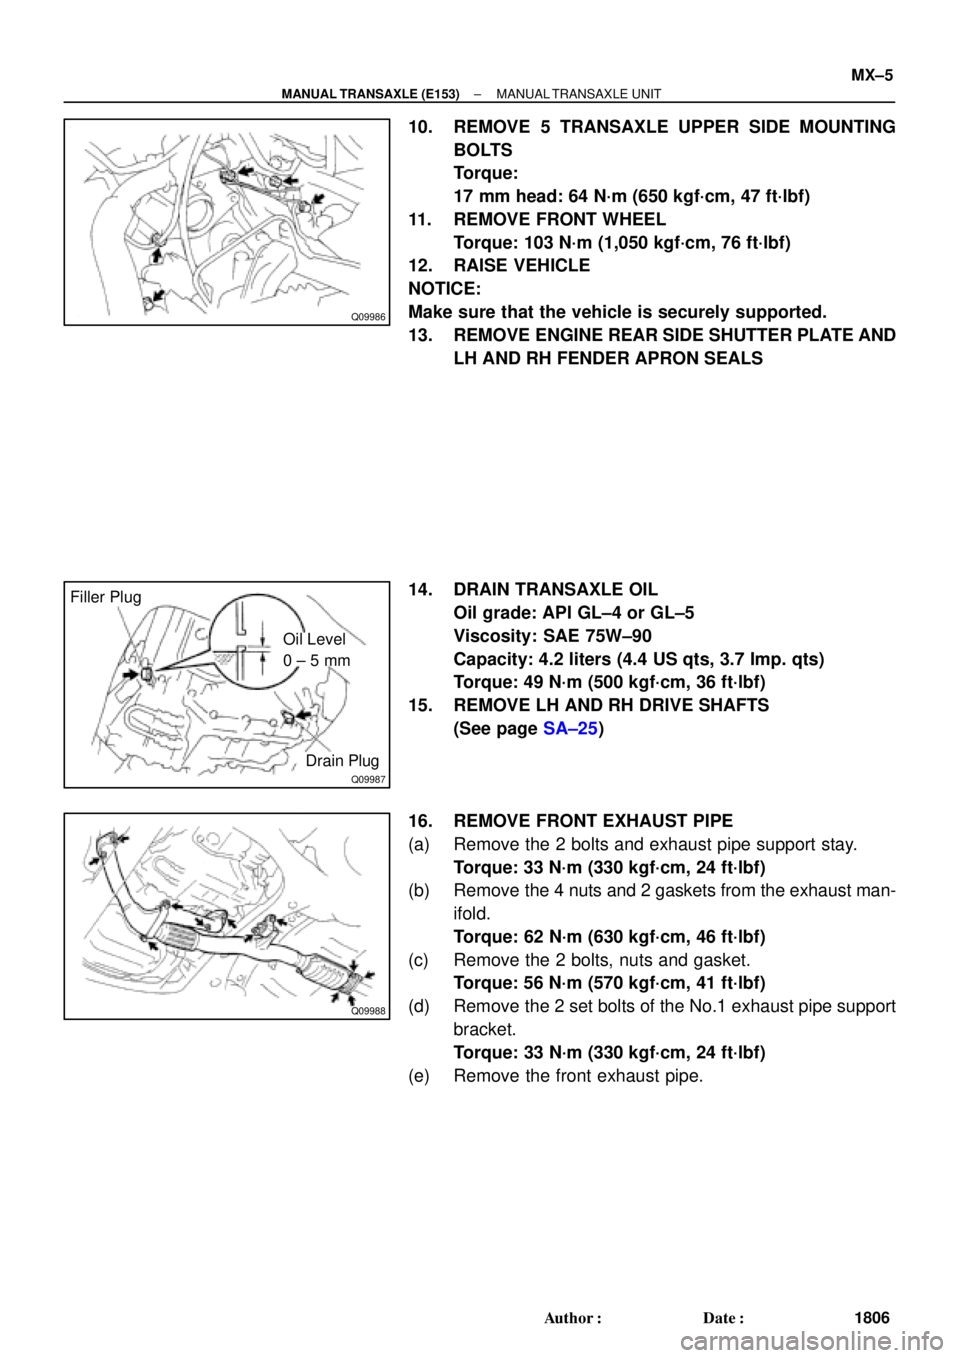
Filler Plug
Oil Level
0 ± 5 mm
Drain Plug
Q09988
± MANUAL TRANSAXLE (E153)MANUAL TRANSAXLE UNIT
MX±5
1806 Author�: Date�:
10. REMOVE 5 TRANSAXLE UPPER SIDE MOUNTING
BOLTS
Torque:
17 mm head: 64 N´m (650 kgf´cm, 47 ft´lbf)
11. REMOVE FRONT WHEEL
Torque: 103 N´m (1,050 kgf´cm, 76 ft´lbf)
12. RAISE VEHICLE
NOTICE:
Make sure that the vehicle is securely supported.
13. REMOVE ENGINE REAR SIDE SHUTTER PLATE AND
LH AND RH FENDER APRON SEALS
14. DRAIN TRANSAXLE OIL
Oil grade: API GL±4 or GL±5
Viscosity: SAE 75W±90
Capacity: 4.2 liters (4.4 US qts, 3.7 Imp. qts)
Torque: 49 N´m (500 kgf´cm, 36 ft´lbf)
15. REMOVE LH AND RH DRIVE SHAFTS
(See page SA±25)
16. REMOVE FRONT EXHAUST PIPE
(a) Remove the 2 bolts and exhaust pipe support stay.
Torque: 33 N´m (330 kgf´cm, 24 ft´lbf)
(b) Remove the 4 nuts and 2 gaskets from the exhaust man-
ifold.
Torque: 62 N´m (630 kgf´cm, 46 ft´lbf)
(c) Remove the 2 bolts, nuts and gasket.
Torque: 56 N´m (570 kgf´cm, 41 ft´lbf)
(d) Remove the 2 set bolts of the No.1 exhaust pipe support
bracket.
Torque: 33 N´m (330 kgf´cm, 24 ft´lbf)
(e) Remove the front exhaust pipe.