Page 1064 of 1456

3. Fuel Flap
A: REMOVAL AND INSTALLATION
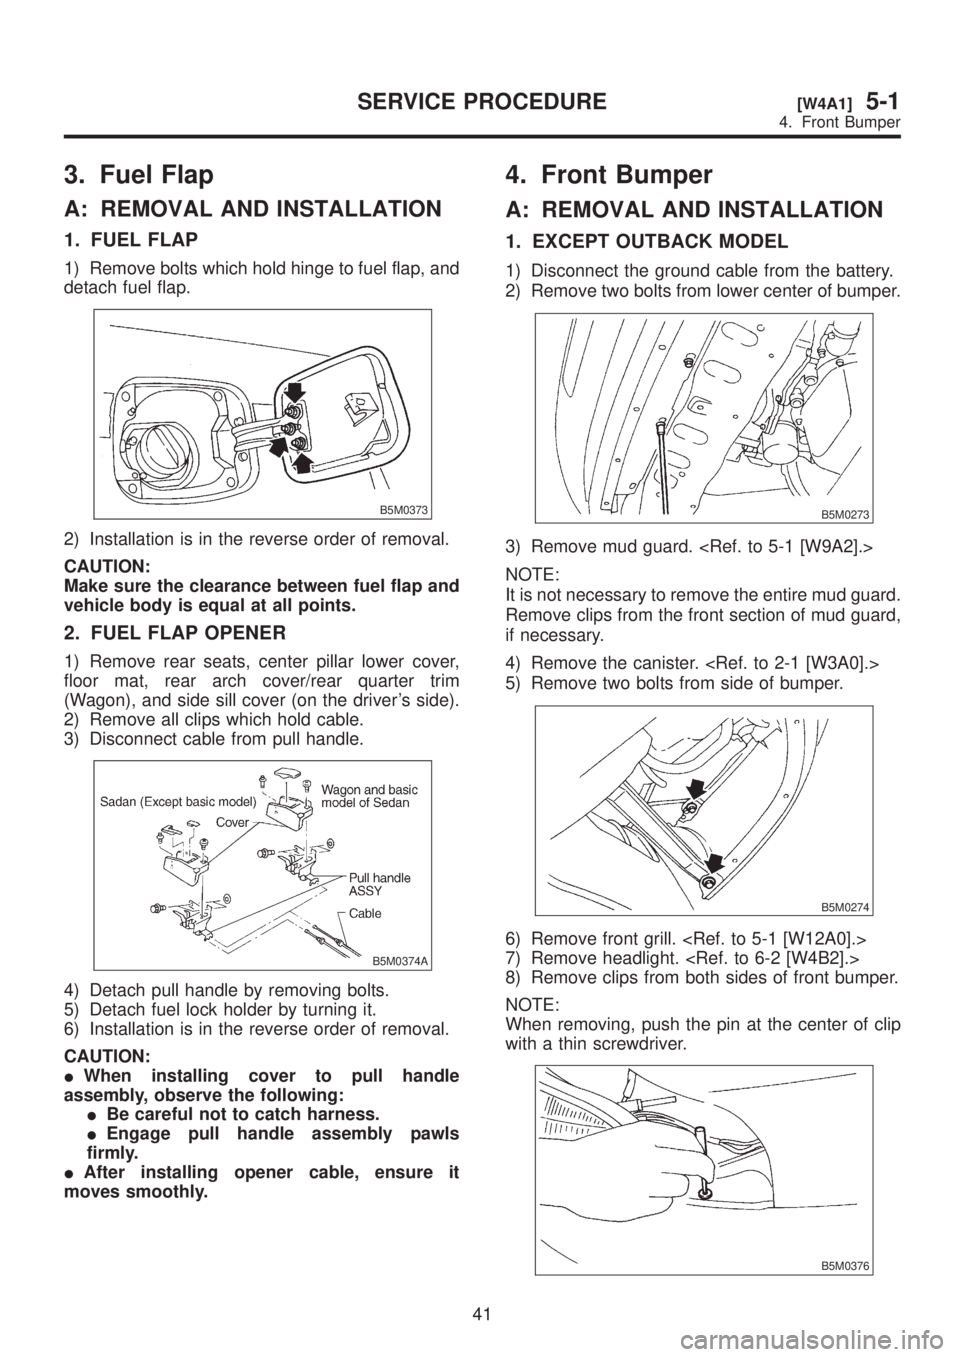
1. FUEL FLAP
1) Remove bolts which hold hinge to fuel flap, and
detach fuel flap.
B5M0373
2) Installation is in the reverse order of removal.
CAUTION:
Make sure the clearance between fuel flap and
vehicle body is equal at all points.
2. FUEL FLAP OPENER
1) Remove rear seats, center pillar lower cover,
floor mat, rear arch cover/rear quarter trim
(Wagon), and side sill cover (on the driver's side).
2) Remove all clips which hold cable.
3) Disconnect cable from pull handle.
B5M0374A
4) Detach pull handle by removing bolts.
5) Detach fuel lock holder by turning it.
6) Installation is in the reverse order of removal.
CAUTION:
IWhen installing cover to pull handle
assembly, observe the following:
IBe careful not to catch harness.
IEngage pull handle assembly pawls
firmly.
IAfter installing opener cable, ensure it
moves smoothly.
4. Front Bumper
A: REMOVAL AND INSTALLATION
1. EXCEPT OUTBACK MODEL
1) Disconnect the ground cable from the battery.
2) Remove two bolts from lower center of bumper.
B5M0273
3) Remove mud guard.
NOTE:
It is not necessary to remove the entire mud guard.
Remove clips from the front section of mud guard,
if necessary.
4) Remove the canister.
5) Remove two bolts from side of bumper.
B5M0274
6) Remove front grill.
7) Remove headlight.
8) Remove clips from both sides of front bumper.
NOTE:
When removing, push the pin at the center of clip
with a thin screwdriver.
B5M0376
41
[W4A1]5-1SERVICE PROCEDURE
4. Front Bumper
Page 1065 of 1456

3. Fuel Flap
A: REMOVAL AND INSTALLATION
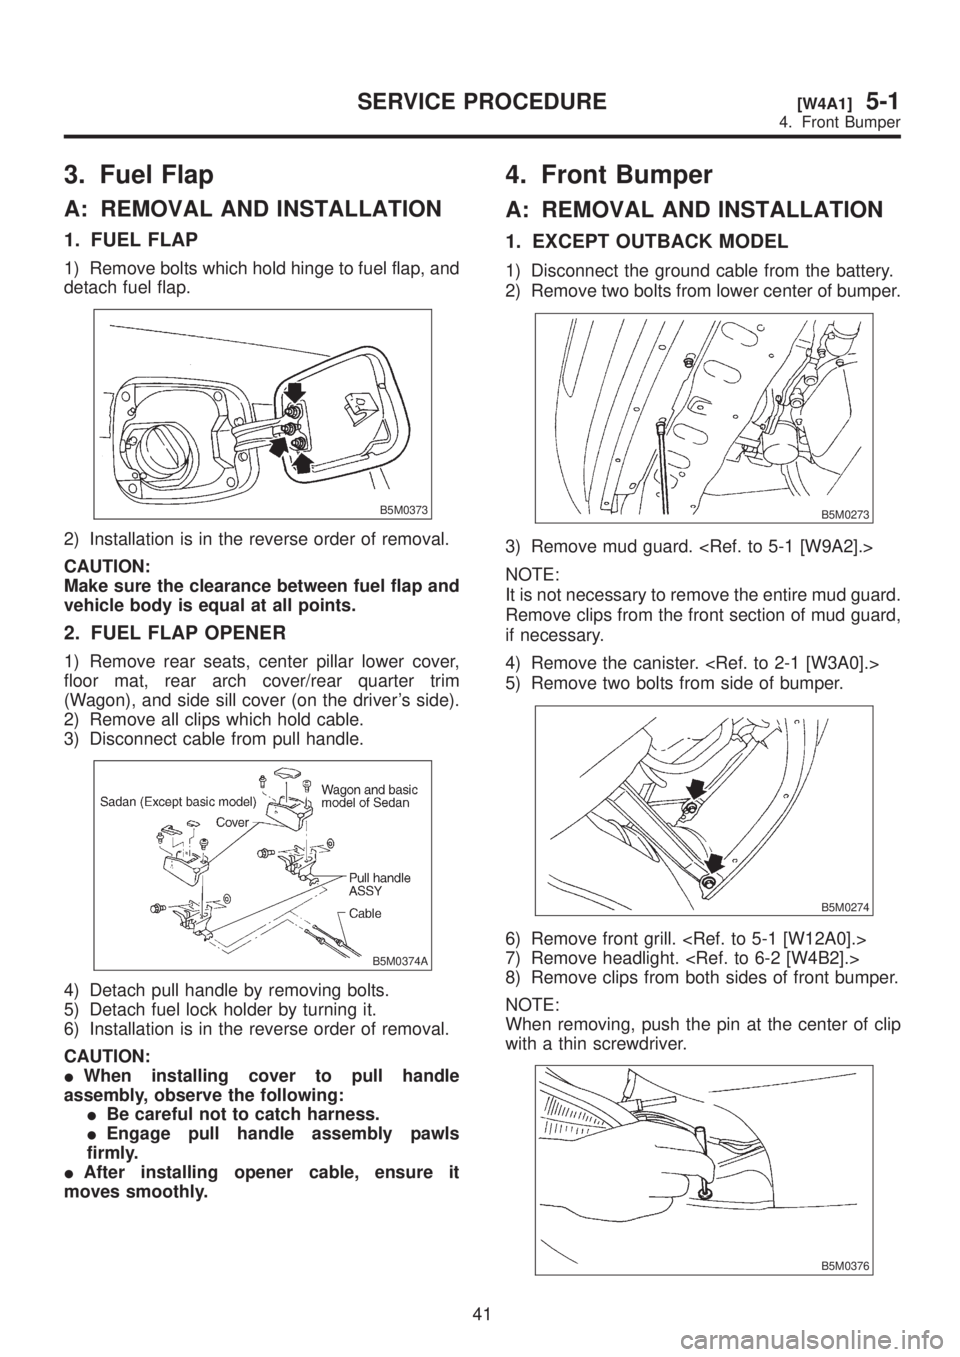
1. FUEL FLAP
1) Remove bolts which hold hinge to fuel flap, and
detach fuel flap.
B5M0373
2) Installation is in the reverse order of removal.
CAUTION:
Make sure the clearance between fuel flap and
vehicle body is equal at all points.
2. FUEL FLAP OPENER
1) Remove rear seats, center pillar lower cover,
floor mat, rear arch cover/rear quarter trim
(Wagon), and side sill cover (on the driver's side).
2) Remove all clips which hold cable.
3) Disconnect cable from pull handle.
B5M0374A
4) Detach pull handle by removing bolts.
5) Detach fuel lock holder by turning it.
6) Installation is in the reverse order of removal.
CAUTION:
IWhen installing cover to pull handle
assembly, observe the following:
IBe careful not to catch harness.
IEngage pull handle assembly pawls
firmly.
IAfter installing opener cable, ensure it
moves smoothly.
4. Front Bumper
A: REMOVAL AND INSTALLATION
1. EXCEPT OUTBACK MODEL
1) Disconnect the ground cable from the battery.
2) Remove two bolts from lower center of bumper.
B5M0273
3) Remove mud guard.
NOTE:
It is not necessary to remove the entire mud guard.
Remove clips from the front section of mud guard,
if necessary.
4) Remove the canister.
5) Remove two bolts from side of bumper.
B5M0274
6) Remove front grill.
7) Remove headlight.
8) Remove clips from both sides of front bumper.
NOTE:
When removing, push the pin at the center of clip
with a thin screwdriver.
B5M0376
41
[W4A1]5-1SERVICE PROCEDURE
4. Front Bumper
Page 1068 of 1456
5. Rear Bumper
A: REMOVAL AND INSTALLATION
1. SEDAN
1) Remove one bolt and one clip from side of
bumper.
B5M0377
2) Open trunk lid. Remove trunk trim panel clips
and detach trim.
3) Remove rear bumper beam (upper) attaching
nut.
4) Remove bolts from bumper stays.
B5M0378
5) Remove rear bumper assembly.
B5M0280
6) Installation is in the reverse order of removal.
CAUTION:
IBe extremely careful to prevent scratches on
bumper face as it is made of resin.
IBe careful not to scratch the body when
removing or installing bumper.ITo facilitate installation of rear bumper,
attach slider to the guide pin.
B5M0283A
B5M0284A
ITo facilitate installation of rear bumper,
insert the bumper hook into the body groove.
B5M0380A
2. WAGON
1) Remove one bolt and one clip from side of
bumper.
B5M0377
2) Open rear gate. Remove rear quarter trim lid.
44
5-1[W5A1]SERVICE PROCEDURE
5. Rear Bumper
Page 1069 of 1456
3) Remove two clips from lower center of bumper.
B5M0379
4) Remove bolts from bumper stays.
B5M0281
5) Remove rear bumper assembly.
B5M0282
6) Installation is in the reverse order of removal.
CAUTION:
IBe extremely careful to prevent scratches on
bumper face as it is made of resin.
IBe careful not to scratch the body when
removing or installing bumper.ITo facilitate installation of rear bumper,
attach slider to the guide pin.
B5M0283A
B5M0284A
ITo facilitate installation of rear bumper,
insert the bumper hook into the body groove.
B5M0380A
3. OUTBACK MODEL
1) Remove one clip from side of bumper.
B5M0407
2) Open rear gate and remove rear quarter trim
lid.
45
[W5A3]5-1SERVICE PROCEDURE
5. Rear Bumper
Page 1070 of 1456
3) Remove five bolts from lower center of bumper.
B5M0408
4) Remove bolts from bumper stays.
B5M0409
5) Remove rear bumper assembly.
B5M0282
6) Installation is in the reverse order of removal.
CAUTION:
IBe extremely careful to prevent scratches on
bumper face as it is made of resin.
IBe careful not to scratch the body when
removing or installing bumper.ITo facilitate installation of rear bumper,
attach slider to the guide pin.
B5M0283A
B5M0284A
ITo facilitate installation of rear bumper,
insert the bumper hook into the body groove.
B5M0380A
46
5-1[W5A3]SERVICE PROCEDURE
5. Rear Bumper
Page 1077 of 1456
9. Mud Guard and Rear Arch
Protector
A: REMOVAL AND INSTALLATION
1. MUD GUARD (EXCEPT OUTBACK
MODEL)
1) Jack-up vehicle to remove tire.
2) Remove screws and clips. Move mud guard
toward the center of the body and remove mud
guard.
B5M0288
3) Installation is in the reverse order of removal.
CAUTION:
Only use new screws and clips.
2. MUD GUARD (OUTBACK MODEL)
1) Jack-up vehicle to remove tire.
2) Remove screws and clips. Move mud guard
toward the center of the body and remove mud
guard.
B5M0410
3) Installation is in the reverse order of removal.
CAUTION:
Only use new screws and clips.
3. REAR ARCH PROTECTOR
1) Remove rear arch protector.
B5M0289
2) Installation is in the reverse order of removal.
CAUTION:
Only use new screws and clips.
53
[W9A3]5-1SERVICE PROCEDURE
9. Mud Guard and Rear Arch Protector
Page 1082 of 1456
5) Disconnect the door mirror connector.
6) Remove the door mirror installation screws.
B5M0298A
7) Installation is in the reverse order of removal.
14. Side Protector
A: REMOVAL AND INSTALLATION
Side protector consists of three parts; front fender,
front door and rear door.
B5M0411A
1. SIDE PROTECTOR FRONT FENDER
PORTION
1) Remove bracket which secures mud guard to
front fender.
B5M0285A
2) Remove mud guard.
NOTE:
Detach the rear part of mud guard as required for
the procedure. It is not necessary to remove the
entire mud guard.
3) Use pliers to remove a clip from inside front
fender. Remove it from vehicle body but keep it
with side protector.
4) Installation is in the reverse order of removal.
56
5-1[W14A0]SERVICE PROCEDURE
14. Side Protector
Page 1083 of 1456
5) Disconnect the door mirror connector.
6) Remove the door mirror installation screws.
B5M0298A
7) Installation is in the reverse order of removal.
14. Side Protector
A: REMOVAL AND INSTALLATION
Side protector consists of three parts; front fender,
front door and rear door.
B5M0411A
1. SIDE PROTECTOR FRONT FENDER
PORTION
1) Remove bracket which secures mud guard to
front fender.
B5M0285A
2) Remove mud guard.
NOTE:
Detach the rear part of mud guard as required for
the procedure. It is not necessary to remove the
entire mud guard.
3) Use pliers to remove a clip from inside front
fender. Remove it from vehicle body but keep it
with side protector.
4) Installation is in the reverse order of removal.
56
5-1[W14A0]SERVICE PROCEDURE
14. Side Protector