Page 2256 of 2490
17. Install centre vent/clock assembly.
1. Install new centre vent retaining screw inserts in
facia.
2. Position centre vent/clo ck assembly at facia and
connect clock harness multiplug to facia harness.
18. Position centre vent/clock as sembly in facia and install
securing screws.
19. Install RH side vent/duct assembly.
1. Install new RH side vent/duct retaining screw inserts in facia.
2. Position RH side vent in facia and install securing
screws.
20. Install new LH side vent/duct re taining screw inserts in facia.
21. Position LH side vent/duct in fa cia and install securing screws.
22. Position passenger air bag mo dule and deployment door
assembly in facia aperture. and install four new securing nuts.
Page 2273 of 2490

Handles, Locks, Latches and Entry Systems - Handles, Locks, Latches and
Entry Systems
Description and Operation
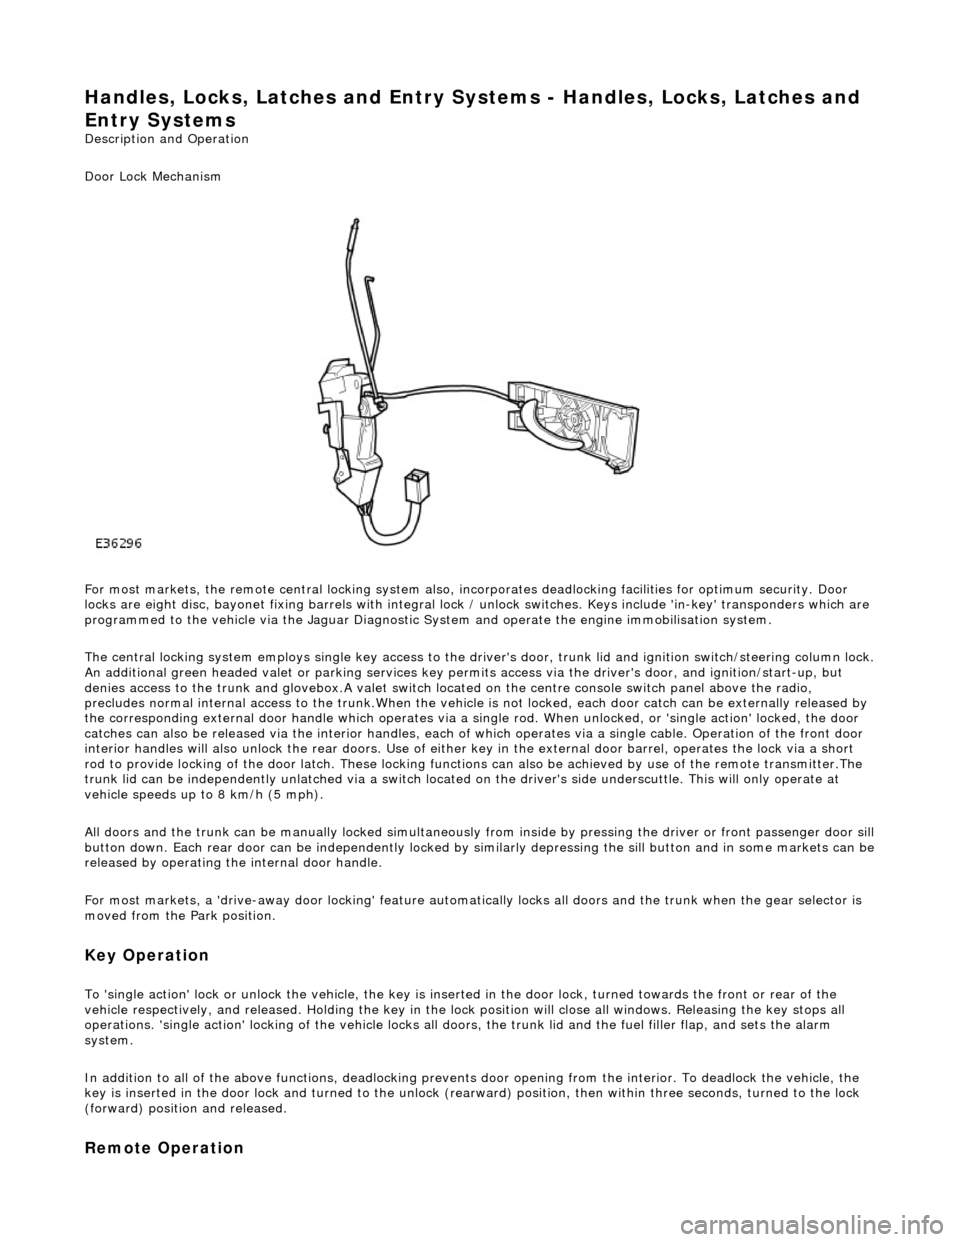
Door Lock Mechanism
For most markets, the remote central locking system also, in corporates deadlocking facilities for optimum security. Door
locks are eight disc, bayonet fixing barrels with integral lock / unlock switches. Keys include 'in-key' transponders which are
programmed to the vehicle via the Jaguar Diagnostic Sy stem and operate the engine immobilisation system.
The central locking system employs single key access to the driv er's door, trunk lid and ignition switch/steering column lock.
An additional green headed valet or park ing services key permits access via the driver's door, and ignition/start-up, but
denies access to the trunk and glovebox.A valet switch located on the centre console switch panel above the radio,
precludes normal internal access to the trunk.When the vehicle is not locked, each door catch can be externally released by
the corresponding external door handle which operates via a si ngle rod. When unlocked, or 'single action' locked, the door
catches can also be released via the interior handles, each of which operates via a single cable. Operation of the front door
interior handles will also unlock the rear doors. Use of either key in the external door barrel, operates the lock via a short
rod to provide locking of the door latch. These locking functions can also be achieved by use of the remote transmitter.The
trunk lid can be independently unlatched via a switch located on the driver's side underscuttle. This will only operate at
vehicle speeds up to 8 km/h (5 mph).
All doors and the trunk can be manually lock ed simultaneously from inside by pressing the driver or front passenger door sill
button down. Each rear door can be independently locked by si milarly depressing the sill button and in some markets can be released by operating the internal door handle.
For most markets, a 'drive-away door locking' feature automati cally locks all doors and the trunk when the gear selector is
moved from the Park position.
Key Operation
To 'single action' lock or unlock the vehicle, the key is inserted in the door lock , turned towards the front or rear of the
vehicle respectively, and released. Holding the key in the lock position will close all windows. Releasing the key stops all
operations. 'single action' locking of the vehicle locks all doors, the trunk lid and the fuel filler flap, and sets the alarm
system.
In addition to all of the above functions, deadlocking prevents door opening from th e interior. To deadlock the vehicle, the
key is inserted in the door lock and turned to the unlock (rearw ard) position, then within three seconds, turned to the lock
(forward) position and released.
Remote Operation
Page 2274 of 2490

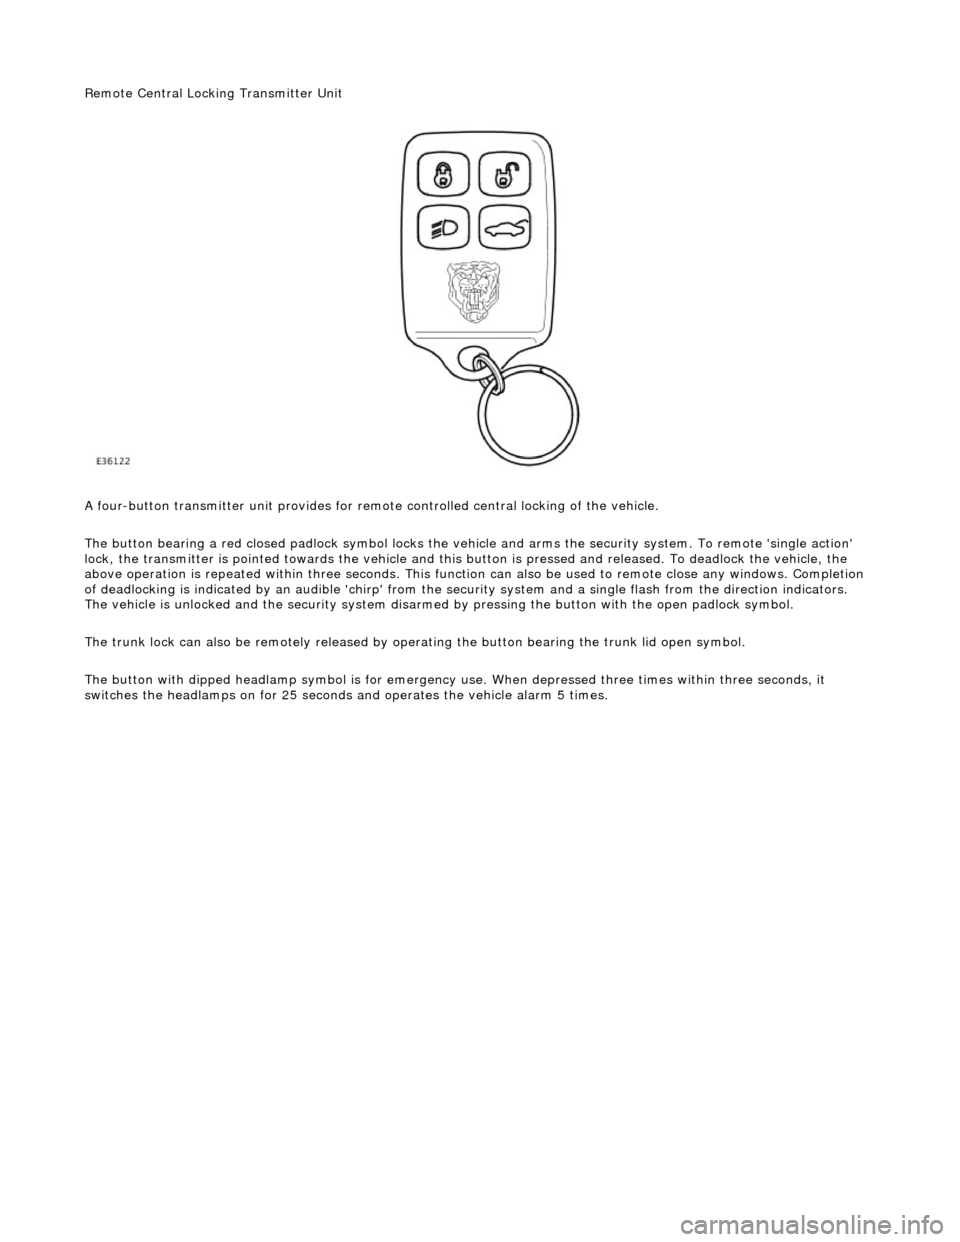
Remote Central Locking Transmitter Unit
A four-button transmitter unit provides for remote controlled central locking of the vehicle.
The button bearing a red closed padlock sy mbol locks the vehicle and arms the security system. To remote 'single action'
lock, the transmitter is pointed towards the vehicle and this bu tton is pressed and released. To deadlock the vehicle, the
above operation is repeated with in three seconds. This function can also be used to remote close any windows. Completion
of deadlocking is indicated by an audible 'chirp' from the security system and a single flash from the direction indicators.
The vehicle is unlocked and the security system disarmed by pressing the button with the open padlock symbol.
The trunk lock can also be remotely released by op erating the button bearing the trunk lid open symbol.
The button with dipped headlamp symbol is for emergency us e. When depressed three times within three seconds, it
switches the headlamps on for 25 seconds and operates the vehicle alarm 5 times.
Page 2275 of 2490
Handles, Locks, Latches and Entry Systems - Door Lock Control Switch
Removal and Installation
Removal
1. Disconnect battery ground cable; refer to 86.15.19.
2. Remove center console veneer panel; refer to 76.47.26.
3. Displace radio for access; refer to 86.50.03.
4. Disconnect air conditioning control module flying lead
connector (blue) from harness connector located at side of 'J'
gate.
5. Displace air conditioning switch module / center console
switch module assembly.
Remove screw.
Reposition assembly for access to connector.
6. Remove air conditioning switch module / center console switch
module assembly.
Disconnect center console switch module harness
connector.
Remove assembly.
Page 2277 of 2490
Handles, Locks, Latches and Entry Systems - Exterior Driver Door Handle
Removal and Installation
Removal
1. Motor door glass to fully up position.
2. Remove battery cover and disconnect ground cable from
battery terminal. Refer to 86.15.19.
3. Remove door casing veneer panel. Refer to 76.47.11.
4. Remove door casing for access. Refer to 76.34.01.
5. Feeding electrical harness thro ugh water shedder, carefully
peel shedder from door and pl ace adhesive face down on a
clean dry polythene sheet.
6. Position PVC inner sheet for access.
7. Disconnect outer handle link rod from lock assembly.
8. Slacken and remove outer handle rear securing bolt.
9. Slacken and remove security gu ard lower securing bolt and
remove guard from door.
Page 2278 of 2490
10. Pull door barrel to lock link rod locking collar downward to
release link rod.
11. Holding handle firmly in posi tion, slacken and remove front
securing bolt and remove ha ndle assembly from door.
12. Remove door handle clamping plate.
13. Remove link rods from door handle assembly.
Page 2279 of 2490

Installation
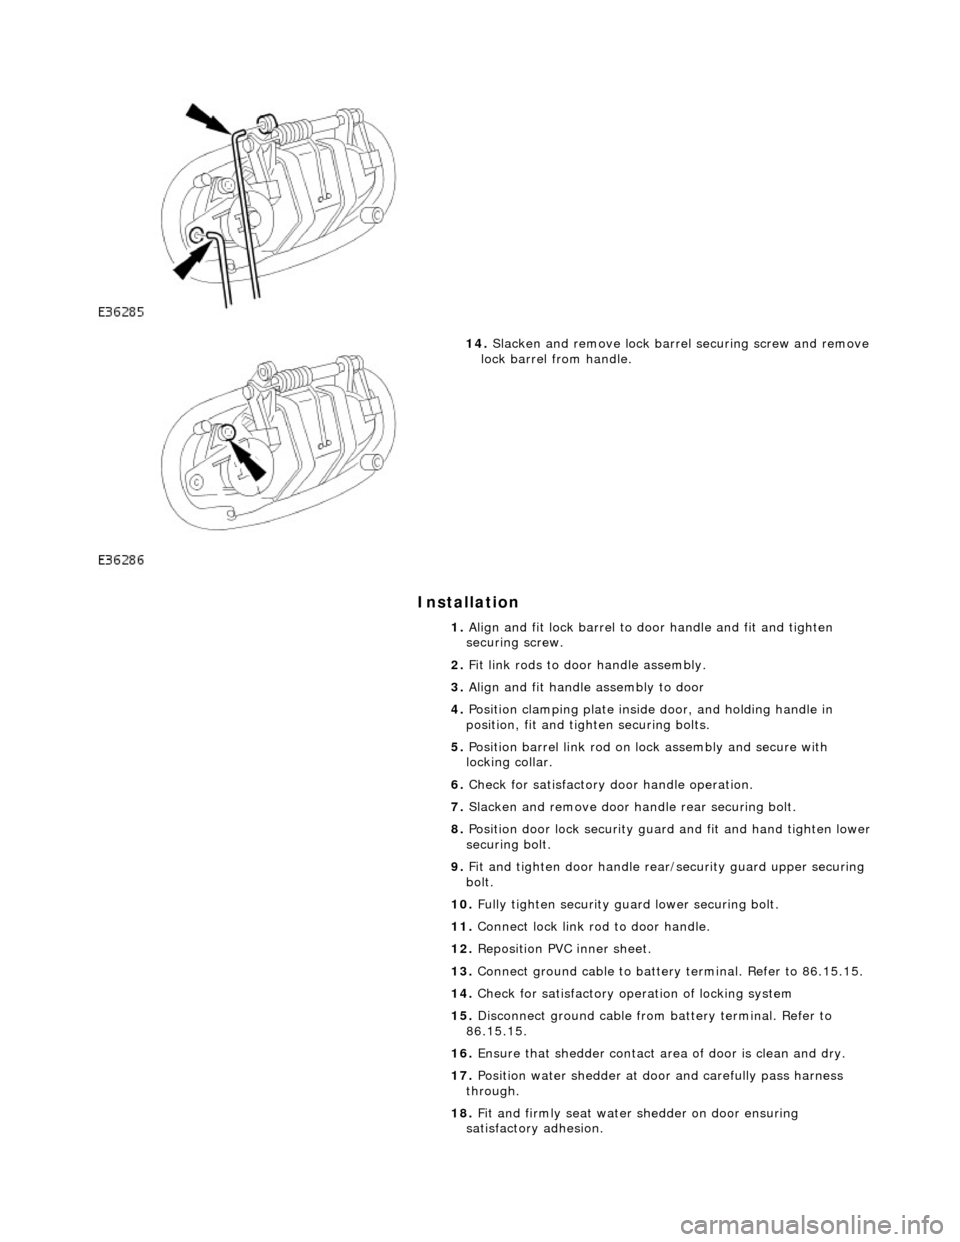
14. Slacken and remove lock barre l securing screw and remove
lock barrel from handle.
1. Align and fit lock barrel to door handle and fit and tighten
securing screw.
2. Fit link rods to door handle assembly.
3. Align and fit handle assembly to door
4. Position clamping plate inside door, and holding handle in
position, fit and tighten securing bolts.
5. Position barrel link rod on lock assembly and secure with
locking collar.
6. Check for satisfactory door handle operation.
7. Slacken and remove door handle rear securing bolt.
8. Position door lock security guard and fit and hand tighten lower
securing bolt.
9. Fit and tighten door handle rear /security guard upper securing
bolt.
10. Fully tighten security guard lower securing bolt.
11. Connect lock link rod to door handle.
12. Reposition PVC inner sheet.
13. Connect ground cable to battery terminal. Refer to 86.15.15.
14. Check for satisfactory operation of locking system
15. Disconnect ground cable from battery terminal. Refer to
86.15.15.
16. Ensure that shedder contact area of door is clean and dry.
17. Position water shedder at door and carefully pass harness
through.
18. Fit and firmly seat water shedder on door ensuring
satisfactory adhesion.
Page 2281 of 2490
Handles, Locks, Latches and Entry Systems - Driver Door Latch
Removal and Installation
Removal
1. Remove battery cover and disconnect ground cable from
battery terminal. Refer to 86.15.19.
2. Remove driver door casing. Refer to 76.34.01.
3. Position water shedder for ac cess and feed door harness
through water shedder.
4. Carefully remove water shedder from door and place adhesive
side down on a clean dry plastic sheet.
5. Release door lock actuator ha rness multiplug from mounting
bracket and disconnect multiplug.
6. Position plastic inner sheet for access.
7. Disconnect outer door handle operating rod from lock
mechanism.
8. Disconnect inner door lock operating rod from lock
mechanism and remove rod assembly.