Page 277 of 1807
BO0QN-01
N08468
AA
BB
C
C
D
BE3367
2 - 2.5 mm
(0.079 - 0.098 in.)
0.7 - 0.75 mm
(0.028 - 0.030 in.)
- BODYFRONT WIPER AND WASHER
BO-21
2101 Author�: Date�:
1997 SUPRA (RM502U)
ADJUSTMENT
1. INSPECT FRONT WASHER NOZZLE
(a) While operating the washer, check that both the point
where the washer fluid from the upper nozzles hits the
windshield, and the up surge area, are within the range
indicated by the hatched line.
ºAº: Approx. 275 mm (10.8 in.)
ºBº: Approx. 150 mm (5.9 in.)
ºCº: Approx. 50 mm (2.0 in.)
ºDº: Within 100 mm (3.9 in.)
(b) Ensure that the lower point where the washer fluid hits the
windshield is within the range of the wiping pattern (the
area of the glass which is wiped by the wiper blades).
2. ADJUST FRONT WASHER NOZZLE
Using a tool like that shown in the illustration, change the direc-
tion of the nozzle hole to adjust the point where washer fluid
strikes the windshield.
Page 281 of 1807
BO0QR-01
N08469
A
B
- BODYREAR WIPER AND WASHER
BO-25
2105 Author�: Date�:
1997 SUPRA (RM502U)
ADJUSTMENT
1. INSPECT REAR WASHER NOZZLE
While operating the washer, check that the point where the
washer fluid hits the back door glass is within the range indi-
cated by the hatched line.
ºAº: Approx. 300 mm (11.8 in.)
ºBº: Approx. 150 mm (5.9 in.)
2. ADJUST REAR WASHER NOZZLE
(See step 2 on page BO-21)
Page 1420 of 1807

MA01F-02
MA-4
- MAINTENANCEUNDER HOOD
41 Author�: Date�:
1997 SUPRA (RM502U)
UNDER HOOD
GENERAL MAINTENANCE
1. GENERAL NOTES
�Maintenance items may vary from country to country. Check the owner's manual supplement in which
the maintenance schedule is shown.
�Every service item in the periodic maintenance schedule must be performed.
�Periodic maintenance service must be performed according to whichever interval in the periodic main-
tenance schedule occurs first, the odometer reading (miles) or the time interval (months).
�Maintenance service after the last period should be performed at the same interval as before unless
otherwise noted.
�Failure to do even one item an cause the engine to run poorly and increase exhaust emissions.
2. WINDSHIELD WASHER FLUID
Check that there is sufficient fluid in the tank.
3. ENGINE COOLANT LEVEL
Check that the coolant level is between the ºFULLº and ºLOWº lines on the see-through reservoir.
4. RADIATOR AND HOSES
(a) Check that the front of the radiator is clean and not blocked with leaves, dirt or bugs.
(b) Check the hoses for cracks, kinks, rot or loose connections.
5. BATTERY ELECTROLYTE LEVEL
Check that the electrolyte level of all battery cells is between the upper and lower level lines on the case.
6. BRAKE AND CLUTCH FLUID LEVELS
Check that the brake and clutch fluid levels are near the upper level line on the see-through reservoirs.
7. ENGINE DRIVE BELT
Check drive belt for fraying, cracks, wear or oil contamination.
8. ENGINE OIL LEVEL
Check the level on the dipstick with the engine turned off.
9. POWER STEERING FLUID LEVEL
�Check the level on the dipstick.
�The level should be in the ºHOTº or ºCOLDº range depending on the fluid temperature.
10. AUTOMATIC TRANSMISSION FLUID LEVEL
(a) Park the vehicle on a level surface.
(b) With the engine idling and the parking brake applied, shift the selector into all positions from ºPº to ºLº,
and then shift into ºPº position.
(c) Pull out the dipstick and wipe off the fluid with a clean rag. Re-insert the dipstick and check that the
fluid level is in the HOT range.
(d) Do this check with the fluid at normal driving temperature (70 - 80°C, 158 - 176°F).
HINT:
Wait until the engine cools down (approx. 30 min.) before checking the fluid level after extended driving at
high speeds, in hot weather, in heavy traffic or pulling a trailer.
11. EXHAUST SYSTEM
If any change in the sound of the exhaust or smell of the exhaust fumes is noticed, have the cause located
and corrected.
Page 1594 of 1807
Z19281
2JZ-GE and 2JZ-GTE:
Reservoir Cap2JZ-GE:
Oil Reservoir
2JZ-GTE:
Suction Port Union
� O-Ring
Flow Control Valve
Pressure Port
Union Front Housing
Vane Pump Shaft
2JZ-GE:
Vane Pump Pulley� O-Ring
� Bearing� Oil Seal� Gasket
Spring
� O-Ring
� Snap Ring
� Snap Ring
� O-Ring
� Straight Pin
Rear Housing Wave Washer
Side Plate
Cam Ring
Vane Plate Vane Pump Rotorx10
� Straight Pin
� Non-reusable part
: Power steering fluid
- STEERINGPOWER STEERING VANE PUMP
SR-25
1909 Author�: Date�:
1997 SUPRA (RM502U)
Page 1602 of 1807

R01174
R06769
SST
- STEERINGPOWER STEERING VANE PUMP
SR-33
1917 Author�: Date�:
1997 SUPRA (RM502U)
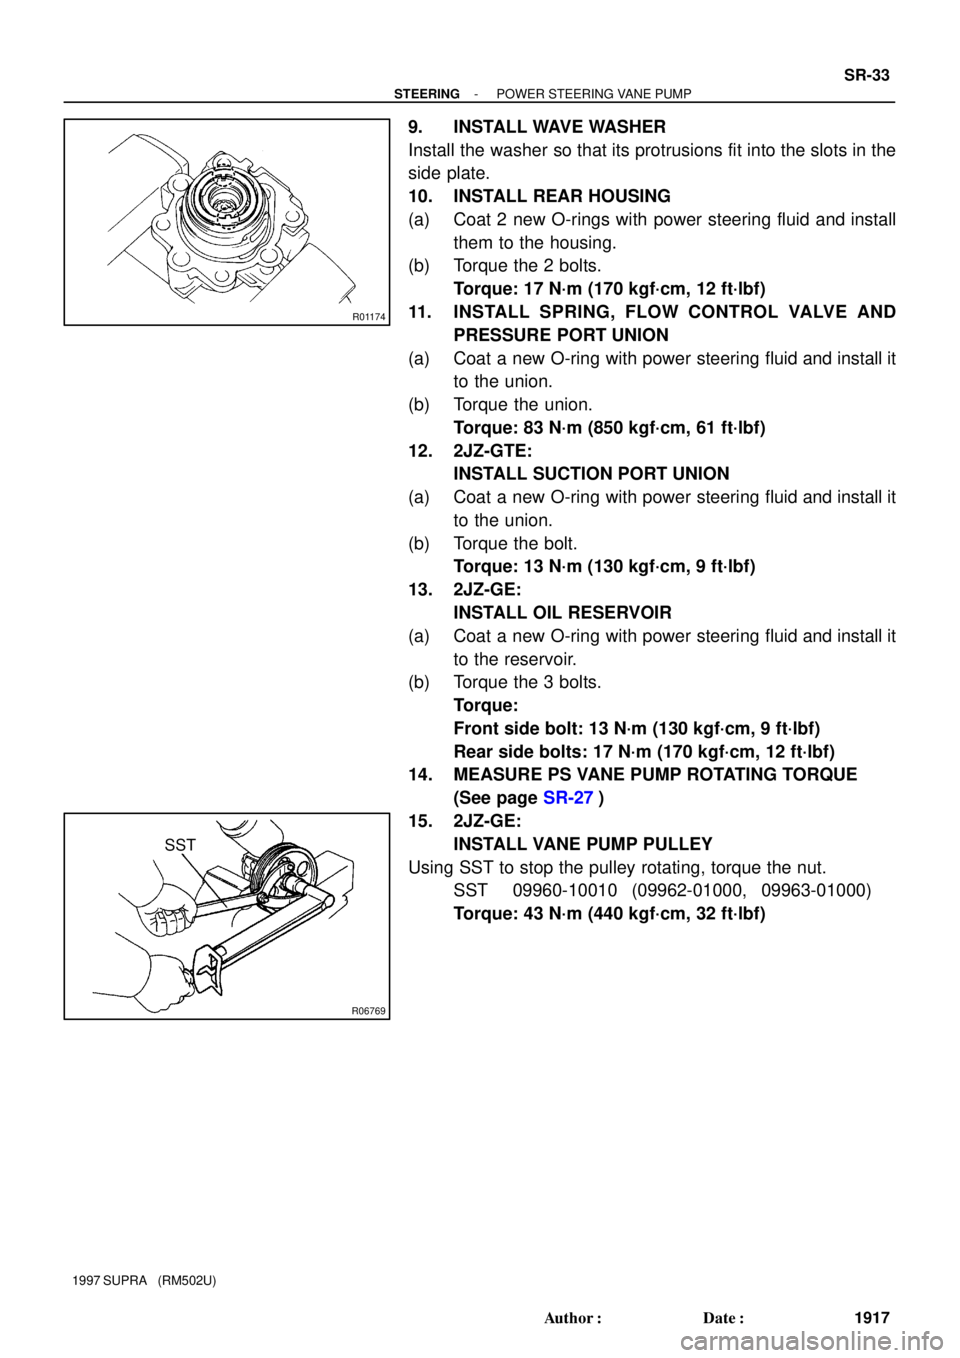
9. INSTALL WAVE WASHER
Install the washer so that its protrusions fit into the slots in the
side plate.
10. INSTALL REAR HOUSING
(a) Coat 2 new O-rings with power steering fluid and install
them to the housing.
(b) Torque the 2 bolts.
Torque: 17 N´m (170 kgf´cm, 12 ft´lbf)
11. INSTALL SPRING, FLOW CONTROL VALVE AND
PRESSURE PORT UNION
(a) Coat a new O-ring with power steering fluid and install it
to the union.
(b) Torque the union.
Torque: 83 N´m (850 kgf´cm, 61 ft´lbf)
12. 2JZ-GTE:
INSTALL SUCTION PORT UNION
(a) Coat a new O-ring with power steering fluid and install it
to the union.
(b) Torque the bolt.
Torque: 13 N´m (130 kgf´cm, 9 ft´lbf)
13. 2JZ-GE:
INSTALL OIL RESERVOIR
(a) Coat a new O-ring with power steering fluid and install it
to the reservoir.
(b) Torque the 3 bolts.
Torque:
Front side bolt: 13 N´m (130 kgf´cm, 9 ft´lbf)
Rear side bolts: 17 N´m (170 kgf´cm, 12 ft´lbf)
14. MEASURE PS VANE PUMP ROTATING TORQUE
(See page SR-27)
15. 2JZ-GE:
INSTALL VANE PUMP PULLEY
Using SST to stop the pulley rotating, torque the nut.
SST 09960-10010 (09962-01000, 09963-01000)
Torque: 43 N´m (440 kgf´cm, 32 ft´lbf)