Page 1047 of 3342
1. Propeller Shaft
A: ON-CAR SERVICE
Check the following points with propeller shaft installed in
vehicle.
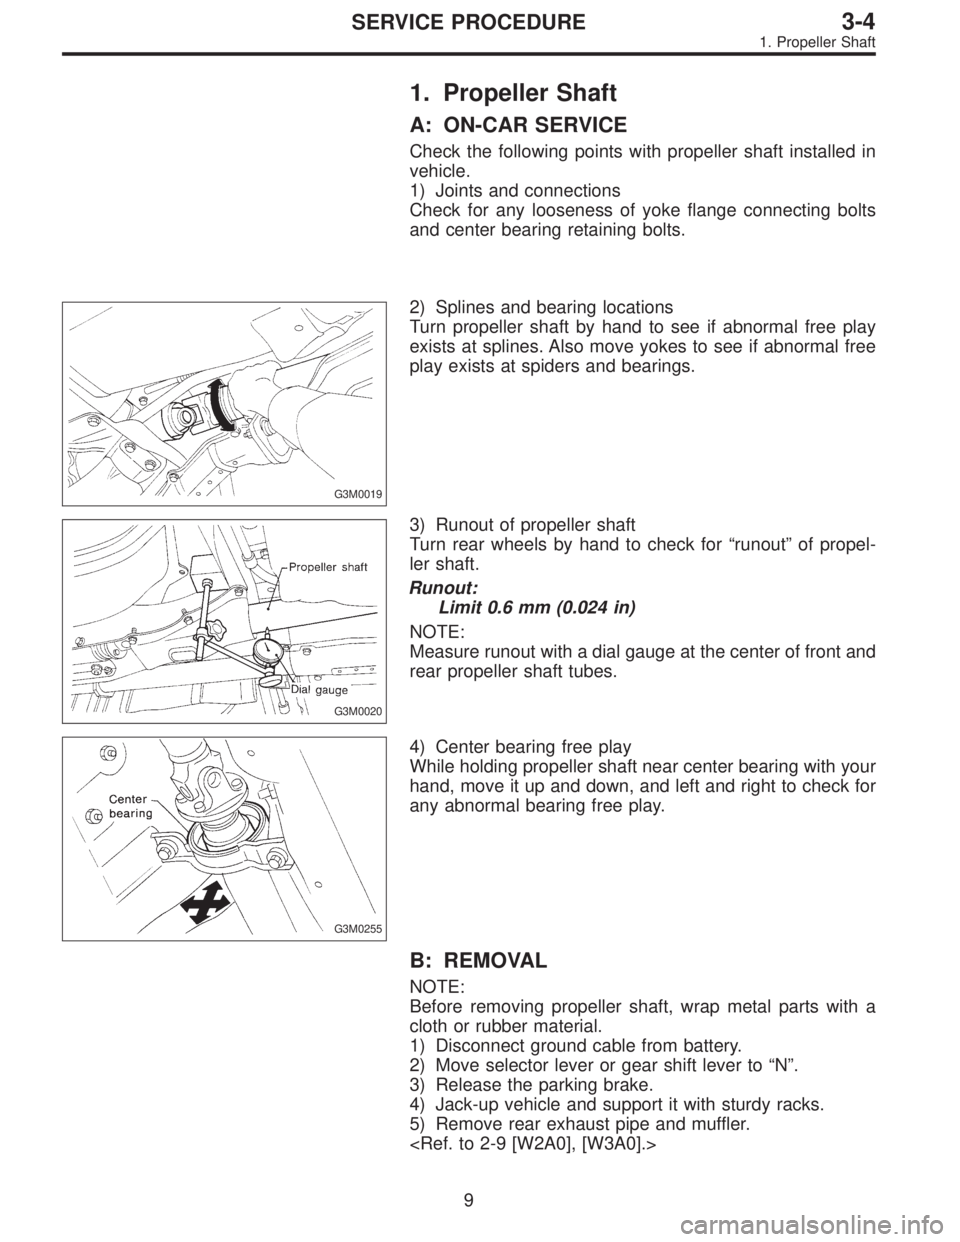
1) Joints and connections
Check for any looseness of yoke flange connecting bolts
and center bearing retaining bolts.
G3M0019
2) Splines and bearing locations
Turn propeller shaft by hand to see if abnormal free play
exists at splines. Also move yokes to see if abnormal free
play exists at spiders and bearings.
G3M0020
3) Runout of propeller shaft
Turn rear wheels by hand to check for“runout”of propel-
ler shaft.
Runout:
Limit 0.6 mm (0.024 in)
NOTE:
Measure runout with a dial gauge at the center of front and
rear propeller shaft tubes.
G3M0255
4) Center bearing free play
While holding propeller shaft near center bearing with your
hand, move it up and down, and left and right to check for
any abnormal bearing free play.
B: REMOVAL
NOTE:
Before removing propeller shaft, wrap metal parts with a
cloth or rubber material.
1) Disconnect ground cable from battery.
2) Move selector lever or gear shift lever to“N”.
3) Release the parking brake.
4) Jack-up vehicle and support it with sturdy racks.
5) Remove rear exhaust pipe and muffler.
9
3-4SERVICE PROCEDURE
1. Propeller Shaft
Page 1148 of 3342
E: INSTALLATION
1) Connect rear housing assembly and strut assembly.
CAUTION:
Use a new self-locking nut.
Tightening torque:
147±15 N⋅m (15±1.5 kg-m, 108±11 ft-lb)
2) Fit BJ (bell joint) to rear housing splines.
CAUTION:
Be careful not to damage inner oil seal lip.
G4M0245
3) Connect rear housing assembly to lateral link assembly.
CAUTION:
Use a new self-locking nut.
Tightening torque:
137±20 N⋅m (14±2 kg-m, 101±14 ft-lb)
G4M0246
4) Connect rear housing assembly to trailing link assem-
bly.
CAUTION:
Use a new self-locking nut.
Tightening torque:
98—127 N⋅m (10—13 kg-m, 72—94 ft-lb)
5) Connect parking brake cable to parking brake.
Disc brake: Perform steps 6) through 8).
6) Install disc rotor on rear housing assembly.
G4M0240
7) Install disc brake caliper on back plate.
Tightening torque:
52±6 N⋅m (5.3±0.6 kg-m, 38.3±4.3 ft-lb)
G4M0266
8) Install rear speed sensor to back plate (only vehicle
equipped with A.B.S.).
22
4-2SERVICE PROCEDURE
2. Rear Axle (AWD Model)
Page 1171 of 3342
5) Connect transverse link to housing.
Tightening torque (self-locking nut):
49±10 N⋅m (5.0±1.0 kg-m, 36±7 ft-lb)
CAUTION:
Use a new self-locking nut.
6) Install stabilizer bracket.
7) While depressing brake pedal, tighten axle nut to the
specified torque.
Tightening torque:
186±20 N⋅m (19±2 kg-m, 137±14 ft-lb)
CAUTION:
�Use a new axle nut.
�Always tighten axle nut before installing wheel on
vehicle. If wheel is installed and comes in contact with
ground when axle nut is loose, wheel bearings may be
damaged.
�Be sure to tighten axle nut to specified torque. Do
not overtighten it as this may damage wheel bearing.
8) After tightening axle nut, lock it securely.
G4M0293
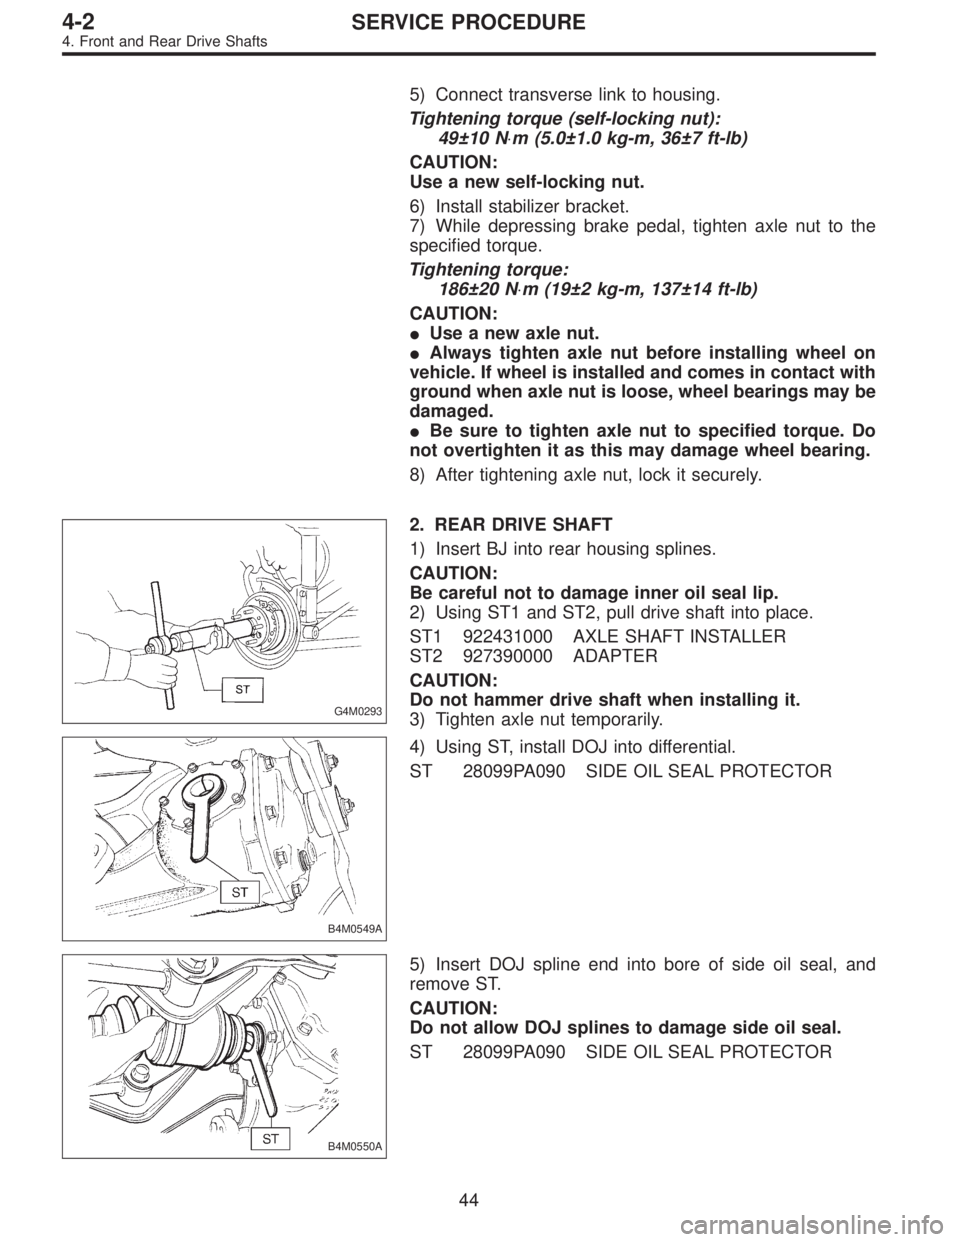
2. REAR DRIVE SHAFT
1) Insert BJ into rear housing splines.
CAUTION:
Be careful not to damage inner oil seal lip.
2) Using ST1 and ST2, pull drive shaft into place.
ST1 922431000 AXLE SHAFT INSTALLER
ST2 927390000 ADAPTER
CAUTION:
Do not hammer drive shaft when installing it.
3) Tighten axle nut temporarily.
B4M0549A
4) Using ST, install DOJ into differential.
ST 28099PA090 SIDE OIL SEAL PROTECTOR
B4M0550A
5) Insert DOJ spline end into bore of side oil seal, and
remove ST.
CAUTION:
Do not allow DOJ splines to damage side oil seal.
ST 28099PA090 SIDE OIL SEAL PROTECTOR
44
4-2SERVICE PROCEDURE
4. Front and Rear Drive Shafts
Page 1172 of 3342
G3M0050
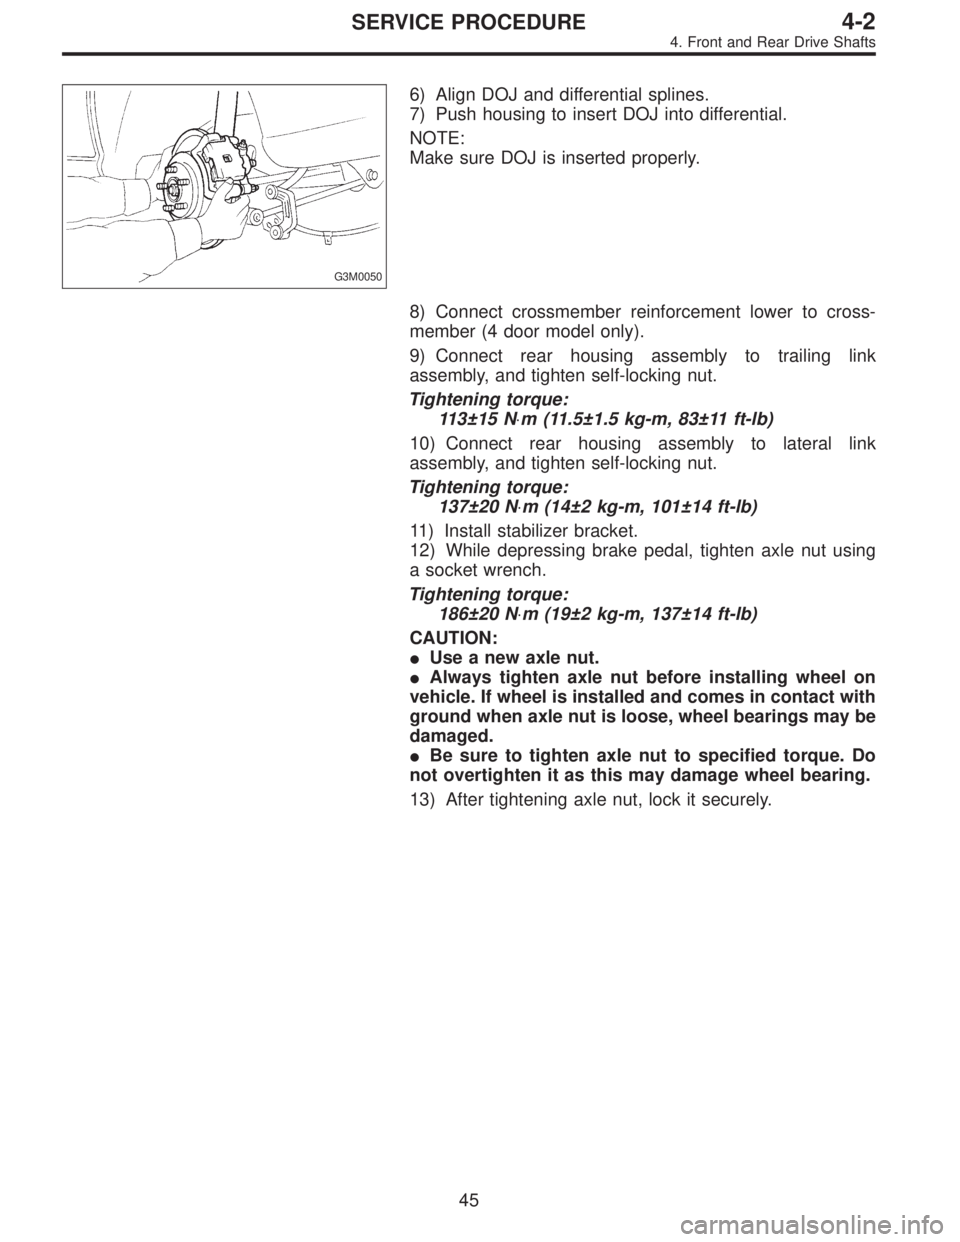
6) Align DOJ and differential splines.
7) Push housing to insert DOJ into differential.
NOTE:
Make sure DOJ is inserted properly.
8) Connect crossmember reinforcement lower to cross-
member (4 door model only).
9) Connect rear housing assembly to trailing link
assembly, and tighten self-locking nut.
Tightening torque:
113±15 N⋅m (11.5±1.5 kg-m, 83±11 ft-lb)
10) Connect rear housing assembly to lateral link
assembly, and tighten self-locking nut.
Tightening torque:
137±20 N⋅m (14±2 kg-m, 101±14 ft-lb)
11) Install stabilizer bracket.
12) While depressing brake pedal, tighten axle nut using
a socket wrench.
Tightening torque:
186±20 N⋅m (19±2 kg-m, 137±14 ft-lb)
CAUTION:
�Use a new axle nut.
�Always tighten axle nut before installing wheel on
vehicle. If wheel is installed and comes in contact with
ground when axle nut is loose, wheel bearings may be
damaged.
�Be sure to tighten axle nut to specified torque. Do
not overtighten it as this may damage wheel bearing.
13) After tightening axle nut, lock it securely.
45
4-2SERVICE PROCEDURE
4. Front and Rear Drive Shafts
Page 1175 of 3342
B4M0549A
2) Using ST, install DOJ into differential.
ST 28099PA090 SIDE OIL SEAL PROTECTOR
B4M0550A
3) Insert DOJ spline end into bore of side oil seal, and
remove ST.
CAUTION:
Do not allow DOJ splines to damage side oil seal.
ST 28099PA090 SIDE OIL SEAL PROTECTOR
G3M0050
4) Align DOJ and differential splines.
5) Push housing to insert DOJ into differential.
NOTE:
Make sure DOJ is inserted properly.
CAUTION:
Discard old self-locking nut. Replace with a new one.
6) Connect rear housing assembly to trailing link
assembly, and tighten self-locking nut.
7) Connect rear housing assembly to lateral link assembly,
and tighten self-locking nut.
8) Connect stabilizer link to lateral link.
9) Install crossmember reinforcement lower to crossmem-
ber (4 door model only).
10) Install A.B.S. sensor clamps and parking brake cable
bracket.
48
4-2SERVICE PROCEDURE
6. Replacement of Rear DOJ and BJ Boots

