Page 145 of 410
Comfort Controls
Climate Control System
L
0
83
HI
to
Fan Control Temperature
Knob
Mode
Knob
3-2
Page 146 of 410
Air Conditioning
011 cool but sunny days, use BI-LEVEL A/C to deliver
~varm
air to the floor and cooler air to the instrument
p"nel outlets.
When the air conditioner is on. you may sometimes
notice slight changes
in your 1:ehicle's engine speed and
power, This
is normal because the system is designed
to cycle the compressor
on and off to keep the
clesired temperature.
Heating
The heater works best if yo11 keep plr windows closed
while using
it. On cold days. use HEATER With the
ten~perature knob turned clockwise.
BLEND is LISS~LI~ in
cool weather when you have fos or ice on the
winclshield
or side windows.
If ~OLI use the optional engine coolant heater befhre
starting yo~~r engine. your heatin2 system will produce
warmer air faster to heat the passenger compartment
in
cold weather. See "Engine Coolant Heater" in the Index.
3-3
Page 147 of 410

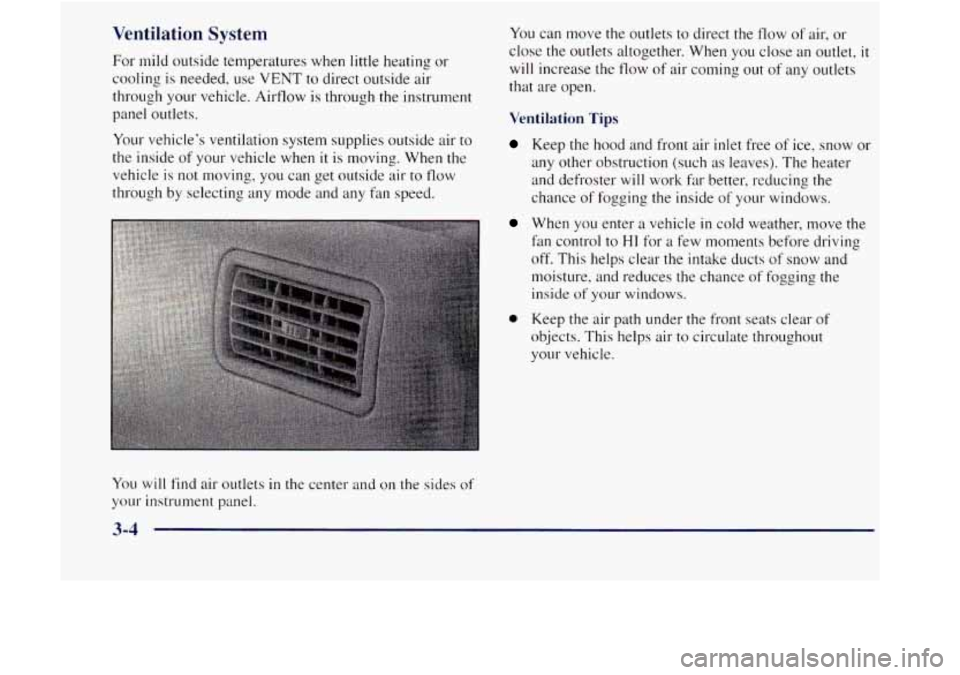
Ventilation System
For mild outside temperatures when little heating or
cooling
is needed, use VENT to direct outside air
through your vehicle. Airflow
is through the instrument
panel outlets.
Your vehicle’s ventilation system
supplies outside air to
the inside of your vehicle when
it is moving. When the
vehicle is not moving, you can get outside air
to flow
through by selecting any mode and any fan speed. You
can move
the outlets to direct the flow of air, or
close the outlets altogether. When you close
an outlet, it
will increase the tlow of air coming out of any outlets
that are open.
Ventilation Tips
Keep the hood and front air inlet free of ice, snow or
any other obstruction (such as leaves). The heater
and defroster
will work far better, reducing the
chance
of fogging the inside of your windows.
When you enter a vehicle in cold weather, move the
fan control
to HI for 2.1 few moments before driving
off. This helps clear the intake ducts of snow and
moisture, and reduces the chance of fogging the
inside of your windows.
0 Keep the air path under the front seats clear of
objects. This helps air to circulate throughout
your vehicle.
You will find air outlets in the center and on the sides of
your instrument panel.
Page 148 of 410

Defogging and Defrosting
On cool. humid days. use BLEND to keep the
windshield and side windows clear.
Use
DEFROST to remove fog or ice from the
windshield quickly
in extreme humid or cold conditions.
Turn the temperature knob clockwise and
move the fhn
control toward HI.
Rear Window Defogger (Option)
window of as much snow or ice as possible before using
the rear window defogger.
To turn on the rear window defogger, find the switch
marked REAR
DEFOG on your instrument panel below
the headlamp switch. Press ON until the light in the
switch comes
on, then release it. It will only work if the
ignition switch is turned to RUN.
The rear window defozger will stay
on for five to seven
minutes. then turn off.
If you need additional warming
time, turn
it on again. You can turn the defogger off at
any time by pressing OFF.
Do not attach a temporary vehicle license, tape or decals
across the defogger grid on the rear window.
NOTICE:
Don’t use a razor blade or something else sharp
on the inside
of the rear window. If you do, you
could cut or damage the warming grid, and the
repairs wouldn’t be covered
by your warranty.
3-5
Page 149 of 410

Audio Systems
Your Delco@ audio system has been designed to operate
easily and give years of listening pleasure. You will get
the most enjoyment out
of it if you acquaint yourself
with it first. Find out what your Delco system can do
and how to operate all its controls, to be sure you're
went into it.
c eetting the most out of the advanced engineering that
Setting the Clock
Press SET. Within five seconds, press and hold SEEK
until the correct minute appears on the display. Press and
hold
SCAN until the correct hour appears on the display.
Setting the Clock for AM-FM Stereo
with Compact
Disc Player and Automatic
Tone Control
Press and hold HR until the correct hour appears on the
display. Press and hold
MIN lmtil the correct minute
appears
on the display. To display the clock with the
ignition
off, press RECALL and the time will be
displayed for a few seconds. There is an initial
two-second delay before the clock goes
into the
time-set mode.
AM-FM Stereo
Playing the Radio
PWR-VOL: This knob turns the system on and off and
controls the volume. To increase volume,
turn the knob
clockwise. Turn
it counterclockwise to decrease volume.
RECALL: Display the time with the ignition off by
pressing this knob. When the radio is playing, press this
knob to recall the station frequency.
Page 150 of 410

Finding a Station
AM-FM:
Press the lower knob to switch between AM
and
FM. The display shows your selection.
TUNE: Turn the lower knob to tune in radio stations.
SEEK: Press this button to go to the next higher station
and stop.
SCAN: Press this button to listen to each station for a
few seconds. The radio will go
to the next station, stop
for a few seconds, then
go to the next station. SCAN
will appear on the display. Press SCAN again to
stop scanning.
PUSHBUTTONS: The four numbered pushbuttons let
you return to your favorite stations. You can set up to
14 stations (seven AM and seven FM). Just:
1. Turn the radio on.
2. Press AM-FM to select the band.
3. Tune in the desired station.
4. Press SET. (SET will appear on the display.)
5. Press one of the four pushbuttons, within five
seconds. Whenever you press that numbered button,
the station you set will return.
6. Repeat the steps for each pushbutton. In addition to the four stations already set,
up to three
more stations may be preset on each band by pressing
two adjoining buttons at the same time. Just:
1. Tune in the desired station.
2. Press SET. (SET will appear on the display.)
3. Press two adjoining pushbuttons at the same time,
within five seconds. Whenever you press the same
two buttons, the station you set will return.
4. Repeat the steps for each pair of pushbuttons.
Setting the Tone
BASS:
Slide this lever up or down to increase or
decrease bass.
TREBLE: Slide this lever up or down to increase or
decrease treble. If a station is weak or noisy, you may
want to decrease the treble.
Adjusting the Speakers
BAL:
Turn the control behind the upper knob to move
the sound to the left or right speakers. The middle
position balances the sound between the speakers.
FADE: Turn the control behind the lower knob to move
the sound to the front or rear speakers. The middle
position balances the sound between the speakers.
3-7
Page 151 of 410

AM-FM Stereo with Cassette Tape Player Finding a Station
(If Equipped) Ahl-I~n'I: Press the lower knob to switch between AM
ancl FM. The display shows your selection.
TUNE: TLII-11 the lower knob to tune in radio stations.
SEEK: Press this button to go to the next higher station
and stay there.
SCAN: Press this button to listen to each station for a
few seconds. The radio will go to the next station, stop
for
a few seconds. then go to the next station. SCAN
will ~1ppear 011 the display. Press SCAN again to
stop scanning.
PUSHBUTTONS: The four nllmbered pushbuttons let
Playing the Radio
PWR-VOL: This knob turns the system on and off and
controls the volume. To increase volume. turn the knob
clockwise. Turn it counterclockwise to decrease c.olulne.
RCL: Display the time with the ignition off by ~mxing
this knob. When the
radio is playing, press this knob to
recall the station frequency.
2. Press AM-FM to select the band.
3. Tune in thc desired station.
4. Press SET. (SET will appear on the display.)
5. Press one of the four pushbuttons. within five
seconds. Whenevcr you press that numbered button.
the station
SOLI set will return.
3-8
Page 152 of 410

In addition to the four stations already set, up to three
more stations may be preset on each band by pressing
two adjoining buttons at the same time. Just:
1. Tune in the desired station.
2. Press SET. (SET will appear on the display.)
3. Press two adjoining pushbuttons at the same time,
within five seconds. Whenever you press the same
two buttons, the station you set will return.
4. Repeat the steps for each pair of pushbuttons.
Setting the Tone
BASS:
Slide this lever up or down to increase Or
decrease bass.
TREBLE: Slide this lever up or down to increase or
decrease treble.
If a station is weak or noisy, you may
want to decrease the treble.
Adjusting the Speakers
BAL:
Turn the control behind the upper knob to move
the sound to the left or right speakers. The middle
position balances the sound between the speakers.
FADE: Turn the control behind the lower knob to move
the sound to the front or rear speakers. The middle
position balances the sound between the speakers.
Playing a Cassette Tape
Your tape player is built to work best with tapes that are
30 to 45 minutes long on each side. Tapes longer than
that
are so thin they may not work well in this player.
Once the tape is playing, use the
PWR-VOL, BAL and
FADE knobs just as you do for the radio. A lighted
arrow will be displayed to show tape play direction.
FORWARD: Press the arrow button in the direction that
the lighted arrow points to advance quickly to another
part of the tape. Press STOP-EJECT lightly to stop
forwarding and play the tape.
REVERSE: Press the arrow button in the opposite
direction that the lighted
arrow points to reverse quickly
to another part of the tape. Press STOP-EJECT lightly
to stop reversing and play the tape.
PROG: Press this knob to go from one side of the tape
to the other.
STOP-EJECT: Press this button to remove the tape or
stop playing the tape in order to play the radio. If you
leave a cassette tape in the player while listening to the
radio, it may become warm.