1997 CHEVROLET CORVETTE buttons
[x] Cancel search: buttonsPage 131 of 356
Downloaded from www.Manualslib.com manuals search engine DIC Controls and Displays
Turn on the system by turning the ignition to ON. When
you turn on the ignition, the DIC will be in the mode last
displayed when the engine was turned off. Each DIC
button allows you to scroll through a menu. A blank
page ends each menu.
If a problem is detected, a diagnostic message will
appear on the display. Press RESET to acknowledge any
current warning or service messages. The following
pages will show the messages you can see on the DIC
display by pressing the DIC buttons.
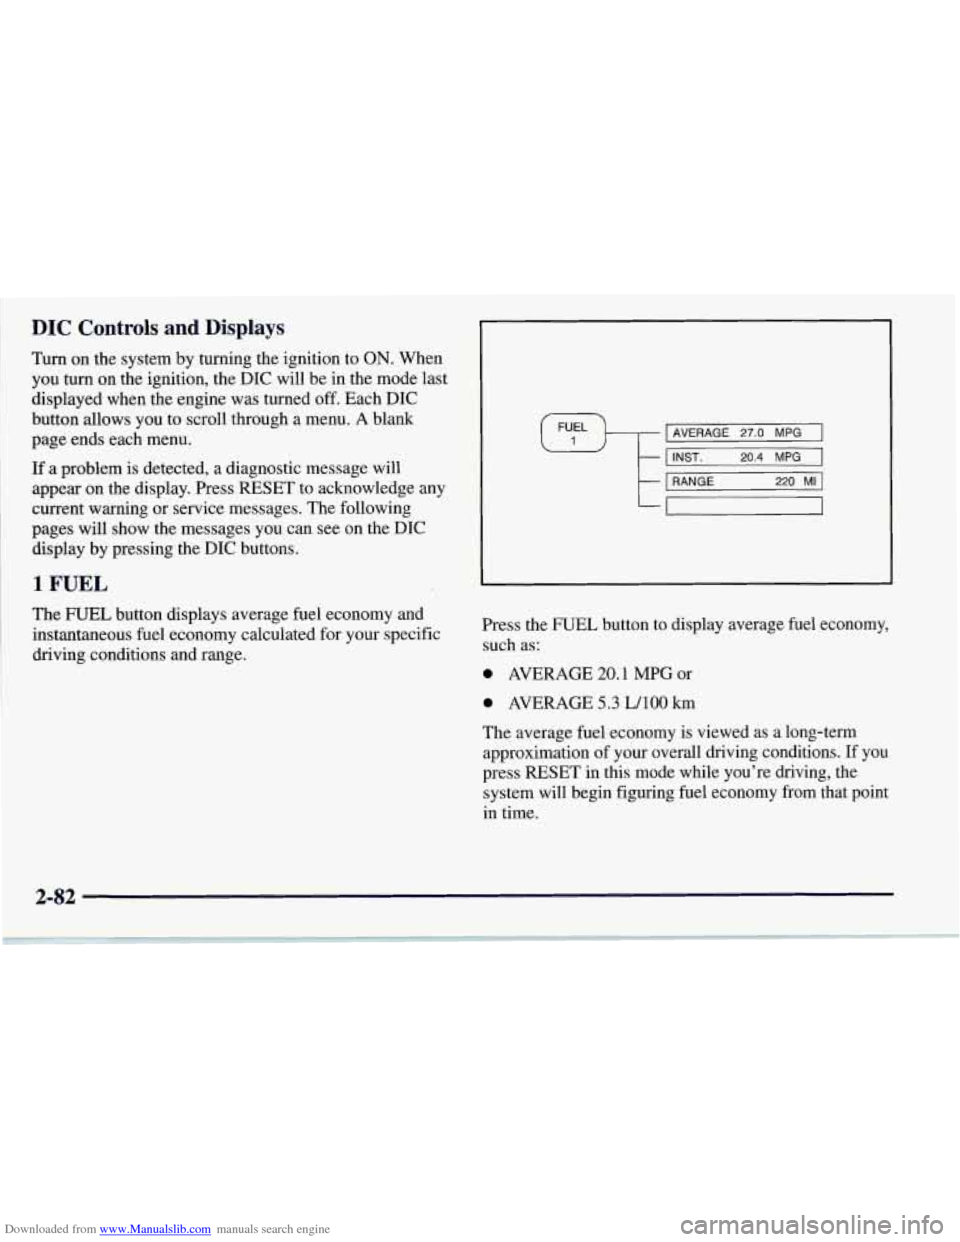
1 FUEL
The FUEL button displays average fuel economy and
instantaneous fuel economy calculated for your specific
driving conditions and range.
I AVERAGE 27.0 MPG I \#/ I I INST. 20.4 MPG 1 I I I
t
1 RANGE 220 MI 1
-
Press the FUEL button to display average fuel economy,
such as:
0 AVERAGE 20.1 MPG or
0 AVERAGE 5.3 LAO0 km
The average fuel economy is viewed as a long-term
approximation of your overall driving conditions. If you
press
RESET in this mode while you're driving, the
system will begin figuring fuel economy from that point
in time.
Page 136 of 356

Downloaded from www.Manualslib.com manuals search engine 4 OPTIONS
This button allows you to choose personal options
available with your vehicle, such as security, door
locks, easy entry seats and language. Some of these
functions work along with the key fob transmitter.
When returning to the options menu, the first item of
the options list will always be displayed, not the one
you were last in when you changed buttons.
1 PASSIVE UNLK DRIVER 1
APPROACH LIGHTS ON
AUTO LOCK
ON
I AUTO UNLOCK-DRIVER I
I SEAT EASY ENTRY ON
t LANGUAGE ENGLISH
LI
r
I FOB TRAINING I
The following are the options listed under the
OPTIONS button:
Lock and Arm
Press the OPTIONS button until LOCK & ARM
appears on the display, then use the RESET button to
page through the following selections:
0 LOCK & ARM OFF
0 LOCK & ARM HORN ONLY
0 LOCK & ARM LIGHTS ONLY
0 LOCK & ARM HORN & LTS
If you choose LOCK & ARM OFF, you will receive no
security feedback when locking or unlocking your vehicle.
If you choose LOCK
& ARM HORN ONLY, only the
horn will chirp to let you know when your alarm system
has armed when locking your vehicle.
If you choose LOCK
& ARM LIGHTS, only your
exterior lights will flash to let you know when your
alarm system has armed when locking your vehicle.
If you choose LOCK
& ARM HORN & LTS, the horn
will chirp and the exterior lights will flash briefly to
let you know the system has armed when locking
your vehicle.
2-87
Page 151 of 356
Downloaded from www.Manualslib.com manuals search engine Mode Buttons
These buttons control the air intake, the air conditioning
and the rear window defogger operation.
outside air into your vehicle. The light on the button will
come on when operating. Use this setting while trying
to
defrost or defog windows to help clear moisture.
amount of fresh
air entering your vehicle by recirculating
most of the
air inside your vehicle. The light on the button
will come on when operating.
This setting is helpful when
you are trying to cool the
air quickly or to limit odors
entering your vehicle.
RECIRCULATE cannot be used
while in the DEFROST or DEFOG modes.
a NC: This button turns the air conditioning
compressor off or on under most conditions. The light
on the
A/C button comes on when the compressor is
operating. The air conditioning does not operate at
temperatures below approximately
35 OF to 40°F
(2" C to 4" C). The air conditioning cools and
dehumidifies the air coming into the vehicle. The
air conditioning cannot be turned off in DEFROST
as it helps to remove moisture from the vehicle. It also
helps to keep the windows clear.
FRESH AIR: Press this button and it will bring
RECIRCULATE: Press this button to limit the The air
conditioning may be forced off at high engine
speeds or high engine oil or coolant temperatures,
Rear Window Defogger
@ This button turns the rear defogger and heated
outside mirrors on. The light on the button will come
on when operating. The system automatically shuts off
after approximately
10 minutes. If further defogging is
desired, press the button again.
The rear window defogger operates only when the
engine
is running.
The rear window defogger uses a warming grid to
remove fog from the rear window.
Do not attach
anything like a temporary vehicle license or a decal
across the defogger grid on the rear window.
I NOTICE:
Don't use a razor blade or something sharp on
the inside
of the rear window. If you do, you
could cut or damage the warming grid, and repairs wouldn't be covered by your warranty.
Page 156 of 356
Downloaded from www.Manualslib.com manuals search engine Mode Buttons
These buttons control climate control ON/OFF, air
intake, front defrost, rear defrost and the air
conditioning operation.
FRONT Press the FRONT defrost button to
quickly remove fog or frost from the windshield. This
setting directs most of the airflow to the windshield and
a small amount toward
the lower and side window
outlets. The light on the button will come on and the
digital display will show the defrost mode symbol and
fan speed when the front defrost mode is being used.
Pressing FRONT defrost again will return the system to
the last operating mode.
If the system is in FRONT defrost when you shut the
engine
off, it will restart in FRONT defrost unless the
engine is off for longer than 40 minutes. If the engine is
off longer than 40 minutes, the system will restart in the
operating mode you had set prior to FRONT defrost.
OFF: Press the OFF button to turn off the climate
control system. This is the only setting that fully shuts
off the fan. The digital display will show only the
outside temperature. You can still adjust the driver-set
temperature, the passenger temperature offset and the air
intake mode while in
OFF.
a NC: This button turns the air conditioning
compressor on or
off, except in the FRONT defrost mode.
The light on the A/C button will come on when
the
compressor is operating in either the automatic or manual
mode. The
air conditioning may also be forced off at high
engine speeds. The light on the A/C button will flash if
pressed when
air conditioning operation is not allowed.
The air conditioning cools and dehumidifies
air coming
into the vehicle. It also operates in defrost to help
remove moisture from the vehicle. The air conditioning
does not operate at temperatures below approximately
35°F to 40°F (2°C to 4°C). If the system is operating in
the AUTO mode, turning the air conditioning off will
delete AUTO from the digital display and show current
mode and fan settings. The AUTO button must be
pressed to return to the automatic mode operation.
from the outside. The light on
this air intake button
will come on to show when it is operating. When in
the
AUTO mode, the system automatically selects FRESH
AIR instead of RECIRCULATE, as required, to control
the temperature
in the vehicle. By pressing FRESH AIR,
the system will lock into the fresh air mode . Any
adjustment to the air intake must then be made manually.
FRESH AIR should be used when trying to defrost or
defog windows to help reduce moisture inside the vehicle.
FRESH AIR: Press this button to provide fkesh air
Page 162 of 356
Downloaded from www.Manualslib.com manuals search engine SCAN: Press and hold one of the SEEK arrows for two
seconds until SCAN appears
on the display. SCAN
allows you to listen to each station for a few seconds.
The radio will go to a station, stop for a few seconds,
then go on to the next station. Press SEEK again to stop
scanning. The sound will mute while scanning.
PUSHBUTTONS: The six numbered pushbuttons let
you return to your favorite stations. You can set up to
18 stations (six AM, six FMl and six FM2). Just:
1.
2.
3.
4.
5.
6.
Turn the radio on.
Press AM-FM to select the band.
Tune in the desired station.
Press AUTO TONE to select the equalization that
best suits the type of station selected.
Press and hold one of the six numbered buttons. The
sound will mute. When it returns, release the button.
Whenever you press that numbered button, the
station you
set will return and the AUTO TONE
equalization that you selected will also be
automatically selected for that button.
Repeat the steps for each pushbutton.
P.SCAN: Press this button to listen to each of your
favorite stations stored on your pushbuttons for
a few
seconds. The radio will scan through each
of the stations stored
on your pushbuttons, except those stations with
weak reception. The AUTO TONE setting stored for
that pushbutton will be automatically chosen. Press
P.SCAN or one of the pushbuttons again to stop
scanning. P.SCAN will be displayed whenever the tuner
is in the P.SCAN mode. The channel number (PI-P6)
will appear momentarily just before the frequency is
displayed. In FM mode, this function will scan through
both FM
1 and FM2 preset stations and FM 1 or FM2 will
appear
on the display.
Setting the Tone
BASS:
Press this knob lightly so it extends. Turn the
knob to the right to increase bass and to the left to
decrease bass. When you use this control, the radio’s
AUTO TONE setting will switch to manual and the
AUTO TONE display will go blank.
TREB: Press this knob lightly so it extends. Turn the
knob to the right to increase treble and
to the left to
decrease treble. When
you use this control, the radio’s
AUTO TONE setting will switch to manual and the
AUTO TONE display will
go blank. If a station is weak
or noisy,
you may want to decrease the treble.
Push these knobs back into their stored positions when
you’re
not using them.
3-15
Page 166 of 356
Downloaded from www.Manualslib.com manuals search engine RECALL: Press this button to recall the station being
played. If you press the button when the ignition is
off,
the clock will show for a few seconds.
SCV: Your system has a feature called
Speed-Compensated-Volume (SCV). With SCV, your
audio system adjusts automatically to make up for road
and wind noise as you drive. Set the volume at the
desired level. Move the control ring behind the upper
knob to the right to adjust the SCV. Then, as you drive,
SCV automatically increases the volume, as necessary,
to overcome noise at any particular speed. The volume
level should always sound the same to you as you drive.
If you don’t want to use SCV, turn the control all the
way down. Each notch on the control ring allows for
more volume compensation at faster vehicle speeds.
Finding a Station
AM-FM: Press this button to switch between AM, FMl
and FM2. The display shows your selection.
TUNE: Press this knob lightly so it extends. Turn it to
choose radio stations. Push the knob back into its stored
position when you’re not using it.
SEEK: Press the right or left arrow to go to the next
higher or lower station and stay there. The sound will
mute while seeking.
SCAN: Press one of the SEEK arrows for two seconds,
and SCAN will appear on the display. Use SCAN to
listen to stations for a few seconds. The radio will go to
a station, stop for a few seconds, then
go on to the next
station. Press SEEK again to stop scanning. The sound
will mute while scanning.
PUSHBUTTONS: The six numbered pushbuttons let
you return
to your favorite stations. You can set up to
18 stations (six AM, six FM1 and six FM2). Just:
1. Turn the radio on.
2. Press AM-FM to select the band.
3. Tune in the desired station.
4. Press AUTO TONE to select the equalization that
best suits the type of station selected.
5. Press and hold one of the six numbered buttons. The
sound will mute. When it returns, release the button.
Whenever you press that numbered button, the
station you set will return and the
AUTO TONE
equalization that you selected will also be
automatically selected for that button.
6. Repeat the steps for each pushbutton.
Page 167 of 356
Downloaded from www.Manualslib.com manuals search engine P.SCAN: Press this button to listen to each of your
favorite stations stored on your pushbuttons for a few
seconds. The radio will scan through each of the stations
stored on your pushbuttons, except those stations with
weak reception. The AUTO TONE setting stored for
that pushbutton will be automatically chosen. Press
P.SCAN or one of the pushbuttons again to stop
scanning. P.SCAN will be displayed whenever the tuner
is in the P.SCAN mode.
In FM mode, this function will
scan through both
FMl and FM2 preset stations and
FM1 or FM2 will appear on the display.
Setting the Tone
BASS:
Press this knob lightly so it extends. Turn the
knob to the right to increase bass and to the left to
decrease bass. When you use this control, the radio’s
AUTO TONE setting will switch to manual and the
AUTO TONE display will go blank.
TREB: Press this knob lightly so it extends. Turn the
knob
to the right to increase treble and to the left to
decrease treble. When you use this control, the radio’s
AUTO TONE setting will switch to manual and the
AUTO TONE display will
go blank. If a station is
weak or noisy, you may want to decrease the treble.
Push these knobs back into their stored positions when
you’re not using them.
AUTO TONE: This feature allows you to choose
preset bass and treble equalization settings designed
for country/western, classical, news, rock, pop and jazz
stations. C/W will appear on the display when you first
press AUTO TONE. Each time you press it, another
setting will appear on the display. Press it again after
JAZZ appears and the AUTO TONE display will go
blank. Tone control will return to the BASS and TREB
knobs. Also, if you use the BASS and TREB knobs,
control will return to them and the AUTO TONE
display will go blank.
Adjusting the Speakers
BAL:
Press this knob lightly so it extends. Turn the
knob to the right for the right speakers and to the left for
the left speakers. The middle position balances the
sound between
the speakers.
FADE: Press this knob lightly so it extends. Turn the
knob to the right to adjust the sound to the front
speakers and to the left for the rear speakers. The middle
position balances the sound between the speakers.
Push these knobs back into their stored positions when
you’re not using them.
3-20
Page 170 of 356
Downloaded from www.Manualslib.com manuals search engine b
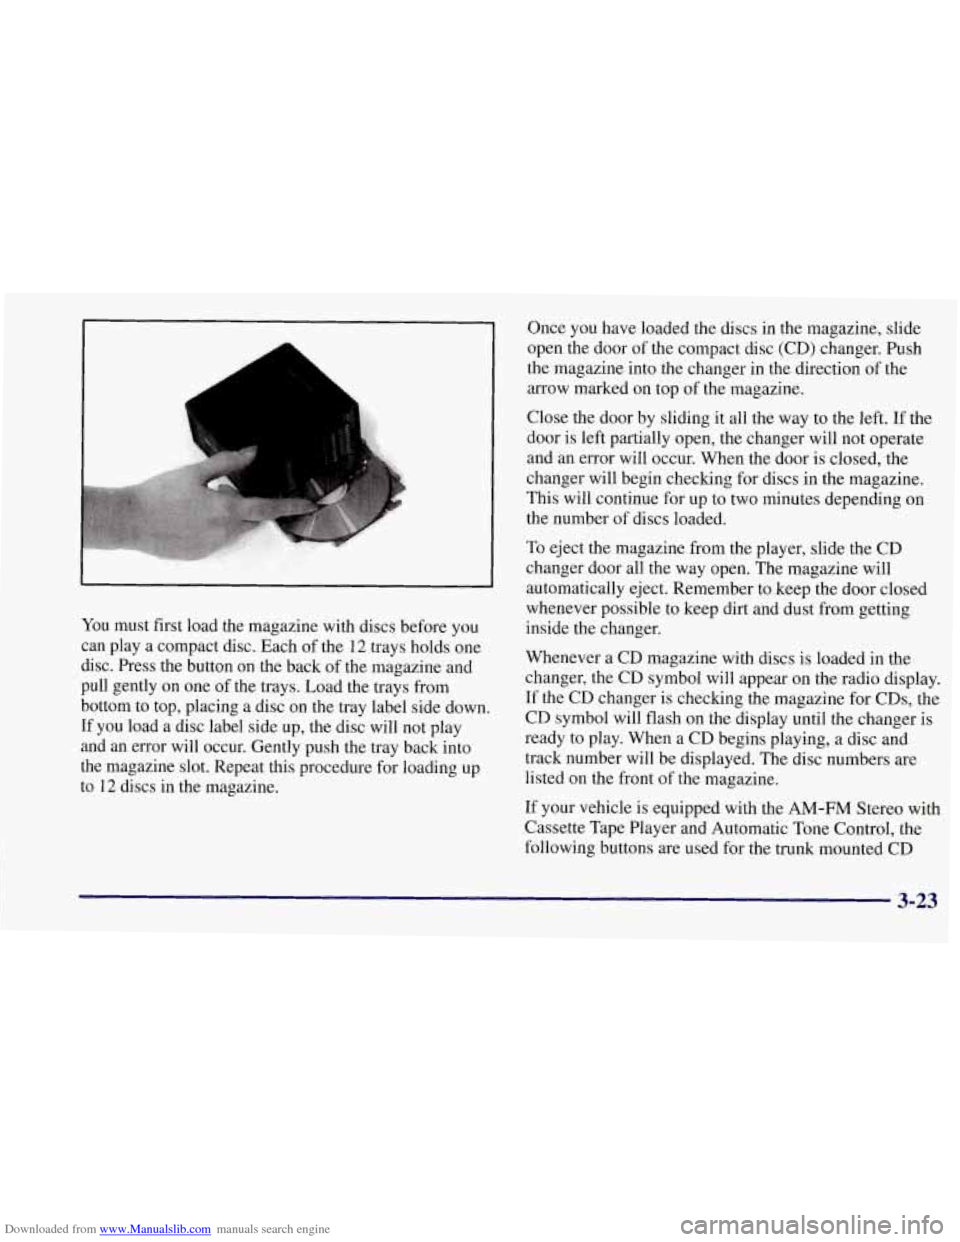
You must first load the magazine with discs before you
can play a compact disc. Each of the
12 trays holds one
disc. Press the button on the back of the magazine and
pull gently on one of the trays. Load the trays from
bottom to top, placing a disc on the tray label side down.
If you load a disc label side up, the disc will not play
and an error will occur. Gently push the tray back into
the magazine slot. Repeat this procedure for loading up
to
12 discs in the magazine. Once you have loaded the discs
in the magazine, slide
open the door of the compact disc (CD) changer. Push
the magazine into the changer in the direction of the
arrow marked on top of the magazine.
Close the door by sliding it all the way to the left. If the
door is left partially open, the changer will
not operate
and an error will occur. When the door is closed, the
changer will begin checking for discs in the magazine.
This will continue for up to two minutes depending on
the number of discs loaded.
To eject the magazine from the player, slide the CD
changer door all the way open. The magazine will
automatically eject. Remember to keep the door closed
whenever possible to keep dirt and dust from getting
inside the changer.
Whenever a CD magazine with discs is loaded in the
changer, the CD symbol will appear on the radio display.
If the CD changer is checking the magazine for CDs, the
CD symbol will flash on the display until the changer is
ready
to play. When a CD begins playing, a disc and
track number will be displayed. The disc numbers are
listed on the front of the magazine.
If your vehicle is equipped with the
AM-FM Stereo with
Cassette Tape Player and Automatic Tone Control, the
following buttons are used for the trunk mounted CD
3-23