1997 CHEVROLET CORVETTE lights
[x] Cancel search: lightsPage 13 of 356
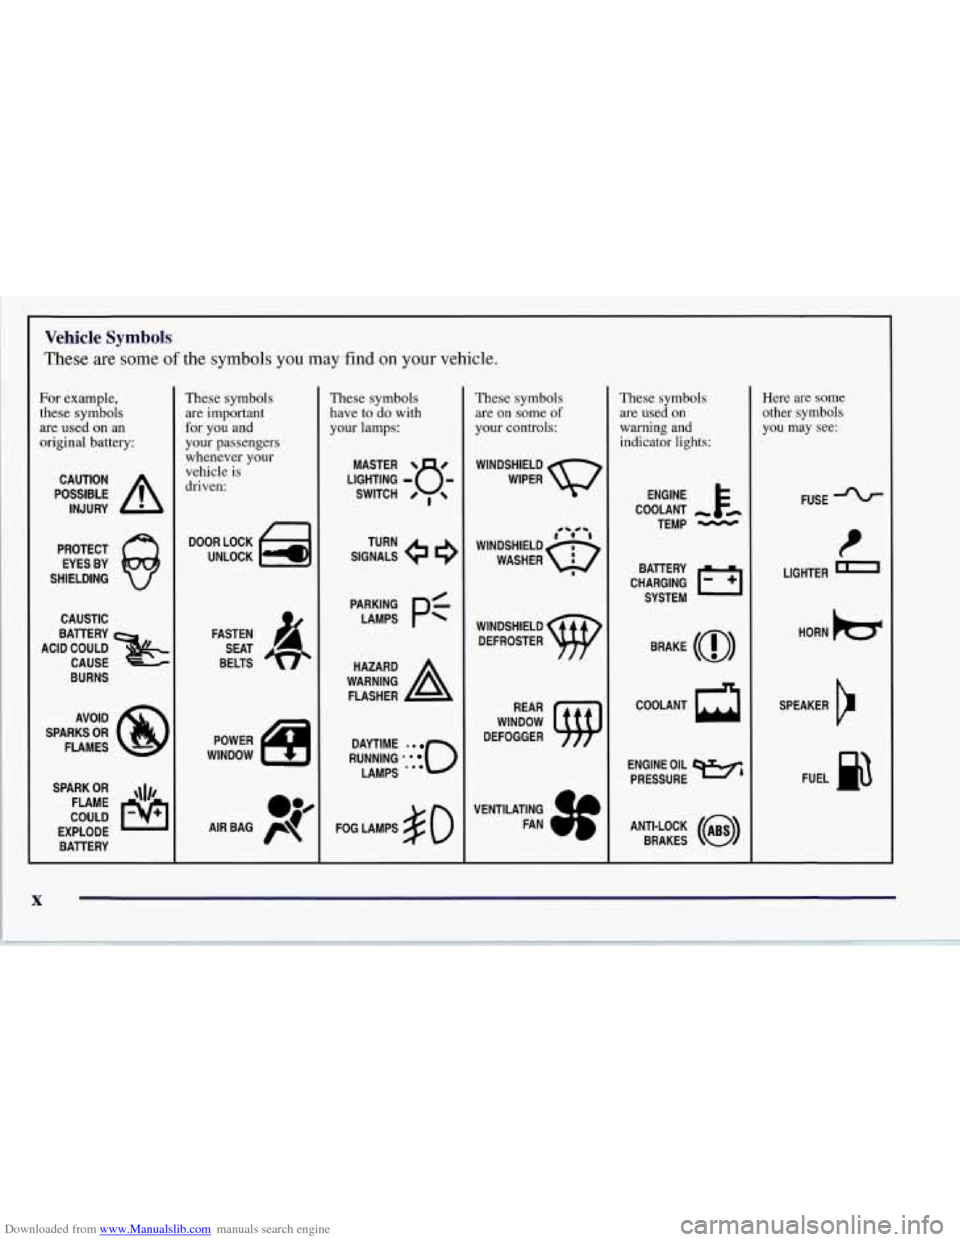
Downloaded from www.Manualslib.com manuals search engine Vehicle Symbols
These are some of the symbols you may find on your vehicle.
For example,
these symbols
are used on an
original battery:
POSSIBLE A
CAUTION
INJURY
PROTECT EYES BY
SHIELDING
CAUSTIC
ACID COULD BATTERY
CAUSE
BURNS
AVOID
SPARKS
OR
FLAMES
SPARK
OR ,\I/,
COULD FLAME
EXPLODE BATTERY
L
These symbols are important
for you and
your passengers
whenever your
vehicle is
driven:
n
UNLOCK w
FASTEN
SEAT
BELTS
These symbols
have to do with
your lamps:
SIGNALS e
TURN
RUNNING
* . 0
DAYTIME -0
LAMPS ***
FOG LAMPS $0
These symbols are on some
of
your controls:
WINDSHIELD
WIPER
WINDSHIELD DEFROSTER
WINDOW
DEFOGGER
VENTILATING FAN
These symbols
are used on
warning and
indicator lights:
COOLANT
TEMP
-
CHARGING I-1
BATTERY
SYSTEM
BRAKE
(0)
ENGINE OIL w,
PRESSURE
ANTI-LOCK
(a)
BRAKES
Here are some
other symbols you may see:
FUSE -%-
LIGHTER m
HORN )a(
SPEAKER
b
FUEL B
Page 50 of 356
Downloaded from www.Manualslib.com manuals search engine e Section 2 Features and Controls
~~ ~~
Here you can learn about the many standard and optional features on your Corvette, and information on starting,
shifting and braking. Also explained are the instrument panel and the warning systems that tell you if everything
is working properly
-- and what to do if you have a problem.
2-2
2-4
2-5
2-6
2- 14
2-15
2- 16
2-18
2-19
2-20
2-22
2-24
2-26
2-29
2-32
2-33
2-35
2-36 Keys
Door
Locks
Memory (Option)
Remote Function Actuation System
Remote Hatch Release
Theft
Universal Theft-Deterrent System
PASS-Key@
New Vehicle “Break-In”
Ignition Switch Starting Your Engine
Engine Coolant Heater (Canada Only)
Automatic Transmission Operation
Manual Transmission Operation
Parking Brake
Shifting Into PARK (P)
(Automatic Transmission Models Only)
Shifting Out
of PARK (P)
(Automatic Transmission)
Parking Your Vehicle (Manual Transmission) 2-36
2-37
2-37
2-38
2-38
2-40
2-4 1
2-4
1
2-50
2-52
2-53
2-54
2-59
2-6
1
2-68 2-70
2-7
1
2-8 1
2-90 Parking
Over Things That Bum
Engine Exhaust
Running Your Engine While You’re Parked
(Automatic Transmission)
Limited-Slip Rear Axle
Selective Real Time Damping (Option)
Windows
Tilt Wheel Turn Signal/Multifunction Lever
Lamps
Interior Lamps
Mirrors Storage Compartments
Floor Mats (Option)
Roof Panel
Instrument Panel
Instrument Panel Cluster
Warning Lights, Gages and Messages
Driver Information Center (DIC)
DIC Warnings and Messages
2-1
Page 101 of 356
Downloaded from www.Manualslib.com manuals search engine Interior Lamps
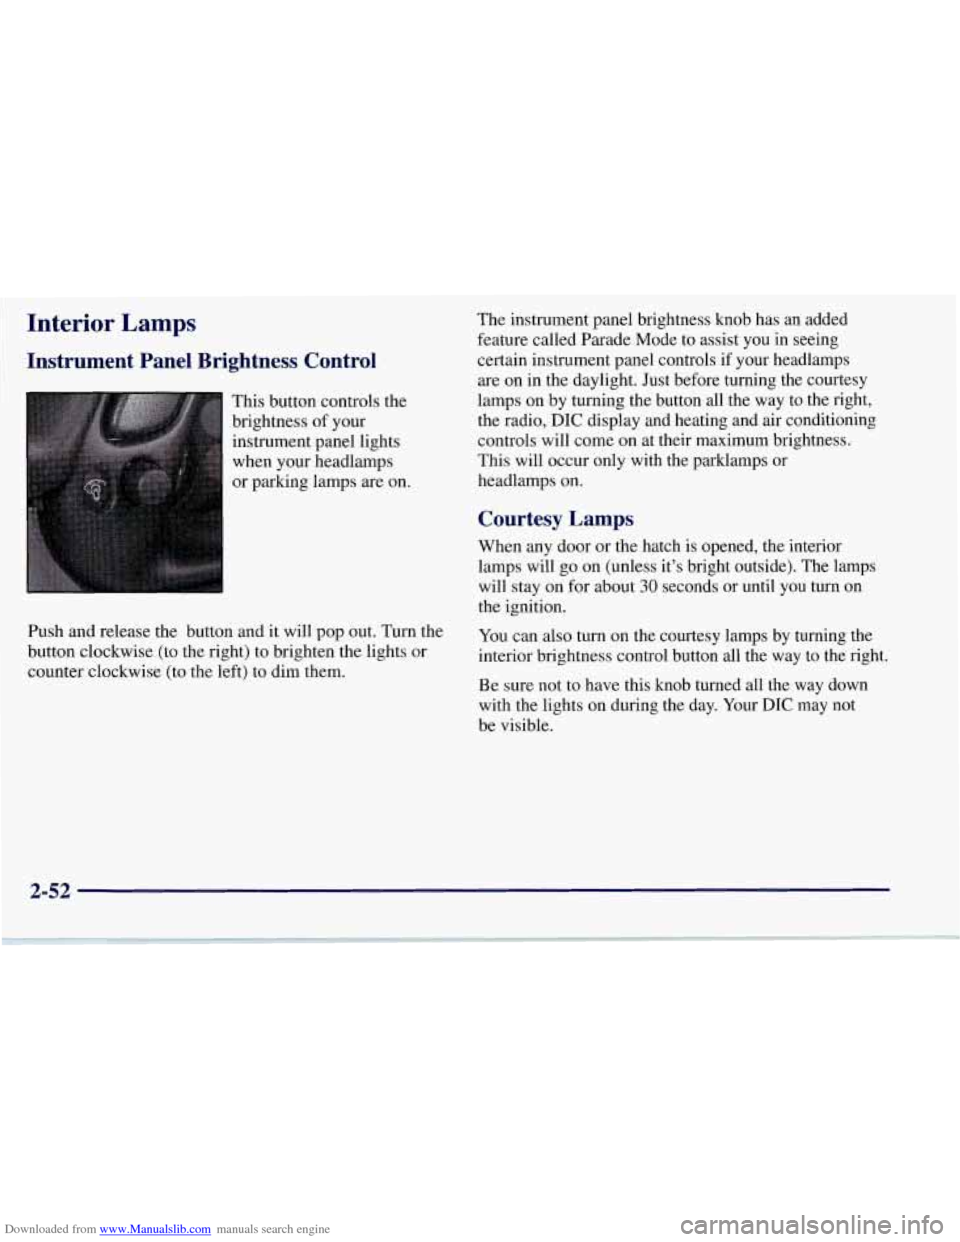
Instrument Panel Brightness Control
This button controls the
brightness of your
instrument panel lights
when your headlamps
or parking lamps are on.
Push and release the button and it will pop out. Turn the
button clockwise (to the right) to brighten the lights or
counter clockwise (to the left) to dim them. The
instrument panel brightness knob has an added
feature called Parade Mode to assist you in seeing
certain instrument panel controls if your headlamps
are on in the daylight. Just before turning the courtesy
lamps on by turning the button all the way to the right,
the radio,
DIC display and heating and air conditioning
controls will come on at their maximum brightness..
This will occur only with the parklamps or
headlamps on.
Courtesy Lamps
When any door or the hatch is opened, the interior
lamps will go on (unless it’s bright outside). The lamps
will stay on for about
30 seconds or until you turn on
the ignition.
You can also turn on the courtesy lamps by turning the
interior brightness control button all the way to the right.
Be sure not to have this knob turned all the way down
with the lights on during the day. Your
DIC may not
be visible.
2-52
Page 107 of 356
Downloaded from www.Manualslib.com manuals search engine To use the lighter, push it in all the way and let go.
~ When it’s ready, it will pop back by itself.
NOTICE:
Don’t hold a cigarette lighter in with your hand
while it is heating.
If you do, it won’t be able to
back away from the heating element when it’s
ready. That can make it overheat, damaging the
lighter and the heating element.
Sun Visors
To block out glare, you can swing down the visors. You
can also swing them to the side.
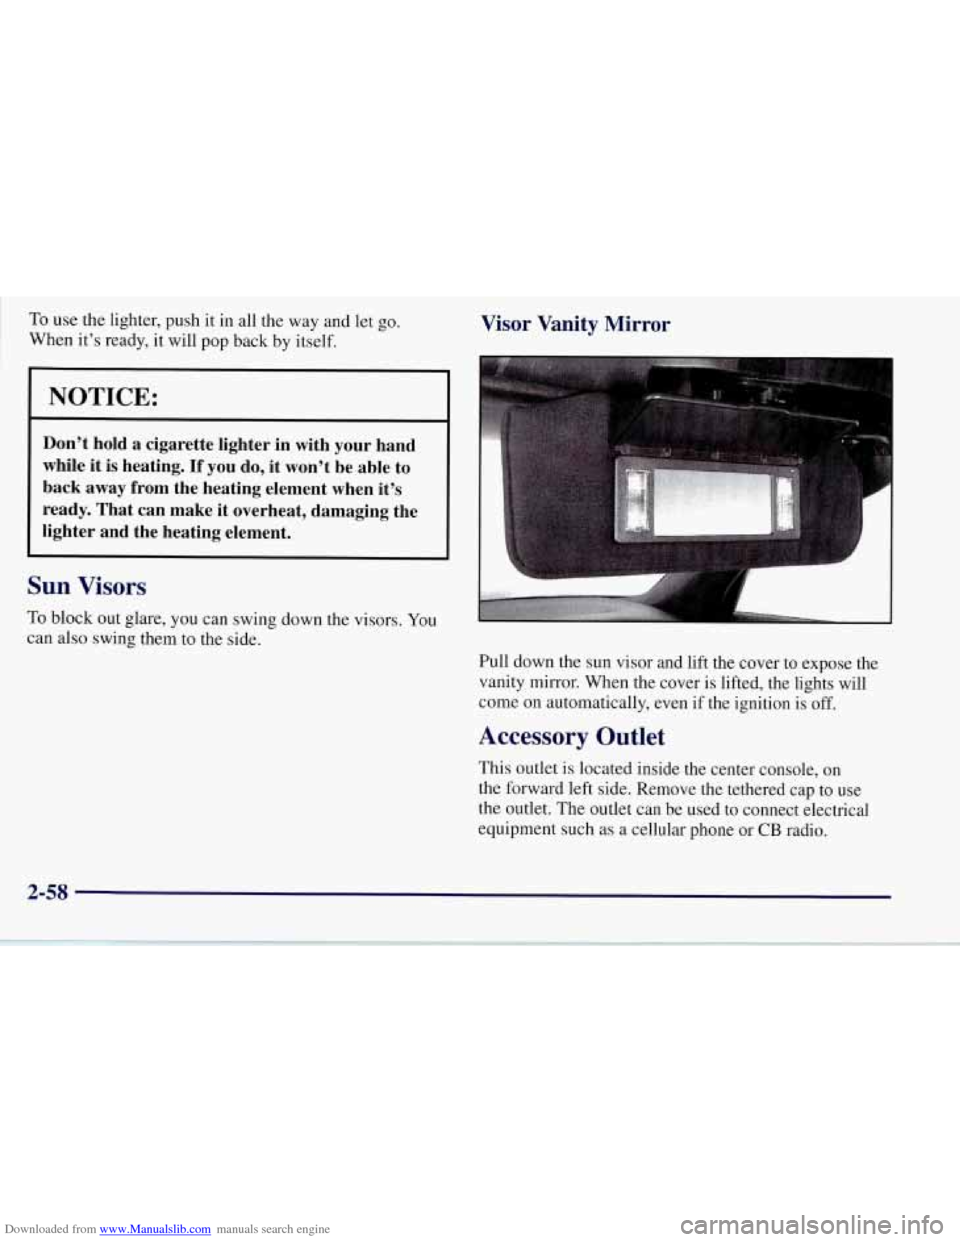
Visor Vanity Mirror
Pull down the sun visor and lift the cover to expose the
vanity
mirror. When the cover is lifted, the lights will
come on automatically, even if the ignition is
off.
Accessory Outlet
This outlet is located inside the center console, on
the forward left side. Remove the tethered cap to use
the outlet. The outlet can be used to connect electrical
equipment such as a cellular phone or
CB radio.
2-58
Page 120 of 356
Downloaded from www.Manualslib.com manuals search engine Speedometer
Your speedometer lets you see your speed in either miles
per hour (mph) or kilometers per hour
(km/h).
You may note that there are not two separate scales
for mph and
km/h. When you press the EM
(EnglisMetric) button on the DIC, the cluster
will calculate the proper speed and move the needle
to the correct position. Either the
MPH or the km/h
telltale will illuminate, depending on which
measurement you choose.
Tachometer
The tachometer displays the engine speed in thousands
of revolutions per minute (rpm).
Fuel will shut off at about
6200 rpm.
If you continue to drive your Corvette at the fuel shut
off rpm, you could damage your engine. Be sure to
operate your Corvette below the fuel shut
off rpm or
reduce your rpm quickly when the fuel shuts off.
Warning Lights, Gages.and Messages
This part describes the warning lights and gages that
may be on your vehicle. The pictures will help you
locate them. Warning
lights and gages can signal that something
is
wrong before it becomes serious enough to cause an
expensive repair or replacement. Paying attention to
your warning lights and gages could also save you or
others from injury.
Warning lights come on when there may be or is a
problem with one of your vehicle’s functions.
As
you will see in the details on the next few pages,
some warning lights come on briefly when you start
the engine just to let you know they’re working. If
you are familiar with this section, you should not be
alarmed when this happens.
Gages can indicate when there may be or is a problem
with one
of your vehicle’s functions. Often gages and
warning lights work together to let you know when
there’s a problem with your vehicle.
When one of the warning lights comes on and stays
on when you are driving, or when one of the gages
shows there may be a problem, check the section that
tells you what to do about it. Please follow this manual’s
advice. Waiting to
do repairs can be costly -- and even
dangerous.
So please get to know your warning lights
and gages. They’re a big help.
Your vehicle also has a Driver Information Center that
works along with the warning lights and gages.
See
“Driver Information Center” in the Index.
2-71
Page 136 of 356

Downloaded from www.Manualslib.com manuals search engine 4 OPTIONS
This button allows you to choose personal options
available with your vehicle, such as security, door
locks, easy entry seats and language. Some of these
functions work along with the key fob transmitter.
When returning to the options menu, the first item of
the options list will always be displayed, not the one
you were last in when you changed buttons.
1 PASSIVE UNLK DRIVER 1
APPROACH LIGHTS ON
AUTO LOCK
ON
I AUTO UNLOCK-DRIVER I
I SEAT EASY ENTRY ON
t LANGUAGE ENGLISH
LI
r
I FOB TRAINING I
The following are the options listed under the
OPTIONS button:
Lock and Arm
Press the OPTIONS button until LOCK & ARM
appears on the display, then use the RESET button to
page through the following selections:
0 LOCK & ARM OFF
0 LOCK & ARM HORN ONLY
0 LOCK & ARM LIGHTS ONLY
0 LOCK & ARM HORN & LTS
If you choose LOCK & ARM OFF, you will receive no
security feedback when locking or unlocking your vehicle.
If you choose LOCK
& ARM HORN ONLY, only the
horn will chirp to let you know when your alarm system
has armed when locking your vehicle.
If you choose LOCK
& ARM LIGHTS, only your
exterior lights will flash to let you know when your
alarm system has armed when locking your vehicle.
If you choose LOCK
& ARM HORN & LTS, the horn
will chirp and the exterior lights will flash briefly to
let you know the system has armed when locking
your vehicle.
2-87
Page 137 of 356
Downloaded from www.Manualslib.com manuals search engine Alarm
Press the OPTIONS button until ALARM appears on
the display, then use the RESET button to page through
the following selections:
ALARM HORN
0 ALARM HORN & LIGHTS
If you choose ALARM HORN, the horn will sound
during an alarm. If you choose ALARM HORN
&
LIGHTS, the horn will sound and the exterior lights
will flash during an alarm.
Passive Unlock
Press the OPTIONS button until PASSIVE UNLOCK
appears on the display, then
use the RESET button to
page through the following selections:
PASSIVE UNLOCK- DRIVER
PASSIVE UNLOCK- BOTH
If you choose the PASSIVE UNLOCK- DRIVER, only
the driver’s door lock will be programmed to passively
unlock. The driver’s door will passively unlock when
you approach the vehicle with the key fob transmitter
slider switch set to
ON.
If you choose PASSIVE UNLOCK- BOTH, the driver
and passenger’s door locks will be programmed to
passively unlock. The driver and passenger doors will
passively unlock when you approach the vehicle with
the key fob transmitter slider switch set to ON.
See “Remote Function Actuation (WA)” in the Index
for more information.
Approach Lights
Press the OPTIONS button until APPROACH LIGHTS
appears on the display, then use the RESET button to
page through the following choices:
APPROACH LIGHTS ON
0 APPROACH LIGHTS OFF
If you choose APPROACH LIGHTS ON, the fog lamps,
front turn signal, rear back-up and courtesy lamps will
come on for
30 seconds as you approach the vehicle
with the key fob transmitter. This will occur only when
it is dark outside.
APPROACH LIGHTS OFF turns
off this option.
See “Remote Function Actuation System” in the Index
for more information.
2-88
Page 196 of 356
Downloaded from www.Manualslib.com manuals search engine Night Vision
No one can see as well at night as in the daytime. But as
we get older these differences increase.
A 50-year-old
driver may require at least twice as much light to see the
same thing at night as a 20-year-old.
What you do in the daytime can also affect your night
vision. For example, if you spend the day in bright
sunshine you are wise to wear sunglasses. Your eyes will
have less trouble adjusting to night. But if you’re
driving, don’t wear sunglasses at night. They may cut
down
on glare from headlamps, but they also make a lot
of things invisible.
You can be temporarily blinded by approaching
headlamps. It can take a second or two, or even several
seconds, for your eyes to readjust to the dark. When you
are faced with severe glare
(as from a driver who
doesn’t lower the high beams, or a vehicle with
misaimed headlamps), slow down a little. Avoid staring
directly into the approaching headlamps. Keep your windshield and all
the glass on your vehicle
clean
-- inside and out. Glare at night is made much
worse by dirt
on the glass. Even the inside of the glass
can build
up a film caused by dust. Dirty glass makes
lights dazzle and flash more than clean glass would,
making the pupils of your eyes contract repeatedly.
Remember that your headlamps light
up far less of a
roadway when you are in a turn or curve. Keep your
eyes moving; that way, it’s easier to pick out dimly
lighted objects. Just as your headlamps should be
checked regularly for proper aim,
so should your eyes
be examined regularly. Some drivers suffer from night
blindness
-- the inability to see in dim light -- and
aren’t even aware of it.
4-17