1997 CHEVROLET CORVETTE power steering
[x] Cancel search: power steeringPage 63 of 356
Downloaded from www.Manualslib.com manuals search engine Remote Hatch Release
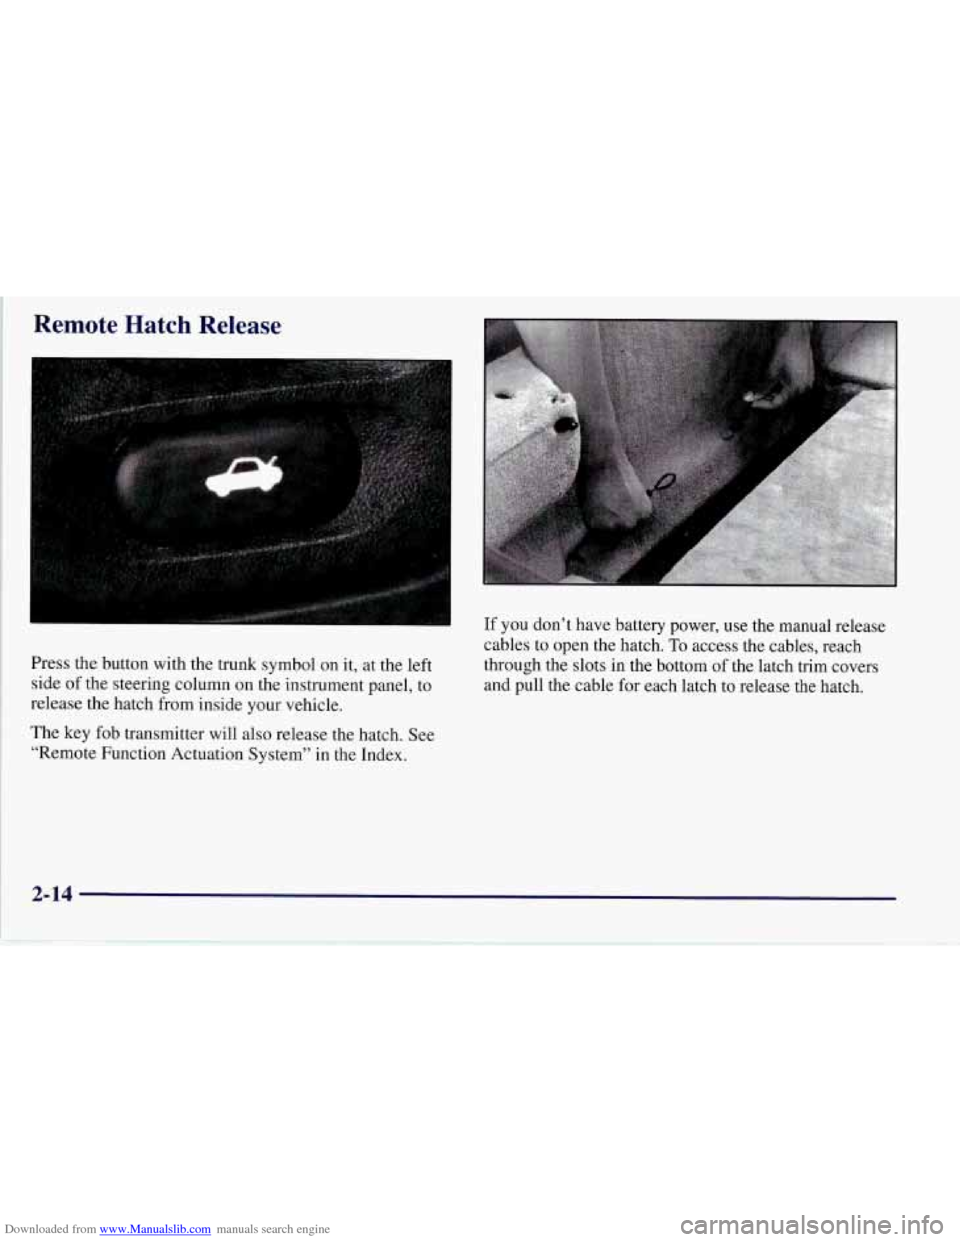
Press the’ button with the trunk symbol on it, at the left
side of the steering column on the instrument panel, to
release the hatch from inside your vehicle.
The key fob transmitter will also release the hatch. See
“Remote Function Actuation System” in the Index. If you
don’t have battery power, use the manual release
cables to open the hatch. To access the cables, reach
through the slots in the bottom of the latch trim covers
and pull the cable for each latch to release the hatch.
2-14
Page 65 of 356

Downloaded from www.Manualslib.com manuals search engine Key in the Ignition
If you leave your vehicle with the keys inside, it’s an
easy target for joy riders or professional thieves
-- so
don’t do it.
When you park your Corvette and open the driver’s
door, you’ll hear a tone reminding you
to remove your
key from the ignition and take it with you. Always do
this. Your steering wheel will be locked, and
so will
your ignition.
If you have an automatic transmission,
taking your key out also locks your transmission. And
remember to lock the doors.
Parking at Night
Park in a lighted spot, close all windows and lock your
vehicle. Remember to keep your valuables out
of sight.
Put them in a storage area, or take them with you.
Parking Lots
If you park in a lot where someone will be watching
your vehicle, it’s best to lock it up and take your keys.
But what if you have to leave your key?
Do not leave
valuables
in your vehicle, since there would be no place
to secure them.
Universal Theft-Deterrent System
SECURITY
Your Corvette has a
theft-deterrent alarm
system. With this system,
the SECURITY light will
flash as you open the door
(if your ignition is off). This
light reminds you to arm the
theft-deterrent system.
To arm the system, do the following:
1. Press the LOCK button on the key fob transmitter, as
2. Walk out of range with the passive switch on, OR
3. Open the door. (The SECURITY light should flash.)
Lock the door with the power door lock switch. The
SECURITY light will stop flashing and stay on. Close
all the doors. The SECURITY light should
go off.
Now, if a door or the hatch is opened without the key or
the key fob transmitter system, the alarm will go
off.
Your horn will sound for two minutes, then it will go off
to save battery power. And, your vehicle won’t start.
mentioned earlier,
OR
2-16
-
Page 69 of 356
Downloaded from www.Manualslib.com manuals search engine Ignition Switch
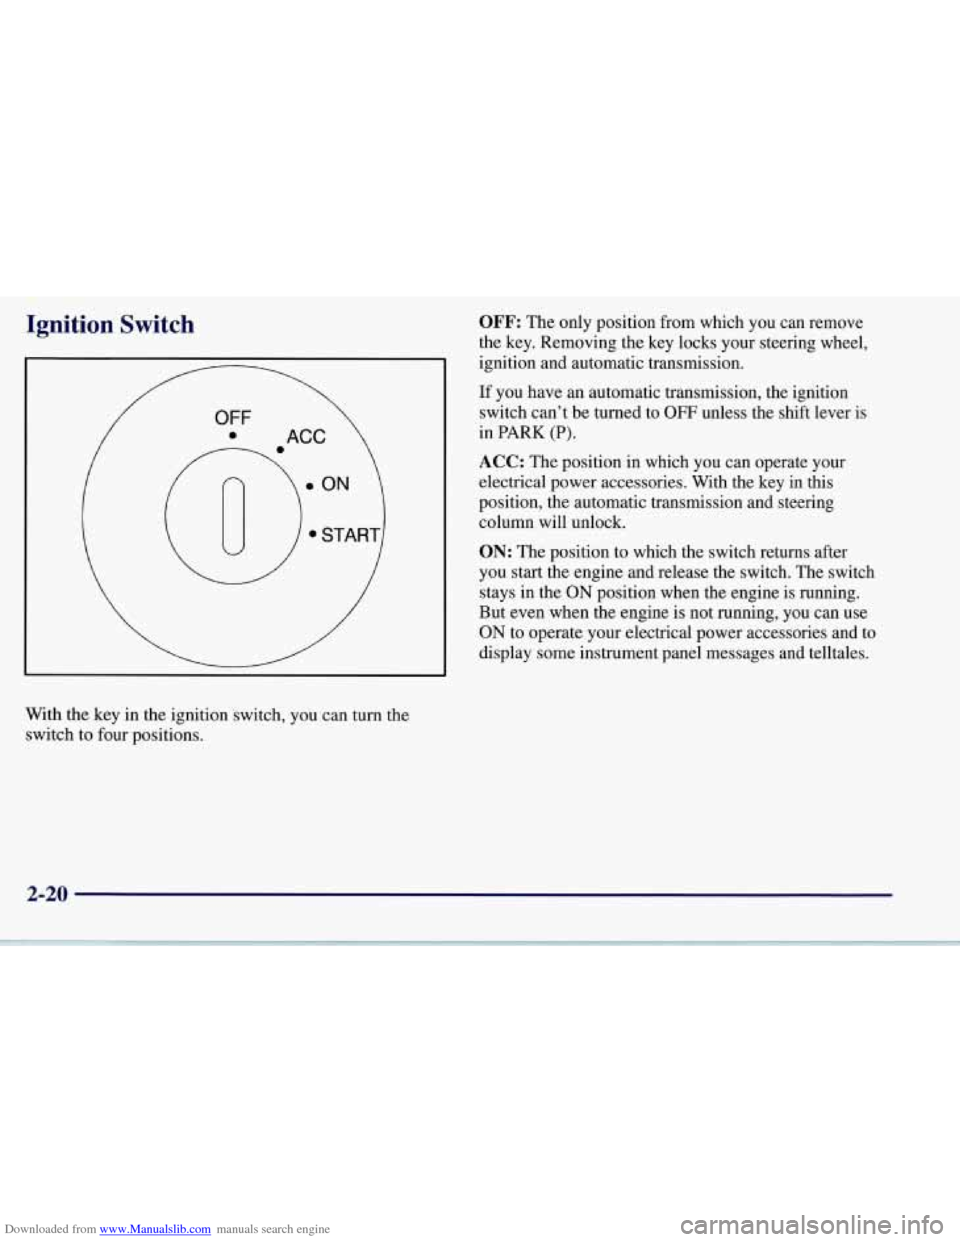
With the key in the ignition switch, you can turn the
switch to four positions.
OFF: The only position from which you can remove
the key. Removing the key locks your steering wheel,
ignition and automatic transmission.
If you have an automatic transmission, the ignition
switch can’t be turned to
OFF unless the shift lever is
in PARK
(P).
ACC: The position in which you can operate your
electrical power accessories. With the key in this
position, the automatic transmission and steering
column will unlock.
ON: The position to which the switch returns after
you start the engine and release the switch. The switch
stays
in the ON position when the engine is running.
But even when the engine is not running, you can use
ON to operate your electrical power accessories and to
display some instrument panel messages and telltales.
2-20
Page 70 of 356
Downloaded from www.Manualslib.com manuals search engine START Starts the engine. When the engine starts,
release the key. The ignition switch will return to
ON
for normal driving.
When the engine is not running, ACC and
ON allow you
to operate your electrical accessories, such as the radio.
A warning tone will sound if you open the driver’s
door when the ignition is in
OFF or ACC and the key
is in the ignition.
I A CAUTION:
Removing the key from the ignition switch will
lock the steering column and result in a loss of
ability to steer the vehicle. This could cause a
collision.
If you need to turn the engine off while
the vehicle is moving, turn the key to ACC.
NOTICE:
If your key seems stuck in OFF and you can’t
turn
it, be sure you are using the correct key; if
so, is it all the way in? If it is, then turn the
steering wheel left and right while you turn the
key hard. But turn the key only with your hand.
Using a tool to force it could break the key or the
ignition switch.
If none of this works, then your
vehicle needs service.
Retained Accessory Power (RAP)
With RAP, your power windows and the audio system
will continue to work for up to
15 minutes after the
ignition key is turned to
OFT and neither door is opened.
If a door is opened, the audio system and power
windows will shut off.
2-21
Page 89 of 356
Downloaded from www.Manualslib.com manuals search engine Windows
Power Windows
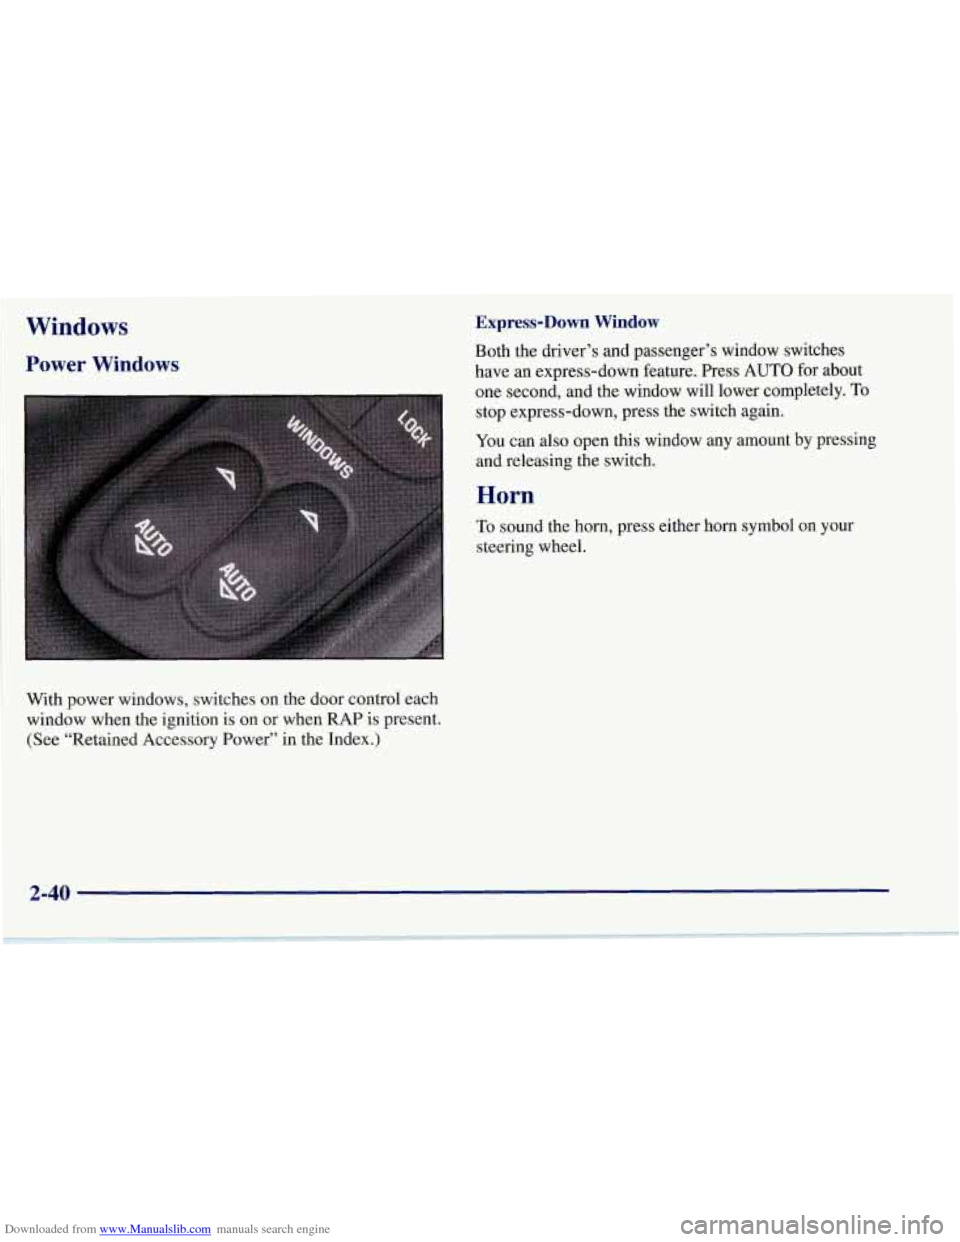
With power windows, switches on the door control each
window when the ignition is
on or when RAP is present.
(See “Retained Accessory Power” in the Index.)
Express-Down Window
Both the driver’s and passenger’s window switches
have an express-down feature. Press AUTO for about
one second, and the window will lower completely. To
stop express-down, press the switch again.
You can also open this window any amount by pressing
and releasing the switch.
Horn
To sound the horn, press either horn symbol on your
steering wheel.
2-40
Page 139 of 356
Downloaded from www.Manualslib.com manuals search engine Languages
You can select which language the DIC will display its
messages in. Press the OPTIONS button until the word
LANGUAGES appears on the display, then use the
RESET button to page through the following choices:
LANGUAGE ENGLISH
0 LANGUAGE FRENCH
0 LANGUAGE GERMAN
0 LANGUAGE SPANISH
Blank Page
At the end of the OPTIONS menu there is a blank page.
When the blank page is displayed, you can access the
following items:
FOB TRAINING: This option allows you to match
the RFA transmitter(s) to your vehicle. You can access
this option by pressing and holding RESET for two
seconds while you
are on the blank page at the end of
the OPTIONS menu. The message
FOB TRAINING
will be displayed. See “Matching Transmitter(s) To
Your Vehicle” in the Index.
TIRE TRAINING: The Tire Pressure Monitor (TPM)
operates with battery powered sensors that are located
inside the valve stems on each tire. Each sensor has a
unique ID code so the vehicle knows the tire location
of the sensor. When the vehicle reaches a speed of
greater than
15 mph (24 km/h), the sensors begin to send
the tire pressure readings to a receiver inside the vehicle.
These readings are displayed when using the GAGES
button on the DIC. If you are unable to display your tire
pressures while the vehicle speed is greater than
15 mph
(24 km/h). You may need to have your sensor ID codes
learned by the vehicle. See your dealer.
DIC Warnings and Messages
The following messages and warnings may appear in
theDIC display. The DIC display area is located in the
instrument cluster below the speedometer and tachometer,
directly above the steering column. You may receive more
than one message at a time. Messages will appear one
behind the other. To acknowledge a message and remove
it
from the display, press RESET. You may scroll through
the messages that may have been sent at the same time.
The message center is continuously updated with the
vehicle performance status.
2-90
Page 190 of 356
Downloaded from www.Manualslib.com manuals search engine Braking in Emergencies
With anti-lock, you can steer and brake at the same
time. In many emergencies, steering can help you more
than even the very best braking.
Steering
Power Steering
If you lose power steering assist because the engine
stops or the system is not functioning, you can steer but
it will take much more effort.
Steering Tips
Driving on Curves
It’s important to take curves at a reasonable speed.
A lot
of the “driver lost control” accidents mentioned on
the news happen on curves. Here’s why: Experienced driver
or beginner, each
of us is subject to
the same laws
of physics when driving on curves. The
traction
of the tires against the road surface makes it
possible for the vehicle to change its path when you turn
the front wheels. If there’s no traction, inertia will keep
the vehicle going in the same direction. If you’ve ever
tried to steer a vehicle on wet ice, you’ll understand this.
The traction you can get in a curve depends on
the
condition of your tires and the road surface, the angle at
which the curve is banked, and your speed. While you’re
in a curve, speed is the one factor you can control.
Suppose you’re steering through
a sharp curve. Then you
suddenly accelerate. Both control systems
-- steering and
acceleration
-- have to do their work where the tires meet
the road. Adding the sudden acceleration can demand too
much of those places. You can lose control. Refer to
“Traction Control System” in the Index.
What should you do
if this ever happens? Ease up on the
accelerator pedal, steer the vehicle the way you want it
to go, and slow down.
Speed limit signs near curves warn that you should
adjust your speed. Of course, the posted speeds are
based on good weather and road conditions. Under less
favorable conditions you’ll want to
go slower.
4-11
Page 236 of 356
Downloaded from www.Manualslib.com manuals search engine e Section 6 Service and Appearance Care
Here you will find information about the care of your Corvette. This section begins with service and fuel information,
and then it shows how to check important fluid and lubricant levels. There is also technical information about your
vehicle, and a part devoted to its appearance care.
6-2 Service 6-3 Fuel
6-5 Fuels in Foreign Countries
6-5 Filling Your Tank
6- 8 Checking Things Under the Hood
6-1 1 Engine Oil
6-16 Air Cleaner
6-18 Automatic Transmission Fluid
6- 19 Manual Transmission Fluid
6-20 Hydraulic Clutch
6-22 Engine Coolant
6-26 Surge Tank Pressure Cap
6-26 Power Steering Fluid
6-22 Rear Axle
6-26
Thermostat
6-27 Windshield Washer Fluid
6-
29 Brakes
6-32 Battery 6-33
6-33
6-37
6-40
6-5
1
6-5 1
6-54
6-55
6-56
6-57
6-57 6-59
6- 60
6- 60
6-6 1
6-69
6-69 6-7
1
Bulb Replacement
Halogen Bulbs
Windshield Wiper Blade Replacement
Tires Appearance Care
Cleaning the Inside of Your Corvette
Care of Safety Belts
Cleaning the Outside of Your Corvette
Aluminum Wheels
Tires Underbody Maintenance
Appearance Care Materials
Vehicle Identification Number (VIN)
Service Parts Identification Label
Electrical System
Replacement Bulbs Capacities and Specifications
Air Conditioning Refrigerants
6-1