1997 CHEVROLET CORVETTE trunk
[x] Cancel search: trunkPage 6 of 356
Downloaded from www.Manualslib.com manuals search engine Supplement to the 1997 Chevrolet Corvette Owner’s Manual
This text under “Remote HatchlTrunk Lid Release ”
may replace the manual release cable information
located
in Section 2 of your Owner’s Manual.
Locate the manual release cables
in your vehicle. If they
are located in the slots
of the bottom of the latch trim
covers (underneath the center storage compartment
in
the trunk area), refer to page 2-14 in your Owner’s
Manual.’
If not, follow the. directions listed here.
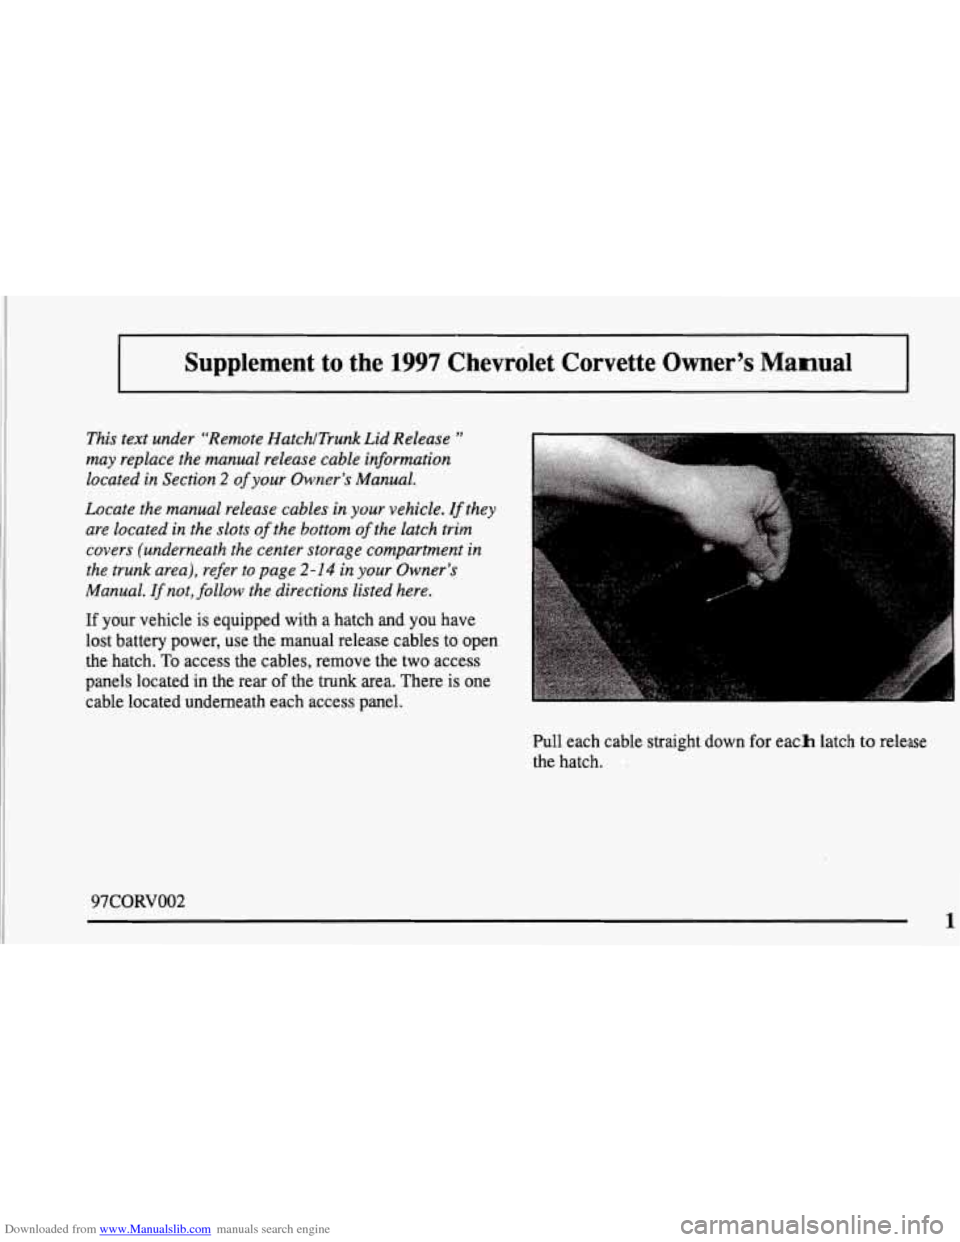
If your vehicle is equipped with a hatch and you have
lost battery power, use the manual release cables to open
the hatch.
To access the cables, remove the two access
panels located in the rear
of the trunk area. There is one
cable located underneath each access panel.
Pull each cable straight down
for each latch to release
the hatch.
97CORVOO2
1
Page 57 of 356
Downloaded from www.Manualslib.com manuals search engine Operation
You don’t have to do anything for the RFA to work
when the passive feature is ON.
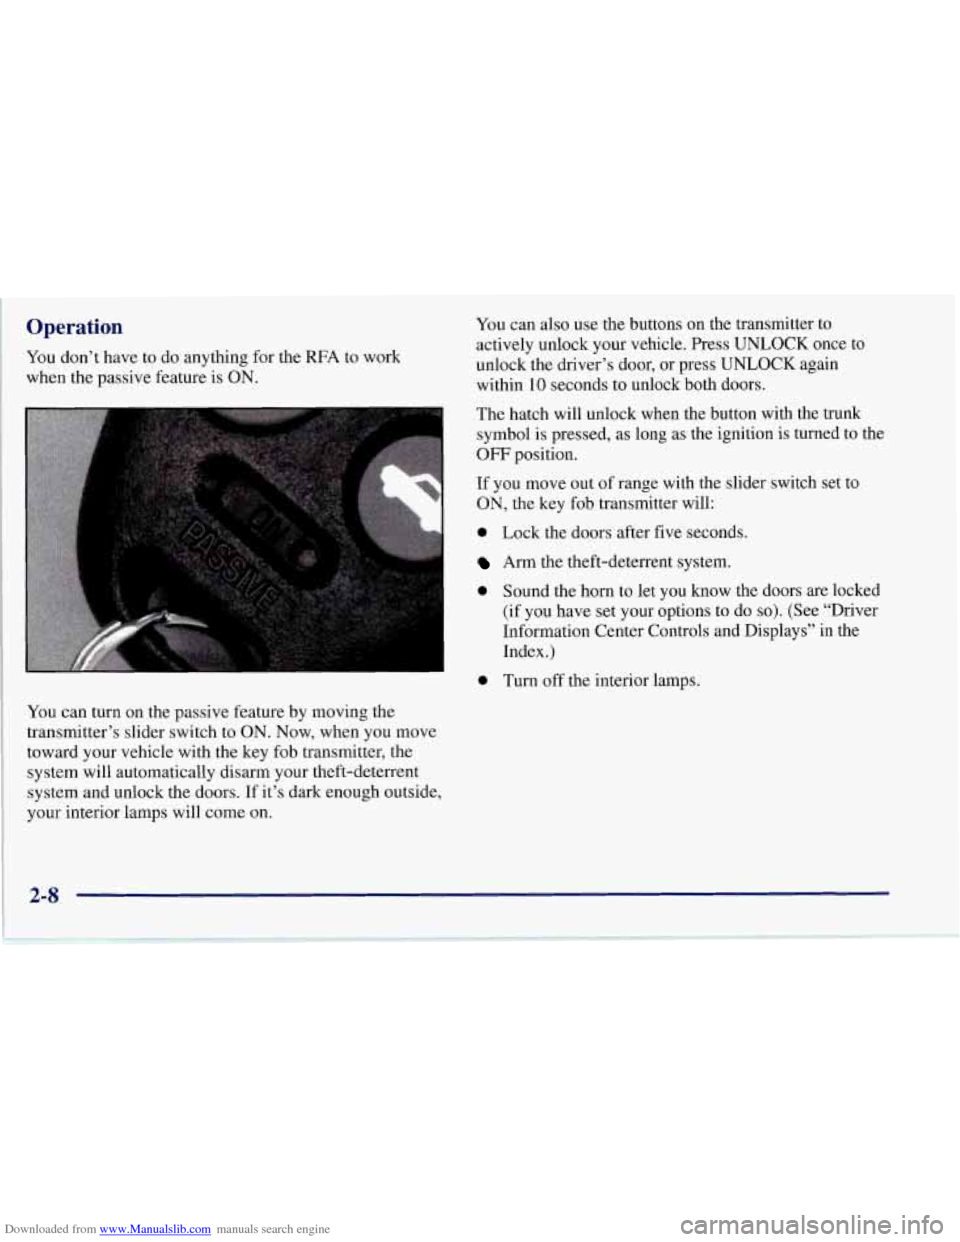
You can turn on the passive feature by moving the
transmitter’s slider switch to
ON. Now, when you move
toward your vehicle with the key fob transmitter, the
system will automatically disarm your theft-deterrent
system and unlock the doors. If it’s dark enough outside,
your interior lamps will come on.
You can also use the buttons on the transmitter to
actively unlock your vehicle. Press UNLOCK once to
unlock the driver’s door, or press UNLOCK again
within 10 seconds to unlock both doors.
The hatch will unlock when the button with the trunk
symbol is pressed, as long as the ignition is turned to the
OFF position.
If you move out of range with the slider switch set to
ON, the key fob transmitter will:
0 Lock the doors after five seconds.
Arm the theft-deterrent system.
0 Sound the horn to let you know the doors are locked
(if you have set your options to do
so). (See “Driver
Information Center Controls and Displays” in the
Index.)
0 Turn off the interior lamps.
Page 63 of 356
Downloaded from www.Manualslib.com manuals search engine Remote Hatch Release
Press the’ button with the trunk symbol on it, at the left
side of the steering column on the instrument panel, to
release the hatch from inside your vehicle.
The key fob transmitter will also release the hatch. See
“Remote Function Actuation System” in the Index. If you
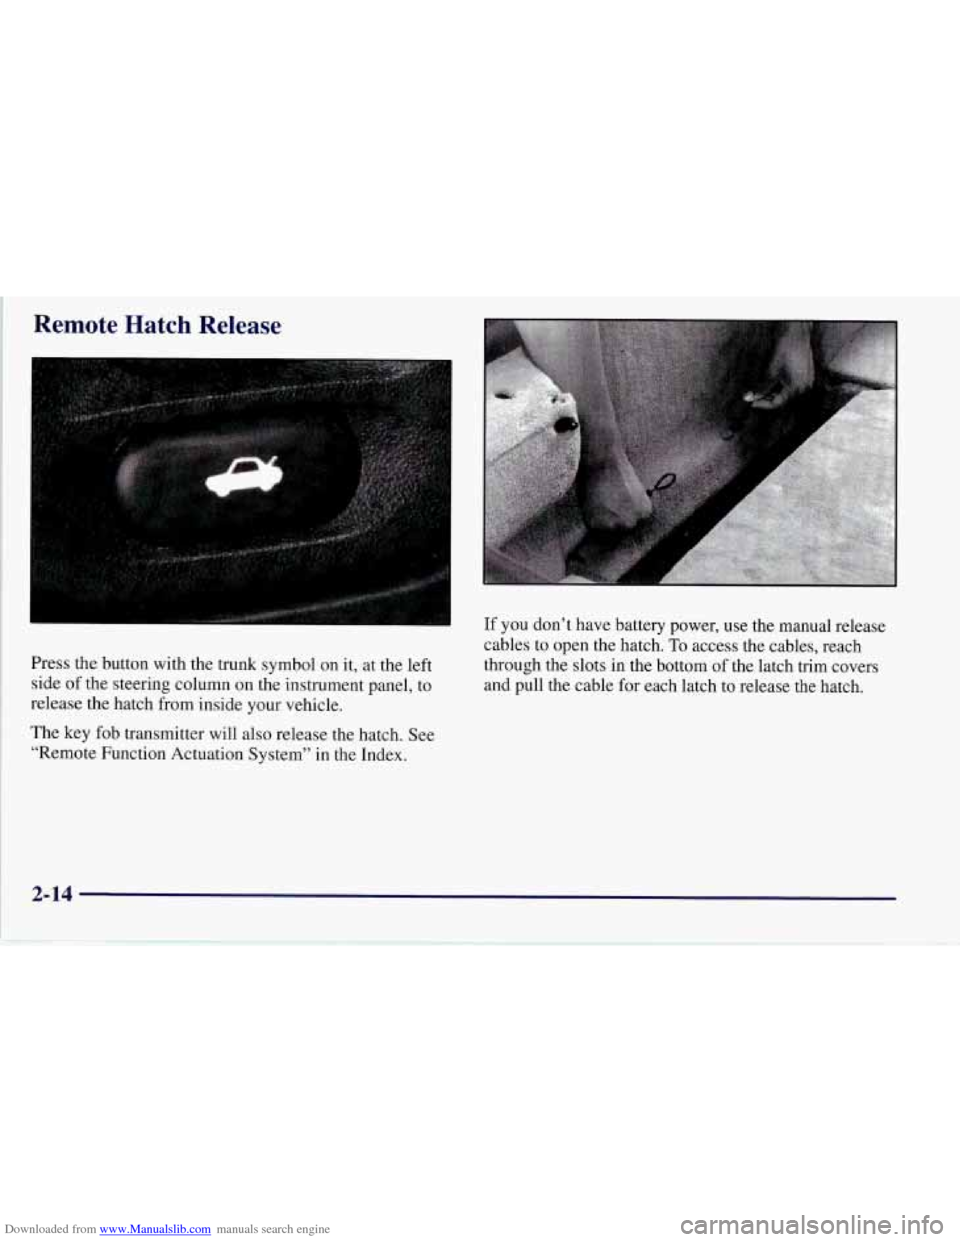
don’t have battery power, use the manual release
cables to open the hatch. To access the cables, reach
through the slots in the bottom of the latch trim covers
and pull the cable for each latch to release the hatch.
2-14
Page 148 of 356

Downloaded from www.Manualslib.com manuals search engine e Section 3 Comfort Controls and Audio Systems
In this section, you’ll find out how to operate the comfort control and audio systems offered with your Corvette. Be
sure to read about the particular systems supplied with your vehicle.
3-2
3-2
3-5
3-1 1
3-12
3-12
3-13
3-13
3-14 Comfort Controls
Manual Comfort
Controls
Automatic Electronic Dual Climate
Control System (Option)
Air Conditioning
Heating
Defogging and Defrosting
Audio Systems
Setting the Clock for All Systems
AM-FM Stereo with Cassette Tape Player
Automatic Tone Control and 3-18
3-18
3
-22
3 -26
3 -28
3-28
3-29
3-30
3-30 CD
Adapter Kits
AM-FM Stereo with Compact Disc Player
and Automatic Tone Control (Option)
Trunk Mounted CD Changer (Option)
Theft-Deterrent Feature
Understanding Radio Reception
Tips About Your Audio System
Care of Your Cassette Tape Player
Care of Your Compact Discs
Integrated Windshield and Rear
Window Antennas
3-1
Page 169 of 356

Downloaded from www.Manualslib.com manuals search engine AM-FM: Press this button to play the radio when a disc
is in the player. The letters
CD will go off the display.
CD AUX: Press this button to change to the disc
function when the radio is on.
A CD icon will appear
on the display when the disc is in the player, whether
it is active or not.
EJECT: Press this button to remove the disc. The radio
will play. The disc will start at the first track when you
reinsert it
.
If you turn off the ignition or radio with a disc in the
player, it
will stay in the player. When you turn on the
ignition or system, the disc will
start playing where it
was stopped.
If you press EJECT but don’t remove the
disc,
the player will pull the disc back in to protect it
after about one minute.
If you leave a compact disc in the
player while listening to the radio, it may become
warm.
Trunk Mounted CD Changer (Option)
With the optional compact disc changer, you can play up
to
12 discs continuously. Normal size discs may be
played using the trays supplied in the magazine. The
small discs
(8 cm) can be played only with specially
designed trays.
I NOTICE:
Heavy objects in the center storage area which
may shift or slide while driving could damage
your
CD changer. Protect your CD changer by
not placing heavy, moveable objects in the center
storage area.
3-22
Page 170 of 356
Downloaded from www.Manualslib.com manuals search engine b
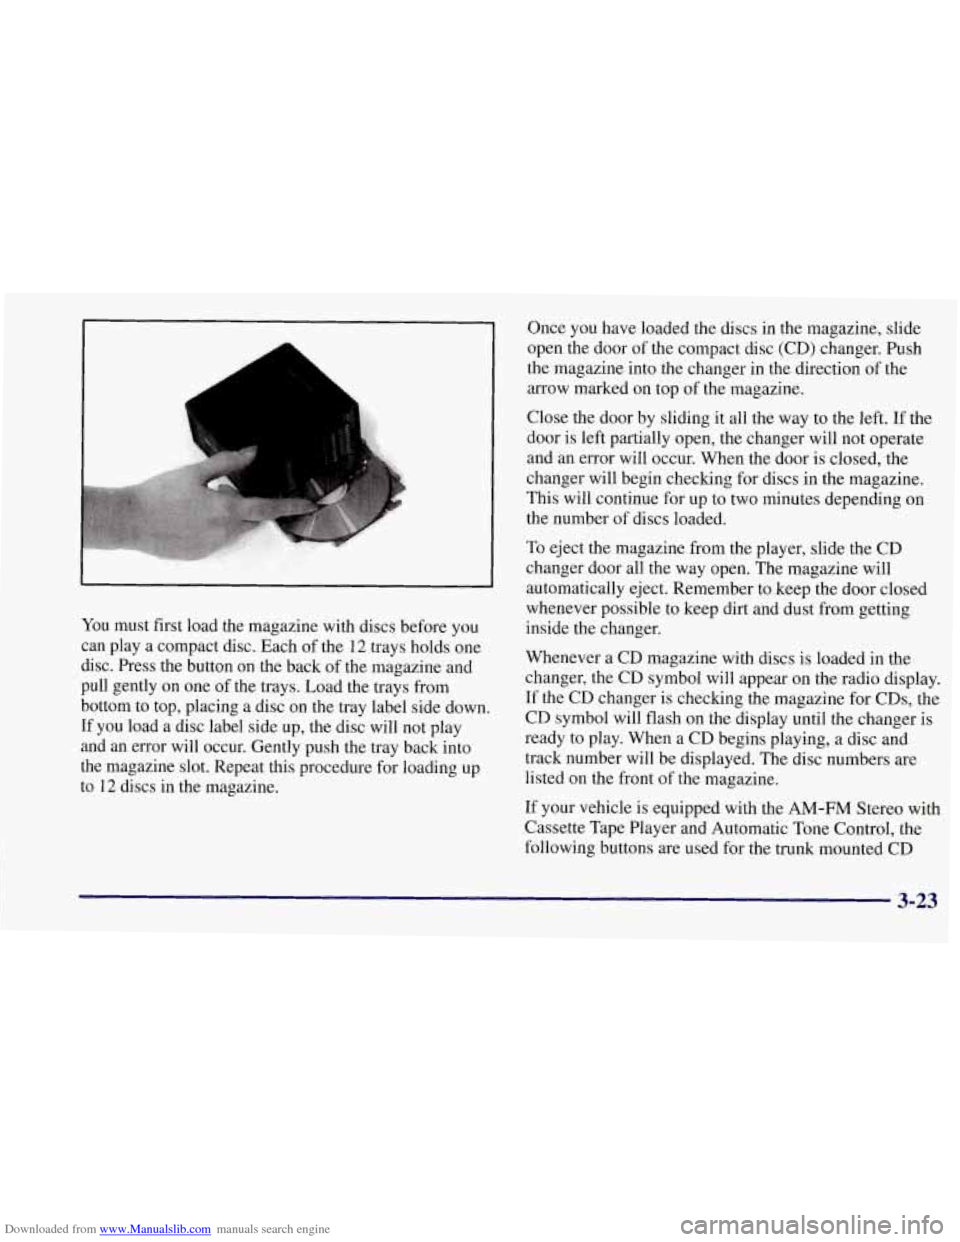
You must first load the magazine with discs before you
can play a compact disc. Each of the
12 trays holds one
disc. Press the button on the back of the magazine and
pull gently on one of the trays. Load the trays from
bottom to top, placing a disc on the tray label side down.
If you load a disc label side up, the disc will not play
and an error will occur. Gently push the tray back into
the magazine slot. Repeat this procedure for loading up
to
12 discs in the magazine. Once you have loaded the discs
in the magazine, slide
open the door of the compact disc (CD) changer. Push
the magazine into the changer in the direction of the
arrow marked on top of the magazine.
Close the door by sliding it all the way to the left. If the
door is left partially open, the changer will
not operate
and an error will occur. When the door is closed, the
changer will begin checking for discs in the magazine.
This will continue for up to two minutes depending on
the number of discs loaded.
To eject the magazine from the player, slide the CD
changer door all the way open. The magazine will
automatically eject. Remember to keep the door closed
whenever possible to keep dirt and dust from getting
inside the changer.
Whenever a CD magazine with discs is loaded in the
changer, the CD symbol will appear on the radio display.
If the CD changer is checking the magazine for CDs, the
CD symbol will flash on the display until the changer is
ready
to play. When a CD begins playing, a disc and
track number will be displayed. The disc numbers are
listed on the front of the magazine.
If your vehicle is equipped with the
AM-FM Stereo with
Cassette Tape Player and Automatic Tone Control, the
following buttons are used for the trunk mounted CD
3-23
Page 171 of 356
Downloaded from www.Manualslib.com manuals search engine changer except the EJECT button for ejecting the CD
magazine.
PREV (1): Press this button or the SEEK left arrow to
go to the previous track if the current selection has been
playing for less than eight seconds.
If the PREV button
is pressed and the current selection has been playing for
more than eight seconds, it will go to the beginning of
the current selection. If you hold or press this button
more than once, the player will continue moving back
through the disc. The sound will mute while seeking.
PROG (2): Press this button to select a disc. The disc
number and track number will be displayed.
NEXT (3): Press this button or the SEEK right arrow to
go to the next track. If you hold the button
or press it
more than once, the player will continue moving
forward through the disc. The sound will mute while
seeking.
REV (4): Press and hold this button to reverse quickly
through a track selection. Release it to resume playing.
FWD (6): Press and hold this button to advance quickly
through a track selection. Release
it to resume playing.
SEEK: Press the right arrow to seek to the next
selection on the
CD. Press the left mow to search for
the previous selection on the CD. The sound will mute
while seeking.
SCAN: When you press SCAN while playing a CD, you.
will hear the first few seconds of each disc. Press SCAN
again to stop on
a CD. The CD will mute while scanning
and SCAN will appear on the display.
P.SCAN: Press this button to hear the tracks in random,
rather than sequential, order. RANDOM will appear on
the display. Press P.SCAN again to turn off random play.
TAPE AUX: Press this button if you have a disc loaded
in the changer and the radio is turned on, to play a
compact disc. Press AM-FM to return
to the radio when
a compact disc is playing. Press TAPE AUX to switch
between the tape and compact disc if both are loaded.
To eject the disc holder in the trunk mounted CD
changer, slide the CD changer door all the way open and
the disc holder will automatically eject.
If your vehicle is equipped with the AM-FM Stereo with
CD Player and Automatic Tone Control, the following
buttons are used for the trunk mounted
CD changer
except the EJECT button for ejecting the
CD magazine.
PREV (1): Press this button or the SEEK left arrow to
go to the previous track if the current selection has been
playing for less than eight seconds. If the PREV button
is pressed and the current selection has been playing
for
more than eight seconds, it will go to the beginning of
3-24
Page 172 of 356
Downloaded from www.Manualslib.com manuals search engine the current selection. If you hold or press this button
more than once, the player will continue moving back
through the disc. The sound will mute while seeking.
RDM (2): Press this button to hear the tracks in random,
rather than sequential, order.
RANDOM will appear on
the display. Press
RDM again to turn off random play.
NEXT (3): Press this button or the SEEK right arrow
to go to the next track.
If you hold the button or press
it more than once, the player will continue moving
forward through the disc. The sound will mute
while seeking.
REV (4): Press and hold this button to reverse quickly
through a track selection. Release it to resume playing.
FWD (6): Press and hold this button to advance quickly
through a track selection. Release it to resume playing.
SEEK: Press the right arrow to seek to the next .
selection on the CD. Press the left arrow to search for
the previous selection on the CD. The sound will mute
while seeking.
SCAN: When you press SCAN while playing a CD, you
will hear the first few seconds of each disc. Press SCAN
again to stop on a CD. The CD will mute while scanning
and SCAN will appear on the display.
P. SCAN: Press this button to hear the tracks in random,
rather than sequential, order. RANDOM will appear on
the display. Press P.SCAN again to turn
off random play.
CD AUX: Press this button if you have a disc loaded in
the changer and the radio is turned on, to play a compact
disc. Press
AM-FM to return to the radio when a compact
disc is playing. Press CD AUX to switch between the CD
player and compact disc if both are loaded.
To eject the disc holder in the trunk mounted CD
changer, slide the CD changer door all the way open
and the disc holder will automatically eject.
Compact Disc Changer Errors
If an error occurs while trying to play a CD in the
compact disc changer, the following conditions may
have caused the error:
The road is too rough. The disc should play when
the road is smoother.
The disc is dirty, scratched, wet or loaded label
side up.
The air is very humid. If so, wait about an hour
and try again.
3-25