Page 62 of 2248

C: INSPECTION
1. CYLINDER HEAD
1) Make sure that no crack or other damage exists. In
addition to visual inspection, inspect important areas by
means of red lead check.
Also make sure that gasket installing surface shows no
trace of gas and water leaks.
2) Place cylinder head on ST.
ST 498267200 CYLINDER HEAD TABLE
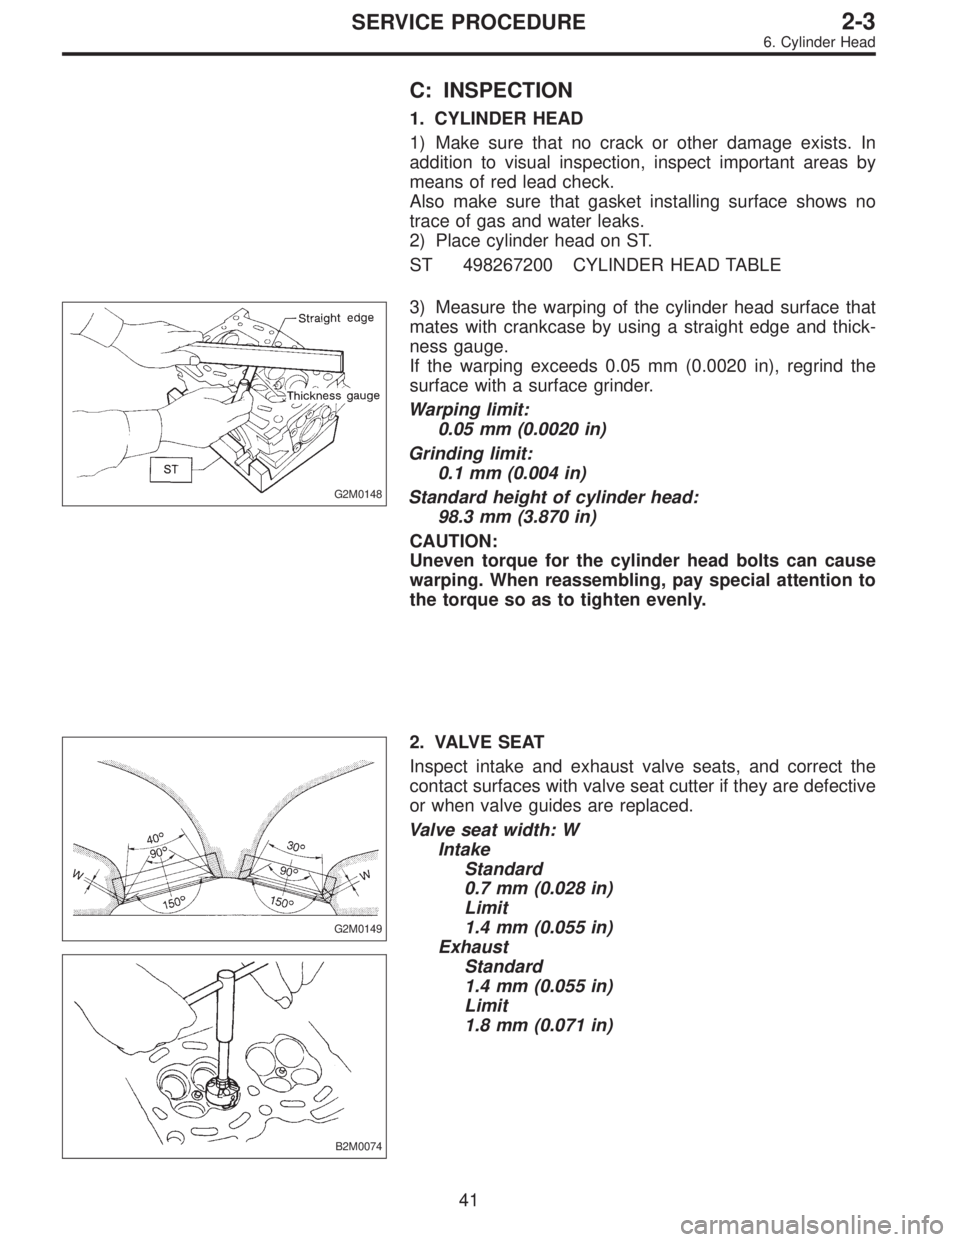
G2M0148
3) Measure the warping of the cylinder head surface that
mates with crankcase by using a straight edge and thick-
ness gauge.
If the warping exceeds 0.05 mm (0.0020 in), regrind the
surface with a surface grinder.
Warping limit:
0.05 mm (0.0020 in)
Grinding limit:
0.1 mm (0.004 in)
Standard height of cylinder head:
98.3 mm (3.870 in)
CAUTION:
Uneven torque for the cylinder head bolts can cause
warping. When reassembling, pay special attention to
the torque so as to tighten evenly.
G2M0149
B2M0074
2. VALVE SEAT
Inspect intake and exhaust valve seats, and correct the
contact surfaces with valve seat cutter if they are defective
or when valve guides are replaced.
Valve seat width: W
Intake
Standard
0.7 mm (0.028 in)
Limit
1.4 mm (0.055 in)
Exhaust
Standard
1.4 mm (0.055 in)
Limit
1.8 mm (0.071 in)
41
2-3SERVICE PROCEDURE
6. Cylinder Head
Page 239 of 2248
1. General Precaution
1) Remove or install engine and transmission in an area
where chain hoists, lifting devices, etc. are available for
ready use.
2) Be sure not to damage coated surfaces of body panels
with tools or stain seats and windows with coolant or oil.
Place a cover over fenders, as required, for protection.
3) Prior to starting work, prepare the following:
Service tools, clean cloth, containers to catch coolant and
oil, wire ropes, chain hoist, transmission jacks, etc.
4) Lift-up or lower the vehicle when necessary. Make sure
to support the correct positions. (Refer to Chapter 1-3
“General Information”.)
5
2-11SERVICE PROCEDURE
1. General Precaution
Page 539 of 2248

C: INSPECTION
Check the disassembled parts for cracks, damage and
wear, and replace with new parts if defective.
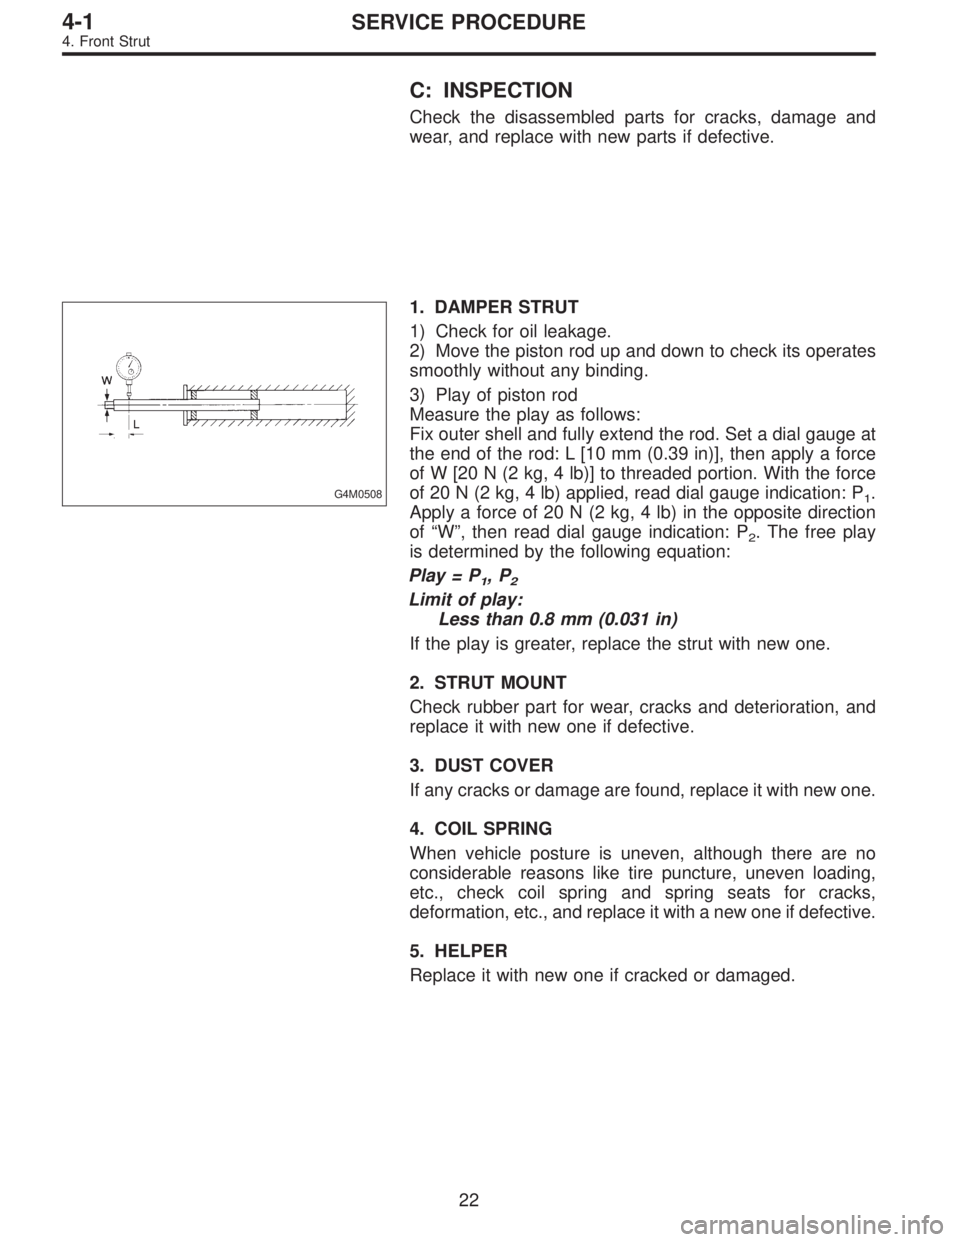
G4M0508
1. DAMPER STRUT
1) Check for oil leakage.
2) Move the piston rod up and down to check its operates
smoothly without any binding.
3) Play of piston rod
Measure the play as follows:
Fix outer shell and fully extend the rod. Set a dial gauge at
the end of the rod: L [10 mm (0.39 in)], then apply a force
of W [20 N (2 kg, 4 lb)] to threaded portion. With the force
of 20 N (2 kg, 4 lb) applied, read dial gauge indication: P
1.
Apply a force of 20 N (2 kg, 4 lb) in the opposite direction
of“W”, then read dial gauge indication: P
2. The free play
is determined by the following equation:
Play = P
1,P2
Limit of play:
Less than 0.8 mm (0.031 in)
If the play is greater, replace the strut with new one.
2. STRUT MOUNT
Check rubber part for wear, cracks and deterioration, and
replace it with new one if defective.
3. DUST COVER
If any cracks or damage are found, replace it with new one.
4. COIL SPRING
When vehicle posture is uneven, although there are no
considerable reasons like tire puncture, uneven loading,
etc., check coil spring and spring seats for cracks,
deformation, etc., and replace it with a new one if defective.
5. HELPER
Replace it with new one if cracked or damaged.
22
4-1SERVICE PROCEDURE
4. Front Strut
Page 640 of 2248
![SUBARU LEGACY 1995 Service Repair Manual �Make adjustment so that steering wheel can be rotated
fully from lock to lock without binding.
9) Check for service limit as per article of“Service limit”.
<Ref. to [W3C1].> Make replacement and SUBARU LEGACY 1995 Service Repair Manual �Make adjustment so that steering wheel can be rotated
fully from lock to lock without binding.
9) Check for service limit as per article of“Service limit”.
<Ref. to [W3C1].> Make replacement and](/manual-img/17/57432/w960_57432-639.png)
�Make adjustment so that steering wheel can be rotated
fully from lock to lock without binding.
9) Check for service limit as per article of“Service limit”.
Make replacement and adjustment if
necessary.
10) Install boot and mounting rubber to housing.
NOTE:
Apply grease through small hole in boot.
G4M0123
11) Fit clip (large) to boot, and then install boot to gearbox
while holding boot flange.
After installing boot, fold back boot flange to the extent that
large clip can not be seen.
NOTE:
�Before installing boot, be sure to apply grease to the
groove of tie-rod.
�Install fitting portions of boots to the following portions in
both sides of assembled steering gearbox.
1. The groove on gearbox
2. The groove on the rod
�Make sure that boot is installed without unusual inflation
or deflation.
G4M0124
12) Turn boot until it seats well on gearbox and rubber
mounting, then bend boot flange back.
G4M0125
13) Fix boot end with clip (small).
CAUTION:
Use screwdriver with blunted tip to prevent boot from
damage, when installing.
NOTE:
After installing, check boot end is positioned into groove on
tie-rod.
24
4-3SERVICE PROCEDURE
3. Steering Gearbox (Power Steering System) [LHD model]
Page 951 of 2248

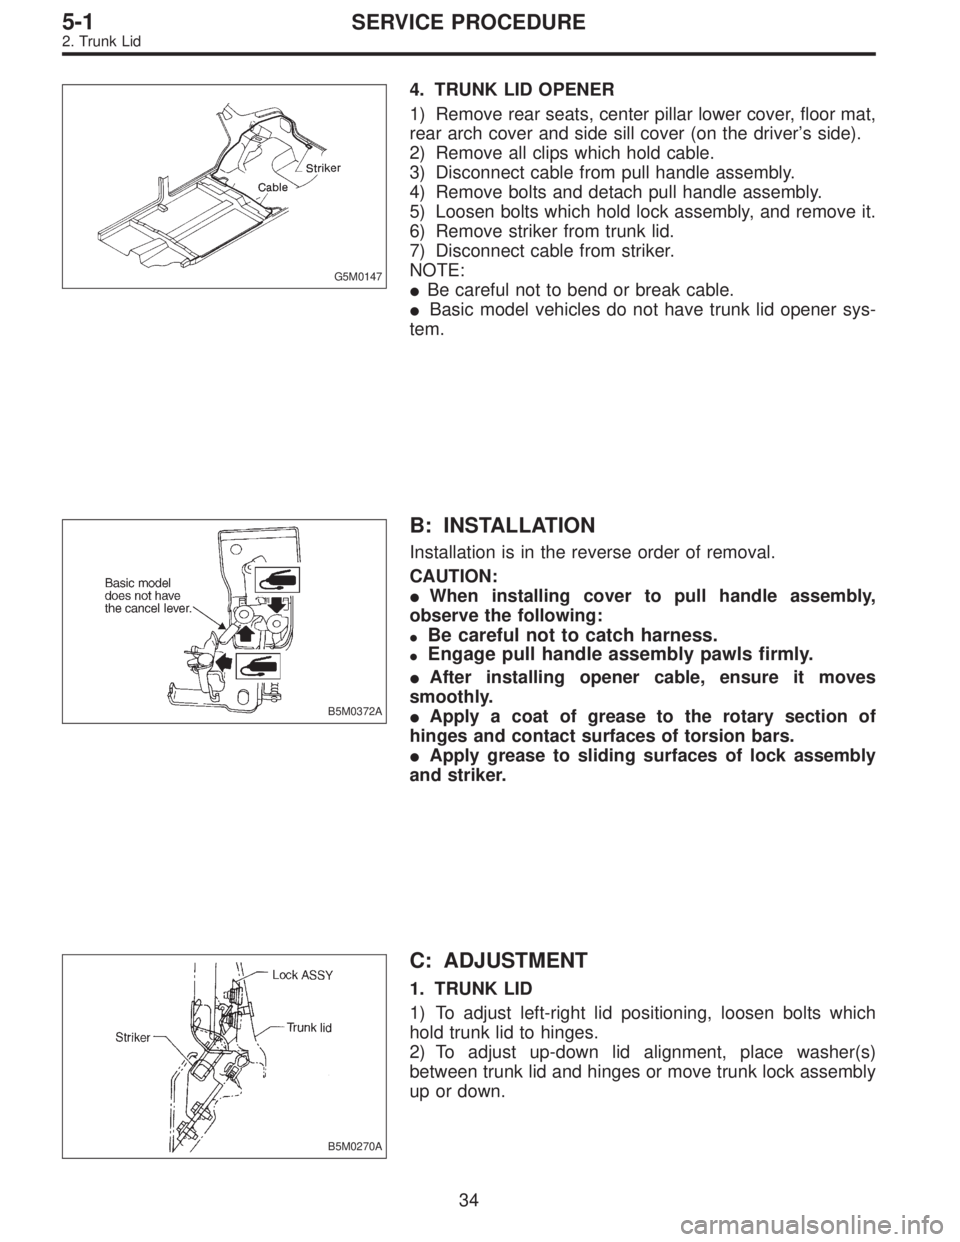
G5M0147
4. TRUNK LID OPENER
1) Remove rear seats, center pillar lower cover, floor mat,
rear arch cover and side sill cover (on the driver’s side).
2) Remove all clips which hold cable.
3) Disconnect cable from pull handle assembly.
4) Remove bolts and detach pull handle assembly.
5) Loosen bolts which hold lock assembly, and remove it.
6) Remove striker from trunk lid.
7) Disconnect cable from striker.
NOTE:
�Be careful not to bend or break cable.
�Basic model vehicles do not have trunk lid opener sys-
tem.
B5M0372A
B: INSTALLATION
Installation is in the reverse order of removal.
CAUTION:
�When installing cover to pull handle assembly,
observe the following:
�Be careful not to catch harness.
�Engage pull handle assembly pawls firmly.
�After installing opener cable, ensure it moves
smoothly.
�Apply a coat of grease to the rotary section of
hinges and contact surfaces of torsion bars.
�Apply grease to sliding surfaces of lock assembly
and striker.
B5M0270A
C: ADJUSTMENT
1. TRUNK LID
1) To adjust left-right lid positioning, loosen bolts which
hold trunk lid to hinges.
2) To adjust up-down lid alignment, place washer(s)
between trunk lid and hinges or move trunk lock assembly
up or down.
34
5-1SERVICE PROCEDURE
2. Trunk Lid
Page 952 of 2248
B5M0373
3. Fuel Flap
A: REMOVAL
1. FUEL FLAP
Remove bolts which hold hinge to fuel flap, and detach fuel
flap.
B5M0374A
2. FUEL FLAP OPENER
1) Remove rear seats, center pillar lower cover, floor mat,
rear arch cover/rear quarter trim (Wagon), and side sill
cover (on the driver’s side).
2) Remove all clips which hold cable.
3) Disconnect cable from pull handle.
4) Detach pull handle by removing bolts.
5) Detach fuel lock holder by turning it.
B: INSTALLATION
Installation is in the reverse order of removal.
CAUTION:
�When installing cover to pull handle assembly,
observe the following:
�Be careful not to catch harness.
�Engage pull handle assembly pawls firmly.
�Make sure the clearance between fuel flap and
vehicle body is equal at all points.
�After installing opener cable, ensure it moves
smoothly.
35
5-1SERVICE PROCEDURE
3. Fuel Flap
Page 1035 of 2248
1) Remove front seats.
2) Remove rear seat cushion.
3) Remove console box.
4) Remove front pillar lower trim panel.
5) Remove center pillar lower trim panel.
6) Remove side sill cover.
7) Remove fuel opener cover.
G5M0368
8) Remove clip under front seat.
9) Remove clip in toe board area.
NOTE:
When pulling out edge, do not pull mat alone; pull mat
together with edge.
Pry off two steel clips on side sill front cover and one on
side sill rear cover using screwdriver.
10) Remove mat hook.
11) Remove mat from toe board area.
12) Remove mat from heater module.
13) Roll mat, and take it out of opened rear door.
14) Installation is in the reverse order of removal.
NOTE:
�Secure mat firmly with hook and velcro tape.
�Insert mat edge firmly into the groove of side sill cover.
16
5-3SERVICE PROCEDURE
5. Inner Trim Panel