Page 17 of 156

Downloaded from www.Manualslib.com manuals search engine L-___________________________________________________~~~_CONTROLS AND EQUIPMENT
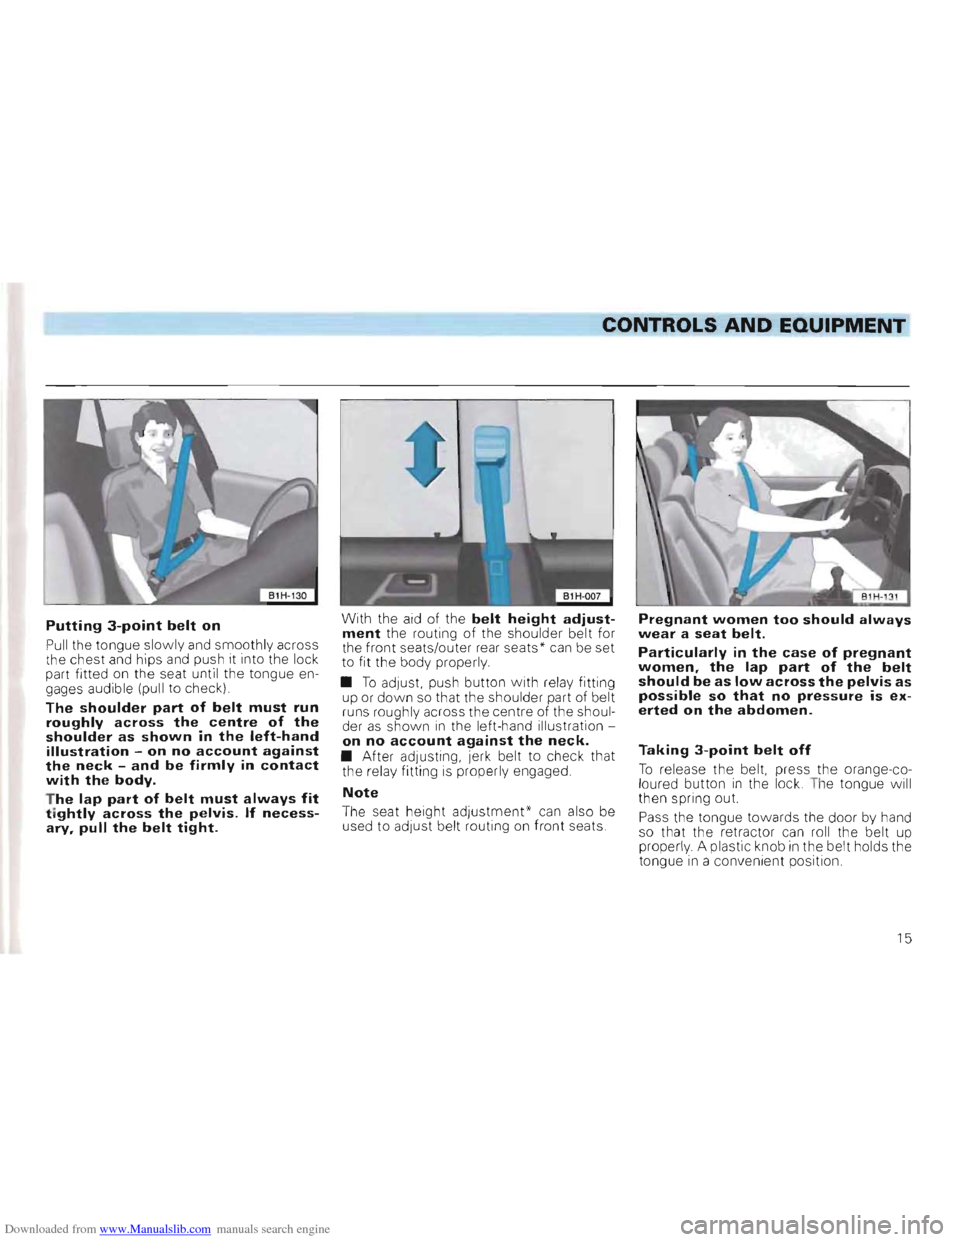
Putting 3-point belt on
Pull the tongue slowly and smoothly across
t he chest and hips and push it into the lock
part fitted on the
seat unti l the tongue en
gages audible (pull to c heck)
The shoulder part of belt must run roughly across the centre of the shoulder as shown in the left-hand illustration -on no account against the neck -and be firmly in contact with the body.
T he lap part of belt must always fit tightly across the pelvis. If necessary, pull the belt tight.
With the aid of the belt height adjustment the routing of the shou lder belt for
the fron t seats/outer rear seat s * can be set
t o fit the body properly.
• T o
adJUSt. push button with re la y fitting
up or down so that the shoulder part of be lt
runs rough ly across the cen tre of the shoul
der as shown i n the le ft-h and illustration on no account against the neck. • After adjustin g, jerk belt to check that
the relay fitting is properly engaged.
Note
The seat height adjustment' can also be
used to adju st be lt routing on front seats.
Pregnant women too should always
wear a seat belt.
Particularly in the case of pregnant
women, the lap part of the belt
should be as low across the pelvis as
possible so that no pressure is ex
erted on the abdomen.
Taking 3-point belt off
To re lease the belt, press the orange-co
l oured button in the lock . T he to ngue will
th en s pring out.
Pass the tongue
towards the door by hand
so that the retractor can roll the belt up
prope
rly . A plastic knob in the belt holds the
t o ngue in a convenient position .
15
Page 27 of 156

Downloaded from www.Manualslib.com manuals search engine CONTROLS AND EQUIPMENT
Front seats
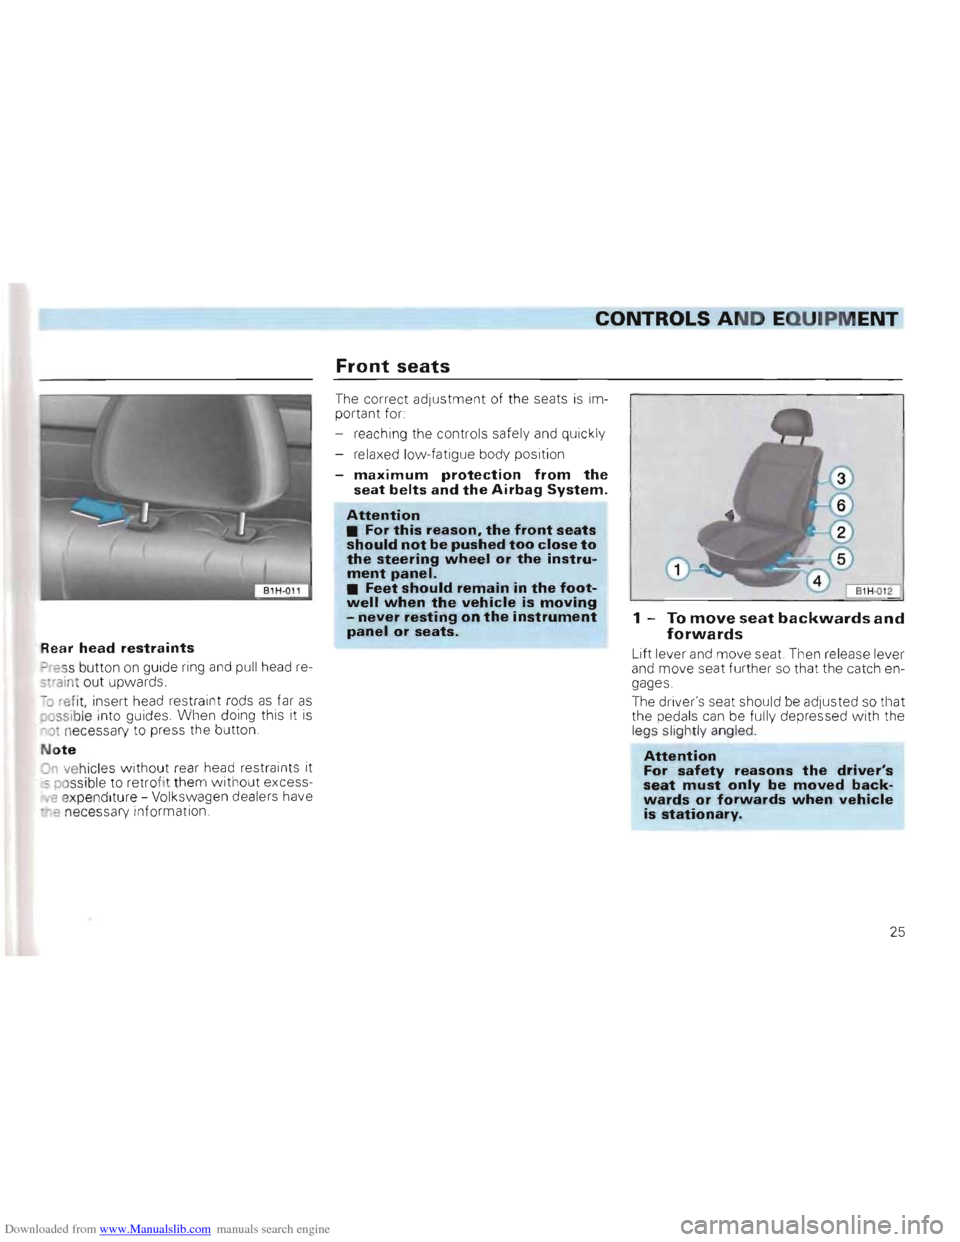
Rear hea d restraints
=>ress button on guide ring and pull head re
s-rai nt out upwards.
-0 refit, insert head restra int ro ds as far as os sible into guides. When doing this it is ~ot necessary to press the button .
N
ote
On ve hicles without rear head restra ints it 5 possibl e to r etrofit t hem without excess-
e expenditure -Vol kswagen dealers have
-'"'e n ecessary information. The
correc t adjustment of the seats
is im
portant for
- reaching the controls safely and quick
ly
- rela xed low-fatigue body po sition
-maximum protection from the seat belts and the Airbag System_
Attention • For this reason, the front seats should not be pushed too close to the steering wheel or the instrument panel. • Feet should remain in the footwell when the vehicle is moving -never resting on the instrument panel or seats_
I B1H-012 I
1 -To move seat backwards and forwards
Lift lever and move seat. Then release lever
and move seat fu rther so that the catch engages
The driver's seat
should be adjusted so that
the peda ls can be fully depr essed with the
legs slightly angled.
Attention For safety reasons the driver's seat must only be moved backwards or forwards when vehicle is stationary_
25
Page 28 of 156

Downloaded from www.Manualslib.com manuals search engine CONTROLS AND EQUIPMENT
2 -Adjusting backrest angle
Take weight off back rest and turn knob.
The backrest of the driv er's seat shou ld be adjusted so that the top of the steerin g
whee l can be reached with the arms angled slightly.
Attention
Do not lower the backrest too far
when on the move because the seat belts are then no longer fully effective.
3 -Releasing backrest
(2 door vehicl es only)
Lif t the
lever (also belt holder) and move the
back rest forward. Before releasing the
backrest pull
belt out of the belt holder (see
page 17).
Attention For safety reasons, ensure that the backrest lock is engaged when the vehicle is moving!
4 -Adjusting angle of the seat
cushion*
If the angle of the seat cushion is to be changed, pull lever up and bring seat
cushion to the desired angle by placing
mo
re or less weight on the backrest.
5 -Adjusting seat height*
Take weight off seat cushion and pull up lever. The whole seat cushion moves up
war ds. To adjust the seat cushion down
w ards, push seat downwards with body
weight.
Attention • For safety reasons the height of the driver's seat must only be adjusted when vehicle is stationary. • Be careful when adjusting the seat height! Careless and uncontrolled adjustment can cause injuries.
6 -Adjusting lumbar support
By turn ing the hand-wheel the seat padding in the lumbar area of the spine can be made
to arch forward slightly. This gives effective
support to the natura l curvatu re of the spine
so that t
he sitting position is less fatigui ng ,
particul arly on long trips
26
Page 150 of 156

Downloaded from www.Manualslib.com manuals search engine ALPHABETICAL INDEX
A Acceleration figu res . . .... . . .
Accessories
Adjusting washer jets
A ir conditioner
.. ....... .
Airbag
Alloy w heels
Analog clock
..
Anti-freeze.
Anti-dazzle inside mirror
Anti-knock properties of the fuel
Anti-locking brake system
(ABS)
Anti-theft warning system
Aq uaplaning .... ..... .
Ashtray .......... . .
ATF.
Automatic gearbox.
Automatic tra ns mission fluid
Automati c was h plants .... . . . .
Axle weights. . ....... .
B Battery . . . ....... . . . . .
Belt height adjustment ... .. . . .
Blower ...
Bonnet.
B rake fluid.
Brake pad wear indicat or
Brake servo .
Brake system
Brake warni
ng I'amp .
B rakes
B ulb changing.
Burglar alarm .
1
36
111
103
59
18
88
41
97
12
82
76
8
106
68
96
32
96
85
143
100
15
56, 59
90
99
48
75
99
48
75
121
8
C Capacities .. . . .... . 146
Care 85
Care of body . . . . . . . . . . . . . 85
Care of vehicle 85
Cavity preservation 89
Central locking system 7
Cetane Number . . . . . . . . . . 84
Changing bulb s . . . . . . . . . . 1
21
Changing wheels 116
Chassis number 147
Child safety . 21
Child seats ........ . . . . . . . 21
Chi ld-proo f catch ......... 9
Cigarette lig hter 68
Cigarette lig h ter socket. 68
Cleaning and anti -corrosion treatment of
engine compartment . . . . . . . . 88
Clean ing veh ic le . . . . . . . . . . 85
C limat ronic 62
Clock .. 41
Cockpit . . . . . . . . . . 4
Cold starting aid 37
Compression rat io 134
Cons umption figures. . 137
Coolant additive 97
Coolant level 46, 97
Coolant tempera ture gauge 45
Cool ing system . . . . . . . . . . 97
Cruise control system 54
Cubic capacity 134
D Dash panel 4
Defrosting windows 57,60,62
Diesel fuel 84
Dimensions. 145
Dip lever 53
Direction indicators 48, 53
Do-it-yourself ......... .
112
Door locks . ..... . . 9
Doors . .. 9
Driver's seat
25
Driving abroad .... . 110
Driving economically 72
Driving tips ...... . ... ..... ..... . 71
Driving with four-wheel drive 79
Dust and pollen filter ...... . .. . . 104
1 48