1993 VOLKSWAGEN GOLF brake light
[x] Cancel search: brake lightPage 5 of 156
Downloaded from www.Manualslib.com manuals search engine CONTROLS AND EQUIPMENT
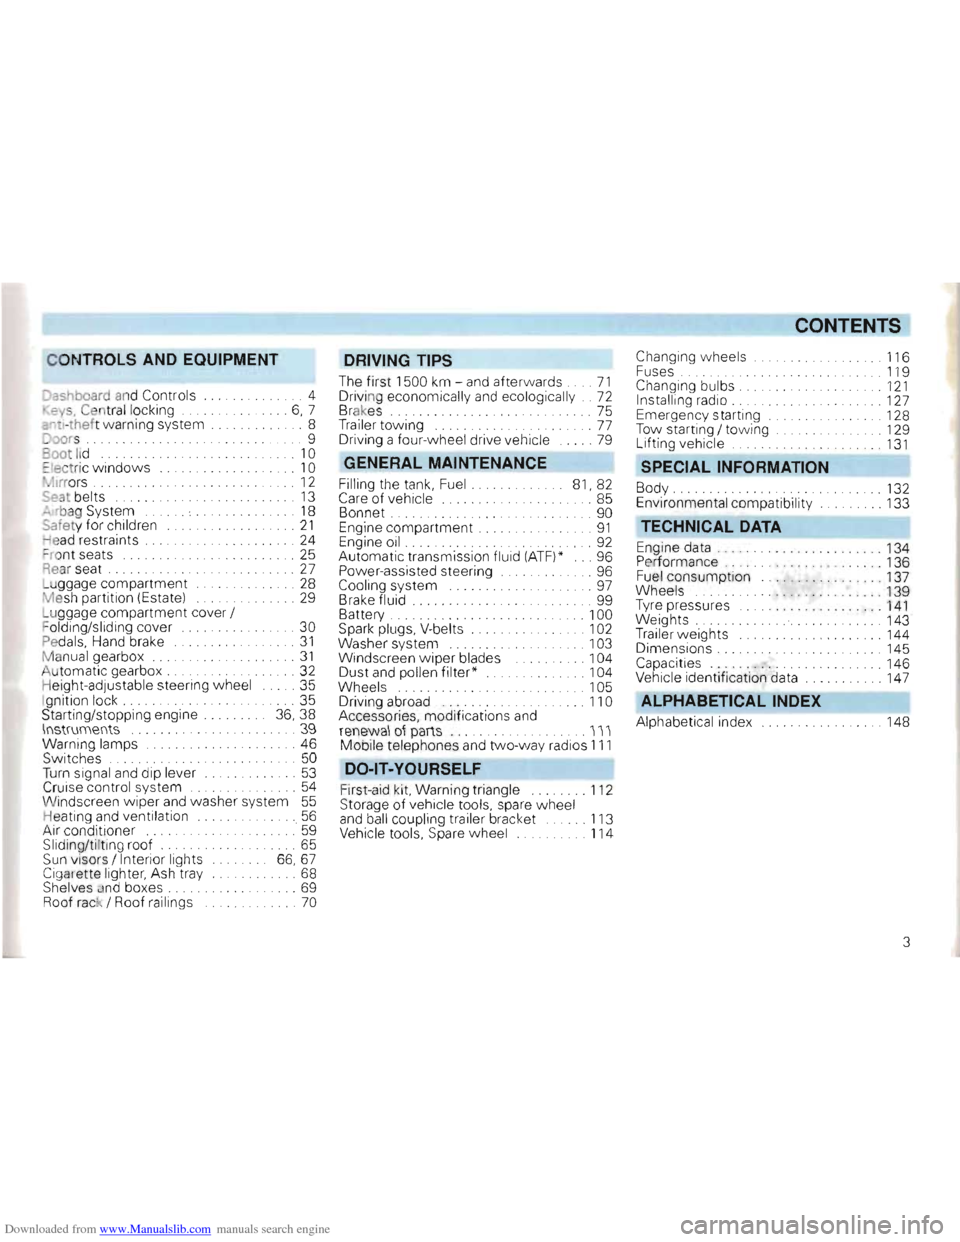
Dashboard and Controls ..... 4
. ey s, Cen tral locking . . .... 6, 7
::"tl-thef t warning system .... 8
Joors .......................... .... 9
oot lid .... ........... . . . . . 10
::Iectric windows .. . .. 10
• ~Irrors . . ..... . ... 12
Seal belts 13
"" rbag System . . . . . 18
Safe ty for children .. ... 21
ead restraints . . . . . .. 24
= ro nt seats . . . . . . . . . . . .. 25
Rear seat . . . 27
L u ggage compartment ... . ... . ...... 28
M esh partition (Estate) ...... 29
L u ggage compartment cover /
F olding/sliding cover
... 30
Pedals, Hand brake .. 31
Manual gearbox .... ... .... 31
Automati c gearbox . . . .. .......... 32
H eig ht-adjustable steering wheel ..... 35
I gnition lock. . . . . .. 35
Starting/stopp ing engine 36, 38
\lIstrumellts .. .... 39
Warning lamps ....... 46
Switches . . . . . . . . . . . . . . 50
Turn signal and dip lever ............. 53
Cruise control system ........... 54
Wi ndscreen wipe r and washer system 55
Heating an d ventilation .. . ...... 56
Air cond itioner ......' 59
Sliding/ti ltin g roof. . . . . . . . . . . . ... 65
Sun visors / Interior lights 66,67
Cigarette lighter, Ash tray ..... 68
Shelves and boxes . . . . . . . . . . . ... 69
Roof rack / Roof ra ilings ... 70
DRIVING TIPS
The firs t 1500 km -and after wards .... 71
Driving economically and ecologically .. 72
Brakes. . . . . . . . . . . . . . . . 75
Tra iler tow ing . .. ..... . .... ... ...... 77
Driving a four- wheel drive vehicle .. 79
GENERAL MAINTENANCE
Filling the tan k, Fuel. 81, 82
Care of vehicle ........ .. . . 85
Bonnet . . ... 90
Engine compartment .. ...... .... .... 91
Engine oil ..... .......... ........... 92
Automatic transmission fluid (ATF)* ... 96
Power-assisted steering .. 96
Cooling system . . . . . . . . . . .. . 97
B rake fluid ...... 99
Battery . . . . .. 100
Spark plugs. V-belts . . . . . . . . . 102
Washer system
... . .. 103
Windscreen w iper blades . . . 104
Dust a
nd pollen filter * . 104
Wheel s . 105
D riving abroad ..... ............... 110
Accessories, modifications and
renewa l ot parts .............. III
Mobile telephones and tw o-way rad ios 111
DO -lT-YOURSELF
First -aid kit, Warn ing triangle ........ 112
Storage of vehicle tools, spare wheel
a n d ball coupling trailer bracket ...... 113
Vehicle tools, Spare wheel 114
CONTENTS
Changing w heels . 116
F uses . ........ .. .. . . . ... . .... 119
Changing bulbs. . .... .. . 121
Installing radio . . . . .. 127
E mergency starting .. .. 128
Tow starting / to wing . . .. 129
L ift ing vehicle ......... 131
SPECIAL INFORMATION
Body ..... .... . .......... 132
Environmental compatibility ... 133
TECHNICAL DATA
Engine data . .. , .... .... . 134
P er forman ce .. ... ... ... . .. 136
Fuel consump tion .. 137
Wh eels
. . 139
T yre pressures
.. .. ... .. . . .. ... 1 4 1
Weights ... 143
Trailer weights .. 144
Dimensions. ...... .. ... 145
Capacities " ..... 146
Vehicle identification data ... 147
ALPHABETICAL INDEX
Alph abetical index ... 148
3
Page 7 of 156
Downloaded from www.Manualslib.com manuals search engine __CONTROLS AND EQUIPMENT
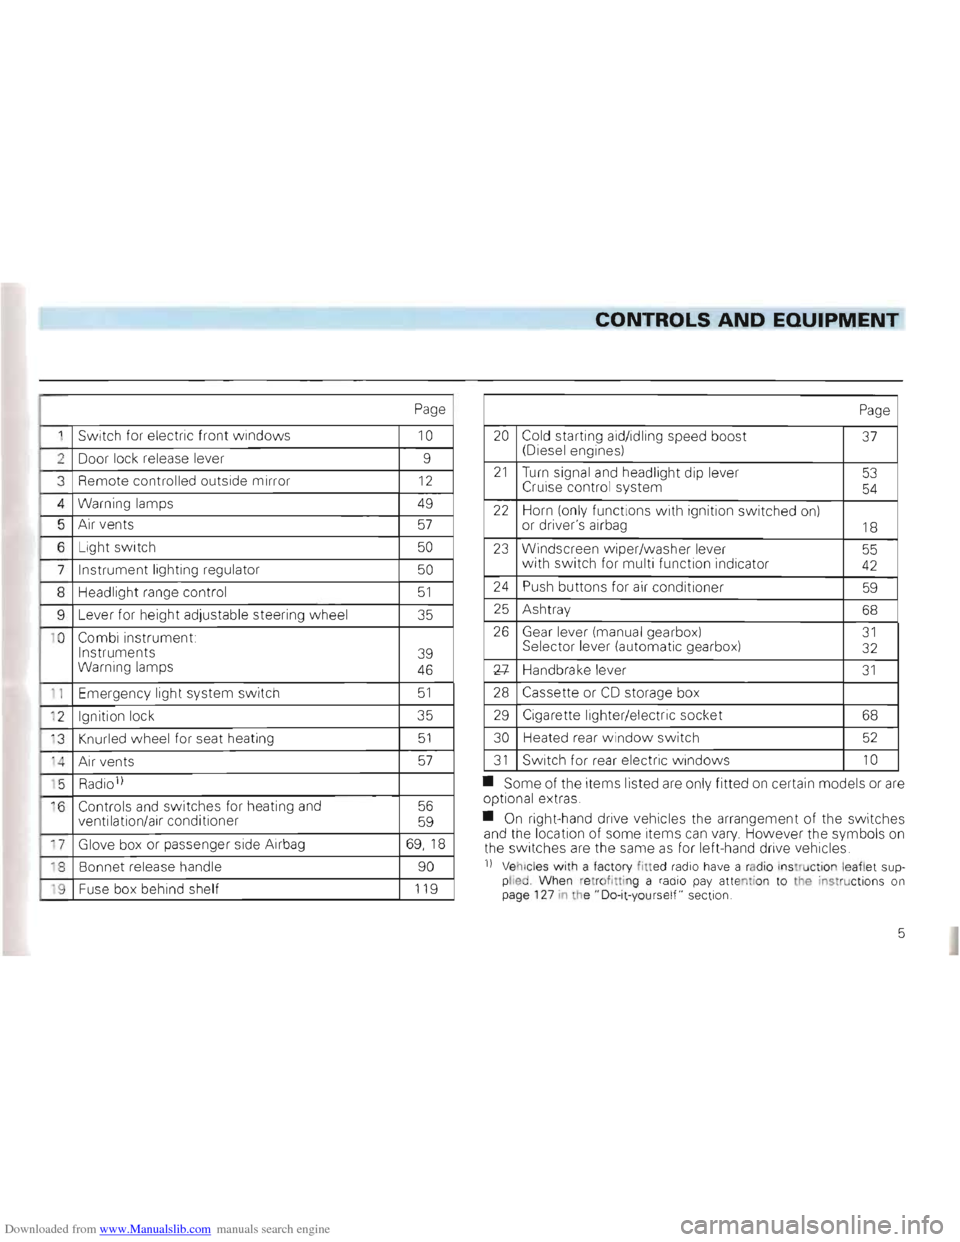
Page
1 Switch for electric front windows 10
2 Door lock release lever 9
3
Remote controlled outside mirror 12
4 Warning lamps 49
5 Air vents 57
6 Light switch 50
7 Instrument lighting regulator 50
8 Headlig ht range control 51
9 Lever for heig ht adjustable steeri ng w heel 35
1 0
Combi instrument:
Instruments
Warning lamps
39
46
1 1 Emer gency light system switch 51
' 2 Ignition lock 35
' 3
Knurled wheel for seat heating 51
'4 A ir ve nts 57
' 5 Radio 1)
·6 Controls and switches for heating and
ventilation/air conditioner 56
59
17 Glove box or passenger side Airbag 69,1 8
18 Bonnet release handle 90
'9 Fuse box behind shelf 119
Page
20 Cold starting aid/idling speed boost (Diesel engines) 37
21 Turn signal and headlight dip lever
Cruise control system 53
54
22 Horn (on ly functions with ign ition switched on)
or driver's airbag 18
23 Windscreen w iper/washer lever
w ith switch for multi function indica tor 55 42
24 Push buttons for air conditi oner 59
25 Ash tray 68
26 Gear lever (manua l ge arbox) Sel ector lever (automa tic gea rbox) 31 32
Xl-Handbrake leve r 31
28 Cassette or CD storage box
29 Cigarette lighter/elec tric soc ket 68
30
Heated rear windo w switch 52
31 Switch for rear electric w indows 10
• Some of the items listed are only fitted on certain models or are op tional extras .
• On right-hand drive vehicles the
arrangement of the switches
and the location of some items can vary. However the symbo ls on
th e switc hes are the same as for left-hand drive vehic les.
n Vehicl es with a facto ry fitted radio have a rad io ins truction le aflet supplied Whe n re trof ittin g a radio pay atte ntion to the instructions on
page 127 in the" Do-it-yours elf " sect ion.
5
Page 29 of 156
Downloaded from www.Manualslib.com manuals search engine CONTROLS AND EQUIPMENT ----------------------------------~~~--
Rear seat
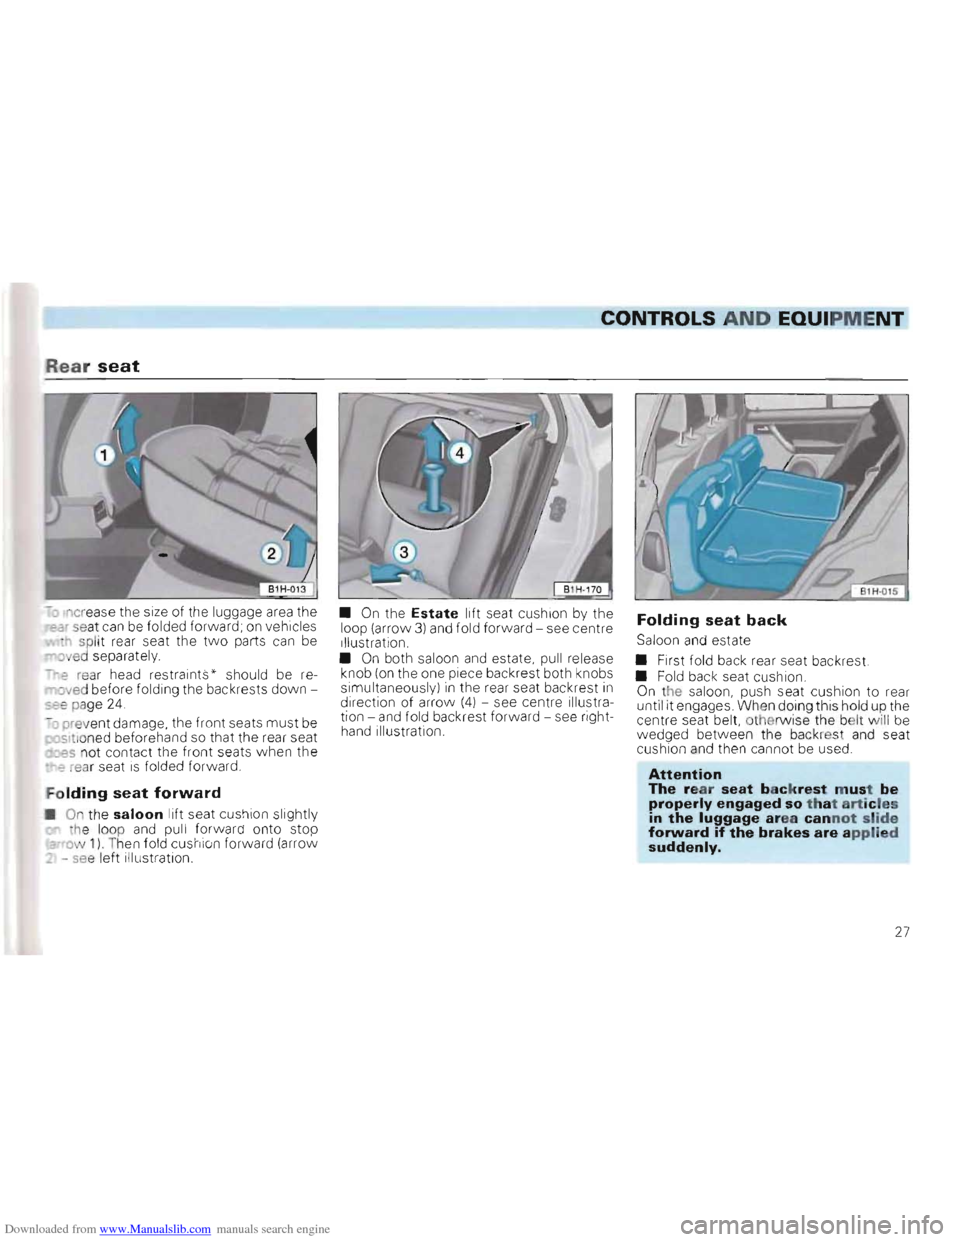
-ncr ease the size of the luggage area the ar seat can be folded forward; on vehi cles
- h sp li t rear seat the two parts can be ov ed separately.
~r-e rear head restraints " should be re~oved before folding the backrests downsee page 24.
-0 pr ev ent damage, the front seats must be sltio ned beforehand so that the rear seat _~s not contact the front seats w hen the -r-2 rear seat is fo lded forward.
Folding seat forward
On the saloon lift seat cushion slightly
t h e loo p and pull forwar d onto stop :::-ow 1) T hen fold cushion forward (arrow
_ -se e left illust ration. •
On the Estate lift
seat cushion by the
l oop (arrow 3) and fold forward -see centre
Illustrat ion. • On both saloon and estate, pu ll release
knob (on the one piece back rest both knobs
simultaneous ly) in the rear seat back rest in direction of arrow (4) -see centre illustra
tion -and fold back rest forward -see flght
hand illustration.
Folding seat back
Sa loon and estate
• First fold back rear seat backrest.
•
Fold back seat cushion. On the saloo n, push seat cushion to rear
unti l it engages When doing this hold up the
centre seat belt, othe rwise the belt w ill b e
wedged between the backre s and seat
cushion and then cannot be used.
Attention The rear seat backrest m ust be properly engaged so tha t articles in the luggage area cannot slide forward if the brakes are applied suddenly.
27
Page 31 of 156
Downloaded from www.Manualslib.com manuals search engine CONTROLS AND EQUIPMENT
esh partition* (Estate)
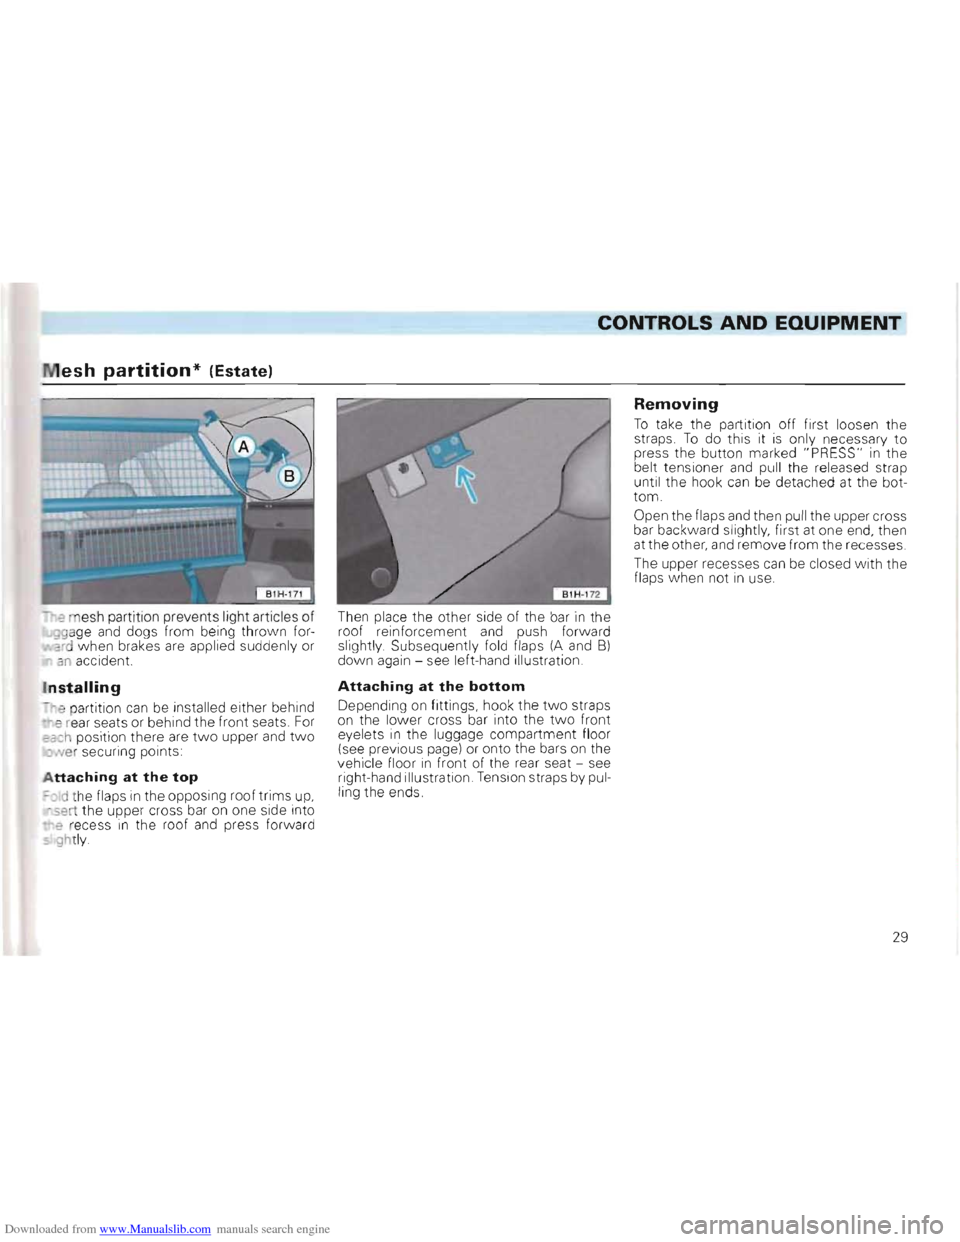
e m esh partit ion prevents light articles of '99age and dogs from being thrown forard when brakes are applied suddenly or ~ an accident.
Installing
-"e part ition can be installed either behind "9 rear seat s or behind the front seats. For "'a::h position there are two upper and two ~ ve r securing points:
Attaching at the top
~:)Id the flaps in the opposing roof trims up, 5ert the upper cross bar on one side into
• e recess in the roof and press forward 5' ghtly. Then
place the other side of the bar
in the
r o of reinforcement and push forward slightly Subsequently fold flaps (A and 8)
down again -see left-hand illustration.
Attaching at the bottom
Depending on fittings, hook the tw o straps
on the lower cross bar into the tw o front
e yelets
in the luggage compartment floor
( see previous page) or onto the bars on the
vehicle floor in front of the rear seat -see
right-hand illustration . Ten sion straps by pul
ling the ends .
Removing
To take the partition off first loosen the straps . To do this it is only necessary to
press the button marked "PRESS" in the
belt tensioner and pull the released strap
until the hook can be detached at the bot
tom.
Open the flaps
and then pull the upper cross
bar bac kward slightly, first at one end, then
at the other, and remo ve from the recesses .
The upper recesses
can be closed with the
flaps when not in use.
29
Page 32 of 156
Downloaded from www.Manualslib.com manuals search engine CONTROLS AND EQUIPMENT
Luggage compartment cover / Folding/sliding cover*
Articles of clothing can be placed on the luggage compartment cover.
Attention Do not place heavy hard articles on the luggage compartment cover or folding/sliding cover they could endanger the vehicle occupants or damage the folding/sliding cover if the brakes are applied suddenly_
Furthermore, the heater element wires in
the heated rear window could be damaged
by articles rubbing against them.
The folding/s liding cover
can be pushed to
gether to the front or rear .
When the tailgate of the saloo n is opened ,
the luggage compartment cover is also
lifted .
If large items of lug gag e are to be carried,
the cover
can be removed:
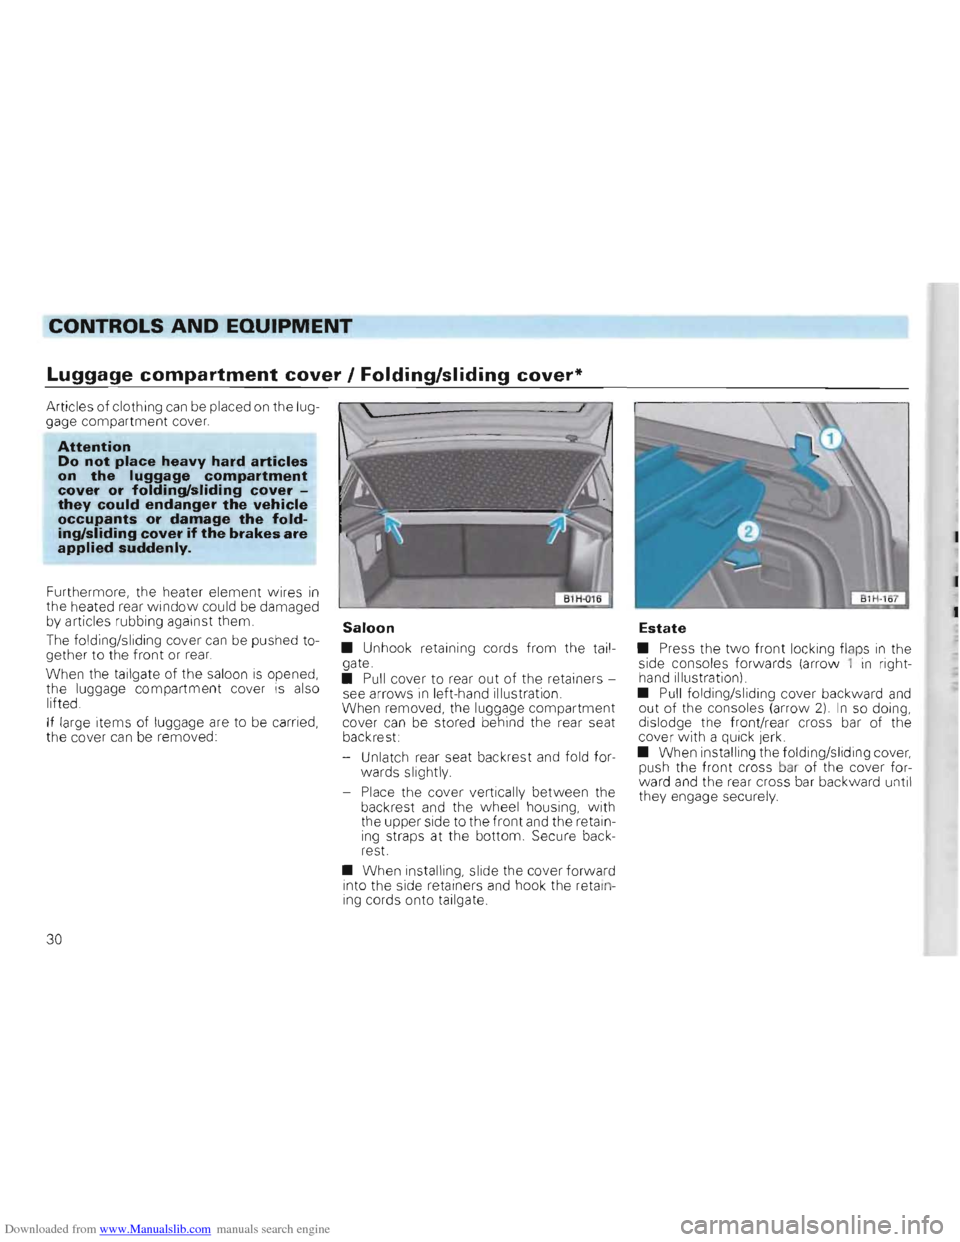
Saloon
• Unhook retaining cords fro m the tailgate.
• Pull cover to rear out of the retainers
see arrow s in left-hand illustration.
When removed, the luggag e co mpartment
cover
can be stored behind the rear seat
backrest:
- Unlat
ch rear seat backrest and fold for
wards slightly.
- Place the cove r vertically between the back rest and the wheel housing, with the upper side to the front and the retain
ing straps at the bottom. Secu re back
r est.
• When installing , slide the cover forward
into the side retainers and hook the retain
ing cords onto tailgate.
Estate
• Press the two front locking flaps in the
side consoles forwards (arrow 1 in right
hand illus tration).
•
Pull fo lding/sliding cover backward and out of the consoles (arrow 2) I n so doing,
dislodge th e front/ rear cross bar of the
cover with a qUi ck jerk.
• When
installing the folding/s liding cover, push the front cross bar of the cover for
ward and the rear cross ba r backward un til
the y engage securely.
30
Page 33 of 156
Downloaded from www.Manualslib.com manuals search engine CONTROLS AND EaUIPMENT ------------------------------~---
Pedals
- _ movement of the peda ls must never be ~S ncted .
::-thIs reason, do not put articles in the '00 well which cou ld roll or slide under
- 3ath th e pedals.
-
he case of defects on the brake sys
'em, a greater pedal travel may be necessa , t should always be possib le to depress
- "'e clut ch and acce le rator pedals fully.
All peda ls must be able to return , unh in-Jere d, to their rest positions. .
= o r these reasons, the only foot mats which e 'Y'\ay be used are those which leave the
ed al area compl ete ly free and which are pre ve nted from slipping .
'11
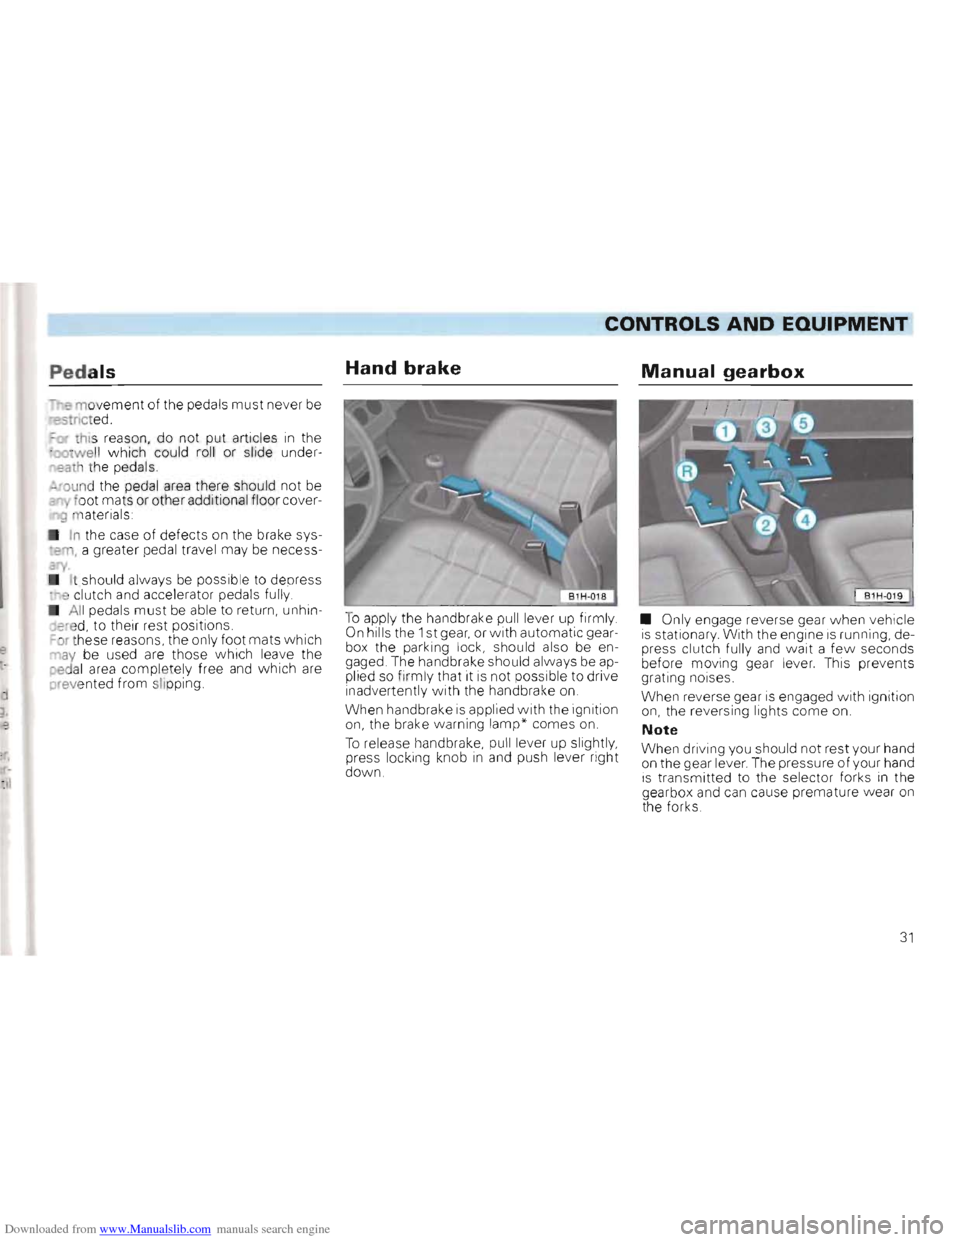
Hand brake
To apply the handbrake pull lever up firmly . On hills th e 1 st gear, or with automatic gear
box the parking lock, sho uld also be en
gaged. The handbrake should a lways be applied so firmly that it is not possible to drive inadve rtentl y with the handbrake on.
W h
en handbrake is applied with the ignition on, the brake warning lam p* comes on.
To release handbrake, pu ll lev er up slightly ,
press locking knob in and push lever right
do w n.
Manual gearbox
• Only engage reverse gear when vehicle is st ationary With the engin e is running, de
press clutch fully and wait a fe w seconds before mo ving gear lever. ThiS prevents
g rating noises .
When
rev erse gear is engaged with ignition on , the reversing lights come on.
Note
When driving you shou ld not rest your hand
on th e gear lever . The pressure of your hand is transmitted to the selector forks In the
gearb ox and can cause premature wear on the forks .
31
Page 34 of 156
Downloaded from www.Manualslib.com manuals search engine Automatic gearbox*
Driving programmes
The gearbox control unit is equipped with two driving programmes:
• Sport programme
• Economy programme
The programme is selected automatically depending on operation of the accel
erator pedal.
The sport programme is selected if the
accelerator pedal is operated rapidly. In this
case the accelerator pedal need not be de
pressed to the point of kick-down (see
Page 33). In the sport programme, full use is made of the engine's power reserves
through delayed change to higher gear
The
economy programme is selected
when the acce lerator, pedal is operated
s lowly or normally. Fuel consumption is reduced by changing early into higher gear and later into lower.
Selector lever lock
In positions "P" and " N" with the ignition
s wi tc h on the selector lever is locked . To move the selector lever out of these posi
t ions the brake pedal must be depressed and the selector lever button pushed in .
This prevents a gear being engaged inadver
tently
and the vehicle unintentional ly mov
ing off .
A de l
ay circuit prevents the selector lever
f rom locking when it is moved quickly past the" N" position (for Instan ce from" R" to "
D " ) This enables for examp
le the vehicle
to be " rocked" out of a "bogged down "
position The shift lock only locks the selec
tor
leve r if it is left in the " N" position for
more than about 1 second without the
brake pedal being depressed.
At speeds above 5 km/h the selector lever
is automatically switched-off in position "N".
Selector lever positions
P -Parking lock
The driving wheels are lock ed mechanically
The parking lock may only be engaged
when the vehicle is stationary. Before mov
ing the lever in or out of the" P" position the
lock button in the selector lever handle
must be pressed. Before moving the selec
tor lever out of
the" P" pOSition, the brake
pedal must also be depressed w hen the
ignition is switched on .
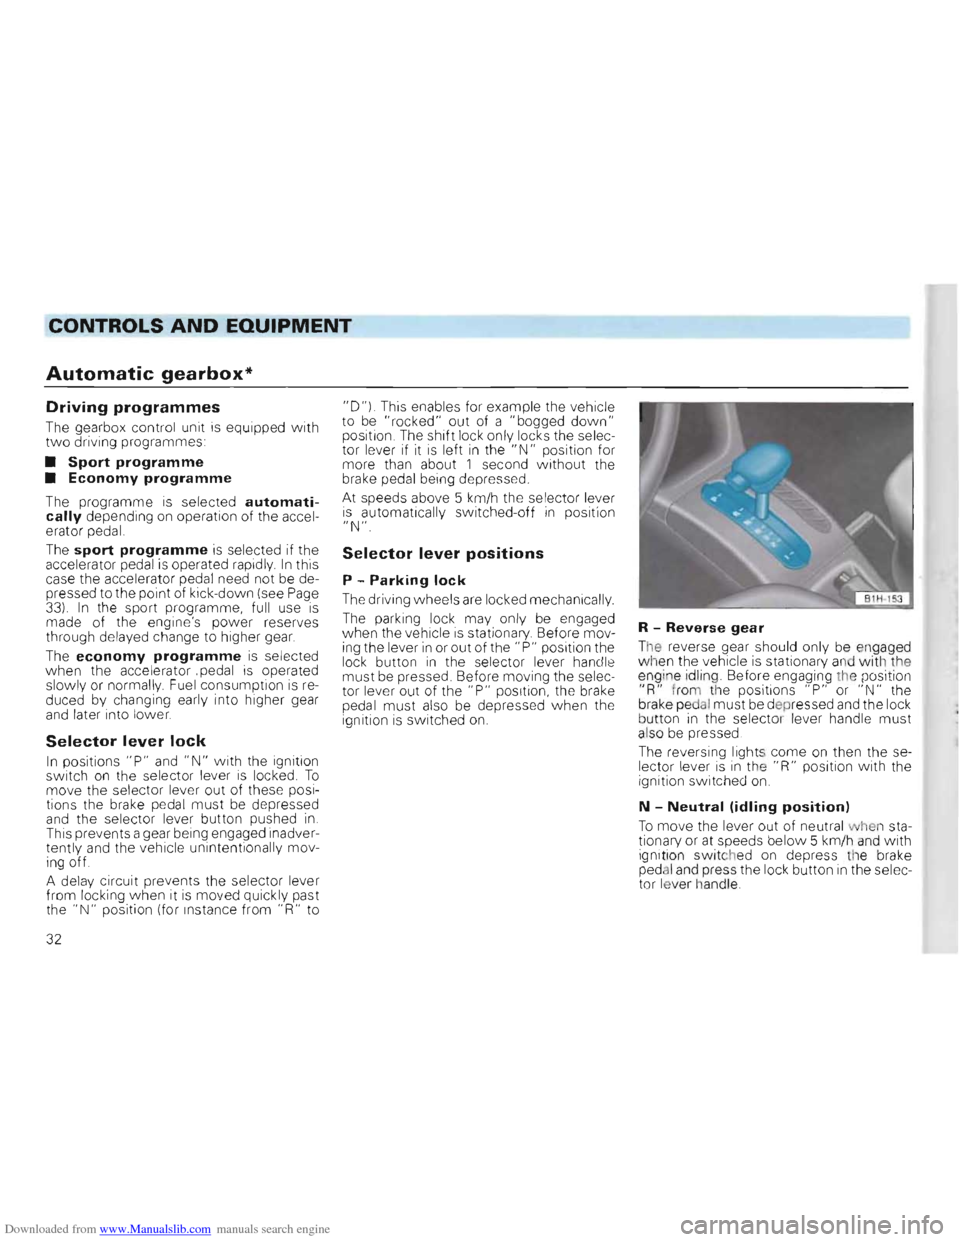
R -Reverse gear
The reverse gear should only be engaged
when the vehicle is station ary and with the
eng ine id ling. Before engaging the position
"R " from the positions "P" or "N " the
brake pedal must be d epr essed and the lock
b u tton in the selecto r lever handle must
also be p re ssed .
The
reversing lights come on then the se
l e cto r leve r is in the "R" position with the
ignition switched on.
N -Neutral (idling position)
To move the leve r out of neutral when sta
tionary or at speeds below 5 km/h and with
ignit ion switc hed on depress the brake
ped al and press the lock button in the selec
t or lever handle .
32
Page 36 of 156
Downloaded from www.Manualslib.com manuals search engine CONTROLS AND EQUIPMENT
• Attention • When the engine is running it is necessary to hold the vehicle with the foot brake in all gears. Because with an automatic gearbox the transfer of power is not fully interrupted even at idling speed -and the vehicle tends to "creep". If a driving range is selected while the vehicle is stationary, the throttle must on no account be opened (e.g. by hand from inside the engine compartment). The vehicle can then start moving, possibly even when the hand brake is applied.
Before working on a running engine, ensure that selector lever is
in position "p" and thatthe handbrake is applied.
Moving off
Select driving range (R, 0, 3, 2, 1) Wait until the gearbox has shifted and the power flow is made to the driving
wheels (light selection jerk perceptible). Then one can accelerate.
Stopping
To stop vehicle temporarily such as at traffic
lights, it is only necessary to apply the
brakes. It is not necessary to move selector
lever to "N". The engine should however on ly be running at idling speed.
Parking
On level ground all you need do is engage
the parking lock. On a gradient the hand
brake should be applied firmly first and then
the parking lock engaged. This will ensure
that the locking mechanism
is not too heav
ily loaded and makes the lock easier to dis
engage .
Tow starting
On vehicles w ith automatic gearbox the en
gine cannot be started by towing or pushing
the vehicle. See page130 .
When the battery
is flat. the engine can be started from the battery of another vehicle
by using jumper cables See" Emergency starting", page 128.
Towing
If the vehicle has to be towed at any time ,
you must read the instructions in the sec
tion "Towing/tow starting on page 129.
Emergency programme
If functional defects occur in the electronic system the gearbox can, amongst other
things, carry on operating in two emergency
programmes: •
The gearbox continues to change up
and
down automatically as before but hard shift
jerks are however noticeable. The vehicle
should
be taken to a Volkswagen dealer.
• The gearbox no longer changes up and
down automatically.
The gearbox can then be shifted manually
but in the selector leve r positions "0", "3"
and "2" only the 3rd gear is available.
I n se lector lever positions " 1 " and " R", the
1 st and reverse gears
are available as nor
mal .
However, the converter must. due to the
absence of 2nd gear work harder ,
and under
certain circumstances this causes the con
verte r to overheat.
In a case such as this the
vehicle should be taken, as soon as poss
ible, to a Volkswagen dealer.
34