1993 VOLKSWAGEN GOLF brake light
[x] Cancel search: brake lightPage 118 of 156
Downloaded from www.Manualslib.com manuals search engine DO-lT-YOURSELF
Changing wheels
Park the vehicle as far as possible away
from the traffic flow. If necessary switch on
emergency warning lights
and place the
warning triangle in position -note legal reQuirements,
• A
ll veh icles occupa nts shou ld leave the
vehicle and move to a safe area (e,g, behind
the barrier),
• App ly handbrake firml
y, If the car is on a
slope, block one of the wheels on the oppo
site side with a stone or some similar ob
ject.
•
Take too ls and spare wheel out of lug
gage compartment.
• Remove wheel bolt caps:
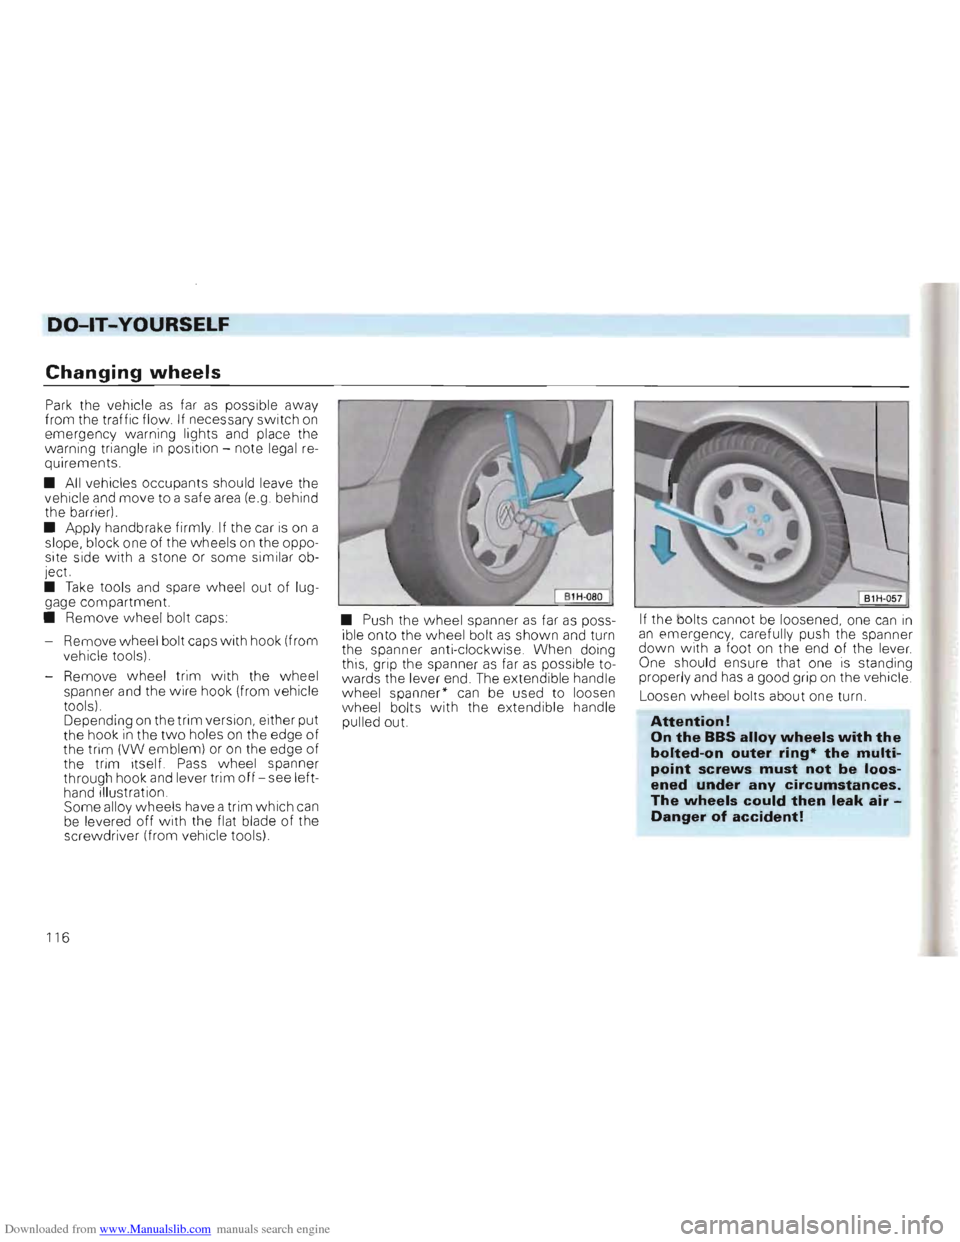
- Remove wheel bolt caps
with hook (from
vehicle tools),
- Remove wheel trim with the
wheel
spanner and the wire hook (from vehicle
tools) ,
Depending
on the trim version , either put
the hook in the two holes on the edge of the trim (VW emblem) or on the edge of
the trim itself, Pass wheel spanner
through hook and lever trim off -see left
hand illustration ,
Some alloy wheels have a trim which can be levered off with the flat blade of the
screwdriver (from vehicle tools) •
Push the wheel spanner
as far as poss
ible onto the wheel bolt as shown and turn
the spanner anti-clockwise, When doing
this, grip the spanner
as far as possib le to
wards the lever end, The extend ib le handle
wheel spanner"
can be used to loosen wheel bolts with the extendible handle
pulled out. If
the bolts cannot be loosened, one can
in an emergency, carefully push the spanner down wi th a foot on the end of the lever.
One should ensure that one is standing
proper ly and has a good grip on the vehic le ,
Loosen
wheel bolts about one turn,
Attention!
On the BBS alloy wheels with the
bolted-on outer ring· the multi
point screws must not be loos
ened under any circumstances.
The wheels could then leak air Danger of accident!
116
Page 122 of 156
Downloaded from www.Manualslib.com manuals search engine DO-lT-YOURSELF
Fuse layout
(from left to rig ht)
No. Component A 1)
1 Dipped beam left,
headlight range control left 10 2 Dipped beam right,
head light ra nge co ntrol right 10 3 Instrument and number plate
light ing . 10 4 Rear w iper, slid ing/tilti ng roo f, 15
5 Windscreen w ipe r, windscr een
a
nd rea r w indo w was her,
ele c. heated windsc reen washer
jets . . . . . . 15
6 Blower,
air co nditi oner ... . 30
7 Tail and side light ri ght 10
8 Tail and side light left . . 10
9 Rear window heating , mirror
heating ... 20 10 F og lights, rear fog light 15 11 Main beam left, main beam
w arnin g lamp 10
12 Mai n bea m right . 10
13 Horn, radiator fan (run- on) . 10
14 Reve
rsi ng lights, electric out
side mirrors, seat heating,
elec. w ind ows,
air conditio ne r
cruis e contro l system 15
No. Component Amp. 1)
15 Engine elec tronics , cool ant
c irculat ion run- on pump,
(six cylinder engine)
.. . .. .. . . . 10
16
Warning lamps, glove box light,
cas sette sto rage box light, 15
17 T urn sig nals. . . . . . . . . . . . .. 10 18 Electri c fue l pum p,
Lambda probe ..... .. ....... 20
1 9 Radiat or fan, air cond itioner. . 30
20 Brake lights, cruise control
syste m (tri gger conta cts
on brake and clutch pedals) . 10 21 Interior and luggage compart
ment lights, clock, cigarette lighter,
ce ntral
locking, multi -function
indicator 15 22 Radio 10
Automatic fuse
All electric windows are protected to
ge ther via an automatic fu se (see rig ht -hand
co lum n) which breaks the circuit when
overloaded (e .g. windows frozen) and makes the circuit again after a few seconds.
Additional fuses
(in separate holders)
• above the
rela ys:
Fu se for ABS motor re lay. ..... . .... 30
Fuse for ABS main relay. ... 30
Fuse for normal air conditioner 10
Fuse for fresh air blower on
Climatronic ... ... ... . 30
Fuse for C1imatronic .. .... ... 5
Automatic fuse for electric w indo ws .. 20
Trailer perma nent + 15
• in the engin e compa rtment on the bulk
head above the brake servo:
Diesel glow plugs 21 . . 50
Fuse colour code:
Light brown :
5 Amper e
Red: 10 Ampere Blue: 15 Ampere Yellow 20 Ampere Green 30 Ampere
21 This fuse shou ld onl y be renewed by a Volks wagen dea ler.
1) Amper e
120
Page 123 of 156
Downloaded from www.Manualslib.com manuals search engine DO-lT-YOURSELF
Changing bulbs
Before starting to replace a bulb, switch off
the light concerned.
Do not touch the glass part of the new bulb
with bare fingers because the finger marks
left
on the glass evaporate when the bulb
becomes hot. the vapour settles on the
reflector and dims it.
Always use the same type of bulb . The des
ignati
on is marked on the base of the bulb
or on the glass .
It
is advisab le to always a carry a box of
spare bulbs in the vehicle . These can be ob
tained from Volkswagen dealers. It shou ld
contain at least the following bulbs w
hich are essentia l for traffic safety:
12 V60/55W Main headlight (H4)
12 V 55 W Double h
eadl igh t (H 1)
12 V 21W Turn signa ls
12 V 21W Brake light
12 V 5W Tail light
12
V4W Side light
12 V5W Number plate light
Glass base
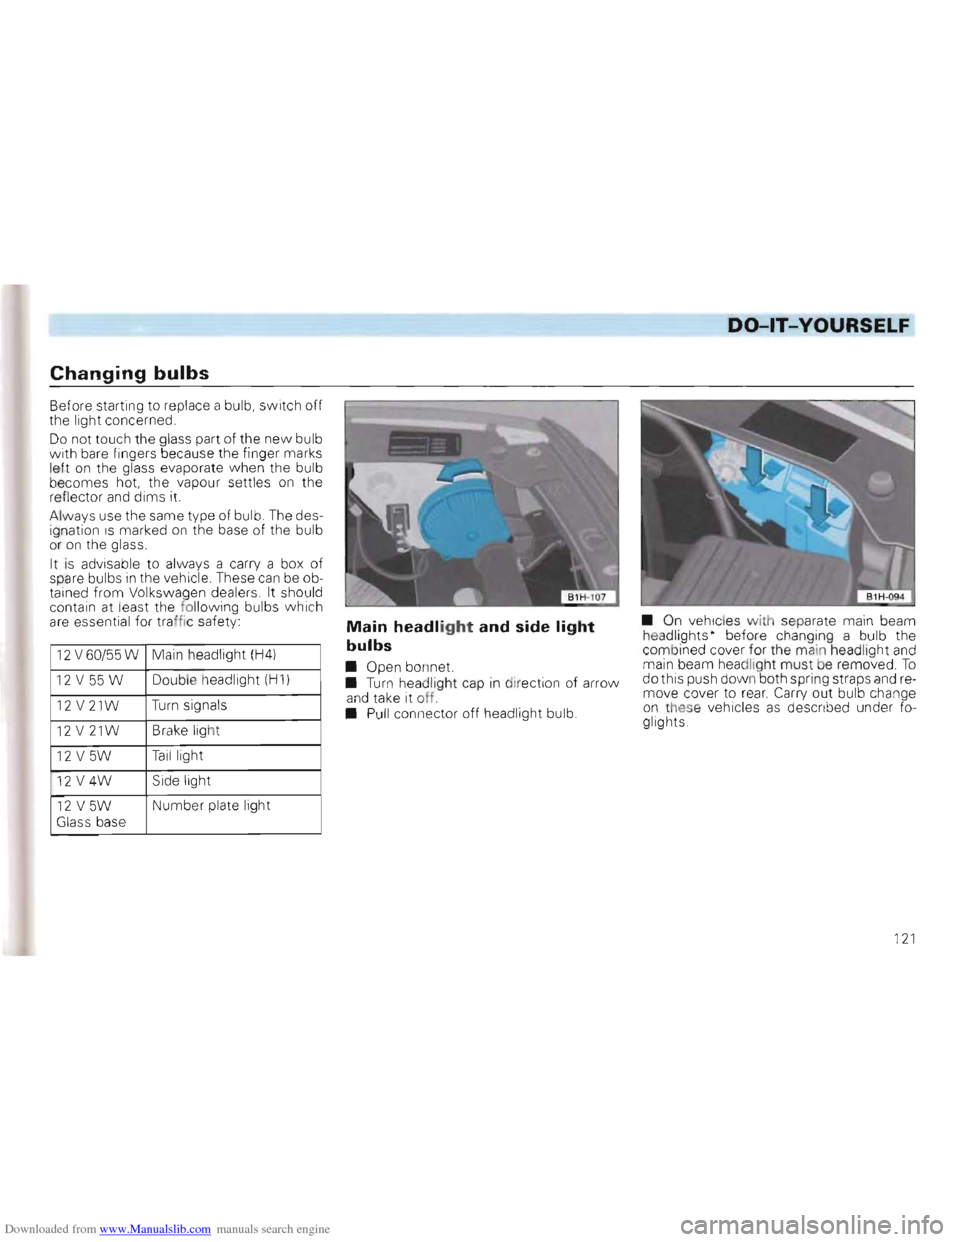
Main headlight and side light
bulbs
• Open bon net.
• Turn hea dligh t cap in di rect ion of arrow
a n d ta ke it off.
• Pull connector
off head light bulb. •
On vehicles
w ith separate main beam
h eadligh ts · before changing a bulb the
com bined cover for the main headlight and main beam headlight must be remo ved. To dothis push down both spring straps and re
move cove r to rear. Carry out bulb change
o n these vehicles as descr ib ed und er fo
glights.
1
21
Page 132 of 156
Downloaded from www.Manualslib.com manuals search engine DO-lT-YOURSELF
• The emergency lights must be switched
on on both vehicles -unless local regula
tions differ.
•
Turn ignition key to "Drive" position so that the steering wheel is free and the turn
signals, horn, and, if necessary, the wind
screen wiper and washer can be used.
•
As the brake servo only works when the
engine is running, considerab ly more pres
sure is required on the brake pedal when
the engine is not running
•
On vehicles with power assisted steer
ing more force is required to turn steering
wheel when engine is not running.
• When there
is no lubricant in the manual
gearbox/automatic gearbox, the vehicle
may
on l y be towed with driving wheels
lifted.
Tow starting
The following points must be
noted when tow starting:
• Before moving off, engage 2nd or 3rd
gear .
• Switc h ignition
on. • As soon as engine starts, depress clutch and move gear lever into neutral to avoid
running into the towing vehicle.
• On vehicles with a catalytic converter the engine must not be started by towing the vehicle in ex
cess of 50 mll. Because then, fuel can pass into the converter and cause damage.
• For technical reasons tow starting a vehicle with an automatic gearbox is not possible.
Towing
When towing vehicles with an automatic gearbox, the following points
must be noted in addition to the details on the previous page :
• Selector lever
at " N". • Do not have the vehicle towed faste r
than 30 mph (50 km/h)
• Do not
tow further than 30 miles (50 km).
If the vehicle has to be towed long dis
tances it mu st be lifted at the front.
Reason: When the engine
is not running ,
the gearbox oi l pump is not working and the
gearbox is not adequately lubricated fo r
high speeds or long distances .
• With a breakdown vehicle the vehicle
may only be suspended at the front.
Reason: If given a rear suspended tow, the
drive shafts turn backwards . The plane tary
gears
in the automatic gearbox then turn at
such high speeds that the gearbox will be severely damaged in a short time .
1) Does not apply to Diese l e ng ines wi h cata
lytic conve rter
Note for the Golf syncro:
• The veh icle can be towed like any two
wheel drive Golf.
• With a recovery vehicle the car
can be
towed with front or rear wheels suspended.
If the vehicle has to be towed with the rear
wheels lifted and the rear wheels cannot
turn freely, one must ensure that the free
wheel
in the rear axle has not been bridged
beforehand by driving vehicle in reverse. To reintroduce the freewheel action the gear
lever must be moved briefly in to 1 st gear
wi th ignition on and then back in to neutral.
1 30
Page 151 of 156
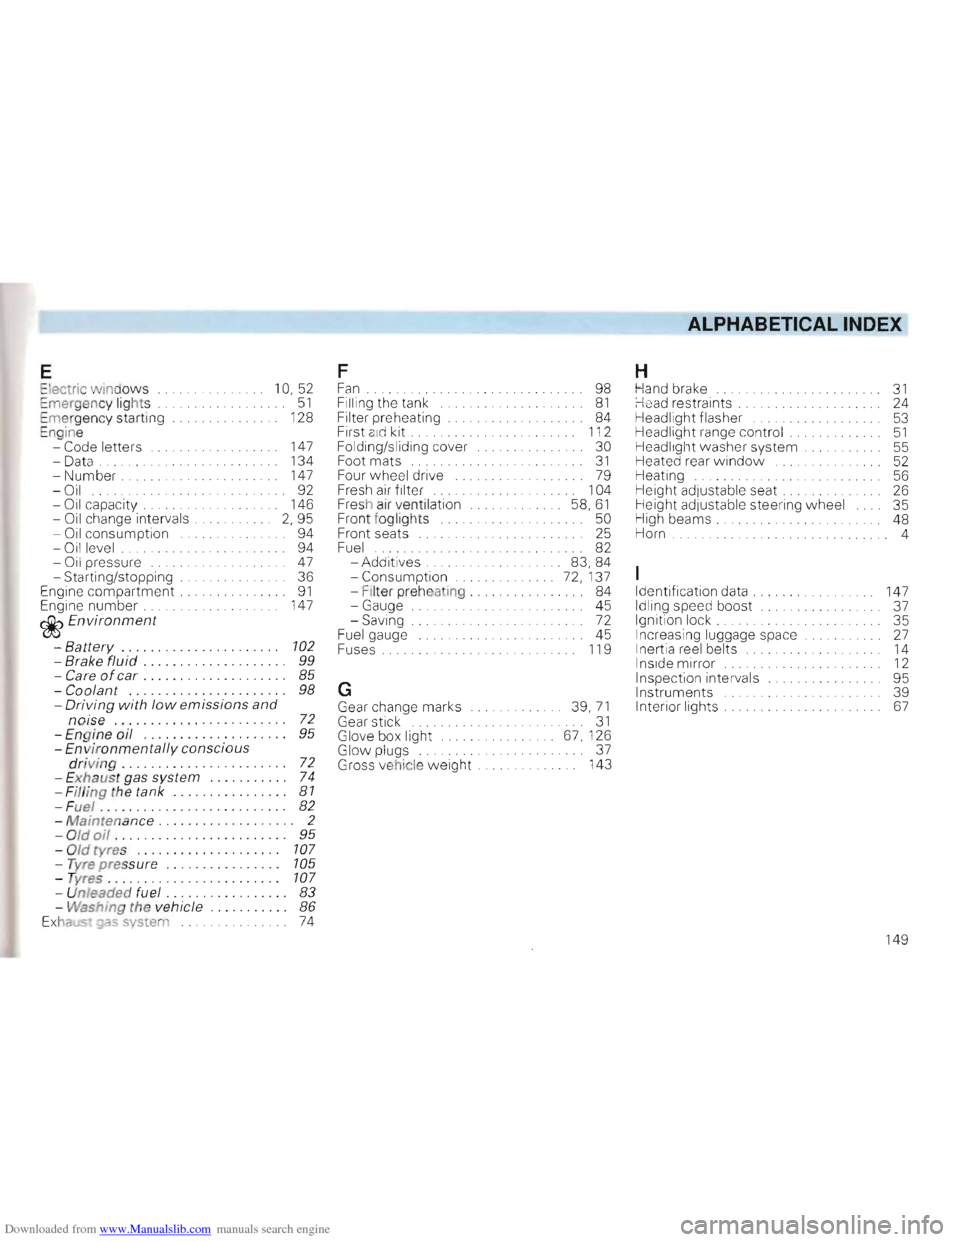
Downloaded from www.Manualslib.com manuals search engine ALPHABETICAL INDEX
E F H Electri
c windows 10.52 Fan . . .. 98 Hand brake 31 Emergency li ght s 51 Filling the tank ...... . . 81 Head restraints .. ............... 24
E me rgency startin g 128
Filter preheating .......... . . 84 Headlight flasher ........ .. . 53 Engine First
aid kit ........... . . . 112 Headlight range control ........... 51 -Code letters 147
Folding/sliding cover 30 Headlig ht washer system
55
- Data 134 Foot mats ............ . 31 Heated rear window 52 -Number 147 Four wheel drive 79 Heating
56 -Oil .. 92 Fresh air filte r ........ . 104 Height adjustable seat. 26
- Oil capacity. 146 Fresh air venti lation
58, 61 Height adjustable steering wheel
35
- Oil change intervals 2.95 Front fogligh ts ........... . .
50 High beams. ........... 48
- Oil consumption
94 Front
seats
25 Horn
4
- Oil level
..... . . .. . . 94 Fuel ........... . . . 82
- Oil pressure 47 -Additives. 83, 84
- Starting/stopping 36 -
Consumption ........ . 72,137 Engine compartment. 91 -Filter preh eating . 84 Identification
data
147
E ngine number. 147 -Gauge
45 Idling speed boost ......... 37 ~Environment -Saving
72 Ignition lock. . . . . . . . . 35
-Battery. . . . . . . . . . . . .
. . . . . . . .. 102 Fuel gauge Fuses. 45
119 Increasing
luggage space
I nertia reel belts ......... 27 14 -Brake fluid. . . . . . . . . . . . . . . . . . .. 99 InSide mirror . . . . . . . . . . . . 12 -Care ofcar. . . . . . . . . . . . . . . . . . .. -Coolant ...................... 85 98 G Inspection intervals
Instruments 95
39
-Driving with low emissions and n
oise......... ............... 72 Gear change marks
Gear stick ....... . . 39, 71 31 Interior
lights 67
-Engine oil .................... -En vironmentally conscious drivin g . . . . . . . . . . . . . . . . . . . . . .. - Exhaust gas system .... . .. . ...
95
72
74
Glove box light .......... .
Glow plugs
Gross vehicle
weight
67,126 37
143
- Filling th e tank ................ 81 -~~.......................... ~ -Maintenance. . . . . . . . . . . . . . . . . .. 2 - Old oil . ....................... 95 - Old tyres .................... 107 - Tyre pressure ................ 105 - Tvres .... . .. . . ............... 107 - Unfeade d fuel. . . . . . . . . . . . . . . .. 83 - Washing th e vehicle ........... 86 Exha..JS. gas system 74
149