1993 VOLKSWAGEN GOLF check engine
[x] Cancel search: check enginePage 10 of 156
Downloaded from www.Manualslib.com manuals search engine CONTROLS AND EQUIPMENT
Anti-theft warning
system*
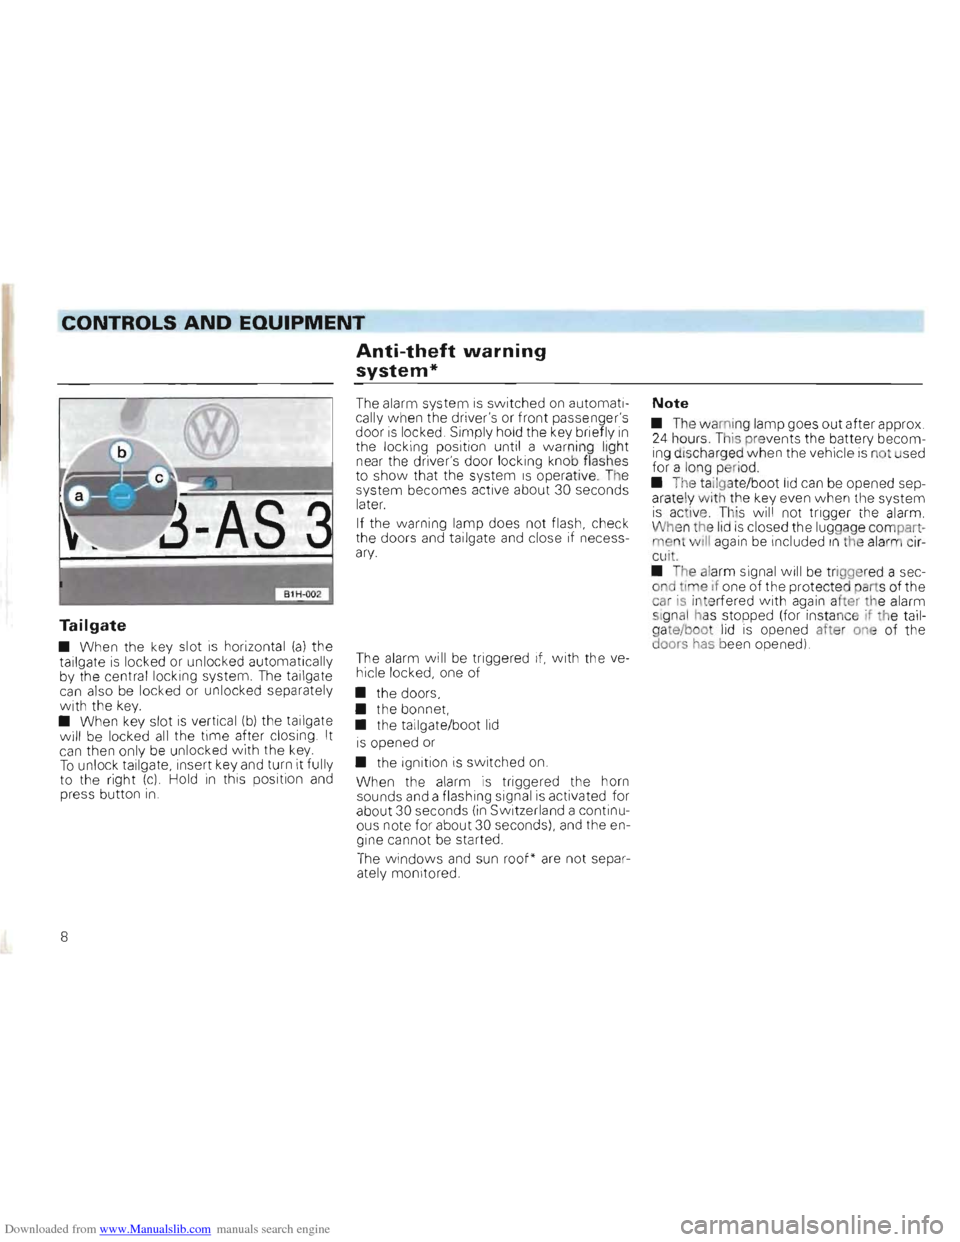
Tailgate
• When the key slot is horizont al (a) the
tailgate is locked or unloc ked automatically
by the central locking system. The tallgate can also be locked or unloc ked separately with the key. • When key slot is vertical (b) the tailgate
will be locke d all the time after closing . It can the n only be unlocked with the key. To unlock tailgate , insert key and turn It fully
to the right (c) Hold in this position and press button in .
The alarm system is switched on automatically when the driver's or front passenger's door is locked. Simply hold the key briefly in the locking position until a warni ng light
near the driver's door locking knob flashes
t o show that the system IS operative. The
system becomes active about 30 seconds
lat
er.
If the warning lamp does not flash, check
the doors and tailgate and close if necessary.
The alarm will be triggered if, with the ve
hicle locked, one of
• the doors,
• the bonnet,
• the tailgate/boot
lid
is opened or
• the ignition is switched
on.
When the alarm is triggered the horn
sounds and a flashi ng signal is activated for
about 30 seconds (in Switz erland a continu
ous note for about 30 seconds), and the en
gine cannot be started .
The windows and sun roof* are not separ
ately monitored .
Note
• The wa mi ng lamp goes out after approx . 24 hours. T hiS pre ven ts the battery becom
ing disc harged when the vehicle is not used for a long peri od
• The
tailgate/boo t lid can be opened sep
arate ly wi th the key even w hen the system is active . This wi ll not trigger the alarm .
Whe n the lid is closed the luggag e compartment wili again be included In the alarm circu it.
•
The alarm signal will be triggered a sec
ond time if one of the protecte d part s of the
car
is inte rfered w ith again aher th e alarm
si gnal has stopped (for insta nce if the tailgate/boo t lid is opened after one of the
doors has been opened)
8
Page 16 of 156
Downloaded from www.Manualslib.com manuals search engine CONTROLS AND EQUIPMENT
--------------------------------------------------------------------------------~
General notes
• The belt must not be twisted.
• Two persons (including children) must never be secured with one belt.
• The be lts give maximum prot ection only in the correct seat position -see page 25.
• The belt shou
ld not be worn over hard or
breakable articles (glasses, bal l pens etc.) because this can cause injury to the body .
• Loose, bulky clothing (e.g. overcoats
over Jackets) affects the
fit and funct ion of
the belts .
• The lock tongue may only be inserted
into the lock part belonging to the approp
riate seat otherwise, the protect ive effect is impaired.
• The belts
must be kep t clea n otherwise
the redactors may not work prope rly (see
a lso" Care of car" section) •
The
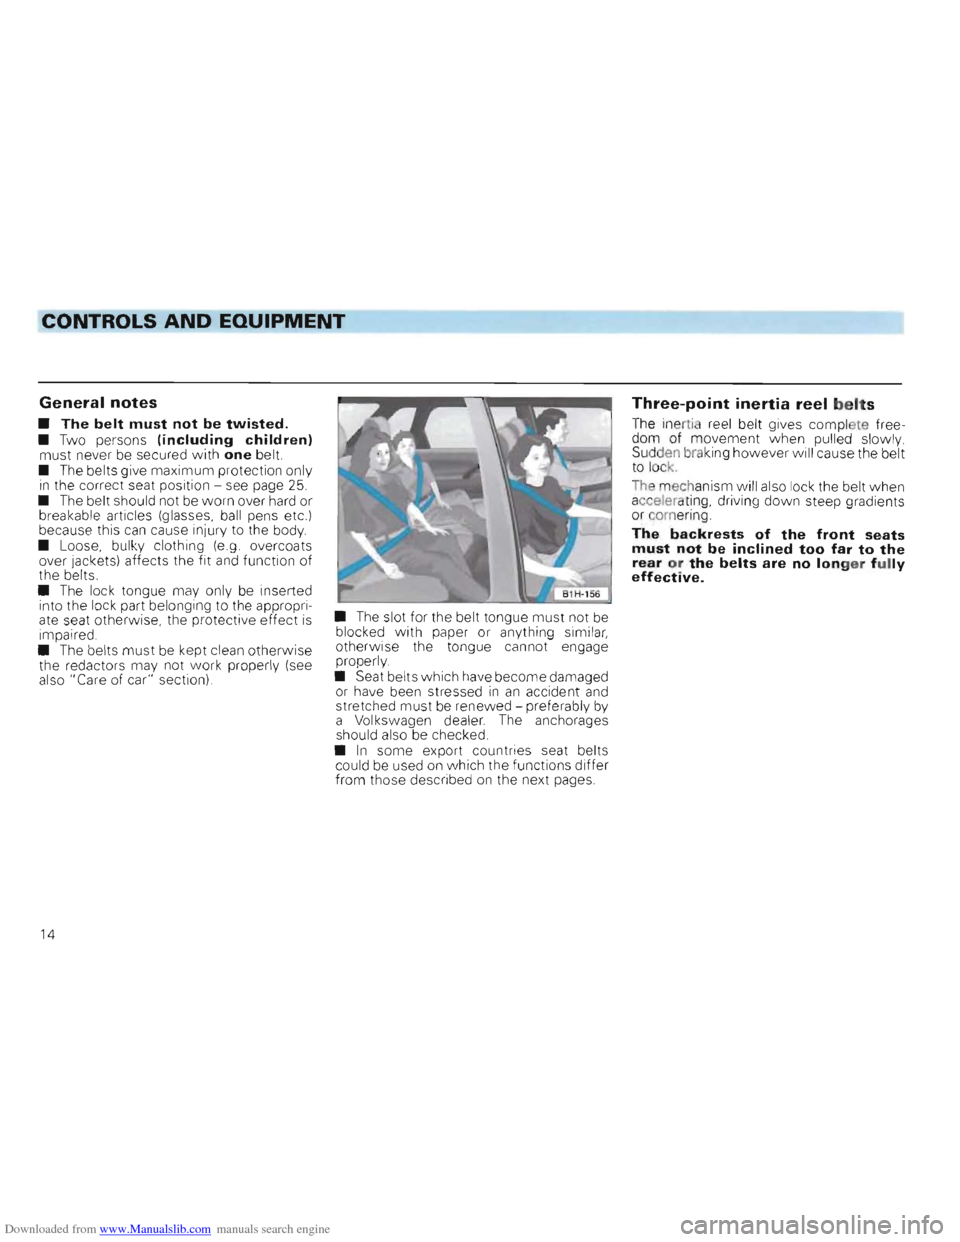
slot for the belt tongue must not be
blocked with paper or anything similar, otherwise the tongue cannot engage
proper ly.
• Seat belts which have become damaged
or have been stressed in an accident and
stretched must be renewed -preferab ly by
a
Vol kswagen dealer. The anchorages
should also be checked .
•
In some export countries seat belts
co uld be used on w hich the functio ns differ
from those described on the next pages.
Three-point inertia reel belts
The ine rtia ree l belt gives complete free
do m o f mov ement when pul[ed slowly.
Sud den brak ing
however will cause the belt
to loc k.
Th e mec hanism w
il[ a lso lock the belt w hen acc eler ati ng, driving down steep gradients
o r cornering.
The backrests of the front seats must not be inclined too far to th e rear or the belts are no longer fully effective.
14
Page 17 of 156
Downloaded from www.Manualslib.com manuals search engine L-___________________________________________________~~~_CONTROLS AND EQUIPMENT
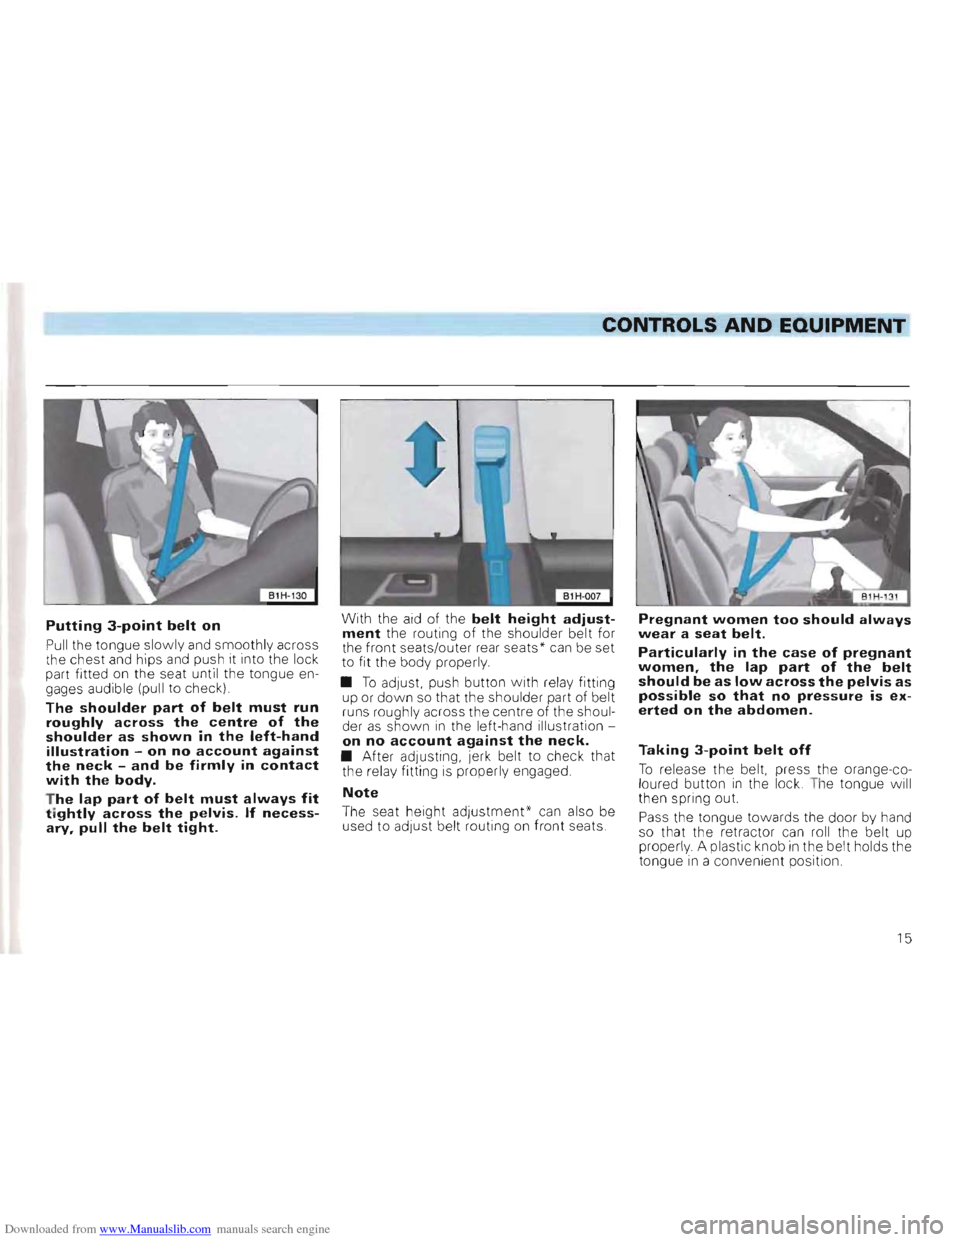
Putting 3-point belt on
Pull the tongue slowly and smoothly across
t he chest and hips and push it into the lock
part fitted on the
seat unti l the tongue en
gages audible (pull to c heck)
The shoulder part of belt must run roughly across the centre of the shoulder as shown in the left-hand illustration -on no account against the neck -and be firmly in contact with the body.
T he lap part of belt must always fit tightly across the pelvis. If necessary, pull the belt tight.
With the aid of the belt height adjustment the routing of the shou lder belt for
the fron t seats/outer rear seat s * can be set
t o fit the body properly.
• T o
adJUSt. push button with re la y fitting
up or down so that the shoulder part of be lt
runs rough ly across the cen tre of the shoul
der as shown i n the le ft-h and illustration on no account against the neck. • After adjustin g, jerk belt to check that
the relay fitting is properly engaged.
Note
The seat height adjustment' can also be
used to adju st be lt routing on front seats.
Pregnant women too should always
wear a seat belt.
Particularly in the case of pregnant
women, the lap part of the belt
should be as low across the pelvis as
possible so that no pressure is ex
erted on the abdomen.
Taking 3-point belt off
To re lease the belt, press the orange-co
l oured button in the lock . T he to ngue will
th en s pring out.
Pass the tongue
towards the door by hand
so that the retractor can roll the belt up
prope
rly . A plastic knob in the belt holds the
t o ngue in a convenient position .
15
Page 20 of 156
Downloaded from www.Manualslib.com manuals search engine CONTROLS AND EQUIPMENT
Airbag-System*
Vehicles with Airbag System for the driver and passenger can be recognized by an inscription "AI RBAG" on the steering wheel padded plate and on the right end of the dash panel.
Supplementary to the three point seat belts the Airbag System offers additional protection for the driver's and passenger's head and chest In a serious
frontal collision.
Apart
from its normal protective function the seat belt also has the task of keeping the
driver or passenger in such a position so
that the Airbag can offer maximum protec
tion in the case of a frontal collision.
The Airbag system will not be triggered for:
• Side collisions
• Rear collisions
•
Rol l i ng-over
• Minor frontal collisions
Therefore the seat belts should always be used not only for reasons of statutory regulations, but also for safety reasons!
Essentially the system consists of
• The electronic control and monitoring
unit
• Both airbags (air sack
with gas gener
ator) with gas generator for the:
- Driver (in steering wheel),
- Passenger (in right of dash panel)
• A
warning lamp in the dash panel -see
page 49.
The functional readiness of the Airbag
System is electronically monitored.
Each
time the ignition is switched on the
warning lamp lights for about 3 seconds
(self diagnosis).
The system has a fault, if
• When switching on the ignition the warn ing lam p does not light.
•
After swi tching on the ignition the warn
ing la m p does not extinguish after about 3
second s
• The warning lamp
comes on or flickers
du rin g the Journey.
Attention
When a fault is present the sys
tem should be checked by a
Volkswagen dealer immediately.
Otherwise there is the danger
that the Airbag will not be acti
vated in the case of an accident.
18
Page 25 of 156
Downloaded from www.Manualslib.com manuals search engine CONTROLS AND EQUIPM ENT
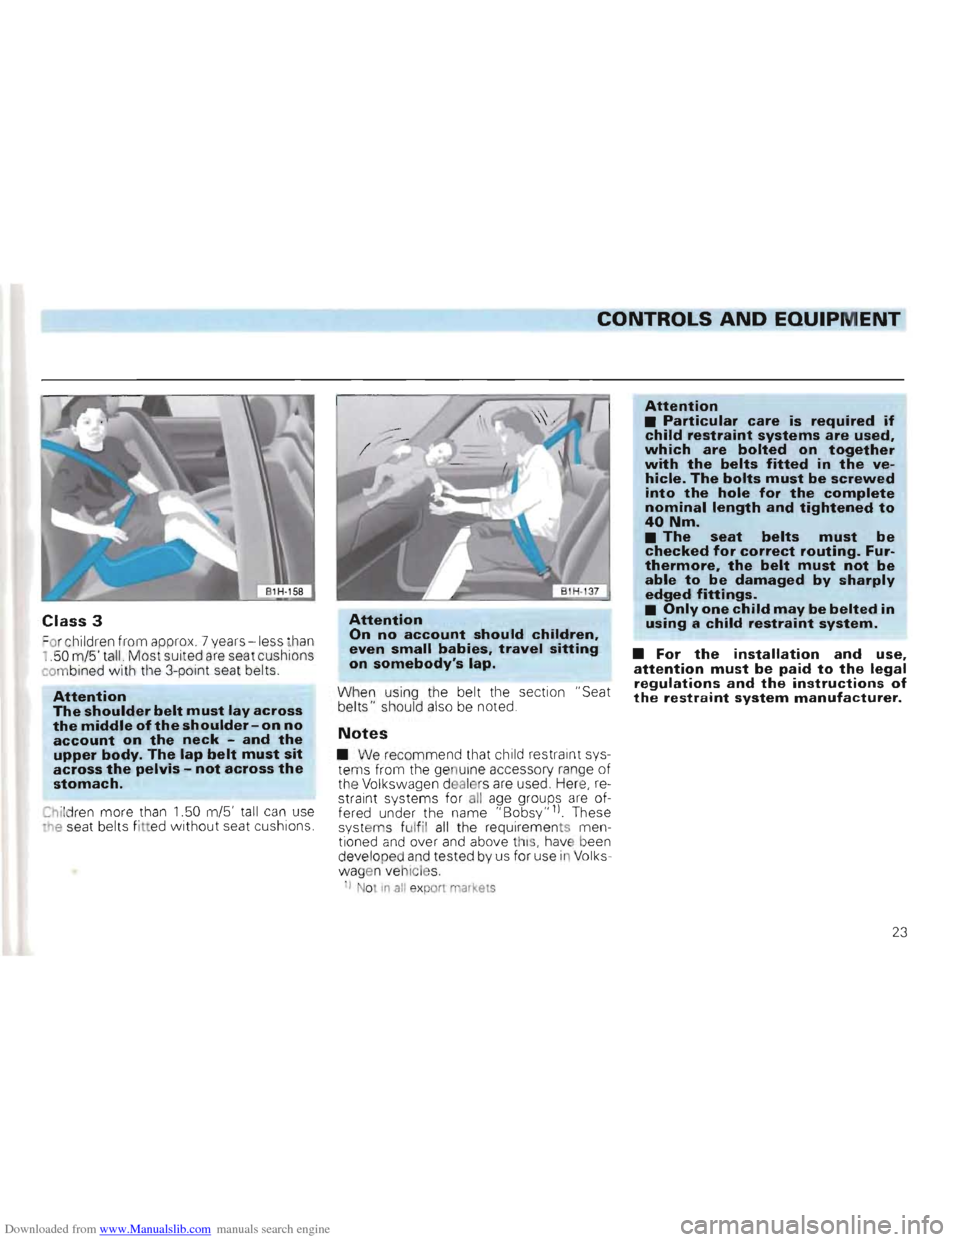
Cla ss 3
=o r c h ild ren from approx . 7 years -les s than i .50 m/5' tall. Most suited are seat cushions
co mbined with the 3-po int seat belts.
Attention The shoulder belt must lay across the middle of the shoulder-on no account on the neck -and the upper body. The lap belt must sit across the pelvis -not across the stomach.
Child ren more than 1.50 m/5' tall can use "lle seat belt s fitted without seat cushions.
Attention
On no account should children,
even small babies, travel sitting
on somebody's lap.
When using the belt the section "Seat
belts" should also be noted.
Notes
• We recommend that child restraint sys
tems from the genuine access ory range of
th e Volkswag en dealer s are used. Here, re
straint systems for all age groups are of
f e red under the name "Bobsy"ll. These
syst ems fu lfil all the requirem ent s mentioned and over and ab ove this, hav e been
develope d and tested by us for use ill Volks
wag en ve hicl es.
I) Not in all e xport market s
Attention • Particular care is required if child restraint systems are used, which are bolted on together with the belts fitted in the v ehicle. The bolts must be screwed into the hole for the complete nominal length and tightened to 40Nm. • The seat belts must be checked for correct routing. Furthermore, the belt must not be able to be damaged by sharply edged fittings. • Only one child may be belted in u sing a child restraint system.
• For the installation and use, atte ntio n must b e paid to t he legal
regulations and the instruction s of the restraint system manufactu rer.
23
Page 47 of 156
Downloaded from www.Manualslib.com manuals search engine CONTROLS AND EQUIPMENT
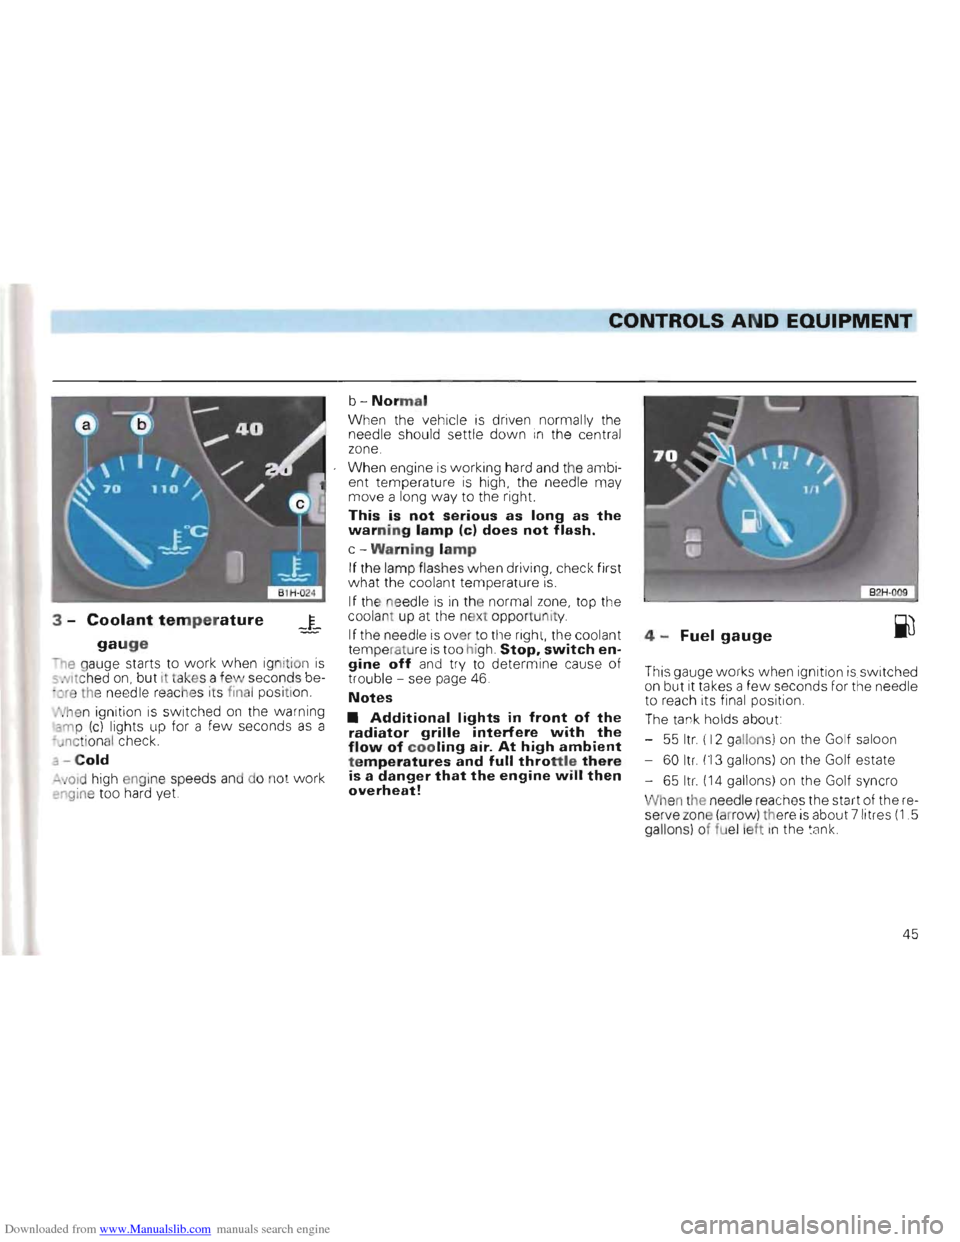
3 -Coolant temperature _~_
gauge
-I
' he n ignition
is switched on the warning amp (c) light s up for a few seconds as a
- u ncti onal check.
3 -Cold
~old high engin e speeds and do no t work engine too hard yet.
b-Normal
When the ~ehicle is dri~en normally the
needle should settle down in the central
zone.
When engine
is working hard and th e ambi
ent temperature is high, the needle may
move a long way to the right.
This is not serious as long as the warning lamp (c) does not flash.
c -Warning lamp
If the lamp flashes when driving , check first
what the coolant temperature is.
If th e needle
is in th e normal zone, top the
coolan t up at the next opportu nity.
If the needle is over to th e rig ht, the coolant
temperat ure is to o high. Stop. switch engine off an d try to determine cause of trouble -see page 46 .
Notes
• Additional lights in front of the radiator grille interfere with the flow of cooling air. At high ambient temperatures and full tt:arottl~ there is a danger that the engme Will then overheat!
4 -Fuel gauge
This gauge works when ign ition is. switched
on but it takes a few seconds for the need le
to reach its fina l posit ion.
The ta holds about
-55 ItL (1 2 gallons) on the Golf saloon
- 60
Itr. (1 3 gallons) on the Golf estat e
- 65 Itr.
(14 gallons) on the Golf syncro
W
hen the needle reaches the start of the re
serve zone (arrow) th ere is about 7 litres (1. 5
gallons) of fue l left in the tank .
45
Page 48 of 156
Downloaded from www.Manualslib.com manuals search engine CONTROLS AND EQUIPMENT
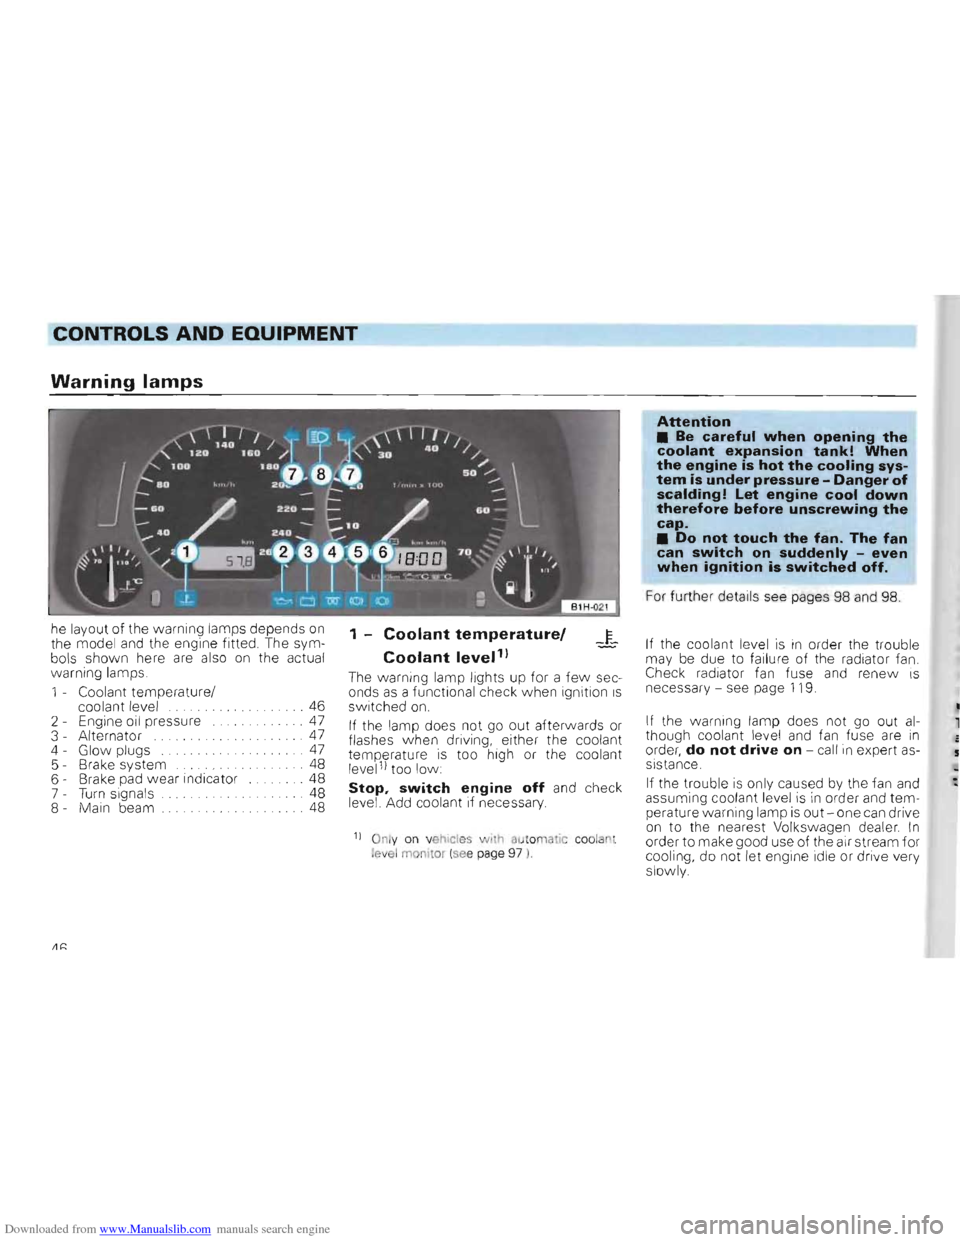
Warning lamps
Attention • Be careful when opening the coolant expansion tank! When the engine is hot the cooling system is under pressure -Danger of scalding! Let engine cool down therefore before unscrewing the cap_
• Do not touch the fan. The fan can switch on suddenly -even when ignition is switched off.
For furthe r details see pages 98 and 98.
1 -Coolant temperaturel _~_ If the coolant le vel is in orde r the trouble Coolant level') may be due to failure of the radiato r fan.
Check radiator fan fuse and renew is
T he wa rni ng lamp lights up for a few sec
necessary -see page 119.onds as a functional check when ign ition IS coo lant level .
. 46 switched on.
2 - Engine oil pressure ... .. 47 If the warning lamp does not go out al
If the lamp does not go out afterwards or 3 -Alternator . 47 though coolant level and fan fuse are inflashes when driving, either the coolant 4 -Glow plugs ... 47 orde r, do not drive on -call in expe rt astempe ratur e is too high or the coolant 5 -Brake system .. 48 sistance
.
level1 l too low: 6 -Brake pad wear indicator .48 If the trouble is only caused by the fan andStop, switch engine off and check7 -Turn signals 48
assuming coolant level is in order and temlevel . Add coolant if necessary . 8 -Main beam .
48
perature warning lamp is out -one can drive on to the nearest Volkswagen dealer. In 11 Only 011 vehicl es wi h a t omatic coolant order to make good use of the air stream for level lllonit or (see page 97 l. cooling , do not let engine idle or drive very
slowly .
he
layout
of the warning lamps depends on the model and the engine fitted. The sym
bols shown here are also on the actual
warn ing lamps.
1 -Coolant temperature /
Page 49 of 156
Downloaded from www.Manualslib.com manuals search engine CONTROLS AND EQUIPMENT
2 -Engine oil pressure ~
e wa rning lamp flashes when ignition is :ched on. the lamp must go out when ,=~g ne has started.
, 'Il e warning lamp does not go out or
ash es when driving -a buzzer also sounds
-' e!,gine spe,eds above 2000 rpm -stop, switch engine off, check oil level and if ecessary, add oil -see page 94.
- - he lamp comes
on although the oil level 5 n order, do not drive on. Do not even "'., t he engine at idling speed -call in expert ~slstance.
-du ring the Journe y the engine is operated
a : a speed less than idling speed, it ca n ~ appen that the oil warning lamp lights up. "crease engine speed by accelerating or :'langing down .
Note Th e oil pressure warning lamp is not an oil level indicator. The oil level shou.'d therefore be checked at reg, ular Intervals, preferably every time the fuel tank is filled.J
3 -Alternator
The warning lamp comes on w hen the igni
tion IS sWitched on and must go out when
the engine is started .
The alternator
is driven by a long-life ribbed
belt.
If the warning lamp lights during the
Journey ,
stop, switch off engine and
check ribbed belt.
If
t~e ribbed belt is loose or broken, do not
drive on -the coolant pump is no longer
being driven. The ribbed belt must be
checked/renewed by the next Volkswagen
dealer.
If the ribbed belt
is not loose or broken, one
can normally drive on to the next Vo lks
wag en dea ler. However as the battery is
then discharging co ntinuously , all electrical
consumers which are not absolutely essen
tial should be switched off.
4 -Glow plugs
(Diesel engines only)
When the engine
is cold the w arning lamp
come s on when key IS turned to Drive posi
tion (ignition on)
If the warning lamp does not come on, there IS a defectln the glow plug system -call in expert assistance.
When the lamp goes out, start the engine
Immediately -see page 37.
As the 55 kWDiesel engine glow period be
gins automatically after closing the drivers'
door,
It can happen that after switching to
the driving position (Ignition on) with a cold
engine, that the glow plug warning lamp
does not light up . The engine
can be started
straight away
When the engine
is warm the glow plug
lamp does not come on -the engine ca n be started straight away
Note
If while driving a fault occurs in the engine
management system of the 66 kW Diesel
engine, this
is indicated by a flashing warnIng lamp The engine must be checked by a
Volkswagen dealer as soon as possible.
47