Page 2009 of 2438
If equipped, unplug torque converter clutch
plug, located near the dipstick.
CAUTION: Raise vehicle. Remove front wheels. Refer
to Suspension, Group 2 to remove or install wheel
hub nut and both drive shafts. Remove torque converter dust cover. Mark
torque converter and drive plate with chalk, for
reassembly. Remove torque converter mounting
bolts.
Fig. 1 Remove Upper and Lower Oil Cooler Hoses
Fig. 2 Engine Support Fixture
Fig. 3 Remove Bell Housing Upper Bolts
Fig. 4 Remove or Install Left Splash Shield
Fig. 5 Remove or Install Access Plug in Right Splash Shield to Rotate Engine Crankshaft
Fig. 6 Remove or Install Wire to Neutral/Park Safety Switch
Ä TRANSAXLE 21 - 49
Page 2011 of 2438
washed in a suitable solvent, then dried by com-
pressed air. Do not wipe parts with shop towels. All
mating surfaces in the transaxles are accurately ma-
chined; therefore, careful handling of all parts must
be exercised to avoid nicks or burrs. Remove all old sealant before applying new MO-
PAR tAdhesive Sealant.
Use only MOPAR tAdhesive Sealant when install-
ing oil pan. Put MOPAR tAdhesive Sealant on the oil pan
flange (Fig. 2) and on all oil pan bolts (underside of
bolt head).
Fig. 12 Raise or Lower Transaxle
Fig. 13 Pry Engine for Clearance
Fig. 1 Transaxle Oil Pan Bolts
Fig. 2 Transaxle Oil Pan
Fig. 3 Oil Filter Screws
Ä TRANSAXLE 21 - 51
Page 2012 of 2438
Remove or install neutral starting and back-up
lamp switch.
Measuring input shaft end play before disassembly
will usually indicate when a thrust washer change is required, (except when major parts are replaced). The
thrust washer is located between input and output
shafts. Attach a dial indicator to transaxle bell housing
with its plunger seated against end of input shaft
(Fig. 9). Move input shaft in and out to obtain end play
reading. End play specifications are 0.19 to 1.50 mm
(.008 to .060 inch). Record indicator reading for reference when reas-
sembling the transaxle.
Fig. 4 Oil Filter
Fig. 5 Remove or Install Parking Rod E-Clip
Fig. 6 Parking Rod
Fig. 7 Valve Body Attaching Bolts
Fig. 8 Valve Body and Governor Tubes
21 - 52 TRANSAXLE Ä
Page 2013 of 2438
Fig. 9 Measure Input Shaft End Play
Fig. 10 Loosen Lock Nut and Tighten Kickdown Band Adjusting Screw
Fig. 11 Pump Attaching Bolts
Fig. 12 Install Tool C-3752 with Adapters L-4437
Fig. 13 Oil Pump with No. 1 Thrust Washer
Fig. 14 Oil Pump Gasket
Ä TRANSAXLE 21 - 53
Page 2017 of 2438

All subassemblies should be inspected and/or recon-
ditioned when transaxle recondition is performed. Re-
fer to appropriate subassembly in this section for
recondition procedure.
ASSEMBLY SUBASSEMBLY INSTALLATION
When rebuilding, reverse the above procedure.
VALVE BODY-RECONDITION
Tighten all valve body screws to 5 Newton-
meters (40 in.lbs.) Do not clamp any portion of valve body or transfer
plate in a vise. Any slight distortion of the aluminum
body or transfer plate will result in sticking valves,
excessive leakage or both. When removing or in-
stalling valves or plugs, slide them in or out
carefully. Do not use force. TAG ALL SPRINGS AS THEY ARE REMOVED
FOR REASSEMBLY IDENTIFICATION.
CLEANING AND INSPECTION
Allow all parts to soak a few minutes in a suitable
clean solvent. Wash thoroughly and blow dry with
compressed air. Make sure all passages are clean and
free from obstructions. Inspect manual and throttle valve operating levers
and shafts for being bent, worn or loose. If a lever is
loose on its shaft, it should be replaced. Do not attempt
to straighten bent levers. Inspect all mating surfaces for burrs, nicks and
scratches. Minor blemishes may be removed with cro-
cus cloth, using only a very light pressure. Using a
straightedge, inspect all mating surfaces for warpage
or distortion. Slight distortion may be corrected, using
a surface plate. Make sure all metering holes in steel
plate are open. Using a pen light, inspect bores in valve
body for scores, scratches, pits and irregularities. Inspect all valve springs for distortion and col-
lapsed coils. Inspect all valves and plugs for burrs,
nicks, and scores. Small nicks and scores may be re-
moved with crocus cloth, providing extreme care is
taken not to round off sharp edges. The sharpness of
these edges is important. They prevent foreign mat-
ter from lodging between valve and valve body, thus
reducing possibility of sticking. Inspect all valves
and plugs for freedom of operation in valve body
bores. When bores, valves, and plugs are clean and dry,
the valves and plugs should fall freely in the bores.
The valve body bores do not change dimensions with
use. Therefore, a valve body that was functioning
properly when vehicle was new, will operate cor-
rectly if it is properly and thoroughly cleaned. There
is no need to replace valve body unless it is damaged
in handling.
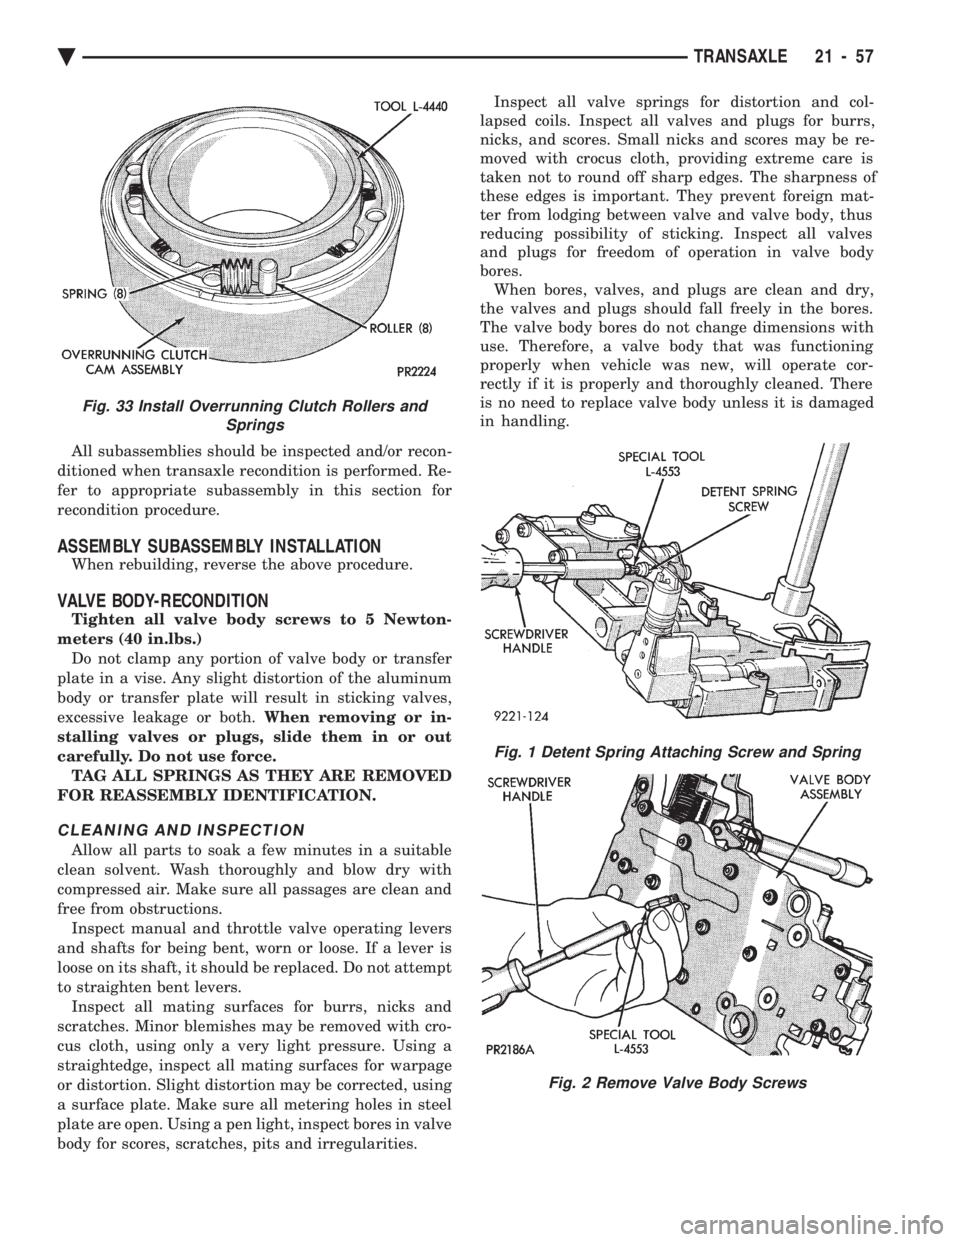
Fig. 1 Detent Spring Attaching Screw and Spring
Fig. 2 Remove Valve Body Screws
Fig. 33 Install Overrunning Clutch Rollers and Springs
Ä TRANSAXLE 21 - 57
Page 2021 of 2438
PUMP OIL SEAL-REPLACEMENT
The pump oil seal can be replaced without remov-
ing the pump and reaction shaft support assembly
from the transaxle case. (1) Screw seal remover Tool C-3981 into seal (Fig.
1), then tighten screw portion of tool to withdraw the
seal.
(2) To install a new seal, place seal in opening of
the pump housing (lip side facing inward). Using
Tool C-4193 and Handle Tool C-4, drive new seal into housing until tool bottoms (Fig. 2).
Fig. 15 Shift Valves and Shuttle Valve
Fig. 16 Remove Pump Oil Seal
Fig. 17 Install Pump Oil Seal
Ä
TRANSAXLE 21 - 61
Page 2022 of 2438

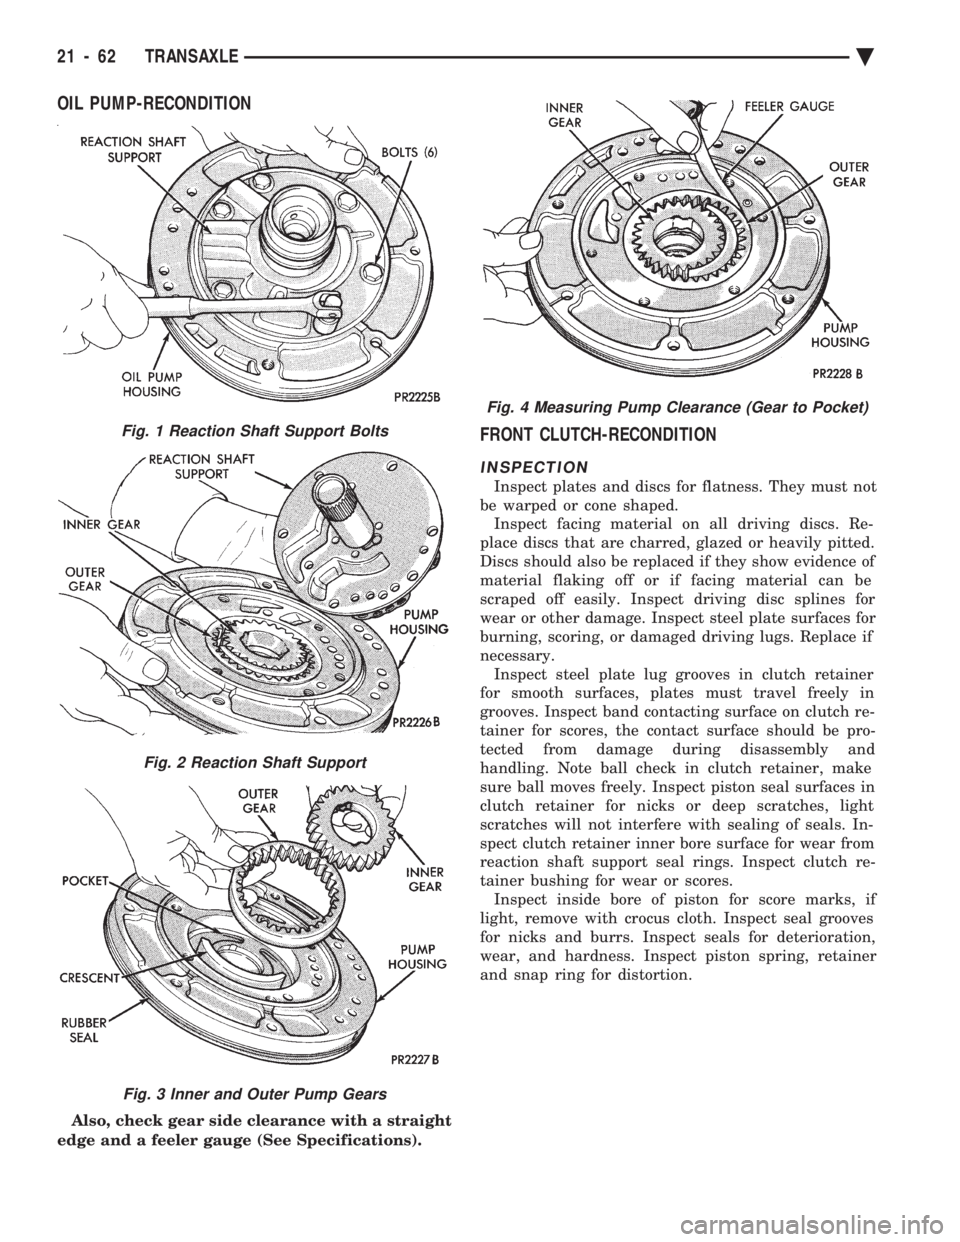
OIL PUMP-RECONDITION
Also, check gear side clearance with a straight
edge and a feeler gauge (See Specifications).
FRONT CLUTCH-RECONDITION
INSPECTION
Inspect plates and discs for flatness. They must not
be warped or cone shaped. Inspect facing material on all driving discs. Re-
place discs that are charred, glazed or heavily pitted.
Discs should also be replaced if they show evidence of
material flaking off or if facing material can be
scraped off easily. Inspect driving disc splines for
wear or other damage. Inspect steel plate surfaces for
burning, scoring, or damaged driving lugs. Replace if
necessary. Inspect steel plate lug grooves in clutch retainer
for smooth surfaces, plates must travel freely in
grooves. Inspect band contacting surface on clutch re-
tainer for scores, the contact surface should be pro-
tected from damage during disassembly and
handling. Note ball check in clutch retainer, make
sure ball moves freely. Inspect piston seal surfaces in
clutch retainer for nicks or deep scratches, light
scratches will not interfere with sealing of seals. In-
spect clutch retainer inner bore surface for wear from
reaction shaft support seal rings. Inspect clutch re-
tainer bushing for wear or scores. Inspect inside bore of piston for score marks, if
light, remove with crocus cloth. Inspect seal grooves
for nicks and burrs. Inspect seals for deterioration,
wear, and hardness. Inspect piston spring, retainer
and snap ring for distortion.
Fig. 4 Measuring Pump Clearance (Gear to Pocket)
Fig. 1 Reaction Shaft Support Bolts
Fig. 2 Reaction Shaft Support
Fig. 3 Inner and Outer Pump Gears
21 - 62 TRANSAXLE Ä
Page 2040 of 2438
CAUTION: Side gear end play must be within .001 to
.013 inch. Four select thrust washers are available: .032,
.037, .042, and .047 inch.DETERMINING SHIM THICKNESS
Shim thickness need only be determined if any of
the following parts are replaced:
² Transaxle case
² Differential carrier
² Differential bearing retainer
² Extension housing
² Differential bearing cups and cones
Refer to Bearing Adjustment Procedure in rear
of this section to determine proper shim thickness for
correct bearing preload and proper bearing turning
torque.
When rebuilding, reverse the above procedure.
Fig. 25 Differential Bearing Retainer
Fig. 26 Install Bearing Cup
Fig. 22 Remove Oil Seal
Fig. 23 Install New Oil Seal
Fig. 24 Remove Bearing Cup
21 - 80 TRANSAXLE Ä