1991 MITSUBISHI ECLIPSE stop start
[x] Cancel search: stop startPage 308 of 1216

9-24ENGINE - Service Adjustment Procedures
ENGINE 4.8L Engine>
SERVICE ADJUSTMENT PROCEDURES -
CHECKING COMPRESSION PRESSURENOSFFAI
(1) Before checking compression, ensure that engine oil, the
starter motor, and battery are all in good condition.
(2) Start the engine and wait until engine coolant temperature
has risen to
85-95°C (185-205°F).
(3) Stop the engine and pull the spark plug cables.
(4) Remove the spark plugs.
(5) Crank the engine to remove any foreign objects in the
cylinders.Caution
Cover the spark plug holes with shop towel, etc., in
order to keep expelled foreign objects from flying out,
and keep away from the holes. When measuring
compression with water, oil, or fuel having entered the
cylinder through a crack, etc., these will come flying
out of the spark plug hole hot and fast, so be sure to
take the proper precautions.
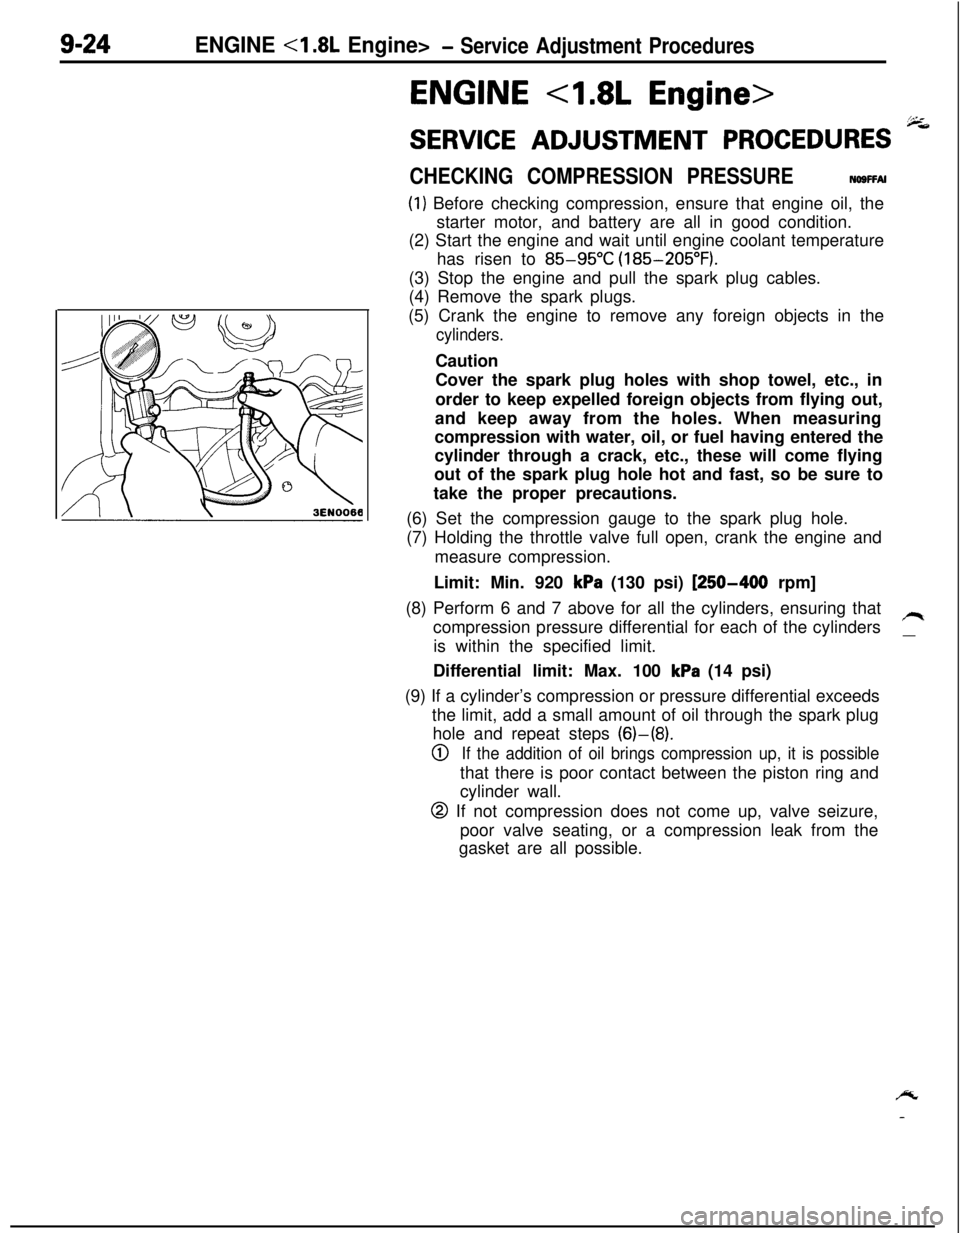
(6) Set the compression gauge to the spark plug hole.
(7) Holding the throttle valve full open, crank the engine and
measure compression.
Limit: Min. 920
kPa (130 psi) [250-400 rpm]
(8) Perform 6 and 7 above for all the cylinders, ensuring that
compression pressure differential for each of the cylinders
/Iis within the specified limit.
__Differential limit: Max. 100
kPa (14 psi)
(9) If a cylinder’s compression or pressure differential exceeds
the limit, add a small amount of oil through the spark plug
hole and repeat steps (6)-(8).
0If the addition of oil brings compression up, it is possiblethat there is poor contact between the piston ring and
cylinder wall.
@ If not compression does not come up, valve seizure,
poor valve seating, or a compression leak from the
gasket are all possible.
/y
-
Page 358 of 1216

9-74ENGINE <2.0L DOHC Engine>- Service Adjustment Procedures
ENGINE <2.0L DOHC Engine>
SERVICE ADJUSTMENT PROCEDURES pi
CHECKING COMPRESSION PRESSURENOSFFAH(1) Before checking compression, ensure that engine oil, the
starter motor, and battery are all in good condition.
(2) Start the engine and wait until engine coolant temperature
has risen to
85-95°C (185-205°F).
(3) Stop the engine and pull the spark plug cables.
(4) Remove the spark plugs.
(5) Crank the engine
to. remove any foreign objects in the
cylinders.
Caution
Cover the spark plug holes with shop towel, etc., in
order to keep expelled foreign objects from flying out,and keep away from the holes. When measuring
compression with water, oil, or fuel having entered the
cylinder through a crack, etc., these will come flying
out of the spark plug hole hot and fast, so be sure to
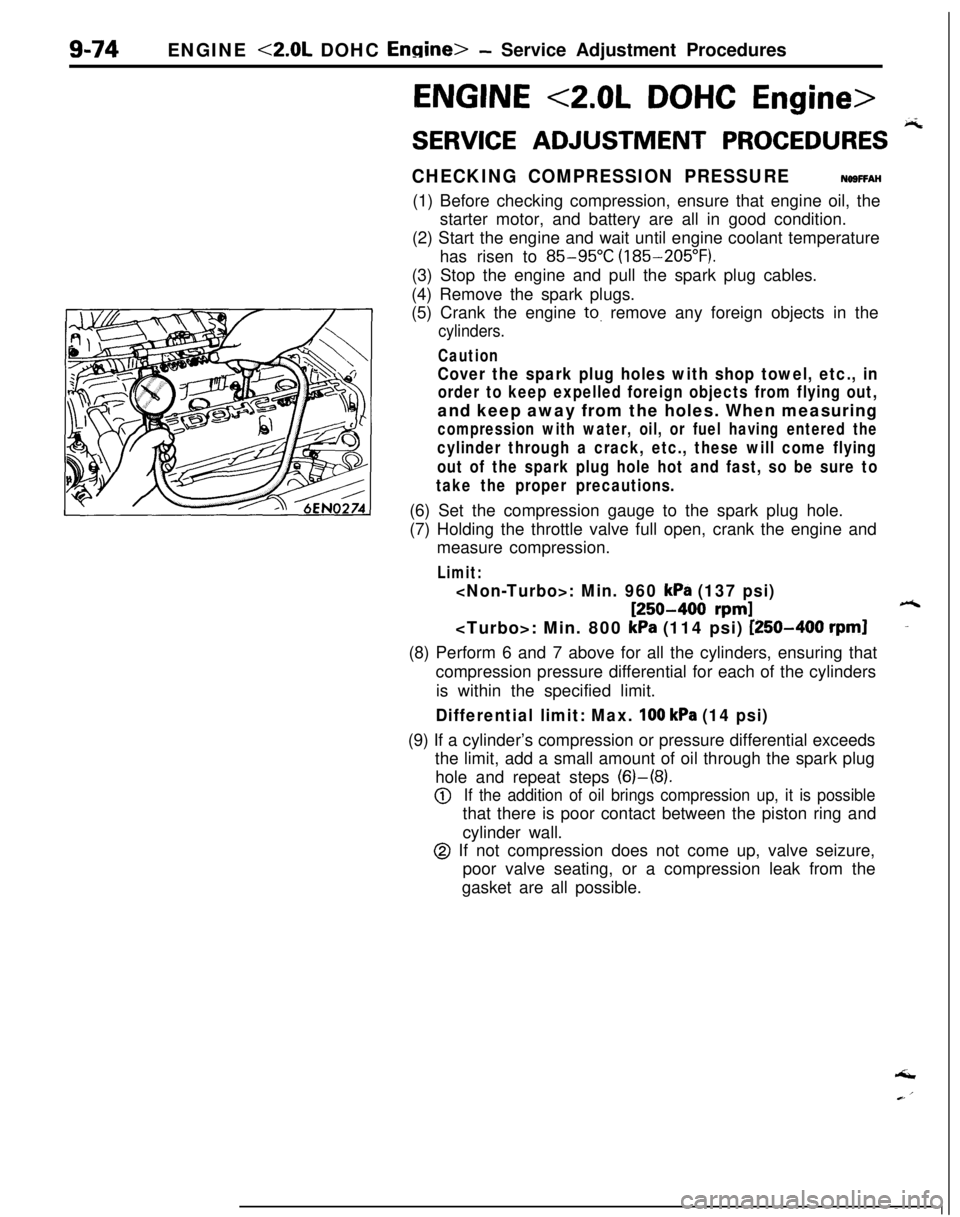
take the proper precautions.(6) Set the compression gauge to the spark plug hole.
(7) Holding the throttle valve full open, crank the engine and
measure compression.
Limit:
[250-400 rpm]6
kPa (114 psi) [250-400 rpml-(8) Perform 6 and 7 above for all the cylinders, ensuring that
compression pressure differential for each of the cylinders
is within the specified limit.
Differential limit: Max. 100 kPa (14 psi)(9) If a cylinder’s compression or pressure differential exceeds
the limit, add a small amount of oil through the spark plug
hole and repeat steps (6)-(8).
@If the addition of oil brings compression up, it is possiblethat there is poor contact between the piston ring and
cylinder wall.
@ If not compression does not come up, valve seizure,
poor valve seating, or a compression leak from the
gasket are all possible.‘I
Page 420 of 1216

9-136ENGINE <2.0L DOHC Engine> - Cylinder Block
CYLINDER BLOCK
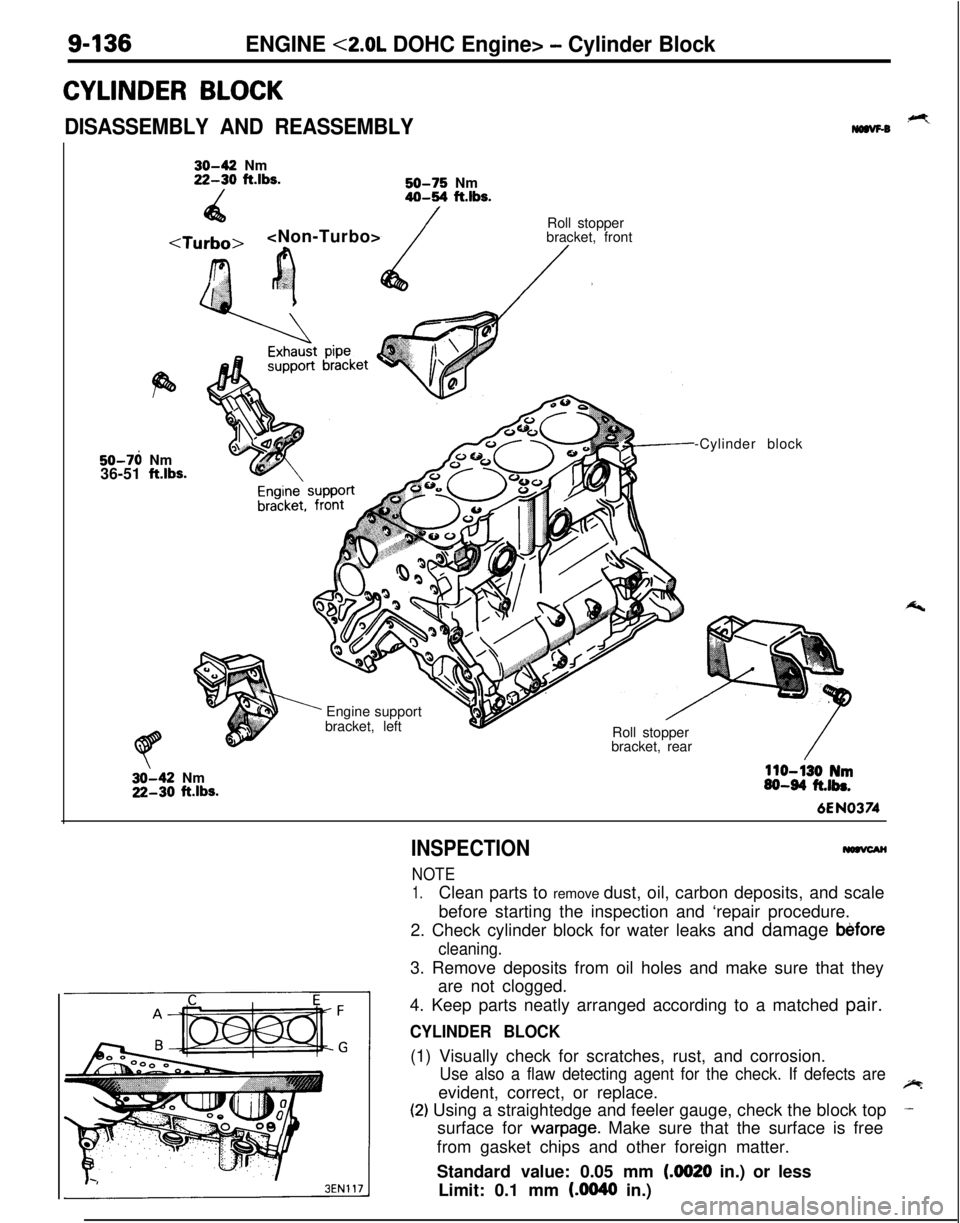
DISASSEMBLY AND REASSEMBLY,+Ymaw-030-42 Nm22-30 ft.lbs.
/50-75 Nm40-54 ft.lbs.
4a
r.‘?’
’ cRoll stopper
bracket, front/.50-76 Nm
36-51
ftlbs.
’ Engine support
bracket, left
Roll stopper
bracket, rear-Cylinder block32-42 Nm22-30
ftlbs.
110-130 Nm60-64 ft.lbs.6EN0374
INSPECTION
NOTE
1.Clean parts to remove dust, oil, carbon deposits, and scale
before starting the inspection and ‘repair procedure.
2. Check cylinder block for water leaks and damage
b&fore
cleaning.3. Remove deposits from oil holes and make sure that they
are not clogged.
4. Keep parts neatly arranged according to a matched pair.
CYLINDER BLOCK(1) Visually check for scratches, rust, and corrosion.
Use also a flaw detecting agent for the check. If defects areevident, correct, or replace.~
(2) Using a straightedge and feeler gauge, check the block top-surface for
warpage. Make sure that the surface is free
from gasket chips and other foreign matter.
Standard value: 0.05 mm
(4020 in.) or less
Limit: 0.1 mm
(AM40 in.)
Page 496 of 1216

14-42FUEL SYSTEM - Service Adjustment Procedures C1.8L Engine>
6FU13%
Idle speed control
adjusting screw(3) Connect a digital voltmeter between terminal 19 (throttle
position sensor output voltage) of the engine control unit
kand terminal 24 (ground).
(4) Set the ignition switch at ON (without starting the engine)
hold it in that position for more than 15 seconds or more.
(5) Set the ignition switch at OFF.
(6) Disconnect the connectors of the idle speed control servo
and lock the idle speed control plunger at the initial position.(7) Back out the fixed SAS enough.
(8) Start the engine and let it run at idle.
(9) Check to ensure that the engine is running at the standard
basic idle speed.
Basic idle speed:
700&50 rpm
CautionLr1. On a new vehicle [driven less than 500 km
(380miles)], the engine speed may ‘be 20 to
100 rpm
lower, but no adjustment is necessary.
2.If the engine stalls or the engine speed is low after
the vehicle has been driven a distance of 500 km
(300 miles) or more, a deposit on the throttle valve
area is suspected. Clean the throttle valve area.
(10)lf the engine speed does not conform to the standard
value, adjust it with the idle speed control adjusting screw.
Caution
When adjusting the idle speed control, use a hexagon
wrench whenever possible.
(11)Turn in the fixed SAS .until the engine speed rises. Then
back out the fixed SAS until the “touch point” where the
engine speed does not fall any longer is found. Back out thefixed SAS an additional half a turn from the touch point.
(12)Stop the engine.
(13)Set the ignition switch at ON (do not start the engine) and
check that the output voltage from the throttle position
sensor is as specified.
Standard value:
0.48-0.52 VA
Page 497 of 1216

FUEL SYSTEM - Service Adjustment Procedures <1.8L Engine>14-43
(14)lf it is out of specification, adjust by loosing the throttle
position sensor mounting screws and rotating the throttle
position sensor. After adjustment, tighten the screws
firmly.
NOTEClockwise rotation of the throttle position sensor increases
the output voltage.
Throttle position
sensor
t-/ /I
(15)Set the ignition switch at OFF.
(16)Adjust the free play of the accelerator cable.
(17)Reconnect the connectors of the idle speed control servo.
(18)Remove the voltmeter.
(19)Start the engine and check that the engine is running at thecurb idle speed.
Curb idle speed:
700f 100 rpm
(20)Set the ignition switch at OFF, disconnect the negative
battery cable and reconnect it more than
10 seconds later
(By doing so, the memory storing the diagnosis data duringthe idle speed control adjustment is cleared.)
(21)Restart the engine, let it run at idle for about 5 minutes, andcheck that the engine is running in good idle quality.
THROTTLE BODY (THROTTLE VALVE AREA)
CLEANING
NllRCK
(1) Warm up the engine, then stop it.
(2) Remove the air intake hose from the throttle body.
(3) Spray cleaning solvent into the valve through the throttle
body intake port and leave it for about 5 minutes.
(4) Start the engine, race it several times and idle it for about 1minute. If the idling speed becomes unstable slightly open
the throttle valve to keep the engine running.
(5) If the throttle valve deposits are not removed, repeat steps
(3) and (4).
(6) Attach the air intake hose.
(7) Disconnect the battery terminal for
10 seconds or more,
and then reconnect it.
(8) Adjust the idle speed control and throttle position sensor.
Page 498 of 1216

FUEL SYSTEM - Service Adjustment Procedures 4.8L Engine>
RELEASE OF RESIDUAL
PRESSURE FROM HIGHPRESSURE FUEL HOSE
N14FGAE
MD998709
MD998742
IFUO157Make the following operations to release the pressure remain-
ing in fuel pipe line so that fuel will not flow out.
(1) Disconnect the fuel pump harness connector at the fuel
tank rear side.
(2) Start the engine and after it stops by itself, turn the ignition
switch to OFF.
(3) Disconnect the battery
(-) terminal.
(4) Connect the fuel pump harness connector.
FUEL PUMP OPERATION CHECK
Nl4FDAG(1) Set the ignition switch at OFF.
(2) Check that when the batten/ voltage is directly applied to
the fuel pump check terminal, the operating sound of the
pump can be heard.
NOTESince the fuel pump is installed in the fuel tank, its
operating sound cannot be readily heard. Remove the fuel
tank cap and listen to the operating sound through the filler
port.(3) Hold the high pressure fuel hose between your fingers and
check that the fuel pressure can be felt.
FUEL PRESSURE TEST
Nl4FNAN(1) Reduce the fuel pressure in the fuel line.
(2) Disconnect the high pressure fuel hose from the delivery
pipe.
CautionCover the hose connection with shop towel to prevent
splash of fuel that could be caused by residual pressurein the fuel pipe line.
(3) Connect a fuel pressure gauge to the special tool (hose
adapter).Use a suitable O-ring or gasket between the fuel pressure
gauge and the special tool so as to seal in order to preventfuel leakage at this time.
-
Page 503 of 1216

FUEL SYSTEM - Service Adjustment Procedures <2.0L Engine>14-49
TerminalNo.10screw(2) Disconnect the female connector (for waterproof protec-
tion of the connector) from the connector for ignition timing
adjustment.
(3) Connect the ignition timing adjusting terminal to the groundusing a jumper wire with alligator clips.
(4) Connect terminal No.
10 of the self-diagnosis connector to
the ground with a jumper wire with alligator clips.
(5) Start the engine and run at idle.
(6) Check to be sure that the engine idling speed is the basic
idle speed.
Basic idle speed: 750
250 rpm
If there is a deviation of the engine speed from the basic
idle speed, first determine whether or not the conditions
described below exist, and then use the speed adjustment
screw to adjust to the basic idle speed.
(a) The engine speed may be
20-100 rpm low for a
new vehicle [driven about 500 km (300 miles) or
less], but adjustment is not necessary.
(b) If engine stalling occurs or the engine speed is low
even though the vehicle has been driven about 500
km (300 miles) or more, it is probable that these are
deposits adhered to the throttle valve, so it should
be cleaned.
(Refer to
P.14-51.)(c) If the engine speed is higher than the standard
value even though the speed adjusting screw is
fully close, check for any indication that the idle
position switch (fixed speed adjusting screw) posi-
tion has changed; if there is such an indication,
adjust the idle position switch (fixed speed adjust-
ing screw).
If there is no evidence of a change of position, it is
probable that there is leakage resulting from de-
terioration of the fast-idle air valve (FIAV), so
replace the throttle body.
(7) Turn OFF the ignition switch and stop the engine.
(8) Disconnect the grounding jumper wire from the diagnosis
connector.(9) Disconnect the grounding jumper wire from the ignition
timing connector and mount a waterproof connector.
(1O)Disconnect the tachometer.
(11)Star-t the engine once again and let it idle for about 5
minutes; check to be sure that the idling condition is
normal.
Page 505 of 1216

FUEL SYSTEM - Service Adjustment Procedures <2.0L Engine>14-51THROTTLE BODY (THROTTLE VALVE AREA)
CLEANINGNl4FtU
(1) Warm up the engine, then stop it.
(2) Remove the air intake hose from the throttle body.
(3) Plug the bypass passage inlet of the throttle body.
CautionDo not allow cleaning solvent to enter the bypass
passage.(4) Spray cleaning solvent into the valve through the throttle
body intake port and leave it for about 5 minutes.
(5) Start the engine, race it several times and idle it for about 1minute. If the idling speed becomes unstable (or if the
engine stalls), slightly open the throttle valve to keep the
engine running.
(6) If the throttle valve deposits are not removed, repeat steps
(4) and (5).
(7) Unplug the bypass passage inlet.
(8) Attach the air intake hose.
(9) Disconnect the battery terminal for 10 seconds or more,
and then reconnect it.
(lO)Adjust the basic idle speed. (Refer to P.14-48.)
RELEASE OF RESIDUAL PRESSURE FROM HIGH
PRESSURE FUEL HOSE
N14FGAFRefer to
P.14-44.FUEL PUMP OPERATION CHECK
N14FDAG(1) Set the ignition switch at OFF.
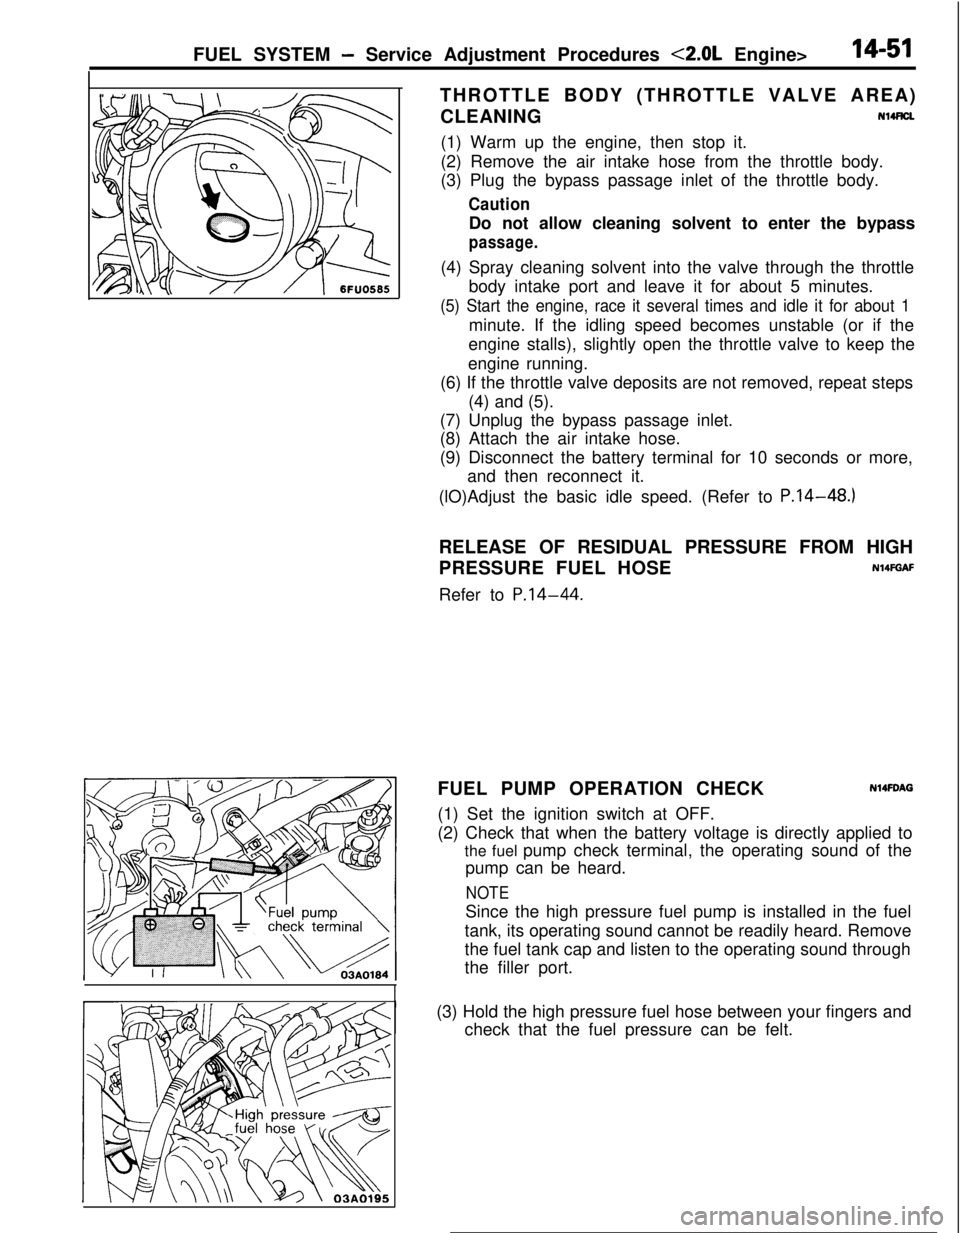
(2) Check that when the battery voltage is directly applied to
the fuel pump check terminal, the operating sound of the
pump can be heard.
NOTESince the high pressure fuel pump is installed in the fuel
tank, its operating sound cannot be readily heard. Remove
the fuel tank cap and listen to the operating sound through
the filler port.
I(3) Hold the high pressure fuel hose between your fingers and
check that the fuel pressure can be felt.