Page 2 of 1640
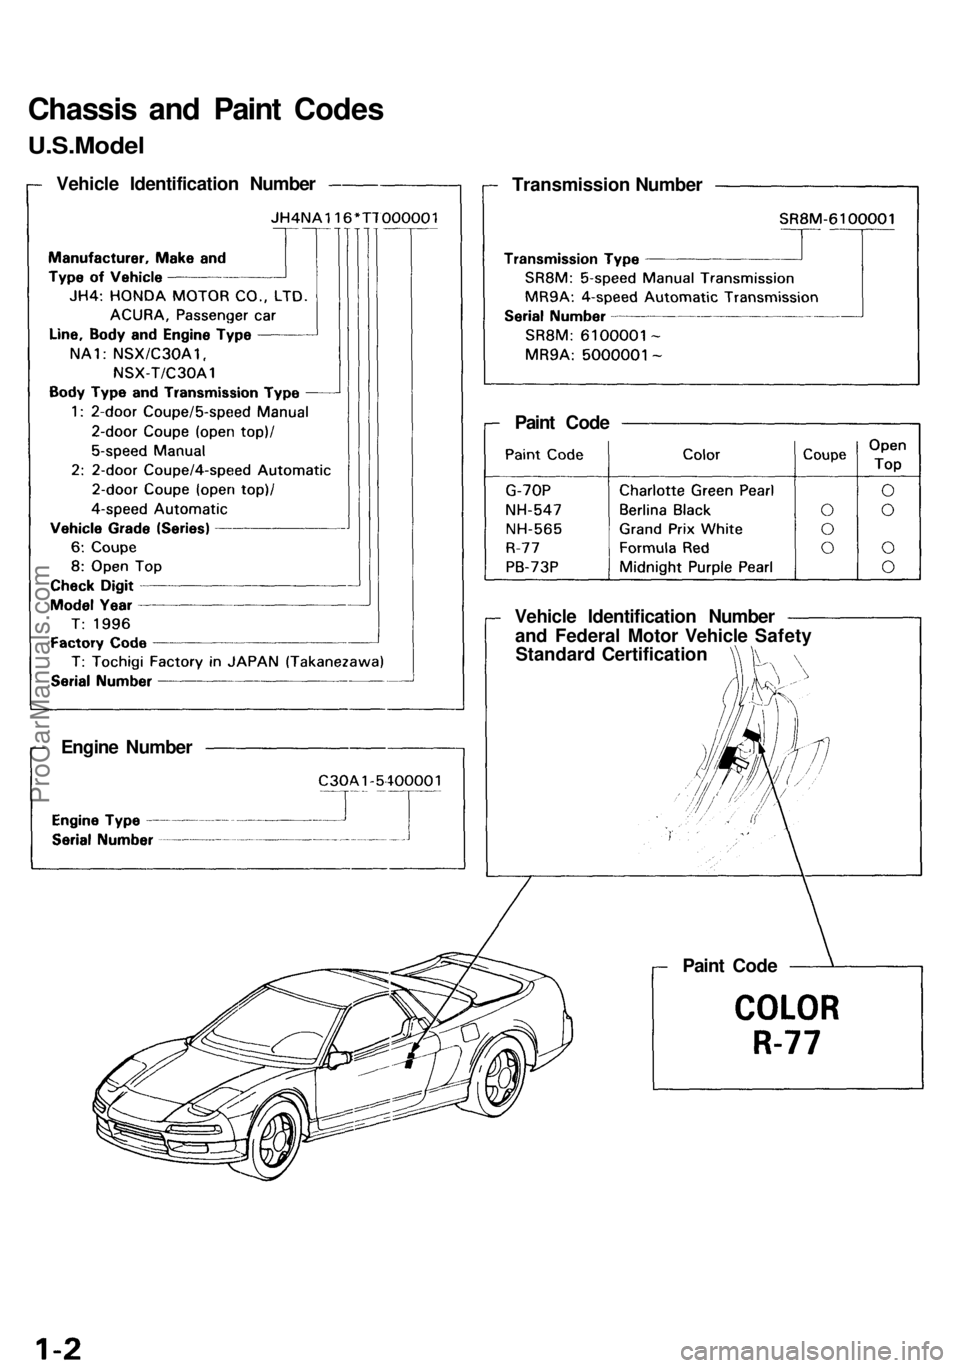
Chassis and Paint Codes
U.S.Model
Vehicle Identification Number
Transmission Number
Engine Number
Vehicle Identification Number
and Federal Motor Vehicle Safety
Standard Certification
Paint Code
Paint CodeProCarManuals.com
Page 3 of 1640
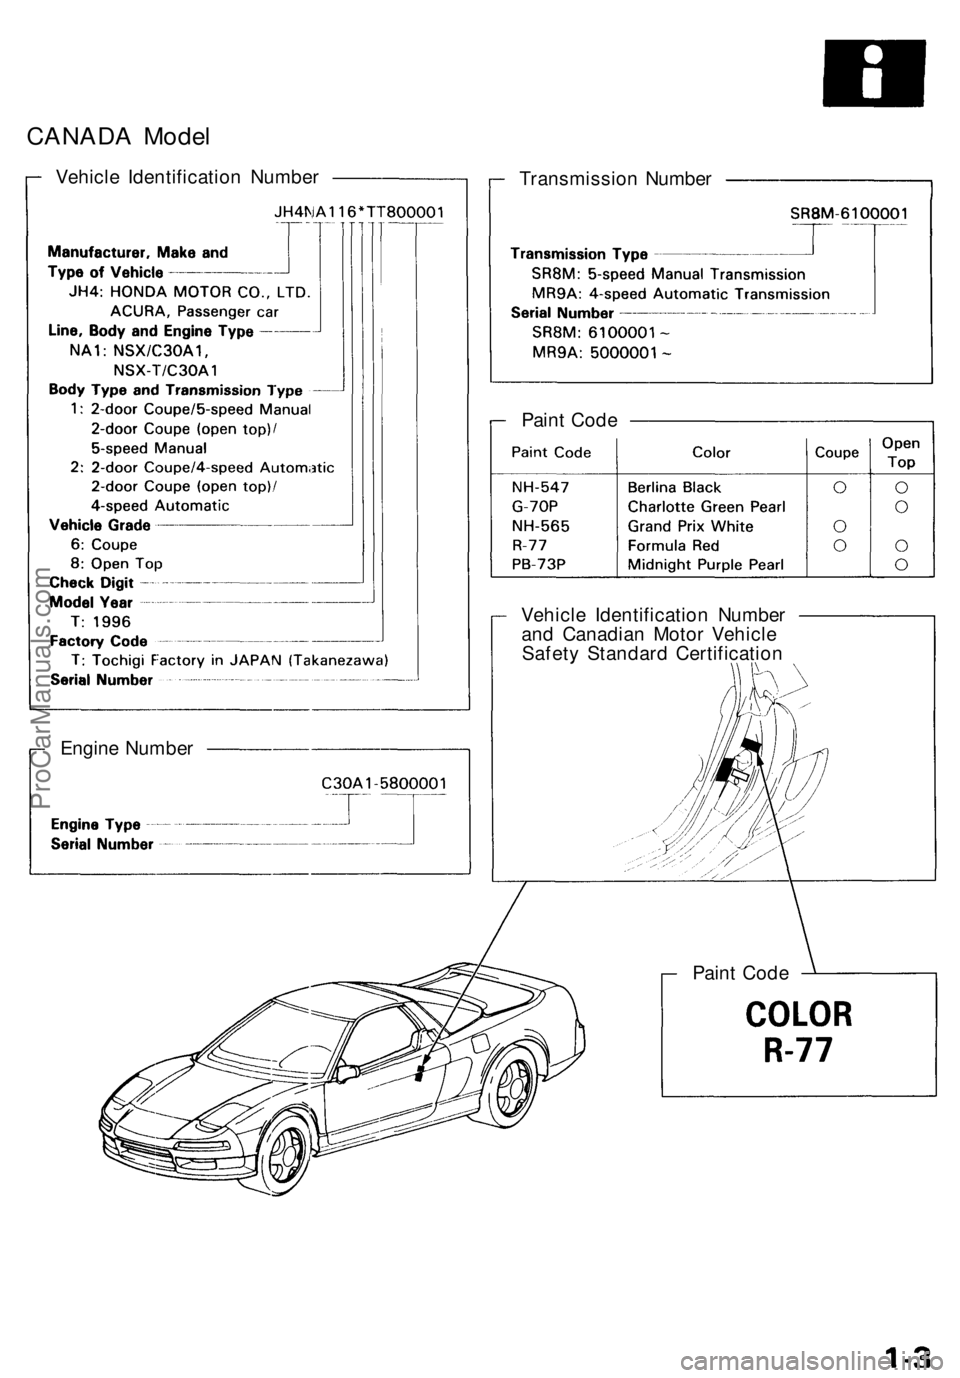
CANADA Model
Vehicle Identification Number
Transmission Number
Engine Number
Vehicle Identification Number
and Canadian Motor Vehicle
Safety Standard Certification
Paint Code
Paint CodeProCarManuals.com
Page 4 of 1640
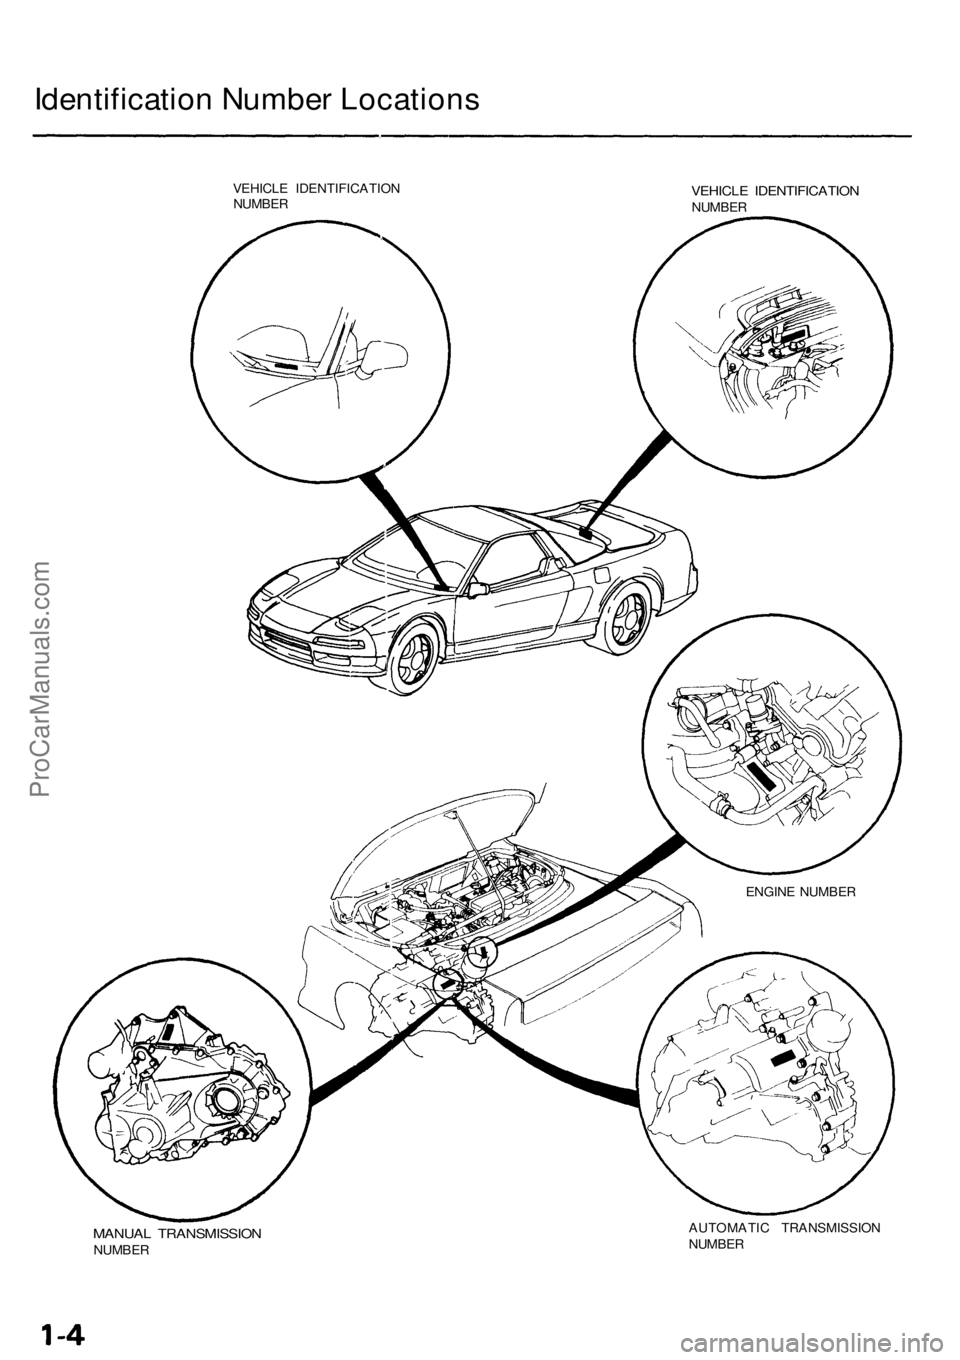
Identification Number Locations
VEHICLE IDENTIFICATION
NUMBER
VEHICLE IDENTIFICATION
NUMBER
MANUAL TRANSMISSION
NUMBER
AUTOMATIC TRANSMISSION
NUMBER
ENGINE NUMBERProCarManuals.com
Page 20 of 1640
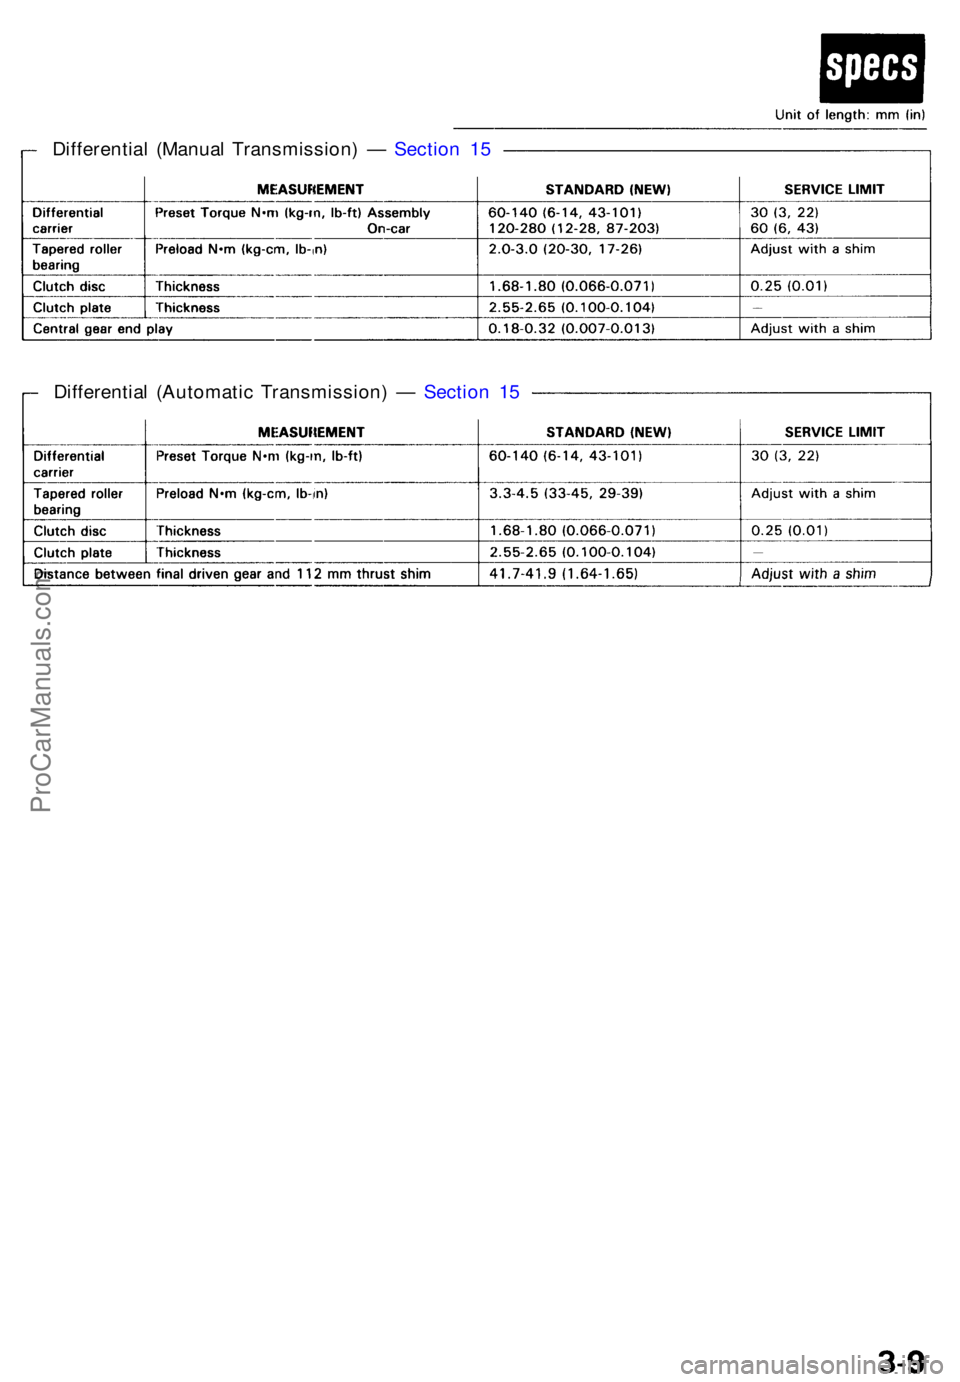
Differential (Manua l Transmission ) — Sectio n 1 5
Differentia l (Automati c Transmission ) — Sectio n 1 5
ProCarManuals.com
Page 27 of 1640
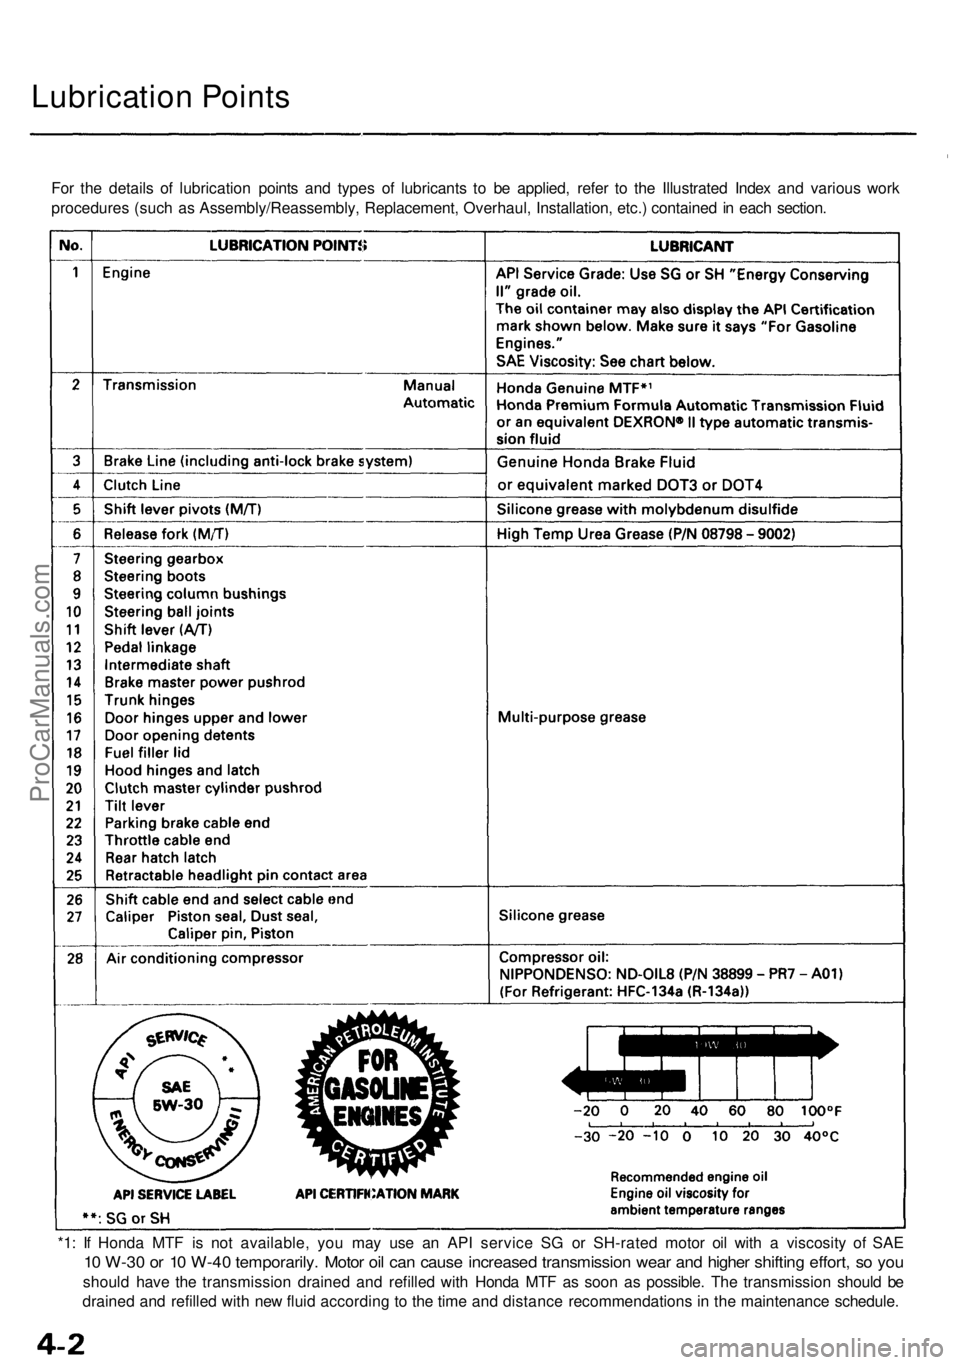
Lubrication Points
For the details of lubrication points and types of lubricants to be applied, refer to the Illustrated Index and various work
procedures (such as Assembly/Reassembly, Replacement, Overhaul, Installation, etc.) contained in each section.
*1: If Honda MTF is not available, you may use an API service SG or SH-rated motor oil with a viscosity of SAE
10 W-30 or 10 W-40 temporarily. Motor oil can cause increased transmission wear and higher shifting effort, so you
should have the transmission drained and refilled with Honda MTF as soon as possible. The transmission should be
drained and refilled with new fluid according to the time and distance recommendations in the maintenance schedule.ProCarManuals.com
Page 34 of 1640
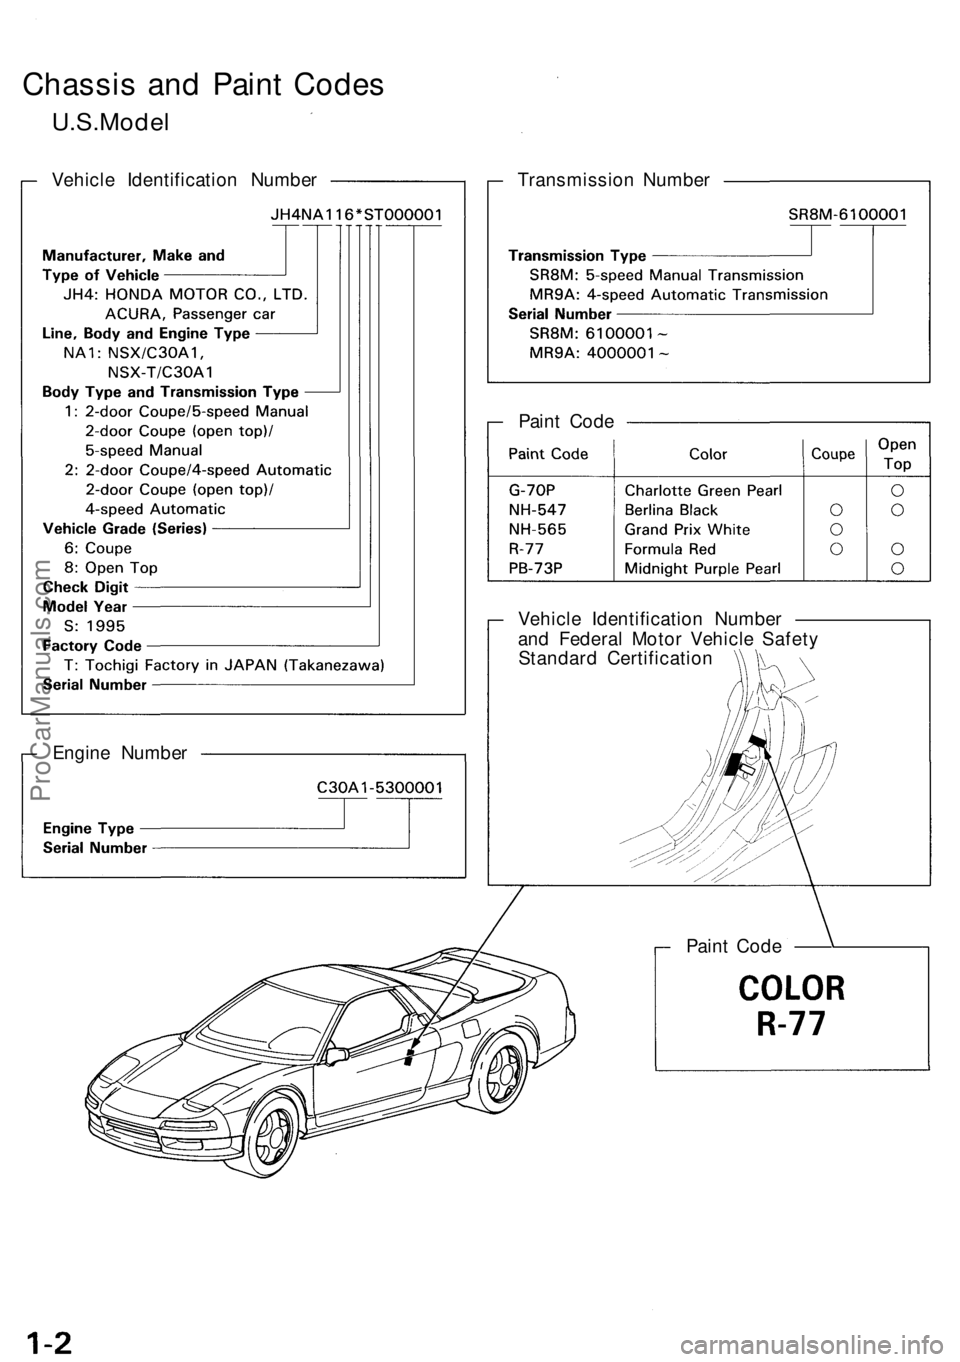
Chassis an d Pain t Code s
U.S.Mode l
Vehicle Identificatio n Numbe r Transmission Numbe r
Pain t Cod e
Engin e Numbe r Vehicl
e Identificatio n Numbe r
an d Federa l Moto r Vehicl e Safet y
Standar d Certificatio n
Pain t Cod e
ProCarManuals.com
Page 56 of 1640
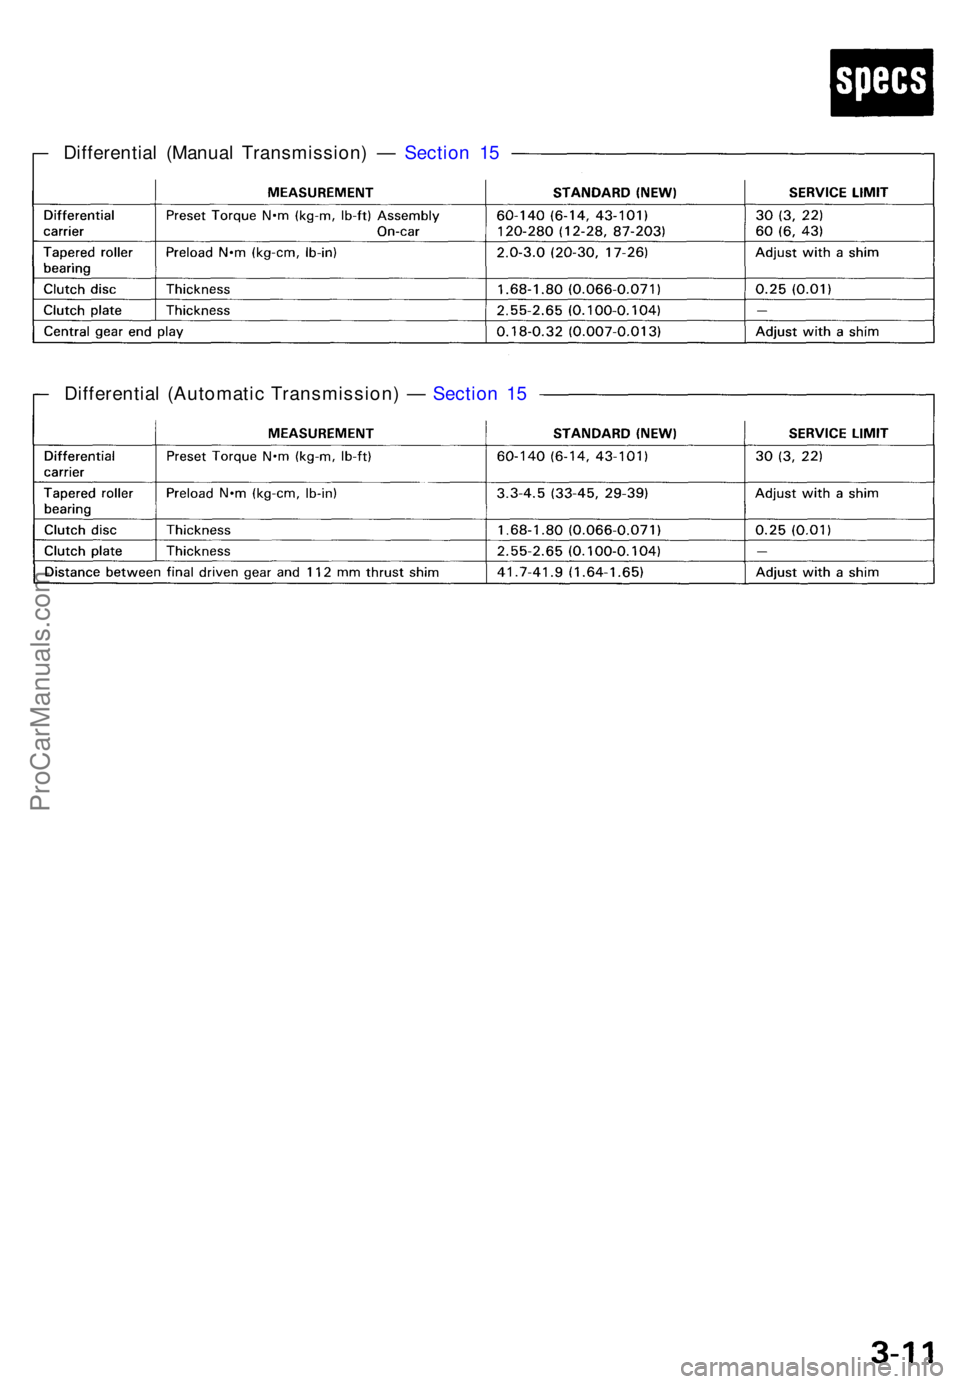
Differential (Manua l Transmission ) — Sectio n 1 5
Differentia l (Automati c Transmission ) — Sectio n 1 5
ProCarManuals.com
Page 72 of 1640
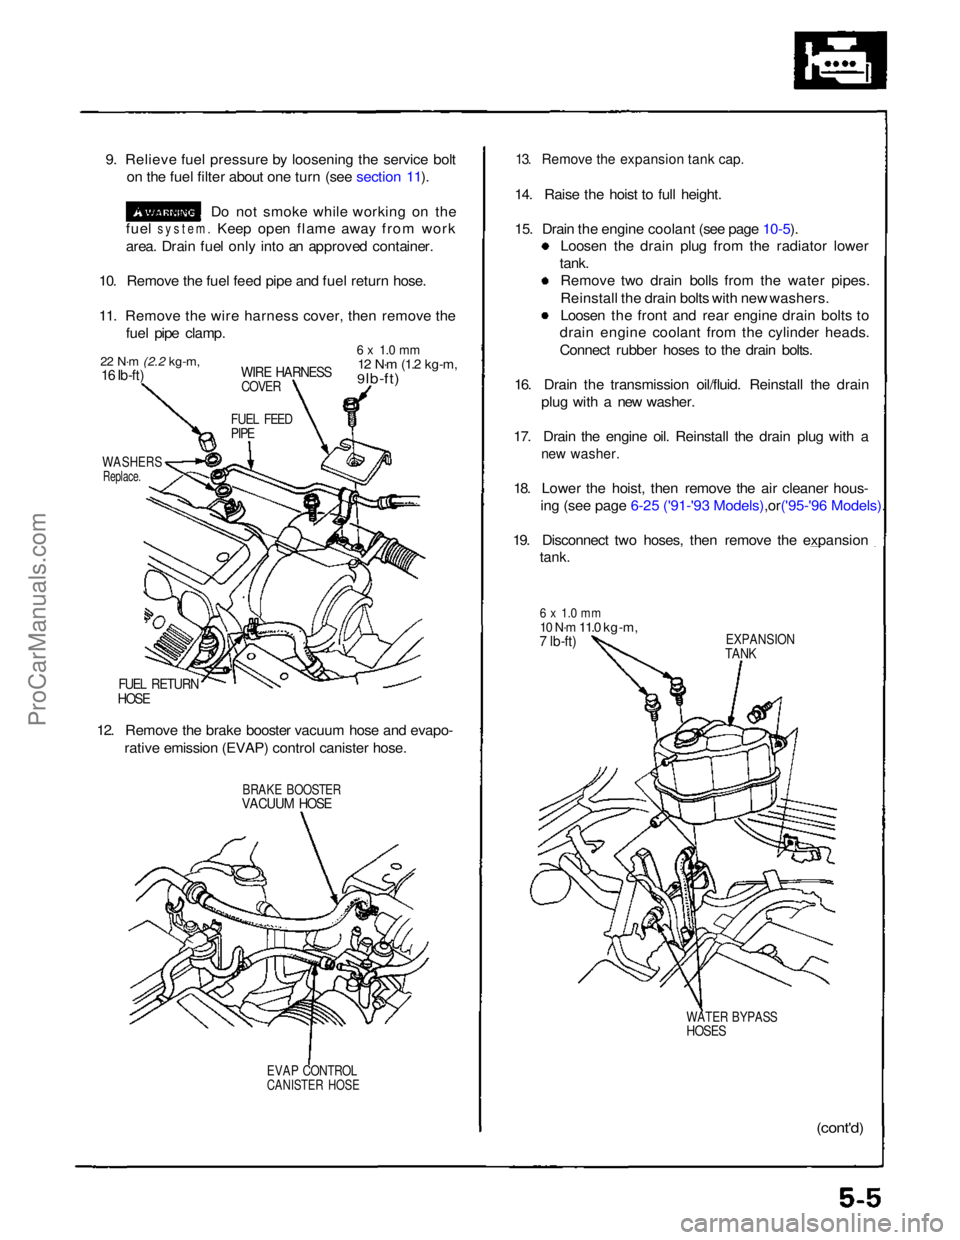
9. Relieve fuel pressure by loosening the service bolt
on the fuel filter about one turn (see section 11).
Do not smoke while working on the
fuel
system.
Keep open flame away from work
area. Drain fuel only into an approved container.
10. Remove the fuel feed pipe and fuel return hose.
11. Remove the wire harness cover, then remove the fuel pipe clamp.
22 N·m
(2.2 kg-m,
16 Ib-ft)
WIRE HARNESS
COVER
6 x 1.0 mm
12 N·m
(1.2 kg-m,
9 lb-ft)
FUEL FEED
PIPE
WASHERS
Replace.
FUEL RETURN
HOSE
12. Remove the brake booster vacuum hose and evapo- rative emission (EVAP) control canister hose.
BRAKE BOOSTER
VACUUM HOSE
EVAP CONTROL
CANISTER HOSE
13. Remove the expansion tank cap.
14. Raise the hoist to full height.
15. Drain the engine coolant (see page
10-5).
Loosen the drain plug from the radiator lower
tank. Remove two drain bolls from the water pipes.
Reinstall the drain bolts with new washers.
Loosen the front and rear engine drain bolts to
drain engine coolant from the cylinder heads.
Connect rubber hoses to the drain bolts.
16. Drain the transmission oil/fluid. Reinstall the drain plug with a new washer.
17. Drain the engine oil. Reinstall the drain plug with a
new washer.
18. Lower the hoist, then remove the air cleaner hous-
ing (see page 6-25 ('91-'93 Mode ls),or('95-'96 Models).
19. Disconnect two hoses, then remove the expansion
tank.
6 x 1.0 mm
10 N·m
11.0 kg-m,
7 lb-ft)
EXPANSION
TANK
WATER BYPASS
HOSES
(cont'd)ProCarManuals.com