Page 97 of 143

Power Steering
The power steering on your car provides easy handling while parking and maneuvering in traffic, without loss of road "feel" at
highway speeds. An engine-driven hydraulic pump provides full
power assist at low speeds and decreasing assist as the car goes
faster.
CAUTION:
If the power steering system should fail, or if the engine should
stall, the car can still be steered. However, much greater effort will be required, particularly in sharp turns at low speed.
NOTE:
You may feel a slight clunk or knock when turning the wheel with
the engine off. This is a normal condition due to the design of the system.
Power Steering Fluid
Check the power steering fluid level with the engine cold and the
car parked on level ground. Make sure the fluid level is between theupper and lower marks on the reservoir. If the level has dropped
close to or below the lower mark, check for leaks before adding
fluid to the upper mark. Do not overfill.
CAUTION:
Use only genuine Honda power steering fluid. The use of other
fluids such as A.T.F. or other manufacturer's power steering fluid will damage the system. POWER STEERING
FLUID RESERVOIR
UPPER
LOWERProCarManuals.comMain Menu t s
Page 98 of 143

Brakes
Brake System Design
The diagonally-separated dual service brake systemis designed so half the
system will still provide
braking action if the other
half fails.However, stopping the car with only half the system will require
more pedal pressure and pedal travel than normal. Also, the distance
required to stop will be longer using only half the brake system. If
the brakes fail suddenly, downshift to a lower gear for increased engine braking, and pull off the road as soon as possible.
It is dangerous to drive your car with a problem in either the
brake electrical or hydraulic system; have your dealer check
both systems if you suspect brake trouble. Do not ride the brakes, In other words, don't put your foot on
the brake pedal unless you intend to brake. This causes excessive brake wear and can damage, or lead to loss of braking
effectiveness through overheating. Your brake lights may also
confuse drivers behind you.Driving through deep water may affect the brakes.
Check their effectiveness by pressing the brake pedal gently.If the car does not slow down at the normal rate, continue
gently applying the brakes, while maintaining a safe speed, until
they dry out and normal performance returns.
Brake Wear
Both front and rear brakes should be inspected for wear at the
intervals shown in the maintenance schedule on page 78
When the brakes require maintenance, use only genuine Honda replacement parts or their equivalent.
Brake Wear Indicators
Your car is equipped with audible brake wear indicators. When the
brake pads need to be replaced, the wear indicators will make a "screeching" sound or a high pitch chirp.
NOTE:
Due to some driving habits or climates, brakes may "squeal" when
you first apply them or when you have them partially applied; this is normal, and does not indicate excessive wear. The wear indicator
makes a "screeching" sound while the brakes are applied.ProCarManuals.comMain Menu t s
Page 99 of 143

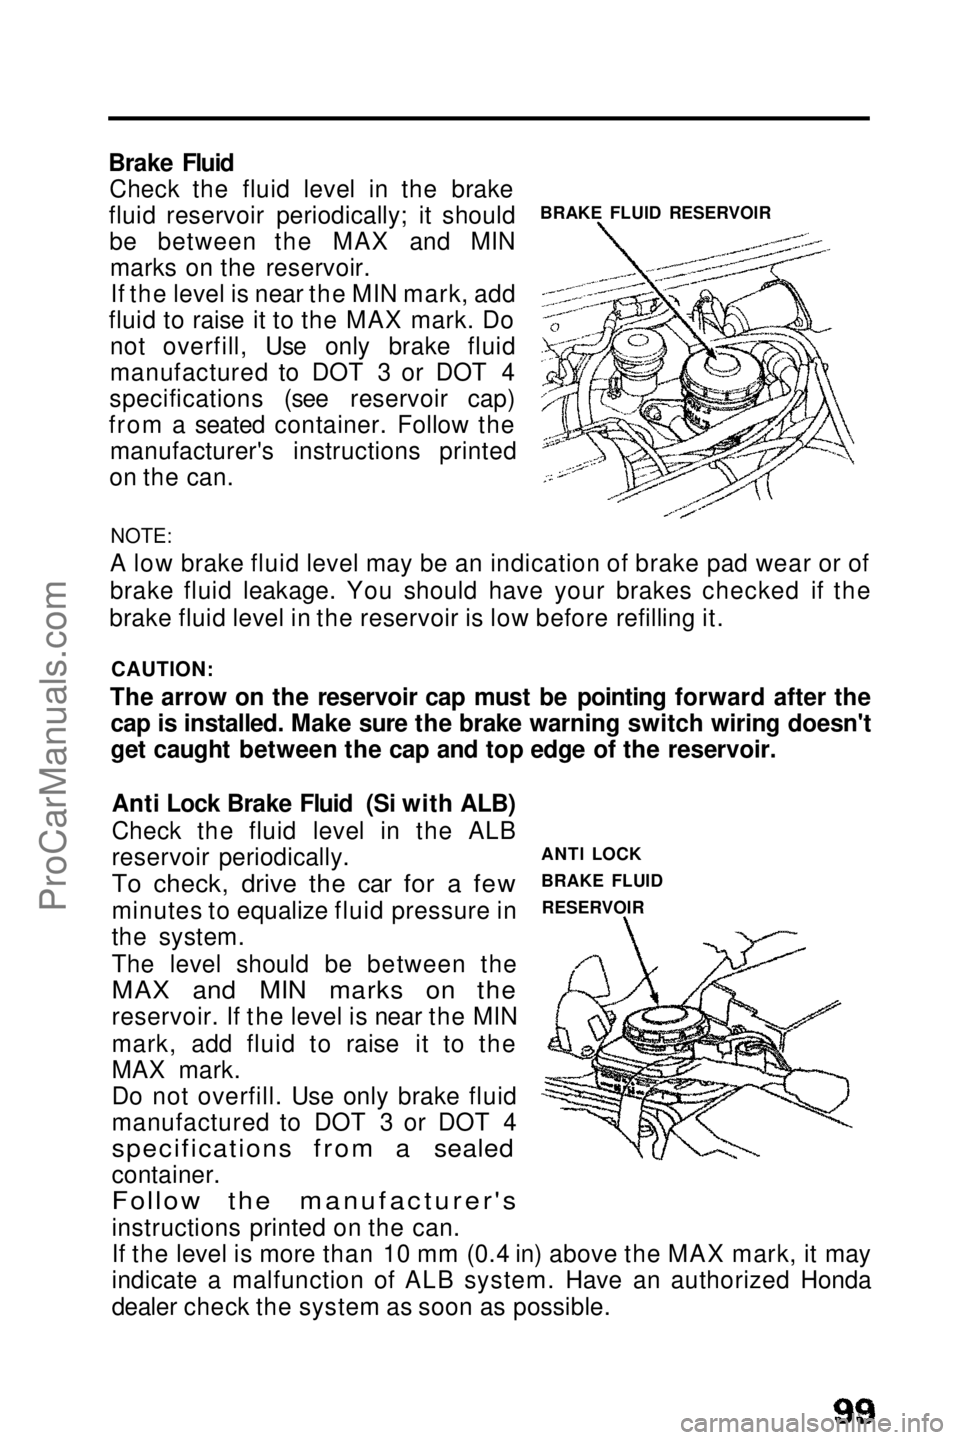
BRAKE FLUID RESERVOIR
Brake Fluid
Check the fluid level in the brake
fluid reservoir periodically; it should be between the MAX and MINmarks on the reservoir.If the level is near the MIN mark, add
fluid to raise it to the MAX mark. Do not overfill, Use only brake fluid
manufactured to DOT 3 or DOT 4
specifications (see reservoir cap)
from a seated container. Follow the manufacturer's instructions printed
on the can.
NOTE:
A low brake fluid level may be an indication of brake pad wear or of
brake fluid leakage. You should have your brakes checked if the
brake fluid level in the reservoir is low before refilling it.
CAUTION:
The arrow on the reservoir cap must be pointing forward after the cap is installed. Make sure the brake warning switch wiring doesn't
get caught between the cap and top edge of the reservoir.
ANTI LOCK
BRAKE FLUIDRESERVOIR
Anti Lock Brake Fluid (Si with ALB)
Check the fluid level in the ALB
reservoir periodically.
To check, drive the car for a few
minutes to equalize fluid pressure in
the system.
The level should be between the
MAX and MIN marks on the
reservoir. If the level is near the MIN
mark, add fluid to raise it to the
MAX mark.
Do not overfill. Use only brake fluid
manufactured to DOT 3 or DOT 4
specifications from a sealed
container.
Follow the manufacturer's
instructions printed on the can.
If the level is more than 10 mm (0.4 in) above the MAX mark, it may
indicate a malfunction of ALB system. Have an authorized Honda
dealer check the system as soon as possible.ProCarManuals.comMain Menu t s
Page 100 of 143

The condition of the battery can be determined by checking the
test indicator. Service as required according to the label on the
battery.
Any corrosion around the positive and negative terminals should be washed off with a solution of baking soda and warm water. Dry the
terminals and then coat them with grease.
The battery gives off explosive gases; keep sparks, flames andcigarettes away. Provide adequate ventilation when charging orusing the battery in an enclosed space.
The battery contains sulfuric acid (electrolyte). Contact with skin or eyes may cause severe burns. Wear protective clothing
and a face shield.
— If electrolyte gets on your skin, flush with water.
— If electrolyte gets in your eyes, flush with water for at least
15 minutes and call a physician immediately.
Electrolyte is poisonous.
— If swallowed, drink large quantities of water or milk and follow with milk of magnesia or vegetable oil and call a physician.
KEEP OUT OF REACH OF CHILDREN.
Battery
TEST INDICATOR
TERMINAL
TERMINAL
ProCarManuals.comMain Menu t s
Page 101 of 143

Fuse Replacement
The fuse boxes are located under the dashboard on the driver's side and on the right front fender beside the battery. The circuitsprotected by each fuse are listed on the plastic sheet in the box.
If any of your car's lights, accessories, or controls don't work,
check their fuses. If a fuse has blown, the wire inside it win be
burned through.
Checking the fuses: 1 . Turn off the ignition and all other switches.
2 . If you find a blown or possibly faulty fuse, use the fuse remover (located inside the fuse box under the dashboard) to pull the
blown fuse out of its clips.
3 . Check all other fuses as well as the one you suspect.
4 . Push in a new fuse of the same rating, and make sure it fits tightly in the clips. If it fits loosely, have your dealer fix it.If you don't have a spare, take a fuse of the same rating (or lower)
out of a circuit you may not need, like the radio or cigarette lighter. Remember to replace the borrowed fuse and the missing spares. FUSE BOX COVER
Blown
FUSE
REMOVER
(cont'd)ProCarManuals.comMain Menu t s
Page 102 of 143

Fuse Replacement (cont'd)
CAUTION:
A blown fuse may be just a symptom of some other problem. If a new fuse blows right away, the cause should be diagnosed and
corrected by a qualified Honda technician. Never replace a fuse with anything but another fuse of the same or lower rating. A
higher capacity fuse could cause damage and even start a fire.
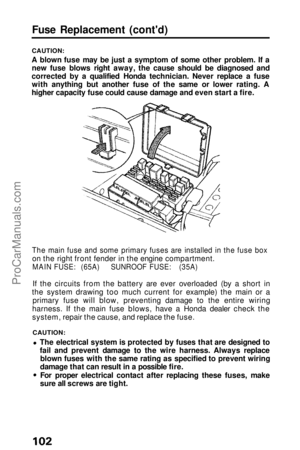
The main fuse and some primary fuses are installed in the fuse box
on the right front fender in the engine compartment.
MAIN FUSE: (65A) SUNROOF FUSE: (35A)
If the circuits from the battery are ever overloaded (by a short in
the system drawing too much current for example) the main or a primary fuse will blow, preventing damage to the entire wiring
harness. If the main fuse blows, have a Honda dealer check the
system, repair the cause, and replace the fuse.
CAUTION:
The electrical system is protected by fuses that are designed to
fail and prevent damage to the wire harness. Always replaceblown fuses with the same rating as specified to prevent wiring
damage that can result in a possible fire.
For proper electrical contact after replacing these fuses, make
sure all screws are tight.ProCarManuals.comMain Menu t s
Page 103 of 143
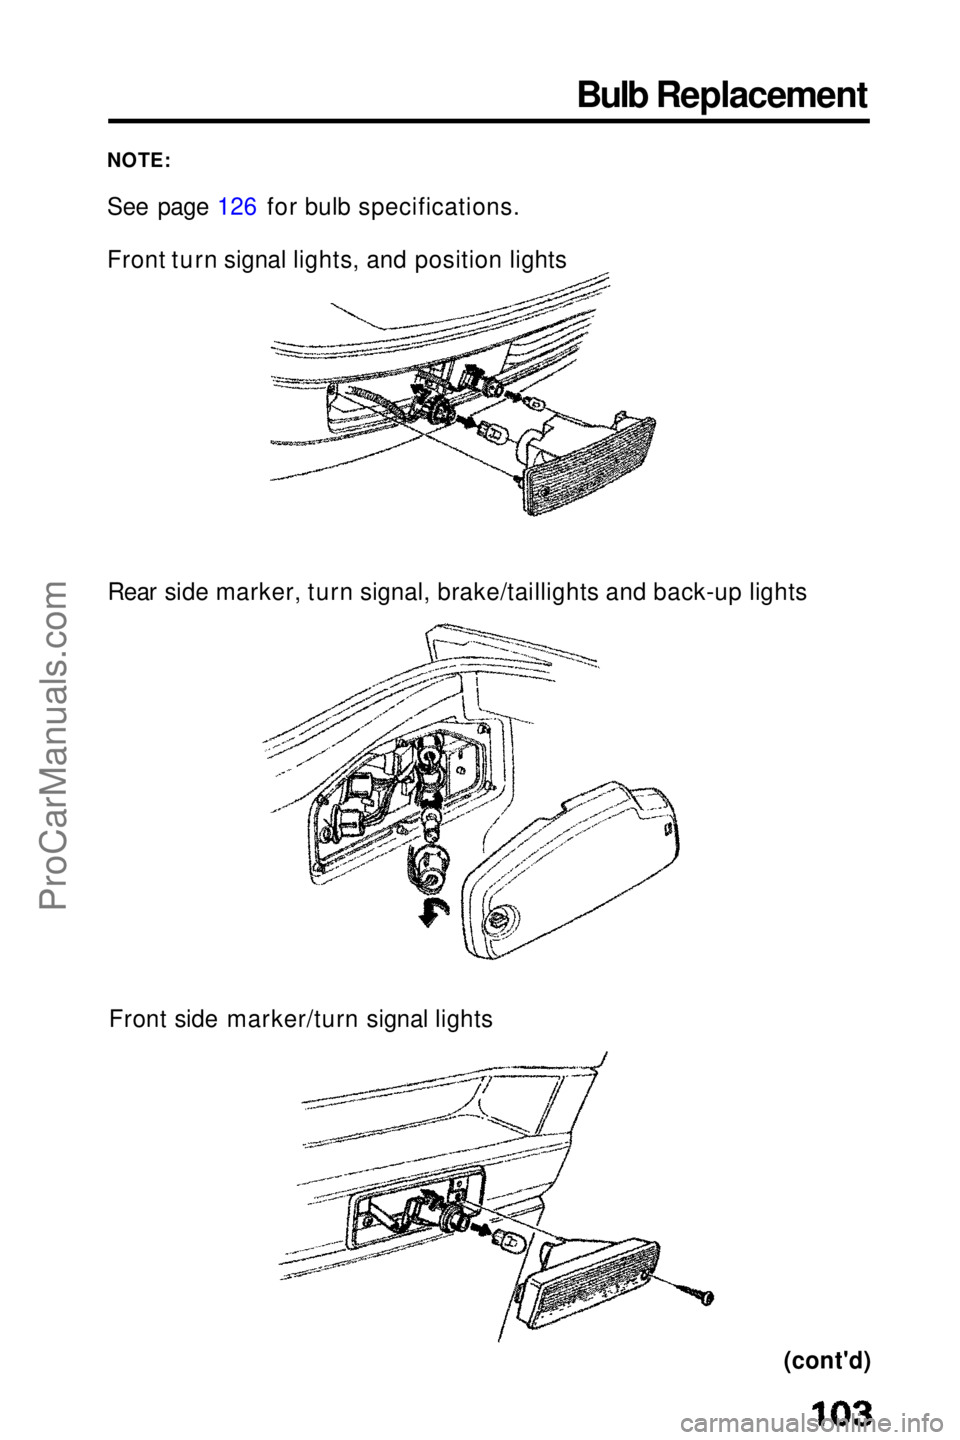
Bulb Replacement
NOTE:
See page 126 for bulb specifications.
Front turn signal lights, and position lights
Rear side marker, turn signal, brake/taillights and back-up lights
Front side marker/turn signal lights
(cont'd)ProCarManuals.comMain Menu t s
Page 104 of 143
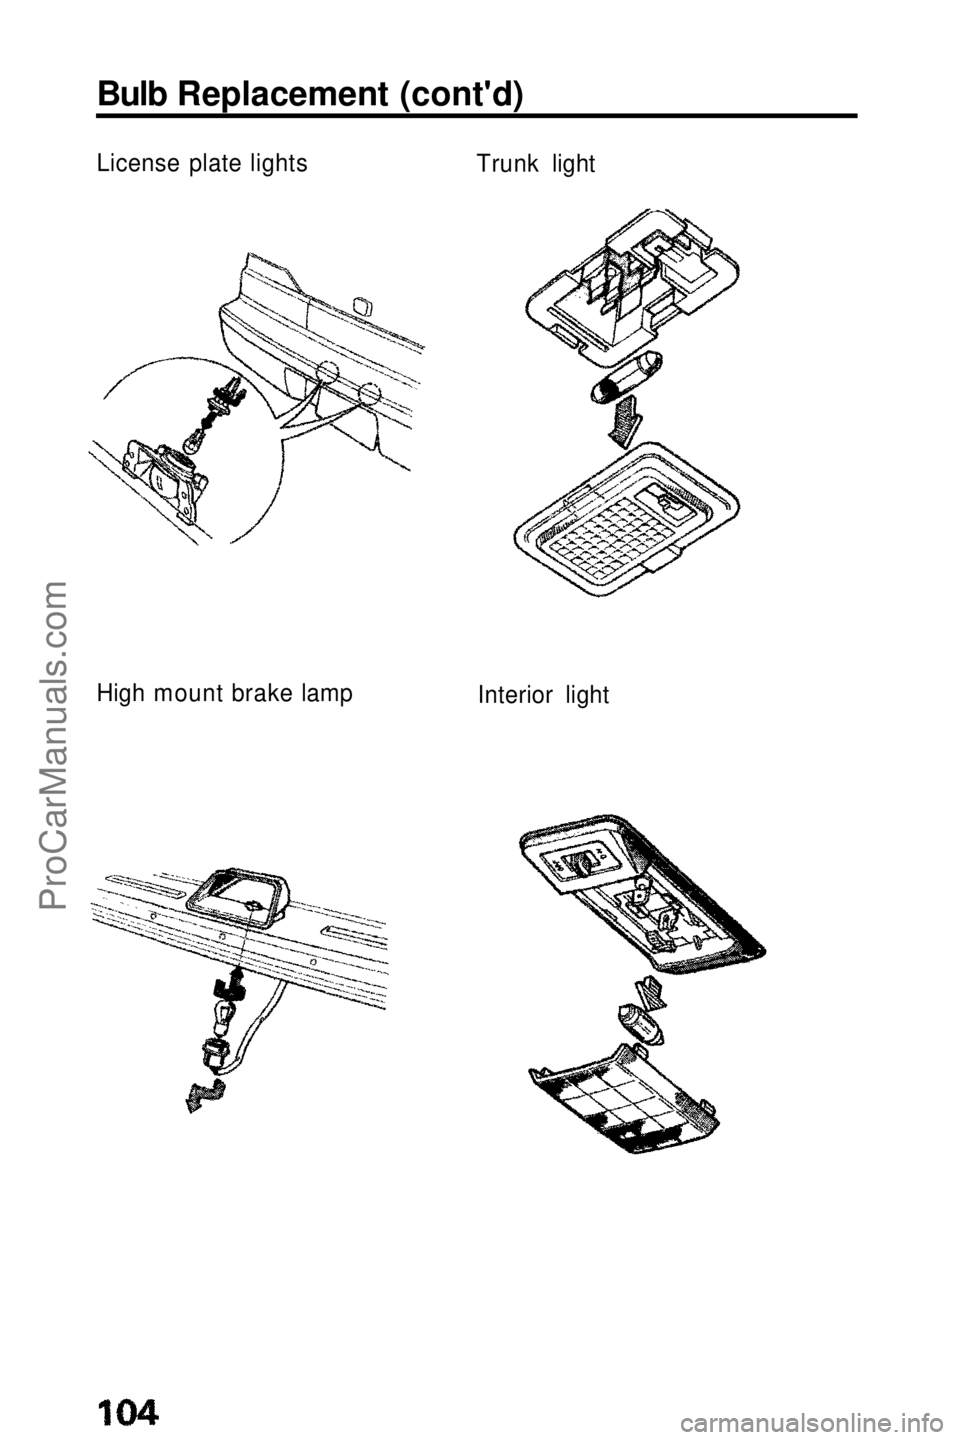
Bulb Replacement (cont'd)
License plate lights
Trunk light
High mount brake lamp
Interior lightProCarManuals.comMain Menu t s