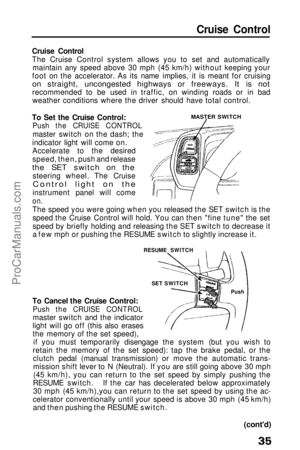
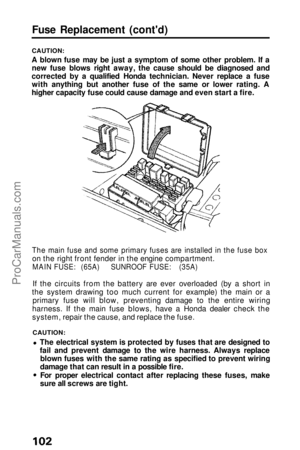
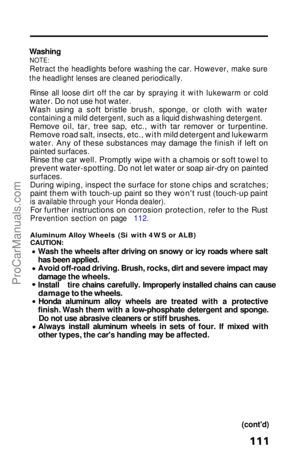
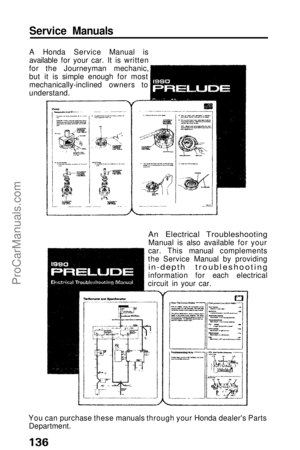
Page 113 of 143
Body Repair
Replacement Body and Fender Parts
If your vehicle incurs body damage and requires replacement parts,
we encourage you to use only Genuine Honda sheet metal body and
fender parts. Many insurance companies are specifying imitation sheet metal parts for collision repairs in an effort to reduce claim
costs; however, if imitation parts are used the following conditionsmay apply: There is no assurance that imitation parts will equal the fit and
finish of Genuine Honda sheet metal parts; and in our experience
they often do not.
There is no assurance that imitation parts will resist corrosion as
well as Genuine Honda sheet metal parts. Imitation sheet metal parts are not covered by the Honda Limited
Warranty.
To ensure your continued satisfaction with your Honda vehicle in
the event of an accident, contact your insurance adjuster and insist on Genuine Honda parts in the repair of your vehicle.ProCarManuals.comMain Menu t s
Page 114 of 143

Spare Tire
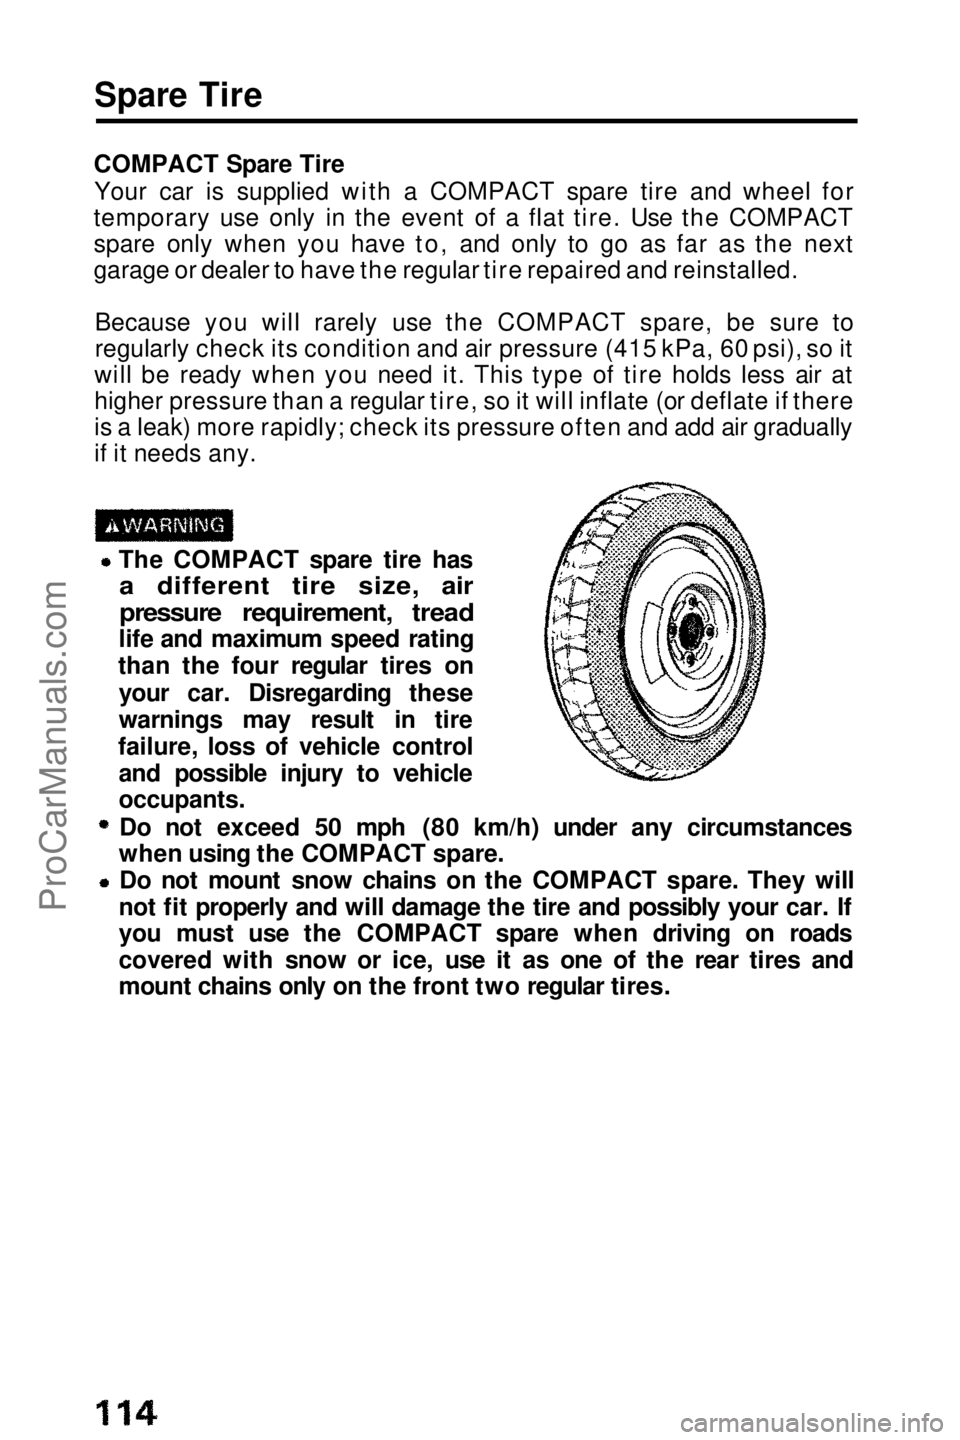
COMPACT Spare Tire Your car is supplied with a COMPACT spare tire and wheel for
temporary use only in the event of a flat tire. Use the COMPACT
spare only when you have to, and only to go as far as the next
garage or dealer to have the regular tire repaired and reinstalled.
Because you will rarely use the COMPACT spare, be sure to
regularly check its condition and air pressure (415 kPa, 60 psi), so it
will be ready when you need it. This type of tire holds less air at
higher pressure than a regular tire, so it will inflate (or deflate if there
is a leak) more rapidly; check its pressure often and add air gradually
if it needs any. The COMPACT spare tire has
a different tire size, air
pressure requirement, tread
life and maximum speed rating
than the four regular tires on
your car. Disregarding these
warnings may result in tire
failure, loss of vehicle control and possible injury to vehicle
occupants.
Do not exceed 50 mph (80 km/h) under any circumstances
when using the COMPACT spare. Do not mount snow chains on the COMPACT spare. They will
not fit properly and will damage the tire and possibly your car. If
you must use the COMPACT spare when driving on roads
covered with snow or ice, use it as one of the rear tires and
mount chains only on the front two regular tires.ProCarManuals.comMain Menu t s
Page 115 of 143
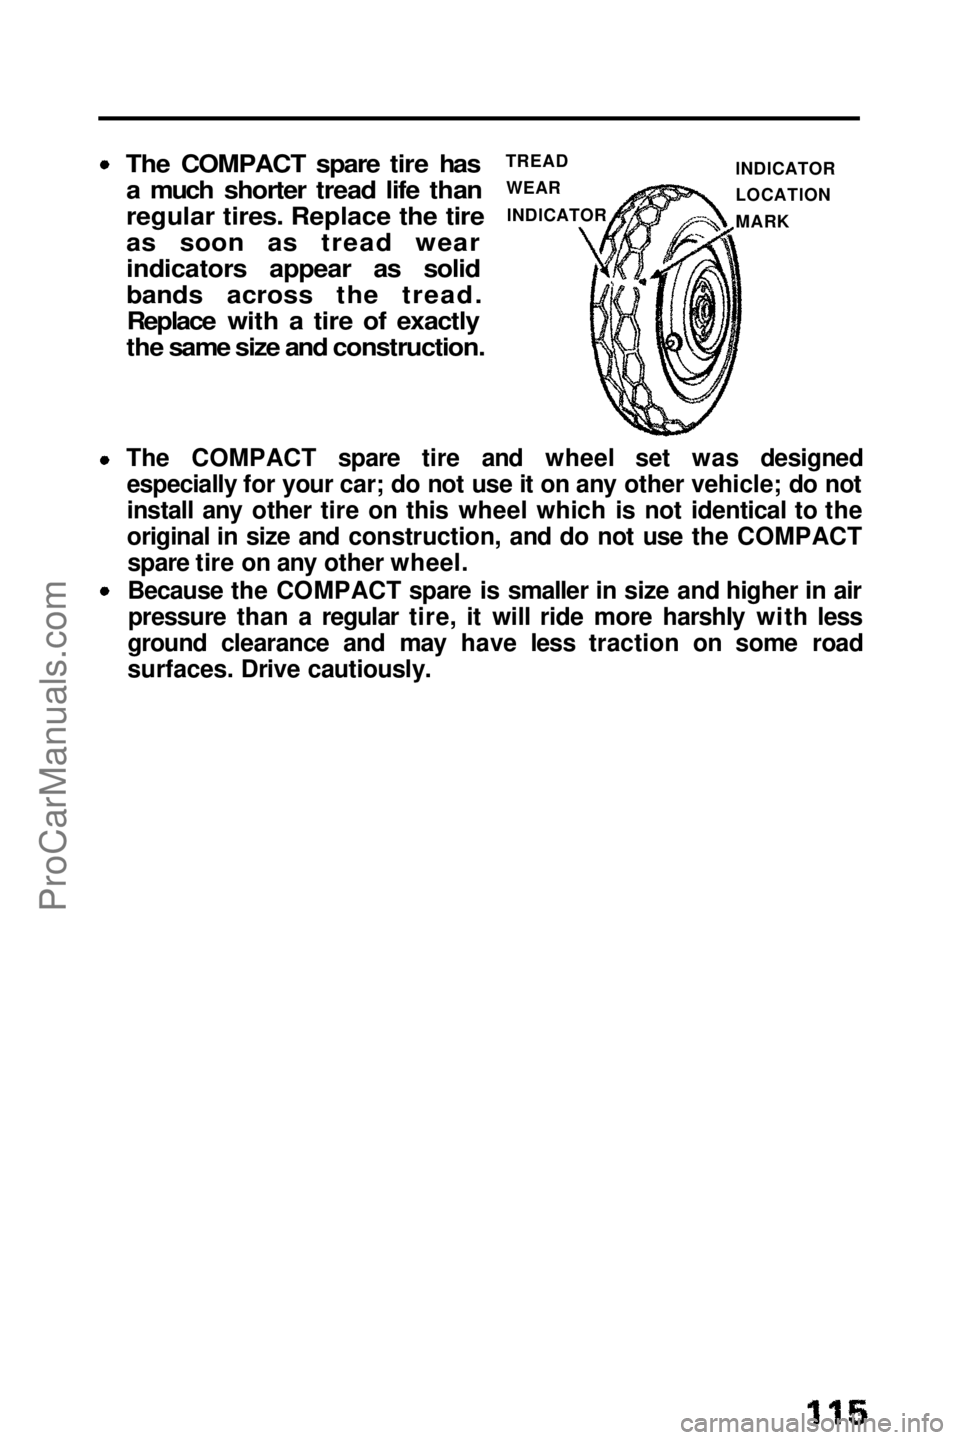
The COMPACT spare tire has
a much shorter tread life than
regular tires. Replace the tire
as soon as tread wear
indicators appear as solid
bands across the tread.Replace with a tire of exactly
the same size and construction.
The COMPACT spare tire and wheel set was designed especially for your car; do not use it on any other vehicle; do not
install any other tire on this wheel which is not identical to the
original in size and construction, and do not use the COMPACTspare tire on any other wheel.
Because the COMPACT spare is smaller in size and higher in airpressure than a regular tire, it will ride more harshly with less
ground clearance and may have less traction on some road
surfaces. Drive cautiously. INDICATOR
LOCATION
MARK
TREAD
WEAR
INDICATORProCarManuals.comMain Menu t s
Page 116 of 143
Changing a Flat Tire
Do not attempt to change a tire unless the car is on firm, level
ground and well out of the flow of traffic.
Park the car on a firm, level surface, apply the parking brake, turn
on the hazard warning switch and put the transmission in gear (Park
for automatic).
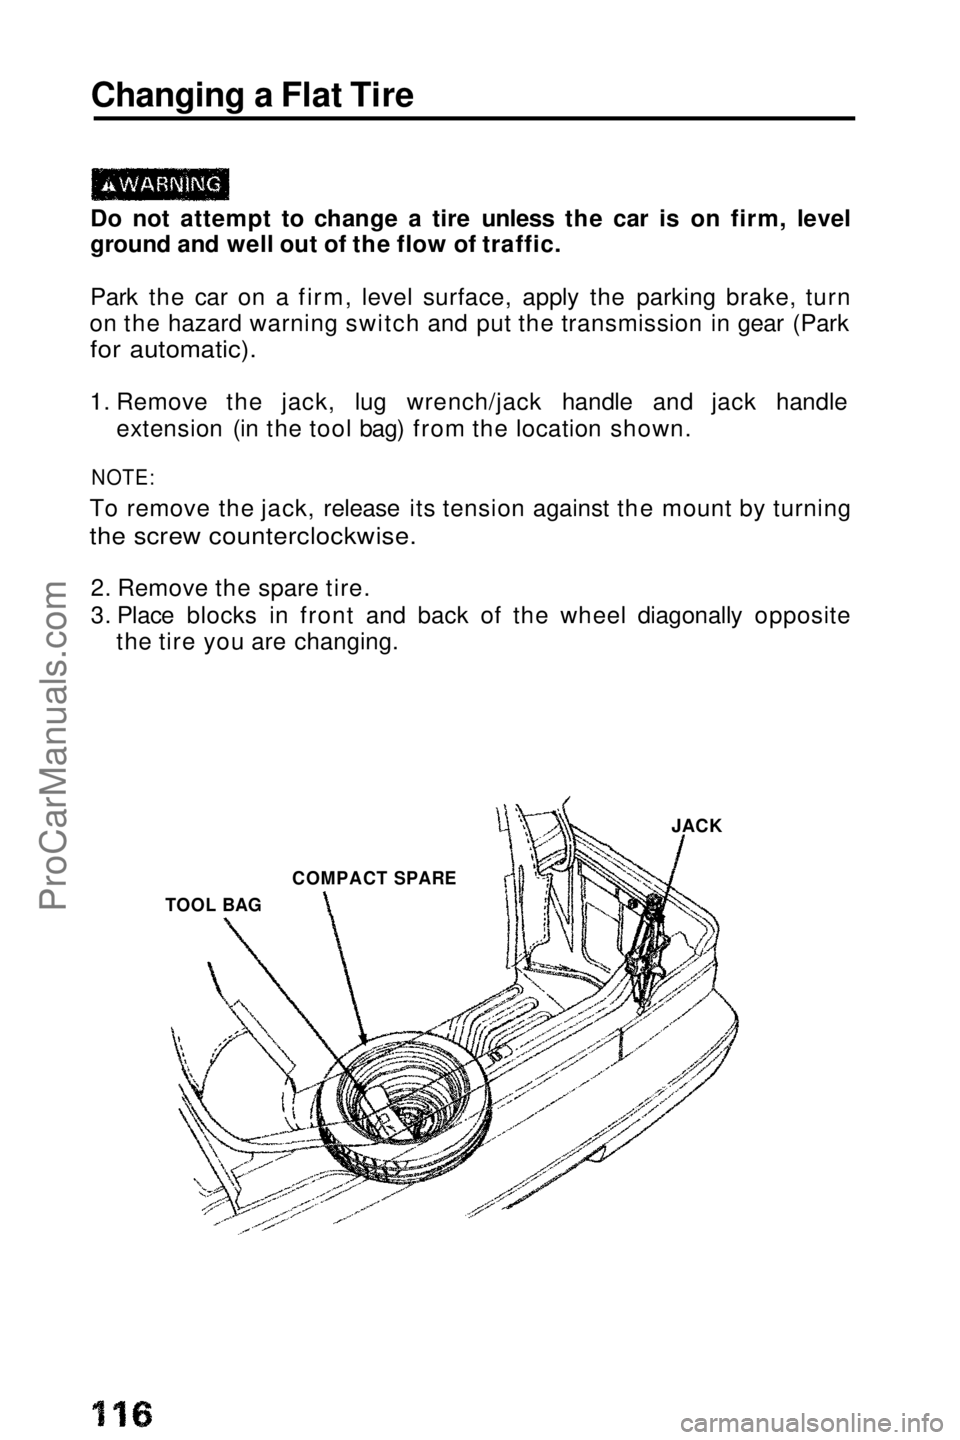
1. Remove the jack, lug wrench/jack handle and jack handle extension (in the tool bag) from the location shown.
NOTE:
To remove the jack, release its tension against the mount by turning
the screw counterclockwise.
2. Remove the spare tire.
3. Place blocks in front and back of the wheel diagonally opposite the tire you are changing.
JACK
COMPACT SPARE
TOOL BAGProCarManuals.comMain Menu t s
Page 117 of 143

4. (2.0 Si,Si)
Remove the center cap from the wheel cover by turning the lock
to 90°.
(Si with 4WS or ALB)
Remove the center cap from the wheel by prying it out with a
common flat screwdriver (not provided in the tool bag).
(2.0 Si,Si)
CAUTION:
(On the Si model with 4WS or ALB)
Hold the center cap with your hand then pry it off using a rag to
protect the
cap and the wheel.
5. Use the lug wrench to loosen the wheel lug nuts
counterclockwise one-half turn.
Follow tire changing preparations and procedures carefully to
reduce the possibility of injury. The jack
is designed for changing
tires only.
STAND CLEAR, DO NOT get under the car and DO NOT
run the engine when the car Is supported only by the jack.
6. Place the jack under the jack point nearest the wheel you are removing; align the jack head so the car frame will fit in the recess
as you raise the jack.
To reduce the possibility of injury, be sure to use the jack provided with the car and the correct jacking points; never use any otherpart of the car for jack support.
RAG
(cont'd)
CENTER CAP
CENTER CAP
(Si with 4WS or ALB)
FLAT
SCREWDRIVERProCarManuals.comMain Menu t s
Page 118 of 143

Changing a Flat Tire (cont'd)
7. Set the jack handle extension in the connector on the end of the jack and install the lug wrench/jack handle. Turn the lug wrench/jack handle clockwise until the tire is slightly off the ground.
8. Remove the lug nuts, wheel cover and wheel.
(Wheel cover is not equipped
with 4WS or ALB models)
9. Install the spare tire; and install the lug nuts hand tight.
10. Lower the car, remove the jack,
then tighten the lug nuts
securely in an "X" pattern as
shown.11. Tighten the lug nuts securely.
The recommended torque is:
110 N .
m(11 kg-m,80 Ib-ft)
If a torque wrench was not
used, ask an authorized Honda
dealer to verify the torque as
soon as possible.
12. Repai
r or replace the damaged tire as soon as you can, then
reinstall it in its original position on the car, and put the spare back
in the car.
CAUTION:
Always stow the jack, tools and tire securely to prevent them
from becoming dangerous projectiles in an accident.
NOTE:
Secure the tire and the spacer as shown in the illustration.
COMPACT SPARE
DAMAGED TIRESPACER
SPACER TIGHTENING TORQUE
110 N.m (11 kg-m, 80 Ib-ft)
VALVE
NUT
WHEEL COVER
LUG WRENCH/JACK HANDLE JACK HANDLE EXTENSIONProCarManuals.comMain Menu t s
Page 119 of 143

Jump Starting
To start a car with a dead battery, use another battery of the same voltage, and the proper jumper cables. Procedures other than those below could cause injury or
damage from battery acid spray, explosion or charging system
overload.
Never connect the jumper cable directly to the negative post of
the "dead" battery.
Never allow the two cars to touch each other.
Never allow the jumper cable clamps to touch each other.
Never lean over the battery when making connections.
Never attempt to jump start a vehicle with a frozen battery. The
battery could rupture and explode. If you suspect a frozen
battery, remove the vent caps and check the fluid. If there
seems to be no fluid, or if you see ice, do not attempt a jump
start until the fluid thaws.
CAUTION:
If jumper cables are connected backwards, the car's main fuse
may blow.
1.Turn off all lights, heater and other electrical loads, set parking
brake, and
shift transmission to Neutral or Park.
2. Use one cable to connect the positive terminal of the booster battery to the positive terminal of the "dead" battery.
(cont'd)
Do not attach cable here
DEAD BATTERY
Positive to positive
Negative to the engine, not to the battery
BOOSTER BATTERYProCarManuals.comMain Menu t s
Page 120 of 143
Jump Starting (cont'd)
3. Use the other cable to connect the negative terminal of the booster battery to the engine at the ground cable as shown.
4.To remove the cables, reverse the above procedures exactly.
DO NOT push or tow a car to start it. The forward surge when the
engine starts could cause a collision. Also, under some conditions,
the catalytic converter could be damaged. A car equipped with an
automatic transmission cannot be started by pushing or towing.
NOTE:
After jump-starting the car, there is a possibility that the ALB
warning light may come on due to insufficient battery voltage. After
the battery is sufficiently recharged and the engine is turned off and restarted, the ALB warning light should indicate that the ALB
system is OK, by coming on for a few seconds each time the engine is started. If the light remains on after recharging, have it checked
by a Honda dealer.ProCarManuals.comMain Menu t s