Page 24 of 1273

00-22GENERAL - Special Handling Instructions for AWD Models
REAR WHEEL MEASUREMENTS
After placing the rear wheels on the brake tester, follow thesame procedures as for the front wheel measurements.
WHEEL BALANCE
FRONT WHEEL MEASUREMENTS
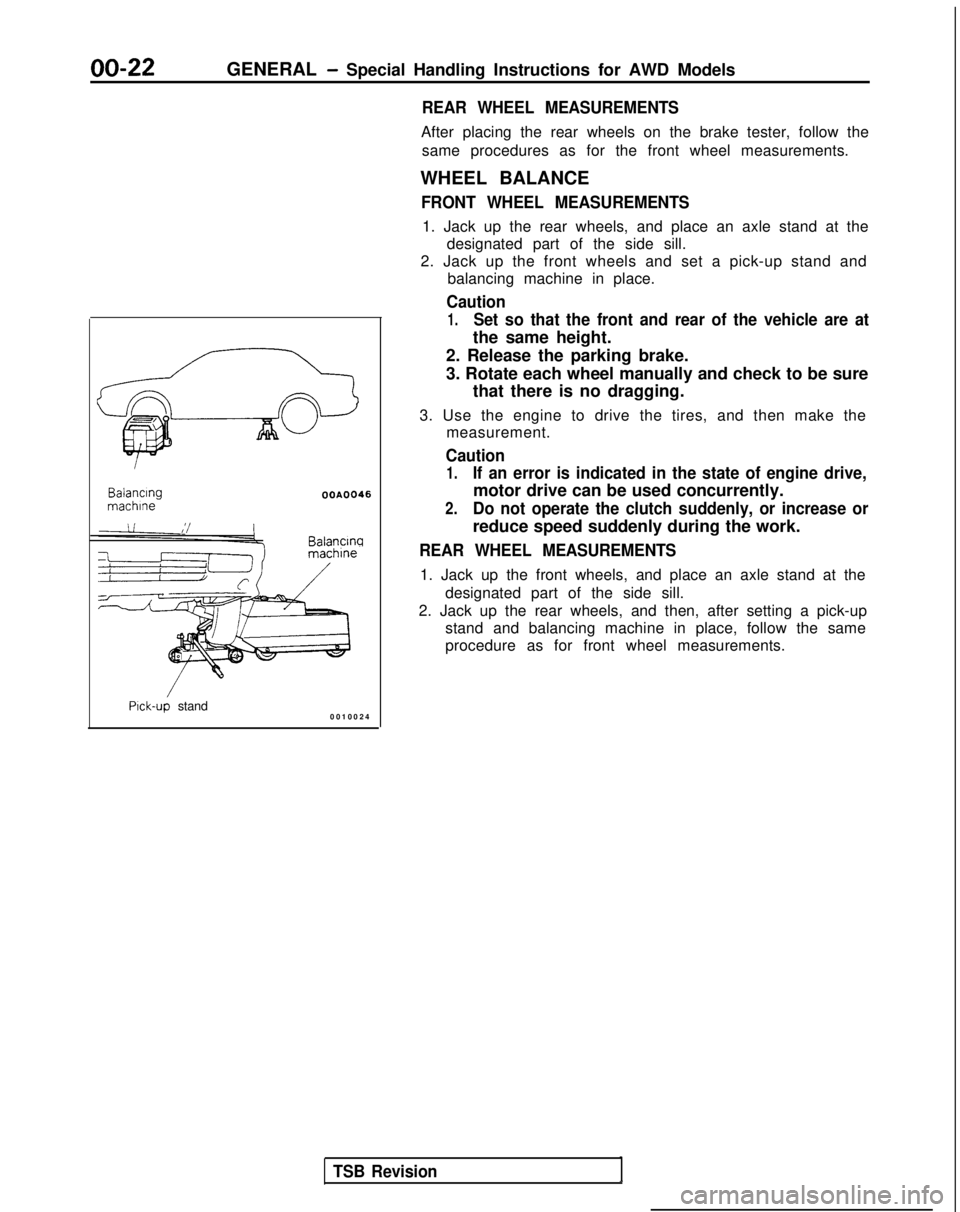
1. Jack up the rear wheels, and place an axle stand at the designated part of the side sill.
2. Jack up the front wheels and set a pick-up stand and balancing machine in place.
Caution
1.Set so that the front and rear of the vehicle are at
the same height. Balancing
machlne
OOA0046
Balancw
Pick-up stand
0010024
TSB Revision
2. Release the parking brake.
3. Rotate each wheel manually and check to be sure
that there is no dragging.
3. Use the engine to drive the tires, and then make the measurement.
Caution
1.If an error is indicated in the state of engine drive,
motor drive can be used concurrently.
2.Do not operate the clutch suddenly, or increase or
reduce speed suddenly during the work.
REAR WHEEL MEASUREMENTS
1. Jack up the front wheels, and place an axle stand at the
designated part of the side sill.
2. Jack up the rear wheels, and then, after setting a pick-up stand and balancing machine in place, follow the same
procedure as for front wheel measurements.
Page 32 of 1273

00-30GENERAL - Master Troubleshooting
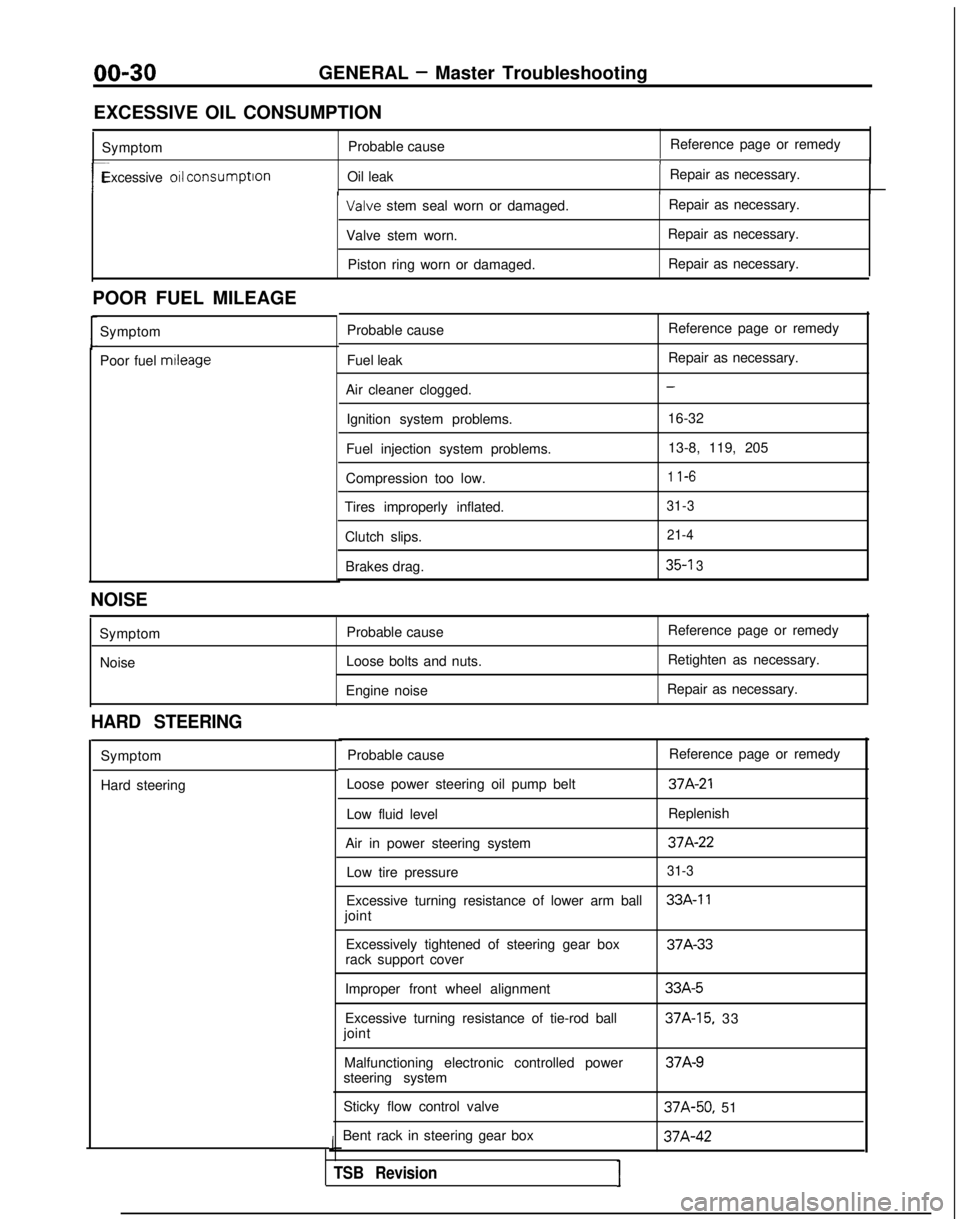
EXCESSIVE OIL CONSUMPTION Symptom Probable cause Reference page or remedy
1
r-Excessive 011 consumption
Oil leak Repair as necessary.I Valve
stem seal worn or damaged. Repair as necessary.
Valve stem worn. Repair as necessary.
Piston ring worn or damaged. Repair as necessary.
POOR FUEL MILEAGE Symptom
Poor fuel mtleage
Probable cause
Fuel leak
Air cleaner clogged. Ignition system problems.
Fuel injection system problems.
Compression too low.
Tires improperly inflated.
Clutch slips.Brakes drag. Reference page or remedy
Repair as necessary.
-
16-32
13-8, 119, 205
1 l-6
31-3 21-4
35-l 3
NOISE
SymptomNoise Probable cause
Loose bolts and nuts.
Engine noise Reference page or remedy
Retighten as necessary.
Repair as necessary.
HARD STEERING
Symptom
Hard steering Probable cause
Reference page or remedy
Loose power steering oil pump belt
37A-21
Low fluid level Replenish
Air in power steering system
37A-22
Low tire pressure31-3
Excessive turning resistance of lower arm ball33A-11
joint Excessively tightened of steering gear box 37A-33
rack support cover
Improper front wheel alignment
Excessive turning resistance of tie-rod ball
joint
Malfunctioning electronic controlled power
steering system
Sticky flow control valve
Bent rack in steering gear box
J
TSB RevisionI
33A-5
37A-15, 33 37A-9
37A-50,
51 37A-42
Page 34 of 1273

00-32
GENERAL - Master Troubleshooting
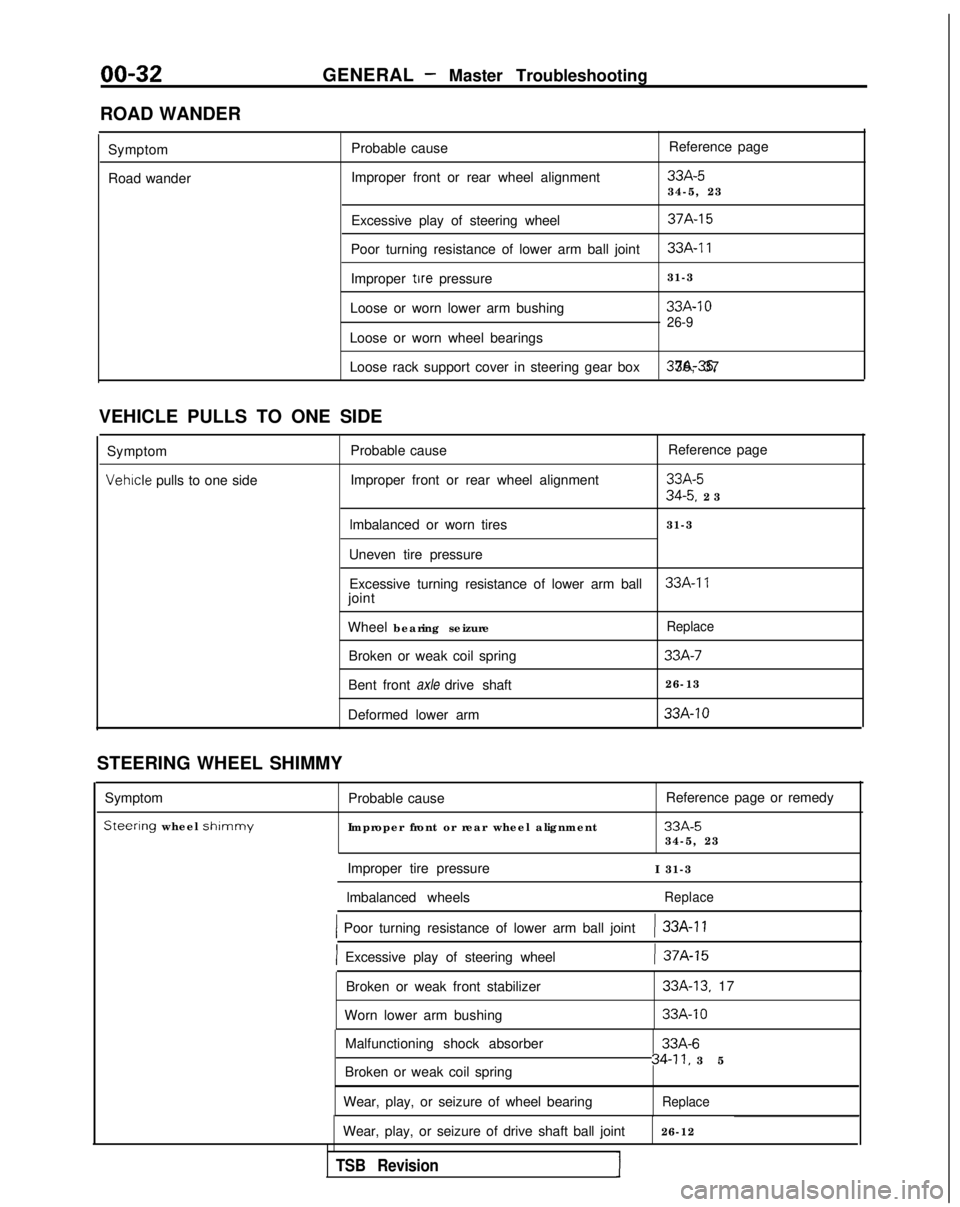
ROAD WANDER Symptom
Road wander Probable cause
Improper front or rear wheel alignment Reference page
33A-534-5, 23
Excessive play of steering wheel
37A-15
Poor turning resistance of lower arm ball joint33A-11
Improper tire pressure 31-3
Loose or worn lower arm bushing
33A-10
26-9
Loose or worn wheel bearings
Loose rack support cover in steering gear box 37A-35. 36, 37
VEHICLE PULLS TO ONE SIDE Symptom Probable cause Reference page
Vehrcle pulls to one side
Improper front or rear wheel alignment33A-5
34-5. 2
3
lmbalanced or worn tires 31-3
Uneven tire pressure Excessive turning resistance of lower arm ball
33A-17joint
Wheel bearing seizure
Replace
Broken or weak coil spring33A-7
Bent front axle drive shaft 26-13
Deformed lower arm
33A-10
STEERING WHEEL SHIMMY
Symptom
Steerlng wheel shlmmy
Probable cause
Improper front or rear wheel alignment Reference page or remedy
33A-534-5, 23
Improper tire pressure I 31-3
lmbalanced wheels
Replace
1 Poor turning resistance of lower arm ball joint) 33A-11
] Excessive play of steering wheel) 37A-15
Broken or weak front stabilizer
Worn lower arm bushing33A-13. 17
33A-10
Malfunctioning shock absorber
Broken or weak coil spring
Wear, play, or seizure of wheel bearing33A-6
34-11, 3
5
Replace
Wear, play, or seizure of drive shaft ball joint
26-12
TSB Revision1
Page 902 of 1273
WHEEL AND TIRE - Troubleshooting31-3
TROUBLESHOOTING
M31EA-
Symptom Remedy
Probable cause
Under-inflation or
lack of rotation Adjust the tire pressure
Rapid wear
at shoulders
Rapid wear
at center Over-inflation or
lack of rotation
Cracked
treads Under-inflation
Excessive camber nspect
the camber
Near on )ne
side
idjust the toe-inIeathered?dge ncorrect
oe-in laid
spots
Jnbalancedvheel Adjust the imbalanced
wheels calloped
ack of rotation of tyres or worn or
ut-of-alignment suspension Rotate the tires Inspect the front sus-
pension alignment fear
TSB Revision
Page 903 of 1273
31-4WHEEL AND TIRE - Service Adjustment Procedures
SERVICE ADJUSTMENT PROCEDURES
TIRE INFLATION PRESSURE CHECKM3lFOAC
Check the inflation pressure of the tires. If it is not within the
standard value, make the necessary adjustment.
W
ear indicator
53YJlO
TIRE WEAR CHECKM31FBAB
Measure the tread depth of tires.
Limit: 1.6 mm
(.06 in.)
If the remaining tread depth is less than the limit, replace the
tire.
NOTE
When the tread depth of tires is reduced to 1.6 mm LO6 in.) or
less, wear indicators will appear.
WHEEL RUNOUT CHECKWlFcAB
Jack up the vehicle so that the wheels are clear of the floor.
While slowly turning the wheel, measure wheel runout
with a
dial indicator.
Limit: Radial
1.2 mm (.047 in.)
1 .O mm (.039 in.)
Lateral
1.2 mm (.047 in.)
1 .O mm (.039 in.)
If wheel runout
exceeds the limit, replace the wheel.
TSB RevisionI
Page 905 of 1273

31-6WHEEL AND TIRE - Wheel and Tire
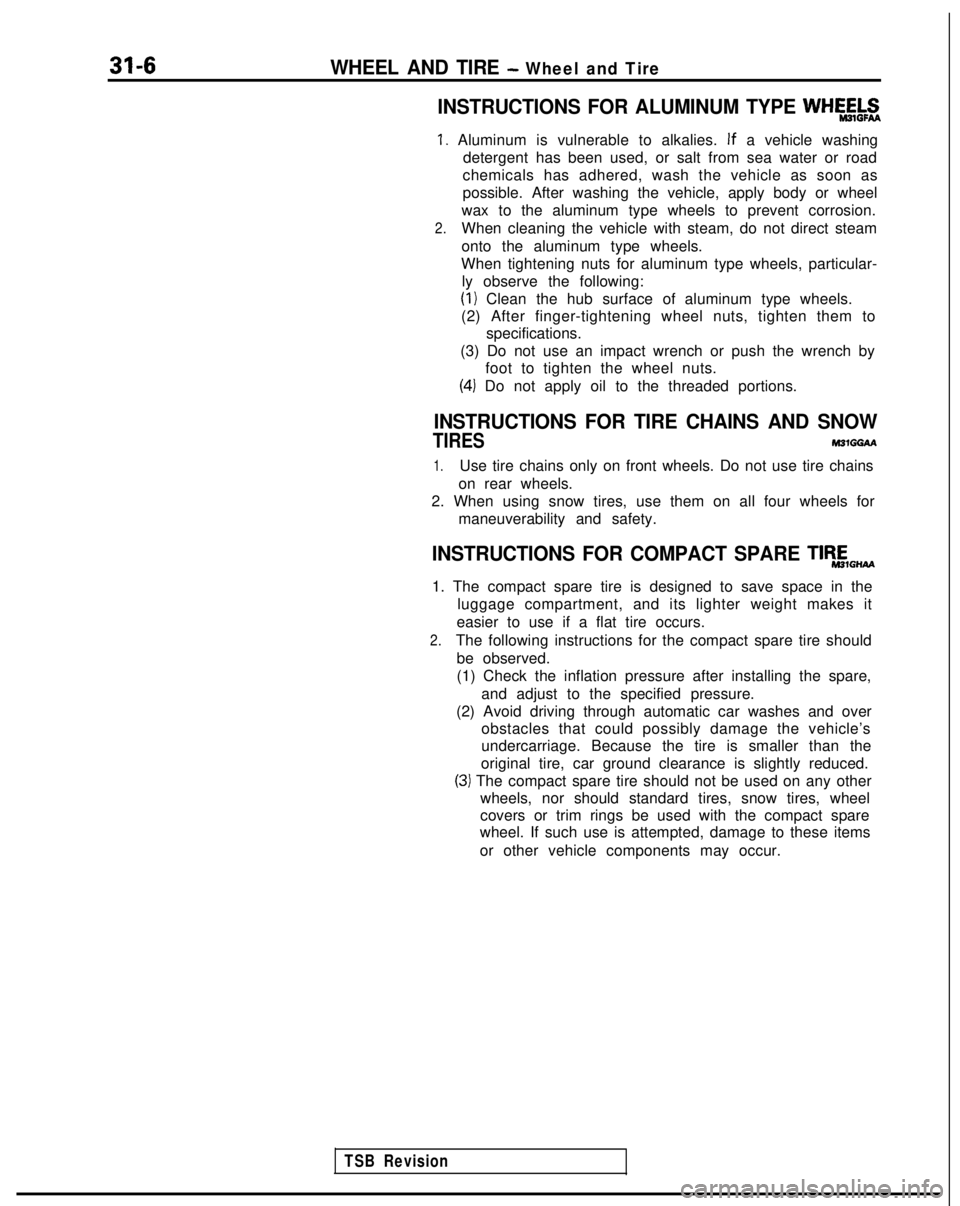
INSTRUCTIONS FOR ALUMINUM TYPE WHk&g
1. Aluminum is vulnerable to alkalies. If
a vehicle washing
detergent has been used, or salt from sea water or road
chemicals has adhered, wash the vehicle as soon as
possible. After washing the vehicle, apply body or wheel
wax to the aluminum type wheels to prevent corrosion.
2.When cleaning the vehicle with steam, do not direct steam
onto the aluminum type wheels.
When tightening nuts for aluminum type wheels, particular- ly observe the following:
(I) Clean the hub surface of aluminum type wheels.
(2) After finger-tightening wheel nuts, tighten them to specifications.
(3) Do not use an impact wrench or push the wrench by foot to tighten the wheel nuts.
(4) Do not apply oil to the threaded portions.
INSTRUCTIONS FOR TIRE CHAINS AND SNOW
TIRES M31GGbl
1.Use tire chains only on front wheels. Do not use tire chains
on rear wheels.
2. When using snow tires, use them on all four wheels for maneuverability and safety.
INSTRUCTIONS FOR COMPACT SPARE TlR,E,,,,
1. The compact spare tire is designed to save space in theluggage compartment, and its lighter weight makes it
easier to use if a flat tire occurs.
2.The following instructions for the compact spare tire should be observed.
(1) Check the inflation pressure after installing the spare, and adjust to the specified pressure.
(2) Avoid driving through automatic car washes and over obstacles that could possibly damage the vehicle’s
undercarriage. Because the tire is smaller than the
original tire, car ground clearance is slightly reduced.
(3) The compact spare tire should not be used on any other wheels, nor should standard tires, snow tires, wheel
covers or trim rings be used with the compact spare
wheel. If such use is attempted, damage to these items
or other vehicle components may occur.
TSB Revision
Page 925 of 1273
33A-4FRONT SUSPENSION -Special Tools/Troubleshooting
SPECIAL TOOLS
Number
NameI Use
OPTIONAL: AVAILABLE FROM O.T.C.
6
TROUBLESHOOTING
Symptom-
wheel is heavy, vibrates or
pulls to one side
-
I
Excessive vehicle rolling
Poor riding
Inclination of vehicle
Noise Probable cause
Suspension malfunction
Ball joint
Coil spring
Wheel alignment
Unbalanced or worn tires
Broken or deteriorated stabilizer
Shock absorber malfunciton Remedy
Adjust or replace
Adjust or replaceReplace
Improper tire inflation pressure
Broken or deteriorated coil spring
Shock absorber malfunction Adjust
Replace
Broken or deteriorated coil spring
Lack of lubrication
Looseness and wear of each part
Broken coil spring
Shock absorber malfunctionReplace
Lubricate
Retighten or replace
Replace
TSB Revision