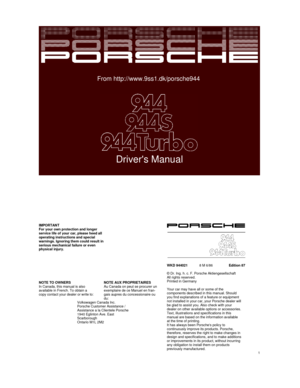
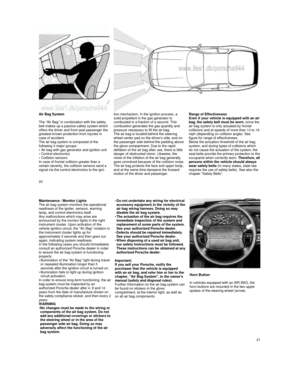
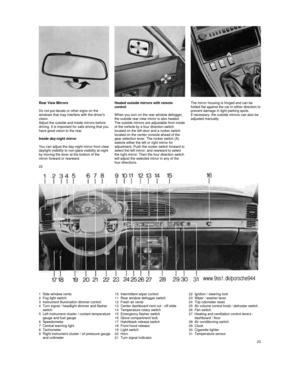
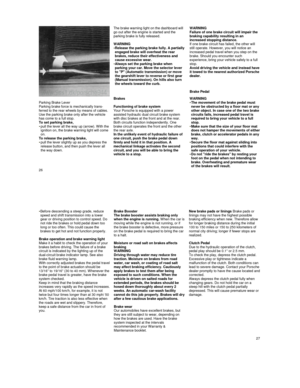
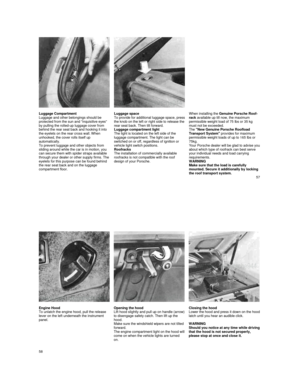
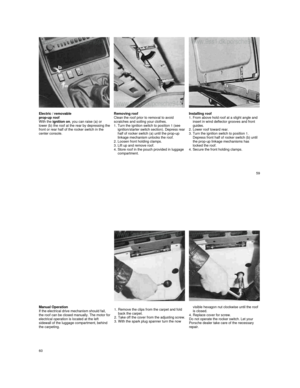
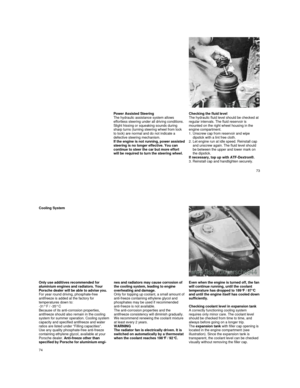
Page 41 of 66

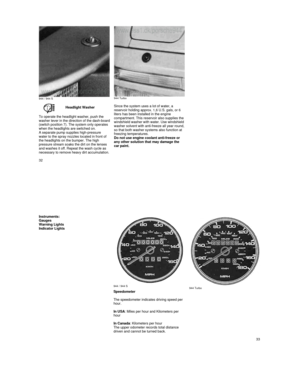
Brake Fluid Reservoir
The brake fluid reservoir is in the engine
compartment. The reservoir has two
chambers, the front chamber for one brake
circuit and the rear chamber for the second
brake circuit and the hydraulic clutch.
The fluid level should be checked regularly. If
the level drops below the "min" mark on the
transparent reservoir, the cause should be
located and corrected by your dealer.
To add brake fluid , unscrew the cap. The
vent bore in the cap should be kept clean and
open.
944 / 944 S WARNING
Every 2 years the brake fluid has to be replaced. See your Warranty &
Maintenance booklet.
If brake fluid must be added to the reservoir, use only new and unused DOT
3 or DOT 4 brake fluid, that meets SAE
specification J1703 and conforms to
Motor Vehicle Safety Standard 116.
Do not use any other brake fluid or brake fluids that have absorbed moisture from
the open air, or brake fluid that is dirty. It
may cause premature wear or unreliable
braking action.
Do not add or mix DOT 5 silicone type brake fluid with the brake fluid in your
vehicle as severe component corrosion
may result. Such corrosion could lead to
brake system failure.
The brake warning light does not indicate brake fluid level. Check fluid level
between regular maintenance services.
Brake fluid is poisonous. Brake fluid is also harmful to the paint of your vehicle.
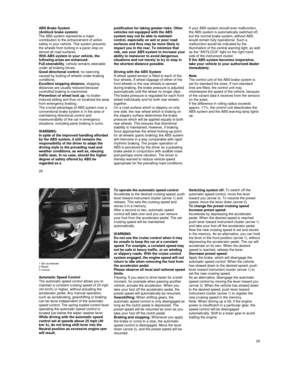
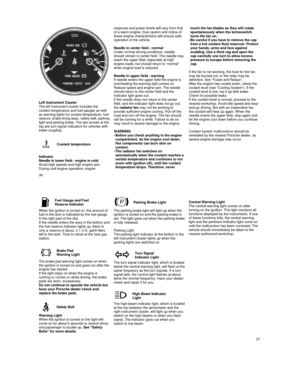
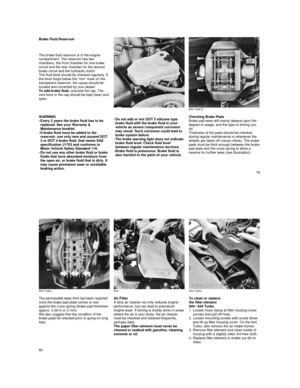
Checking Brake Pads
Brake pad wear will mainly depend upon the
degree of usage, and the type of driving you
do.
Thickness of the pads should be checked
during regular maintenance or whenever the
wheels are taken off (visual check). The brake pads must be thick enough between the brake pad plate and the cross spring to allow a
reserve for further wear (see illustration).
79
944 Turbo
944
944 Turbo
The permissible wear limit has been reached
once the brake pad plate comes to rest
against the cross spring (brake pad thickness
approx. 0.08 in or 2 mm).
We also suggest that the condition of the
brake pads be checked prior to going on long
trips. Air Filter
A dirty air cleaner not only reduces engine performance, but can lead to premature
engine wear. If driving is mostly done in areas
where the air is very dusty, the air cleaner must be checked and cleaned frequently,
perhaps daily.
The paper filter element must never be
cleaned or soaked with gasoline, cleaning
solvents or oil.
To clean or replace
the filter element
944 / 944 Turbo
1. Loosen hose clamp at filter housing cover (arrow) and pull off hose.
2.
Loosen mounting screws with screw driver
and lift up filter housing cover. On the 944
Turbo, also remove the air intake funnel.
3.
Remove filter element and clean inside of
housing with a slightly oiled, lint-free cloth.
4.
Replace filter element or shake out dirt to
clean.
80
Page 42 of 66
 and carefully
place in position. Tighten fastening screws,
connect hose and screw down hose clamp")
944
5. Press together the housing cover with the air intake funnel (944 Turbo) and carefully
place in position. Tighten fastening screws,
connect hose and screw down hose clamp.
944 S
1. Unscrew the retaining screws and remove
the filter cover.
2.
Remove the filter element.
3. Clean the inside of the filter housing with a
lightly oiled lint-free cloth.
4.
Fit a replacement filter element. Carefully
place the housing cover in position and
tighten the retaining screws.
Reservoir for Windshield and Headlight
Washer System
The transparent reservoir is in the engine
compartment. As clear water is usually
inadequate for cleaning windshield or
headlights, add a cleaning solution, such as
windshield washer solvent and antifreeze offered by your dealer. To assure that the
system also functions at freezing
temperatures, antifreeze must be added to the water beforehand. Follow the instructions on the can for the right amount to be used (also
see "Filling Capacities"). Do not use engine
coolant anti-freeze or any other solution
that can damage the car paint.
81
Tires/Wheels
The original equipment tires and wheel rims
on your Porsche comply with all applicable
Federal Motor Vehicle Safety Standards.
For your driving safety remember the
following:
Wheel rims and wheel bolts are matched to
fit your Porsche.
If you intend to use other than original equipment wheels, be sure that they conform to Porsche specifications for your model. The use of wheel rims and wheel bolts that
do not meet specifications of the original
factory installed equipment will affect the safe operation of your vehicle. Before you plan on exchanging wheels, or winter tires already mounted on wheel rims, consult your Porsche dealer. He has the
technical information necessary to advise
you which wheel rims and wheel bolts are
compatible with the original factory
installations.
Tire pressures
WARNING
Incorrect tire pressures cause increased
tire wear and adversely affect road holding of the vehicle, leading to loss of control.
Always use an accurate tire pressure
gauge when checking inflation pressures.
Do not exceed the maximum tire inflation
pressure listed on the tire sidewall. (Also
refer to "Technical data"). Cold tire infla-
tion pressure means: when a car has not been driven for at least 3 hours or less
than 1 mile. Never let any air out of warm
tires to meet cold tire pressure
specifications.
Tire traction
WARNING
When driving on wet or slushy roads, a
wedge of water may build up between the
tires and the road. This phenomenon is
known as aquaplaning and may cause
partial or com
plete loss of traction, vehicle control or stopping ability. Reduce speed
on wet surface.
Tire Life
Tire life depends on various factors, i.e.,
roads, traffic and weather conditions, driving
habits, type of tires and tire care.
Inspect your tires at least
every 2.000 miles or 3.000 km for wear and damage. If you notice
uneven or substantial wear, wheels might
need alignment or tires should be balanced or
replaced.
Tires must always remain on same side of
vehicle.
After changing, adjust tire pressure and torque wheel nuts diagonally to 94 ft Ibs (130 Nm) (see "Changing wheels").
The supposition that tire durability and
performance are immune to the effects of
storage and age is unfounded. Chemical
additives, which make the rubber elastic, lose
their effectiveness in the course of time and
the rubber becomes brittle and cracks.
Therefore, the tires, especially the collapsible
spare tire, should from time to time undergo a
visual check. To accomplish this,
pump up the collapsible spare tire.
Under no circumstances should tires older
than 6 years be used on your Porsche. The
age of the tire can be obtained from the "DOT" code number. If, for example, the last three
numbers read 125, then the tire was produced in the 12th week of 1985.
Tire wear
The original equipment tires on your Porsche
have built-
in wear indicators. They are molded into the bottom of the tread grooves and will
appear as approximately 1/2 in (12 mm)
bands when the tire tread depth is down to
1/2 of an in (1.6 mm).
When the indicators appear in two or more
adjacent grooves, it is time to replace the
tires. We recommend, however, that you do
not let the tires wear down to this extent. Worn tires cannot grip the road surface properly,
and are even less effective on wet roads.
In the United States, state laws may govern
the minimum tread depth permissible. Follow
all such laws.
WARNING
Do not drive with worn tires or tires
showing cuts or bruises as they may lead
to sudden deflation.
If you notice that tires are wearing unevenly,
consult your Porsche dealer. Uneven wear
82
Page 43 of 66

may not always be due to improper wheel
alignment. It can be the result of individual
driving habits such as cornering at high
speeds. If the tire pressure is not checked and adjusted regularly, abnormal tire wear can
also occur.
Tire care
WARNING
Avoid damaging tires and wheel rims. If you must drive over a curb or other obstacle,
drive slowly and at an obtuse angle.
Frequently check tires for uneven wear and
damage.
Remove imbedded material. Replace worn or damaged tires immediately. Replace missing valve dust caps. Keep oil, fuel, brake fluid, etc. away from
tires.
Keep tires inflated correctly.
Tire replacement
In the interest of maximum safety and best
all-around car handling, always buy
replacement tires that have the same
specifications with regard to tire size,
design, load carrying capacity, tread
pattern, tread depth etc. This also applies
to Porsche recommended alternate
replacement tires. If you do not use a
Porsche recommended replacement tire,
make sure that you purchase your new
tires from a reputable
tire specially dealer and that the dealer complies with all manufacturers warnings
for those tires.
In case of tire damage where it is uncertain
whether there is a break in the ply with all its consequences or, tire damage caused by
thermal or mechanical overloading due to a
loss of pressure or any other prior damage,
we recommend that the tire be replaced for safety reasons.
If one faulty tire on an axle is replaced it
should be noted that the difference in tread
depth on one axle must not be more than
30%.
Tire specifications are imprinted on the
sidewall of the tires. If in doubt, check with
your Porsche dealer.
When replacing tubeless tires, always install
new valve stems. When replacing tires
requiring an inner tube, always install new
tubes.
New tires do not possess maximum
traction. They tend to be slippery. Break
new tires in by driving at moderate speed
for the first 60-120 miles or 100-200
kilometers.
Wheel balancing
A wheel should always be balanced after a tire repair. Even with regular use a wheel can
get out of balance, and should therefore be
balanced from time to time. Unbalanced
wheels may affect car handling and tire life.
When balancing light alloy wheels, use only
adhesive balancing weights supplied through
the Porsche parts service.
Wheels
If you intend to use other than original
equipment wheels, be sure that they conform
to Porsche specifications for your model.
Check with your Porsche dealer regarding the
correct wheel specifications for type and
model year.
Removing and storing tires
The driving direction should be clearly marked on all tires before removing them for storage,
to make sure they are mounted and run in the
same direction as before. Store tires in a cool
and dry place. Tires without rims upright!
Avoid contact with oil, grease or gasoline. When remounting, put tires with the most
tread depth at the front.
Snow tires
For a better grip on snow and ice use radial M + S tires or snow tires with studs. Check with
your local Motor Vehicle Bureau for possible
restrictions.
Radial ply M+S tires should be inflated with
the same cold tire inflation pressures required
for the regular radial ply tires. However, do not exceed the maximum tire inflation pressure
listed on the tire sidewall.
Snow tires should have the same load
capacity as original equipment tires and
should be mounted on all four wheels. Snow
tires with studs should be run at moderate
speeds when new in order to give the studs
time to settle.
83
WARNING
Tires with badly worn treads and studs are
very dangerous. Make sure they are replaced
immediately.
Do not drive a vehicle equipped with snow
tires at prolonged high speed. Snow tires do
not have the same degree of traction on dry,
wet or snow free roads as a normal tire. Furthermore, snow tires wear rapidly under
these conditions.
Snow tires do not fulfill their purpose if the
tread depth is less than 5/32 in. / 4 mm.
Comply with all state and local laws
governing snow tire and tread depth
requirements.
Snow chains Should snow chains be necessary, they
must be mounted on the drive wheels
only.
Check with local authorities for possible
restrictions.
Use only Porsche-approved snow chains with
fine pitch links, so that enough
space remains between the chains and the inside of the wheel arches.
Drive wheels must rotate freely with chains
mounted to prevent damage to body, axle or
brake components. Follow instructions issued
by the supplier of the chains. Remove chains
as soon as roads are free of ice and snow.
New Tire Identifications
The European tire manufacturers have
changed their tire identification system for SR
and HR-tires pertaining to maximum
permissible speed and maximum load carrying capacity for belted tires. The following is an
example only.
During the transition period some tires might
show both old and new identification codes,
such as: 215/60 SR 15 M+S 80 Q. In this
instance, the new codes apply.
The identification codes for VR tires
remain unchanged; for example: 205/55 VR
16. (V = maximum permissible speed for radial tires, i.e. over 130 mph or 210 km/h).
84
Page 44 of 66

Collapsible Spare Tire
The spare tire is stored underneath the
luggage compartment cover.
Due to tread and space saver design features
of the collapsible tire, car handling may be
affected.
Therefore, do not drive more than 50 mph
(80 km/h) when using the collapsible spare tire. It is for emergency use and short
distances only. Remount the original road
tire as soon as possible.
Inflating the collapsible tire WARNING
Do not overinflate your spare tire.
Inflate the collapsible tire with the electric air
compressor that comes with your Porsche. Do not use other equipment!
1. Mount spare wheel before inflating the tire.The wheel nuts for the light alloy wheels of the vehicle can be used to mount the spare wheel. This applies to emergency use and
short distances only.
2.
Attach hose to tire valve. Insert plug of electric cord into cigarette lighter socket.
3. The required tire pressure is 36 psi or 2.5 bar/atm (front or rear). Check
pressure with tire pressure gauge.
4.
Disconnect hose and electric cord and store air compressor.
5. Have flat road tire repaired and remounted
on car at next service stop. Remember, the collapsible tire is for emergency use and short distances only.
When the air is released from the collapsible
tire, it will return to its original shape after
cooling down for several hours. Store
collapsible tire in luggage compartment.
The collapsible spare tire cannot be
repaired or mounted on the rims with
standard workshop equipment. Repair and
remounting must only be done by the tire
manufacturer.
Tire tread depth As required by law, the tread depth of the collapsible tire is the same as that of the
original equipment tire. Replace a worn
collapsible spare tire in time.
If air compressor does not work
...
Check if tobacco or any other foreign matter is lodged in the cigarette lighter socket.
Remove carefully with a wooden pick. Do
not use metal object to prevent short circuit.
... Check if fuse is blown. Replace with new
equivalent fuse.
Maintenance of air compressor
The air compressor is maintenance-free. Do
not apply oil or any other lubricant.
The air filter should be cleaned periodically to
assure maximum efficiency of the unit.
85
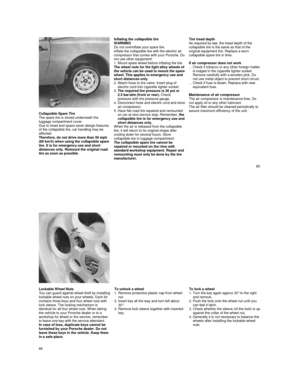
Lockable Wheel Nuts You can guard against wheel theft by installing lockable wheel nuts on your wheels. Each kit
contains three keys and four wheel nuts with
lock sleeve. The locking mechanism is
identical for all four wheel nuts. When taking
the vehicle to your Porsche dealer or to a
workshop for wheel or tire service, remember to leave one key with the service attendant.
In case of loss, duplicate keys cannot be
furnished by your Porsche dealer. Do not
leave these keys in the vehicle. Keep them
in a safe place.
To unlock a wheel
1. Remove protective plastic cap from wheel
nut.
2.
Insert key all the way and turn left about
30°.
3.
Remove lock sleeve together with inserted
key.
To lock a wheel
1. Turn the key again approx 30° to the right and remove.
2.
Push the lock onto the wheel nut until you
can feel it latch.
3.
Check whether the sleeve (of the lock) is up against the collar of the wheel nut.
4. Generally it is not necessary to balance the wheels after installing the lockable wheel nuts.
86
Page 45 of 66

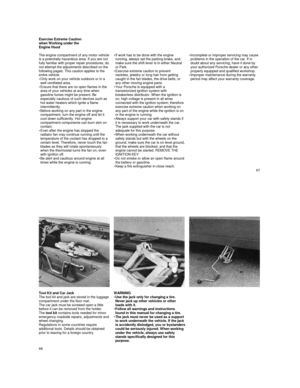
Jack support points
Black arrow: Jackport for car jack
White arrows: Lift points for workshop hoist or flo or jack
front on the inboard side members
rear on the side reinforcement brackets
Jacking at any other place may damage the vehicle o r may
result in personal injuries.
Changing a Tire
WARNING - Failure to follow these
instructions may result in serious personal injuries to you or to bystanders.
If you have a flat tire, move a safe distance off the road. Turn the emergency flasher on and use other warning devices
to alert other motorists.
Passengers must not remain in the vehicle when it is jacked up. Before you change a tire, be sure the ground is level and firm. If necessary, use a board under the jack to ensure that the jack does not sink into the ground. Set the parking brake and block the wheels opposite the flat tire on the other
side of the vehicle.
The jack is only to be used for changing
a tire. Do not use it as a support to work
under the car.
Never jack the car up by the body or the bumpers.
Sequence of operations:
1.
Loosen all wheel nuts. Do not yet remove
nuts.
2.
Securely place the jack in the jack support
at the indicated point. Place the jack at an
angle so that the jack base rests firmly on
the ground. If the ground is not firm under
the jack, use a board.
Do not raise the vehicle until you are sure
the jack is securely engaged.
3.
Raise the car by turning the handle
clockwise. Only raise the car as much as is
needed to change a wheel.
4.
Fully unscrew wheel nuts and remove wheel.
5. After you have mounted the spare wheel, insert the wheel nuts and hand tighten them crosswise. Snug wheel nuts with socket wrench and breaker bar.
6. To lower the car, turn the handle
counterclockwise till tire touches ground.
7.
Then go crosswise from one nut to another
tightening them firmly with the socket
wrench and breaker bar.
8. Fully lower the vehicle and remove jack.
9. Correct the air pressure of the tire you have just put on. Have flat tire repaired at next service stop.
Correct tightness of the wheel nuts is
important. The torque of 94 ft Ib (130 Nm) can
be obtained with a socket wrenc
h and breaker bar by any person of average strength. If in
doubt about the correct tightness of the wheel
nuts, have it checked with a torque wrench by
your dealer or a service station.
87
Lifting Vehicle
The jack ports are located below the middle of the door underneath the left and right rocker
panels, hidden from view.
Lifting with car jack
The car jack must never be used as a
support to work underneath the vehicle. If
the jack is accidentally dislodged, you
could be seriously injured. When working
under the vehicle always use safety stands specifically designed for this purpose.
WARNING
Jacking at any other place may damage the vehicle or may result in personal injuries.
The vehicle should never be lifted or jacked up from underneath the engine oil pan, the transmission housing, or the front or rear axle. This could lead to serious
damage.
Lifting with workshop hoist
Make sure there is sufficient clearance
between pads and vehicle before driving
vehicle onto hoist, especially if the vehicle
has a large front panel or spoiler. The vehicle must be lifted only at the lift points illustrated.
The front lift points are located on the inboard
side members of the underbody.
The rear lift points are located on the side
reinforcement brackets of the underbody.
Take care to avoid damaging critical
components which are close to the lift
points.
WARNING
When removing components such as
engine block, transmission housing, fuel
tank, wheels, front or rear axle, anchor
vehicle to hoist or add corresponding
weights to maintain the center of gravity.
Otherwise the vehicle might tilt or slip off
the hoist, causing serious damage or
personal injury.
Lifting with floor jack
The same lift points as illustrated for the hoist
also apply when using a floor jack. To avoid
damage to the underbody or chassis frame, it
is necessary to insert a rubber pad between
the floor jack and the lift points.
88
Page 46 of 66

If it fails to light up, the fuse is defective and
must be replaced. Replace black plastic
cover.
The central electrical system contains plug in
relays for various electrical switching
functions.
Defective relays should be tested and
replaced by an authorized Porsche dealer.
To prevent damage to the electrical system
we recommend having all work - including the
installation of electrical accessories -carried
out by your authorized Porsche dealer. . ,
Fuses and Relays
The individual circuits are protected by fuses
to prevent damage to electrical leads and
components due to short-circuits and
overload.
The fuse box with a black plastic cover is
located on the left side in the engine
compartment directly in front of pivot point for
left windshield washer arm.
The use of the fuses and relays is shown
in a list on the inside of the cover of the
fuses and relays.
Replacing a Fuse
Before replacing a fuse, turn off all
electrical components and the ignition;
remove the key. Replacing a fuse or relay with the
engine running or the ignition on could
cause electrical shock.
A blown fuse indicates an overload in the circuit. When a fuse is blown it is not sufficient
to merely replace it. The cause of the short
circuit or overload must be located. Fuses
should never be patched up with tin foil or
wire as this may cause serious damage
elsewhere in the electrical circuit.
Open snap-on latches and remove plastic
cover.
To find out whether a fuse is serviceable, pull
it out with the plastic pliers specifically
provided for this purpose. Insert the fuse at
the test point on relay (G 3). If the fuse is in
proper condition, the green indicator light will
come on.
Loudspeakers
When installing a radio or booster amplifier,
check that the output is compatible with the
capacity of the loudspeakers supplied with the vehicle.
Rated capacity in Watt (Sinus)
Front Rear
2x10 2x10
HiFi Audio Package 2 x 25 2 x 25
89
Battery-12 Volt
The battery is located under the front hood in
the cowl area.
A replacement battery should always have the same rating as the original equipment battery.
Specifications are printed on the battery
housing.
Before work is done on the electrical
system, the battery must be disconnected
to prevent short circuiting. First
disconnect the negative ground wire and
then the positive cable. To reconnect
battery, reverse the procedure.
Disconnecting the battery while the engine is running will damage the alternator. This
also applies to cars equipped with a
battery main switch.
Never drive the car with a disconnected battery as this will damage the alternator. WARNING
Do not lay tools or other metal objects on the battery as they could cause a short
circuit across the battery terminals.
Do not expose the battery to an open flame or electric spark. Hydrogen gas
generated by the battery is explosive.
Do not let battery acid come in contact with skin, eyes, fabric or painted
surfaces.
If you get electrolyte, which is an acid, in your eyes or on skin, immediately rinse
with cold water several minutes and call a doctor. Spilled electrolyte must be rinsed off at once with a solution of water and baking
soda to neutralize the acid and prevent
damage to fabric and metal.
Checking the electrolyte fluid level
The electrolyte fluid level in your battery can
be checked by unscrewing and opening the
filler vent caps of each cell. The fluid level
should meet the indicator mark in each cell. If
necessary, top off with distilled water.
How often water must be added depends on
operating conditions and on the time of year.
Generally, the electrolyte level must be
checked more often in the summer than in the winter, and more often when driving long distances.
Only fill up to mark, otherwise the electrolyte will overflow when the battery is being charged and cause damage.
Battery care
Battery should be securely mounted
Terminals and connections should be kept
clean and properly tightened. Corrosion can
be prevented by coating terminals and
connections with petroleum jelly or silicone
spray
Vent caps must be securely tightened to
prevent spillage
Winter operation
During the winter months, battery capacity
tends to decrease as temperatures drop.
Additionally, more power is consumed while starting, and the headlights, heater, rear window defogger, etc., are used more
frequently. Curtail unnecessary power
consumption, particularly in city traffic or when travelling short distances only. Let your
Porsche dealer test the battery's capacity
before winter sets in. A well charged battery
will not only prevent starting problems but will
also live longer.
Battery charging
Automotive batteries lose their efficiency when not in use. The charge available in your
battery can be measured with a hydrometer.
We recommend that battery voltage be tested
by your Porsche dealer who has the
appropriate equipment. If the car is not driven
for prolonged periods, the battery
90
Page 47 of 66

must be charged at least every 6 weeks. A
discharged battery allows rapid formation of
sulfates, leading to premature deterioration of
the plates.
WARNING
Charge battery in a well ventilated area.
Keep away from open flame or electrical
spark. Do not smoke. Hydrogen gas
generated by the battery is explosive.
Electrolyte fluid that may spill during charging should be washed off with a solution of warm water and baking soda to neutralize the acid. If you get electrolyte in your eyes or on your
skin, immediately rinse with cold water for
several minutes and call a doctor.
Never charge a frozen battery. It may
explode because of gas trapped in the ice.
Allow a frozen battery to thaw out first. Never use a fast charger as a booster to start the engine. This may seriously damage the
vehicle's electrical system and the charger.
Fast charging a battery is dangerous and
should only be attempted by a competent
mechanic with the proper equipment.
Slow battery charging
WARNING
Heed all warnings and follow instructions
that come with your battery charger.
Disconnect battery cables and remove the
battery.
All vent caps should be open. If fluid level is low, it should be topped up to the full mark in
each cell.
Connect charger cables.
Charger cables must be connected
POSITIVE (+) to POSITIVE (+) and
NEGATIVE (-) to NEGATIVE (-).
Do not connect or disconnect charger cables while charger is operating. Switch on charger. Normally, a battery should be charged at no
more than 10 percent of its rated capacity.
Rated capacity of the battery in your vehicle
is listed on the battery housing.
After charging, turn off charger and disconnect charger cables. Tighten the vent caps and reinstall battery.
91
Emergency Starting with Jumper Cables
WARNING
Improper use of booster battery to start a
vehicle may cause an explosion.
Lead-acid batteries generate explosive
gases. Keep sparks, flame and lighted
cigarettes away from batteries.
Do not charge a frozen battery, thaw it out
first. Gas trapped in the ice may cause an
explosion.
No attempt should be made to jump start any vehicle with a low electrolyte level in the
battery.
Check electrolyte level of each cell. If
necessary, fill with distilled water to just
above plates.
Make sure the voltage of both batteries is the same. The capacity (Ah) of the booster battery
should not be lower than that of the
discharged battery.
Vehicle with discharged battery: turn off
lights and accessories, remove key, move
lever to N or P and set parking brake.
Vehicle with booster battery should not be
running. Disconnect ground cable.
Remove vent caps from booster battery and
discharged battery. Preferably lay a cloth
over open vents to reduce explosion hazard.
How to use jumper cables WARNING
To avoid serious personal injury and damage to the vehicle, heed all warnings
and instructions of the jumper cable
manufacturer. The jumper cables must be long enough so that neither vehicles nor cables touch
another.
Improper hook-up of jumper cables can
ruin the alternator.
Always connect POSITIVE (+) to POSITIVE
(+), and NEGATIVE (-) to ground on engine
block.
1. Connect clamp of plus-cable to positive (+) terminal of discharged battery (1).
2.
Connect clamp on opposite end of cable to
positive (+) terminal of booster battery (2).
3.
Connect clamp of minus-cable to negative
(-) terminal of booster battery (3).
4.
Connect clamp on opposite end of cable to
a bare metal part bolted directly to the
engine block or to the engine block itself (x)
of car with discharged battery. Connect
clamp as far away from battery as possible.
5. Start engine in the usual manner. If engine
fails to start, do not continue to crank but
contact nearest workshop.
6.
With engine running, remove jumper cables from both cars in exact reverse order: Steps 4 through 1.
7. Reconnect ground cable of booster battery.
A - Discharged Battery
B - Booster Battery
Do not try to start car by pushing or towing.
Damage to the catalytic converter, the
transmission, and/or other components of the
car may result.
92
Page 48 of 66

Replacing Bulbs
944 / 944 S
944 Turbo To avoid short circuits, turn off the respective
electrical components when changing light
bulbs.
Keep bulbs free of grease and dirt. Hold
them only with a clean cloth or soft paper.
Do not use chemical cleaning agents on
the plastic lenses. Plastic lenses should
only be cleaned with water or a mild soap/
water solution.
We recommend that you have an assortment
of spare bulbs in the car.
When traveling abroad don't forget that some
countries require spare bulbs as part of the
safety equipment.
Front - Turn Signal Lights /
Parking Lights
1. Remove the Phillips screws from lamp lens
and remove lens.
2.
Push bulb into holder and twist to the left
(bayonet mount).
3.
Remove bulb.
4. Insert new bulb and turn to the right so that
it snaps into position.
5. Install lamp lens and tighten the retaining screws evenly, alternating from one to the
other.
Do not overtighten screws as this may
crack the lens.
6. Check lights.
93
Front
Rear Rear - Turn Signal Lights /
Stop Lights / Parking Lights /
Back-up Lights
1. Open hatchback and unsnap carpeting.
2.
Remove knurled nut and take off bulb
holder
3.
Press defective bulb into socket and turn to
left (bayonet mount). Discard bulb.
4.
Press new bulb into socket, turn to right
until it snaps into position.
5.
Install bulb holder and tighten knurled nut.
6. Snap carpeting back in place.
Side Marker Lights
To change the bulb, open the flap at the front
of the plastic shell beneath the fender. The
rear housing is in the stowage well beneath
the mat.
1.
Unscrew knurled nut and remove the plastic cover.
2. Unclip lamp socket (arrow), remove
defective bulb and fit replacement (bayonet
mount).
3.
Clip socket into place and refit plastic cover. 4. Check that light is functioning correctly.
94