Page 9 of 66

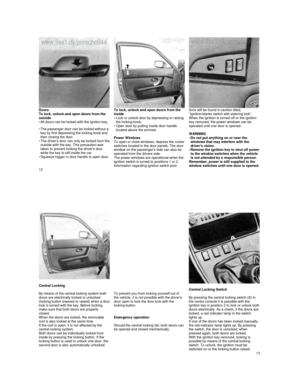
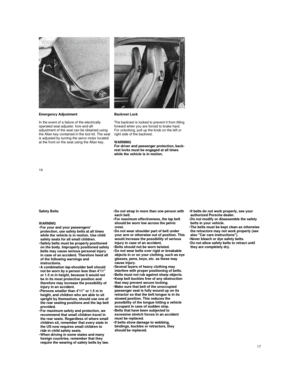
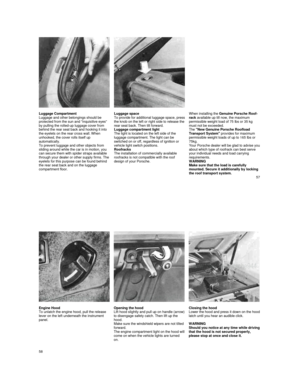
Emergency Adjustment
In the event of a failure of the electrically
operated seat adjuster, fore-and-aft
adjustment of the seat can be obtained using
the Allan key contained in the tool kit. The seat is adjusted by turning the servo motor located
at the front on the seat using the Allan key.
Backrest Lock
The backrest is locked to prevent it from tilting forward when you are forced to brake hard.
For unlocking, pull up the knob on the left or
right side of the backrest.
WARNING
For driver and passenger protection, back-
rest locks must be engaged at all times
while the vehicle is in motion.
16
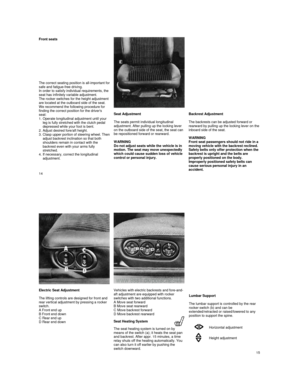
Safety Belts
WARNING
For your and your passengers' protection, use safety belts at all times
while the vehicle is in motion. Use child
safety seats for all small children. Safety belts must be properly positioned on the body. Improperly positioned safety belts may cause serious personal injury
in case of an accident. Therefore heed all
of the following warnings and
instructions.
A combination lap-shoulder belt should not be worn by a person less than 4'11"
or 1.5 m in height, because it would not
be in its most protective position and
therefore may increase the possibility of
injury in an accident.
Persons smaller than 4'11" or 1.5 m in height, and children who are able to sit
upright by themselves, should use one of the rear seating positions and the lap belt provided. For maximum safety and protection, we recommend that small children travel in
the rear seats. Regardless of where small
children sit, remember that every state in
the US now requires small children to
ride in child safety seats. When driving in some states and many foreign countries, remember that they
require the wearing of safety belts by law.
Do not strap in more than one person with each belt. For maximum effectiveness, the lap belt should be worn low across the pelvic
crest.
Do not wear shoulder part of belt under your arm or otherwise out of position. This would increase the possibility of serious
injury in case of an accident.
Belts should not be worn twisted. Do not wear belts over rigid or breakable objects in or on your clothing, such as eye glasses, pens, keys, etc. as these may
cause injury.
Several layers of heavy clothing may interfere with proper positioning of belts. Belts must not rub against sharp objects. Keep belt buckles free of any obstruction that may prevent secure locking. Make sure that belt of the unoccupied passenger seat is fully wound up on its
retractor so that the belt tongue is in its
stowed position. This reduces the
possibility of the tongue hitting a vehicle
occupant in case of sudden stop.
Belts that have been subjected to excessive stretch forces in an accident
must be replaced.
If belts show damage to webbing, bindings, buckles or retractors, they
should be replaced.
If belts do not work properly, see your authorized Porsche dealer. Do not modify or disassemble the safety belts in your vehicle. The belts must be kept clean as otherwise the retractors may not work properly (see
also "Car care instructions").
Never bleach or dye safety belts. Do not allow safety belts to retract until they are completely dry.
17
Page 10 of 66

Safety belt warning system
An audio-visual warning system is
interconnected with the driver's safety belt.
Every time the ignition is turned on, the seat
belt warning light in the left instrument cluster
comes on for about 6 seconds to remind driver and passenger to buckle up. If the driver does
not fasten the safety belt, the buzzer will
continue for the duration of this six second
period. The buzzer will go off as soon as the
driver has buckled up.
Inertia reel retractor
The combination lap/shoulder belt with inertia
reel locking mechanism adjusts automatically
to your size and movements as long as the
pull on the belt is slow.
Rapid deceleration during hard braking or a
collision locks the belt. The belt will also lock
when you drive up or down a steep hill or in a sharp curve. Otherwise the shoulder belt will
not inhibit your upper body movement.
To fasten, grasp belt and pull belt in
continuous slow motion across your chest
and lap.
Insert belt tongue into buckle on inboard side of seat. Push down until it securely locks with an audible click. Pull belt to check. Pull shoulder section to make sure belt fits
snugly across the hips.
Belts should fit snugly across the pelvis and
chest. Make sure any slack is wound on the
retractor.
18
To unfasten belt, push in release button on
buckle. Belt tongue will spring out of buckle.
To release a locked belt, lean back to take
the body pressure off the belt.
To store lap/shoulder belt, allow belt to wind
up on retractor as you guide belt to its
stowed position on doorpost.
Lap belts for rear seats
The lap belt with inertia reel locking
mechanism adjusts automatically to your size
and movements as long as the pull on the belt is slow.
Rapid deceleration during hard braking or a
collision locks the belt. The belt will also lock
when you drive up or down a steep hill or in a
sharp curve.
To fasten lap belt, grasp belt on outboard
side of seat and slowly pull across the pelvis.
Insert belt tongue into buckle on inboard side
of seat and push down until it securely locks
with an audible click. Pull belt to check.
To unfasten belt, push in release button on
the buckle.
To store belt, allow belt to wind up as you
guide belt to retractor.
19
Page 11 of 66

Air Bag System
The "Air Bag" in combination with the safety
belt makes up a passive safety system which
offers the driver and front seat passenger the
greatest known protection from injuries in
case of accident.
The air bag system is composed of the
following 3 major groups:
Air bag with gas generator and ignition unit Control electronics Collision sensors
In case of frontal collision greater than a
certain severity, the collision sensors send a
signal via the control electronics to the igni- tion mechanism. In the ignition process, a
solid propellant in the gas generator is
combusted in a fraction of a second. This
combustion generates the gas quantity and
pressure necessary to fill the air bag.
The air bag is located behind the steering
wheel center pad on the driver's side, and on the passenger side behind the padding above
the glove compartment. Due to the rapid
deflation of the air bag after use, there is little
danger of obstructed vision. Likewise, the
noise of the inflation of the air bag generally
goes unnoticed because of the collision noise. The air bag protects the face and upper body,
and at the same time dampens the forward
motion of the driver and passenger.
Range of Effectiveness Even if your vehicle is equipped with an air bag, the safety belt must be worn, since the air bag system is only actuated by frontal collisions and at speeds of more than 13 to 19 mph (depending on collision angle). See
figure for range of effectiveness.
Below the actuation threshold of the air bag
system, and during types of collisions which
do not cause the actuation of the system, the
seat belts provide the primary protection to the occupants when correctly worn. Therefore, all persons within the vehicle should always
wear safety belts (in many states, state law
requires the use of safety belts). See also the
chapter "Safety Belts".
20
Maintenance / Monitor Lights
The air bag system monitors the operational
readiness of the igniter, sensors, warning
lamp, and control electronics itself.
Any malfunctions which may arise are announced by the monitor lights in the right
instrument cluster. Upon activation of the
vehicle ignition circuit, the "Air Bag" notation in
the instrument cluster lights up for
approximately 5 seconds and then goes out
again, indicating system readiness.
In the following cases you should immediately
consult an authorized Porsche dealer in order
to assure the air bag system is functioning
properly:
Illumination of the "Air Bag" light during travel
or repeated illumination longer than 5
seconds after the ignition circuit is turned on.
Illumination fails to light up during ignition
circuit activation.
In order to ensure long-
term functioning, the air bag system must be inspected by an
authorized Porsche dealer after 4, 8 and 10
years from the date of manufacture shown on
the safety compliance sticker, and then every 2 years.
WARNING
No changes must be made to the wiring or components of the air bag system. Do not
add any additional coverings or stickers to the steering wheel or in the area of the
passenger side air bag. Doing so may
adversely affect the functioning of the air
bag system.
Do not undertake any wiring for electrical accessory equipment in the vicinity of the air bag wiring harness. Doing so may
disable the air bag system.
The actuation of the air bag requires the immediate inspection of the system and
replacement of some parts of the system.
See your authorized Porsche dealer.
Defects should be repaired immediately. See your authorized Porsche dealer. When disposing of a used air bag unit, our safety instructions must be followed. These instructions can be obtained at any authorized Porsche dealer.
Important:
If you sell your Porsche, notify the
purchaser that the vehicle is equipped
with an air bag, and refer him or her to the
chapter, "Air Bag System", in the owner's
manual (safety and disposal rules).
Further information on the air bag system can
be found on stickers in the glove
compartment, at the interior light, as well as
on all air bag components.
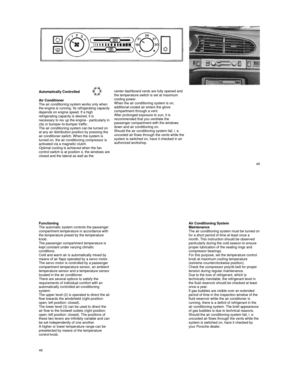
Horn Button
In vehicles equipped with an AIR BAG, the
horn buttons are mounted in the two upper
spokes of the steering wheel (arrow).
21
Page 12 of 66

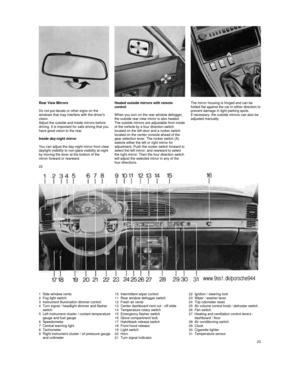
Rear View Mirrors
Do not put decals or other signs on the
windows that may interfere with the driver's
vision.
Adjust the outside and inside mirrors before driving. It is important for safe driving that you have good vision to the rear.
Inside day-night mirror
You can adjust the day-
night mirror from clear daylight visibility to non-glare visibility at night by moving the lever at the bottom of the
mirror forward or rearward.
Heated outside mirrors with remote
control
When you turn on the rear window defogger,
the outside rear view mirror is also heated.
The outside mirrors are ad
justable from inside of the vehicle by a four direction switch
located on the left door and a rocker switch
located on the center console ahead of the
gear selection lever. The rocker switch (A)
selects either the left or right mirror for
adjustment. Push
the rocker switch forward to select the left mirror, and rearward to select
the right mirror. Then the four direction switch
will adjust the selected mirror in any of the four directions.
The mirror housing is hinged and can be
folded flat against the c
ar in either direction to prevent damage in tight parking spots.
If necessary, the outside mirrors can also be
adjusted manually.
22
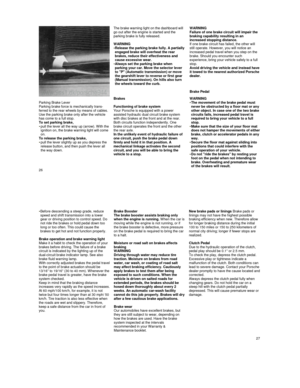
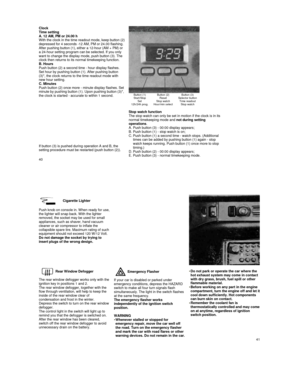
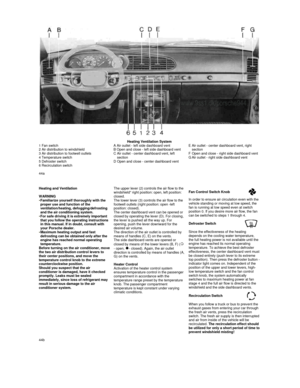
1 Side-window vents 2 Fog light switch
3 Instrument illumination dimmer control
4 Turn signal / headlight dimmer and flasher
switch
5
Left instrument cluster / coolant temperature gauge and fuel gauge
6 Speedometer
7 Central warning light
8 Tachometer
9 Right instrument cluster / oil pressure gauge and voltmeter
10 Intermittent wiper control
11 Rear window defogger switch
12 Fresh air vents
13 Center dashboard vent cut -
off slide14 Temperature rotary switch
15 Emergency flasher switch
16 Glove compartment lock
17 Hatchback release switch
18 Front hood release
19 Light switch
20 Horn
21 Turn signal indicator
22 Ignition / steering lock
23 Wiper / washer lever
24 Trip odometer reset
25
Air volume control knob / defroster switch
26 Fan switch
27 Heating and ventilation control levers -
dashboard / floor
28
Air conditioning switch
29 Clock
30 Cigarette lighter
31 Temperature sensor
23
Page 13 of 66

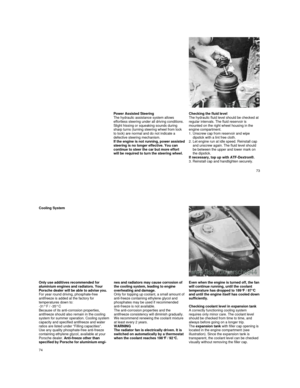
Ignition/Starter Switch with Steering Lock
The steering is equipped with an anti-theft
ignition lock.
Switch positions
0
The steering is blocked by the steering lock: all circuits wired through the ignition
are switched off.
The ignition key can only be withdrawn in the
"0" position. The parking lights can be
operated in this position by pushing the turn
signal indicator lever up and down (also see
"Parking lights").
1 Position for radio. Steering unlocked. If it is difficult to turn the key, gently move the
steering wheel until the key turns freely.
Note: all circuits which are disconnected in
position "3" can be switched on.
To conserve battery power, switch off other
electrical consumers while playing radio in
position "1".
2
Ignition on. All electric circuits are
operational. With the engine stationary, the
central warning light and all individual
warning lights located in both combination
instruments will light up for a bulb check.
3
The starter is operated by turning the
ignition key to the right. As soon as the
engine starts, release the key. It will spring
back to position "2". With the engine
running, the central and individual warning
lights should go out (see "Central warning
light").
To conserve battery power, the electric
circuits for headlights, rear window de-
fogger/defroster, temperature control and
wiper/washer system are temporarily interrupted during the starting process.
The starter should not be operated for more
than 10 to 15 seconds at a time. If the engine
does not start the first time or stalls at any
time, the ignition key must be returned to the
"0" position. The non-repeat lock in the switch
prevents the
starter from being operated when the engine is running and guards against
starter damage.
To remove the key and to lock the steering
wheel
, turn the key back to position "0" and
pull out. Turn the steering wheel until it locks.
WARNING
Never remove key from ignition lock or
turn key off while vehicle is moving. The
steering wheel will lock, causing loss of
control.
Instrument panel lights
Warning lights for alternator, oil pressure, and
brake system will light up for a bulb check
when the ignition is turned on. They should go out after the engine is started. The brake
warning light will go out after the parking
brake has been fully released. See
"Warning lights" for more details.
Buzzer
If you leave the key in the ignition/steering
lock, the buzzer will sound when the driver's
door is opened. This is a reminder to remove
the key.
For further details see "Starting Procedures"
on the following page.
24
Starting Procedures
WARNING
Fasten safety belts before driving.
Never start or let the engine run in an enclosed, unventilated area. Exhaust
fumes from the engine contain carbon
monoxide, which is a colorless and
odorless gas. Carbon monoxide can be
fatal if inhaled.
Never leave engine idling unattended. An unattended vehicle with a running engine
is potentially hazardous.
Do not park or operate the vehicle in areas where the hot exhaust system may
come in contact with dry grass, brush,
fuel spill or other flammable material.
Never leave engine idling. When starting engine, be ready to drive immediately.
Maintain moderate speed until engine is
warm.
Automatic Transmission - Start with selec-
tor lever in Park.
Manual Transmission - Start with gearshift
lever in Neutral.
Temperature sensors on the engine auto- matically provide the correct fuel/air mixture
required for starting.
Therefore, do not depress the accelerator
pedal while starting a cold or a warm engine.
When starting at very low outside
temperatures , fully depress the clutch pedal,
so that the starter only has to crank the
engine.
As soon as the engine starts, release the ignition key.
If the engine fails to start after 10 to 15
seconds of cranking, wait about 10
seconds before engaging starter again.
Do not let engine idle to warm it up. After
starting, drive vehicle at moderate speeds and with gradual accelerations. Avoid high rpm
and full throttle operation until the engine has
reached normal operating temperature.
Stopping engine
Turn key back to position 0.
Do not stop engine immediately after hard
or extended driving. Keep engine running
at increased idle for about two minutes to
prevent excessive heat buildup before
turning off engine.
WARNING
Before you check anything in the engine compartment, let the engine cool down.
Hot components can burn skin on
contact.
The radiator fan switches on automatically when the coolant reaches a
certain temperature and continues to run
(even with ignition off) until the coolant
temperature drops. Therefore, never
touch the fan blades as they will rotate
spontaneously when the thermoswitch
turns the fan on.
If you have an automatic garage door...
The transistorized ignition system in your
Porsche may interfere with your electronically
operated garage door. To check this: drive
your Porsche close to the garage door and
run the engine at different speeds.
If the garage door opens or closes without
your operating the garage door unit in your
car, contact the dealer who installed the
automatic garage door to have the frequency
and/or coding of the garage door signal
modified.
25
Page 14 of 66

The brake warning light on the dashboard will go out after the engine is started and the
parking brake is fully released.
WARNING
Release the parking brake fully. A partially engaged brake will overheat the rear
brakes, reduce their effectiveness and
cause excessive wear.
Always set the parking brake when parking your car. Move the selector lever
to "P" (Automatic transmission) or move
the gearshift lever to reverse or first gear
(Manual transmission). On hills also turn
the wheels toward the curb.
WARNING Failure of one brake circuit will impair the
braking capability resulting in an
increased stopping distance.
If one brake circuit has failed, the other will
still operate. However, you will notice an
increased pedal travel when you step on the
brake. Should you encounter such
experience, bring your vehicle safely to a full
stop.
Avoid driving the vehicle and instead have it towed to the nearest authorized Porsche
dealer.
Brake Pedal
Parking Brake Lever
Parking brake force is mechanically trans-
ferred to the rear wheels by means of cables.
Use the parking brake only after the vehicle
has come to a full stop.
To set parking brake,
pull the lever all the way up (arrow). With the ignition on, the brake warning light will come
on.
To release the parking brake,
pull the lever slightly up as you depress the
release button, and then push the lever all
the way down.
Brakes
Functioning of brake system
Your Porsche is equipped with a power
assisted hydraulic dual circuit brake system
with disc brakes at the front and at the rear. Both circuits function independently. One
brake circuit operates the front and the other
the rear axle.
In the unlikely event of hydraulic failure of
one circuit, push the brake pedal down
firmly and hold it in that position. A
mechanical linkage activates the second
circuit, and you will be able to bring the
vehicle to a stop.
WARNING
The movement of the brake pedal must never be obstructed by a floor mat or any
other object. In case one of the two brake
circuits fails, increased pedal travel is
required to bring your vehicle to a full
stop.
Make sure that the size of your floor mat does not hamper the movements of either brake, clutch or accelerator pedals in any
way.
Secure the floor mat against sliding into positions that could interfere with the
safe operation of your vehicle.
Do not "ride the brakes" by resting your foot on the pedal when not intending to
brake. Overheating and premature wear
of the brakes will result.
26
Before descending a steep grade, reduce
speed and shift transmission into a lower
gear or driving position to control speed. Do
not ride the brakes or hold pedal down too
long or too often. This could cause the
brakes to get hot and not function properly.
Brake operation and brake warning light
Make it a habit to check the operation of your
brakes before driving. The failure of a brake
circuit is indicated by the lighting up of the
dual-circuit brake indicator lamp. See also
brake fluid warning lamp.
With correctly adjusted brakes the pedal travel to the point of brake actuation should be
13/16" to 19/16" (30 to 40 mm). Whenever the brake pedal travel is greater, have the brake
system checked.
Keep in mind that the braking distance
increases very rapidly as the speed increases. At 60 mph/100 km/h, for example, it is not twice but four times longer than at 30 mph/ 50
km/h. Tire traction is also less effective when
the roads are wet and slippery. Therefore,
keep a safe distance from the car in front of
you.
Brake Booster The brake booster assists braking only
when the engine is running. When the car is moving while the engine is not running, or if
the brake booster is defective, more pressure
on the brake pedal is required to bring the car
to a halt.
Moisture or road salt on brakes affects
braking
WARNING
Driving through water may reduce tire
traction. Moisture on brakes from road
water, car wash, or coating of road salt
may affect braking efficiency. Cautiously
apply brakes to test them after being
exposed to such conditions. When the
vehicle is driven on salted roads for
extended periods, the brakes should be
hosed down thoroughly about every 2
weeks. An automatic car-wash facility
cannot do this job properly. Brakes will dry after a few cautious brake applications.
Brake wear
Our automobiles have excellent brakes, but
they are still subject to wear, depending on
how the brakes are used. Have the brake
system inspected at the intervals
recommended in your Warranty &
Maintenance booklet.
New brake pads or linings Brake pads or
linings may not have the highest possible
braking efficiency when new. Therefore allow
for longer braking distance during the initial
100 to 150 miles or 150 to 250 kilometers of
normal city driving; longer if fewer stops are
realized.
Clutch Pedal
Due to the hydraulic operation of the clutch,
pedal play should be 0.1" or 2.5 mm.
To check the play, depress the clutch pedal.
Excessive play or tightness indicate a
malfunction of the clutch. Both conditions can
lead to severe damage. Contact your Po
rsche dealer promptly to have the cause located and corrected. Always depress the clutch pedal fully when changing gears. Do not hold the car on a
steep hill with the clutch pedal partially
depressed. This will cause premature wear or
damage.
27
Page 15 of 66

The ABS system represents a major
contribution to the enhancement of active
safety in your vehicle. This system prevents
the wheels from locking in a pan")
ABS Brake System (Antilock brake system)
The ABS system represents a major
contribution to the enhancement of active
safety in your vehicle. This system prevents
the wheels from locking in a panic stop on
almost all road surfaces.
With ABS system in your vehicle, the
following areas are enhanced:
Full steerability , vehicle remains steerable
under all braking forces.
Good directional control , no swerving
caused by locking of wheels under braking
conditions.
Excellent stopping distance , stopping
distances are usually reduced because
controlled braking is maximized.
Prevention of wheel lock up , no brake-
induced sliding and thus no localized tire wear from emergency braking.
The crucial advantage of ABS system over a
conventional brake system is in the area of
maintaining directional control and
maneuverability of the car in emergency
situations, including panic braking in turns.
WARNING:
In spite of the improved handling afforded
by the ABS system, it still remains the
responsibility of the driver to adapt the
driving style to the prevailing road and
weather conditions, as well as, obeying
traffic laws. In no case, should the higher
degree of safety offered by ABS be
regarded as a
justification for taking greater risks. Other vehicles not equipped with the ABS
system may not be able to maintain
control, especially on wet or poor road
surfaces and thus may be more likely to
impact you in the rear. To minimize that r
isk, use your ABS system to increase your ability to maneuver to avoid dangerous
situations and not merely to try to stop in
the shortest distance possible.
Driving with the ABS System
A wheel speed sensor is fitted to each of the four wheels. If wheel slippage of either of the
front wheels or the rear wheels is sensed
during braking, the brake pressure is adjusted
automatically until the wheel no longer slips.
The brake pressure is regulated for each front
wheel individually and for both rear wheels together.
On a road surface which is slippery on only
one side, the rear wheel which is braking on
the slippery surface determines the brake
pressure which will be applied equally to both
rear wheels. This ensures that directional
stability is maintained. However, if braking
force approaches the wheel locking-up point
for all wheels (panic braking) the ABS system
will intervene in a way comparable with rapid rhythmic braking. The proper operation of ABS is perceived by the driver as a pulsating brake pedal in conjunction with audible noise
and perhaps some vibration. The driver is
thereby warned to reduce vehicle speed
appropriate for the prevailing road conditions.
If your ABS system should ever malfunction,
the ABS system is automatically switched off,
but the normal brake system, without ABS,
would remain fully operational. Such a malfunction would be indicated by the illumination of the central warning light, as well as the "ANTILOCK" light on the right hand
side of the instrument cluster.
If the ABS system becomes inoperative,
take your vehicle to your authorized dealer immediately.
Note
The control unit of the ABS brake system is
set for standard tire sizes. If non-standard
tires are fitted, the control unit may
misinterpret the speed of the vehicle, because of the variant data it receives from the sensors on the axles.
If the difference in rolling radius exceeds
approx. 17%, the control unit deactivates the
ABS system and the ABS warning lamp lights up.
28
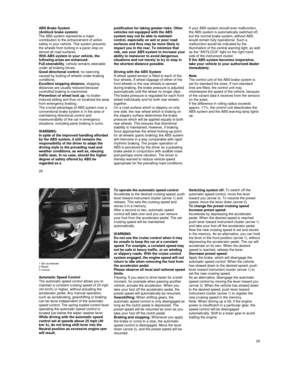
1 Set accelerate
2 Reset
3 Cancel
Automatic Speed Control
The automatic speed control allows you to
maintain a constant cruising speed of 25 mph
(40 km/h) or higher, without actuating the
accelerator pedal. Any manual operation,
such as accelerating, gearshifting or braking
can be done independent of the automatic
speed control. The spring loaded control lever
operating the automatic speed control is
located just below the wiper/ washer lever.
While driving with the automatic speed
control set at speeds above 25 mph (40
km/ h), do not bring shift lever into the
Neutral position as excessive engine rpm
will result.
To operate the automatic speed control Accelerate to the desired cruising speed, push lever toward instrument cluster (arrow 1) and
release. This sets the cruising speed and
stores it in a memory.
After a second or two, automatic speed control will take over and you can remove
your foot from the accelerator pedal. The set
cruising speed will be maintained
automatically.
WARNING
Do not use the cruise control when it may
be unsafe to keep the car at a constant
speed. For example, a constant speed may not be safe in heavy traffic, or on winding
or slippery roads. With the cruise control
system engaged, the engine speed will not
return to idle when removing the foot from
the accelerator pedal.
Please observe all local and national speed limits.
Passing: If you want to drive faster for a brief
moment, for example when passing another
vehicle, actuate the accelerator. When you
take your foot off the accelerator pedal, the
preset speed will automatically be resumed.
Gearshifting: When shifting gears, the
automatic speed control is only disengag
ed as long as the clutch pedal is depressed. The
preset speed will be resumed as soon as you
take your foot off the clutch pedal.
Braking and stopping: Whenever you apply
the brake or come to a stop, the automatic
speed control is disengaged. Move the lever
down (arrow 2), and the preset speed will be
resumed.
Switching system off: To switch off the
automatic speed control, move the lever
toward you (arrow 3). To resume the preset
speed, move the lever down (arrow 2).
To change the preset cruising speed
Increase preset speed:
Accelerate by depressing the accelerator pedal. When the desired speed is reached push lever toward instrument cluster (arrow 1) and take your foot off the accelerator pedal.
Now the new cruising speed is set and stored
in the memory. As an alternative, you can hold the lever in the front position (arrow 1), without depressing the accelerator pedal. The car will
accelerate on its own. When the desired
speed is reached, release the lever.
Decrease preset speed:
Apply the brake, which will disengage the automatic speed control. When the vehicle
has slowed down to the desired speed, push
lever toward instrument cluster (arrow 1) to
set the new cruising speed.
As an alternative, disengage the automatic
speed control by moving the lever toward you
(arrow 3). When the vehicle has slowed down
to the desired speed, push lever toward
instrument cluster (arrow 1) to register the
new cruising speed in the memory.
Note: When driving up a hill, if the engine
power is insufficient in a particular gear, the
speed control will be disengaged
automatically. Shift to a lower gear to avoid
stalling the engine.
29
Page 16 of 66

Lane changer
To indicate your intention when changing
lanes on the highway, slightly push the turn
signal switch lever up or down to the point of
resistance. The lever will return to the OFF
position when released.
Headlight dimmer
With the light switch at stage 2, high beam is
switched on by pressing the lever towards the
instrument panel, and low beam is switched
on by pulling the lever towards the steering
wheel. When high beams are on, the blue indicator light between the tachometer and the right instrument cluster will light up.
You can flash signal other motorists by
repeatedly pulling and releasing the lever just
up to the point of resistance.
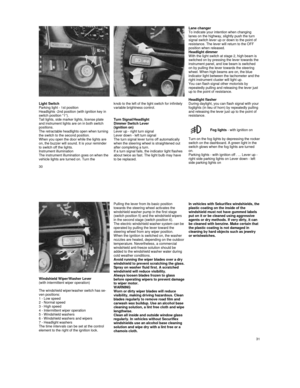
Light Switch
Parking light - 1st position
Headlights -2nd position (with ignition key in
switch position "1").
Tail lights, side marker lights, license plate
and instrument lights are on in both switch
positions.
The retractable headlights open when turning
the switch to the second position.
When you open the door while the lights are
on, the buzzer will sound. It is your reminder
to switch off the lights.
Instrument illumination
The instrument illumination goes on when the
vehicle lights are turned on. Turn the
knob to the left of the light switch for infinitely
variable brightness control.
Turn Signal/Headlight
Dimmer Switch Lever
(ignition on)
Lever up - right turn signal
Lever down - left turn signal
The turn signal lever turns off automatically
when the steering wheel is straightened out after completing a turn.
If a turn signal fails, the indicator light flashes
about twice as fast. The light bulb may have
to be replaced.
Headlight flasher
During daylight, you can flash signal with your
foglights (in lieu of horn) by repeatedly pulling
and releasing the lever just up to the point of
resistance.
Fog lights
- with ignition on
Turn on the fog lights by depressing the rocker switch on the dashboard. A green light in the
switch glows when the fog lights are turned
on.
Parking lights - with ignition off . ... Lever up -
right side parking lights on Lever down - left
side parking lights on
30
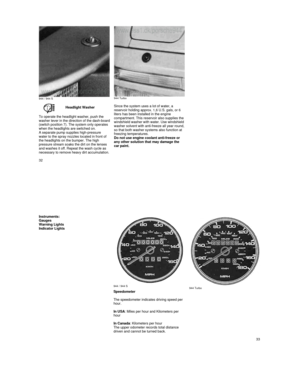
Windshield Wiper/Washer Lever
(with intermittent wiper operation)
The windshield wiper/washer switch has se-
ven positions:
1 - Low speed
2 - Normal speed
3 - High speed
4 - Intermittent wiper operation
5 - Windshield washers
6 - Windshield washers and wipers
7 - Headlight washers
The time intervals can be set at the control
element to the right of the ignition lock.
Pulling the lever from its basic position
towards the steering wheel activates the
windshield washer pump in the first stage
(switch position 5) and the windshield wipers
in the second stage (switch position 6).
The electric windshield washer system can be operated by pulling the lever toward the
steering wheel from any wiper position.
When the ignition is switched on, the washer
nozzles are heated, depending on the outdoor temperature. Nevertheless, a commercial windshield anti-freeze solution should be
added to the windshield washer water during
cold weather conditions.
Avoid running the wiper blades over a dry
windshield to p
revent scratching the glass. Spray on washer fluid first. A scratched
windshield will reduce visibility.
Always loosen blades frozen to glass
before operating wipers to prevent damage to wiper motor.
WARNING
Worn or dirty wiper blades will reduce
visibility, making driving hazardous. Clean
blades regularly to remove road film and
carwash wax buildup. Use an alcohol base
cleaning solution, a lint free cloth and wipe lengthwise.
Clean all inside and outside window glass
regularly. In vehicles without Securiflex
windshields use an alcohol base cleaning
solution and wipe dry with a lint free or a
chamois cloth.
In vehicles with Sekuriflex windshields, the plastic coating on the inside of the
windshield must not have gummed labels
put on it or be cleaned using aggressive
agents or dry methods. If very dirty, it can
be cleaned with benzine. Make certain that
the plastic coating is not damaged in
cleaning by hard objects such as jewelry
or wristwatches.
31