GENERAL REPAIR INSTRUCTIONS
1. Use fender seat and floor covers to keep the vehicle clean
and prevent damage.
2. During disassembly, keep parts in the appropriate order to
facilitate reassembly.
3. Observe the following:
(a) Before performing electrical work, disconnect the neg-
ative cable from the battery terminal.
(b) If it is necessary to disconnect the battery for inspection
or repair, always disconnect the cable from the nega-
tive H terminal which is grounded to the vehicle body.
(c) To prevent damage to the battery terminal post, loosen
the terminal nut and raise the cable straight up
without twisting or prying it.
(d) Clean the battery terminal posts and cable terminals
with a shop rag.
o not scrape them with a file or other
abrasive objects.
(e) Install the cable terminal to the battery post with
the nut loose, and tighten the nut after installation. Do
not use a hammer to tap the terminal onto the post.
(f) Be sure the cover for the positive (+) terminal is properly
in place.
4. Check hose and wiring connectors to make sure that they are
secure and correct.
5. Non±reusable parts
(a) Always replace cotter pins, gaskets, 0±rings and oil
seals etc. with new ones.
(b) Non±reusable parts are indicated in the component il-
lustrations by the ºrº symbol.
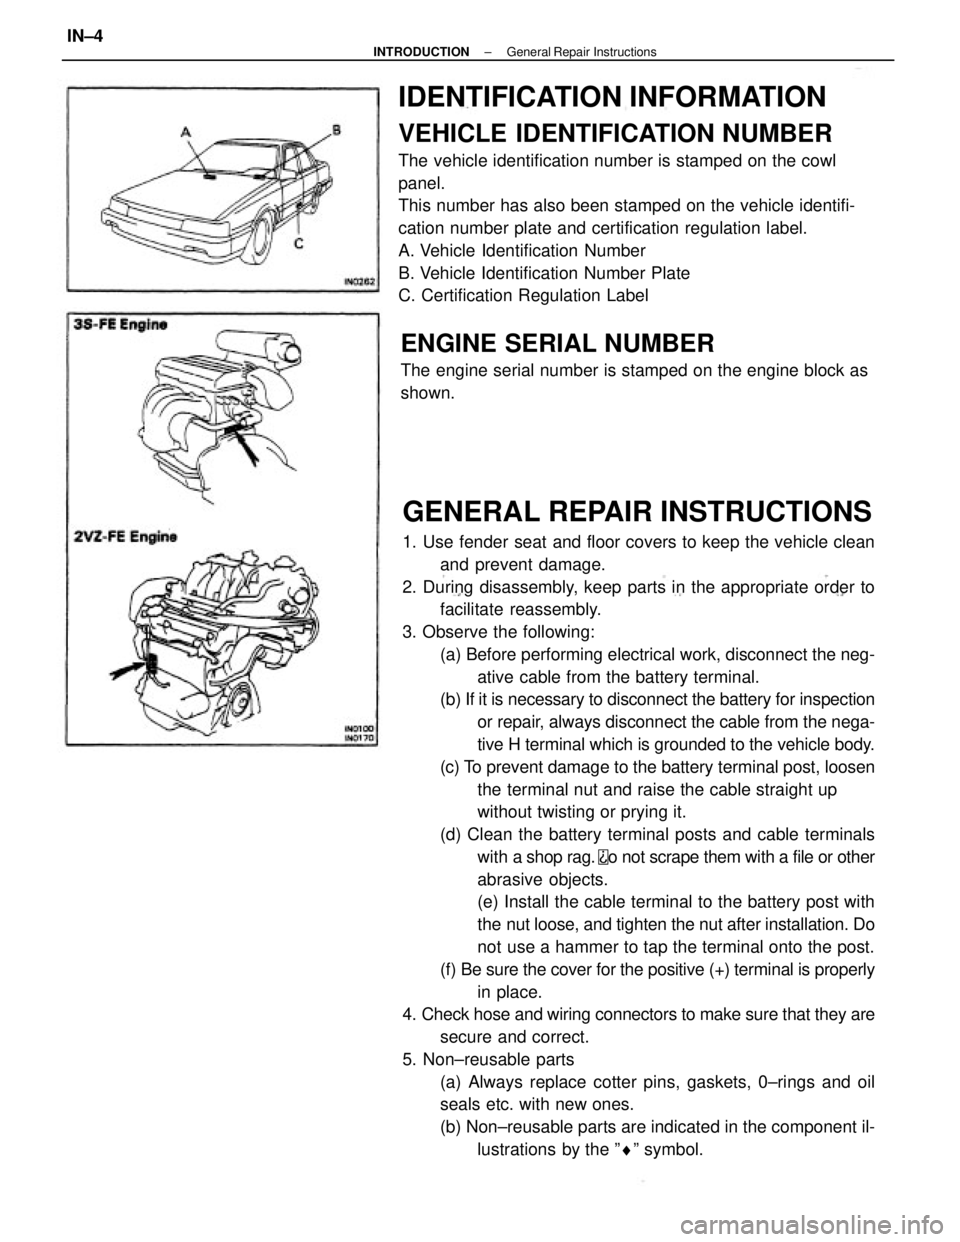
IDENTIFICATION INFORMATION
VEHICLE IDENTIFICATION NUMBER
The vehicle identification number is stamped on the cowl
panel.
This number has also been stamped on the vehicle identifi-
cation number plate and certification regulation label.
A. Vehicle Identification Number
B. Vehicle Identification Number Plate
C. Certification Regulation Label
ENGINE SERIAL NUMBER
The engine serial number is stamped on the engine block as
shown.
± INTRODUCTIONGeneral Repair InstructionsIN±4
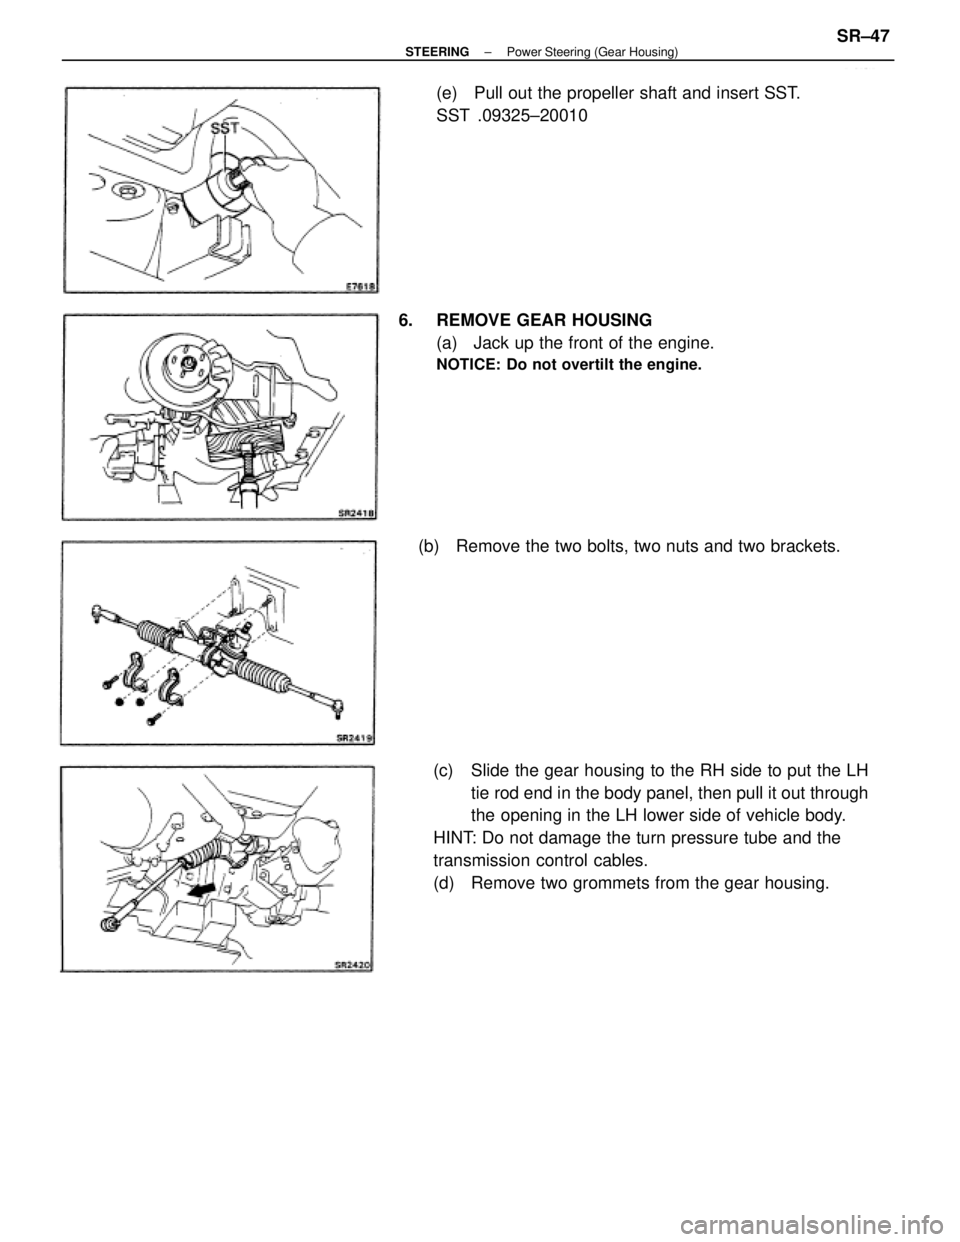
(c) Slide the gear housing to the RH side to put the LH
tie rod end in the body panel, then pull it out through
the opening in the LH lower side of vehicle body.
HINT: Do not damage the turn pressure tube and the
transmission control cables.
(d) Remove two grommets from the gear housing. 6. REMOVE GEAR HOUSING
(a) Jack up the front of the engine.
NOTICE: Do not overtilt the engine.
(e) Pull out the propeller shaft and insert SST.
SST .09325±20010
(b) Remove the two bolts, two nuts and two brackets.
± STEERINGPower Steering (Gear Housing)SR±47
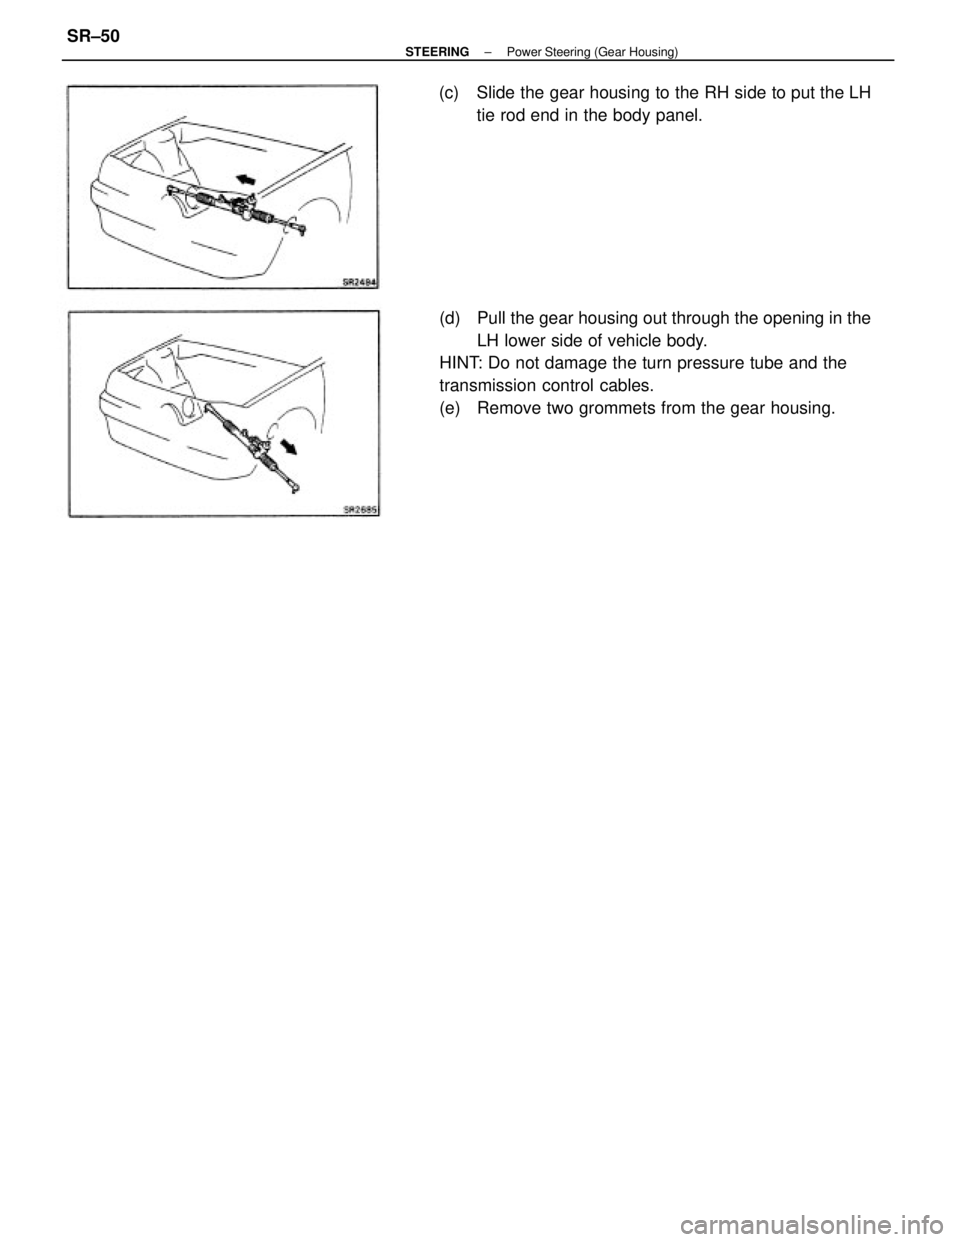
(d) Pull the gear housing out through the opening in the
LH lower side of vehicle body.
HINT: Do not damage the turn pressure tube and the
transmission control cables.
(e) Remove two grommets from the gear housing. (c) Slide the gear housing to the RH side to put the LH
tie rod end in the body panel.
± STEERINGPower Steering (Gear Housing)SR±50