Page 694 of 2389
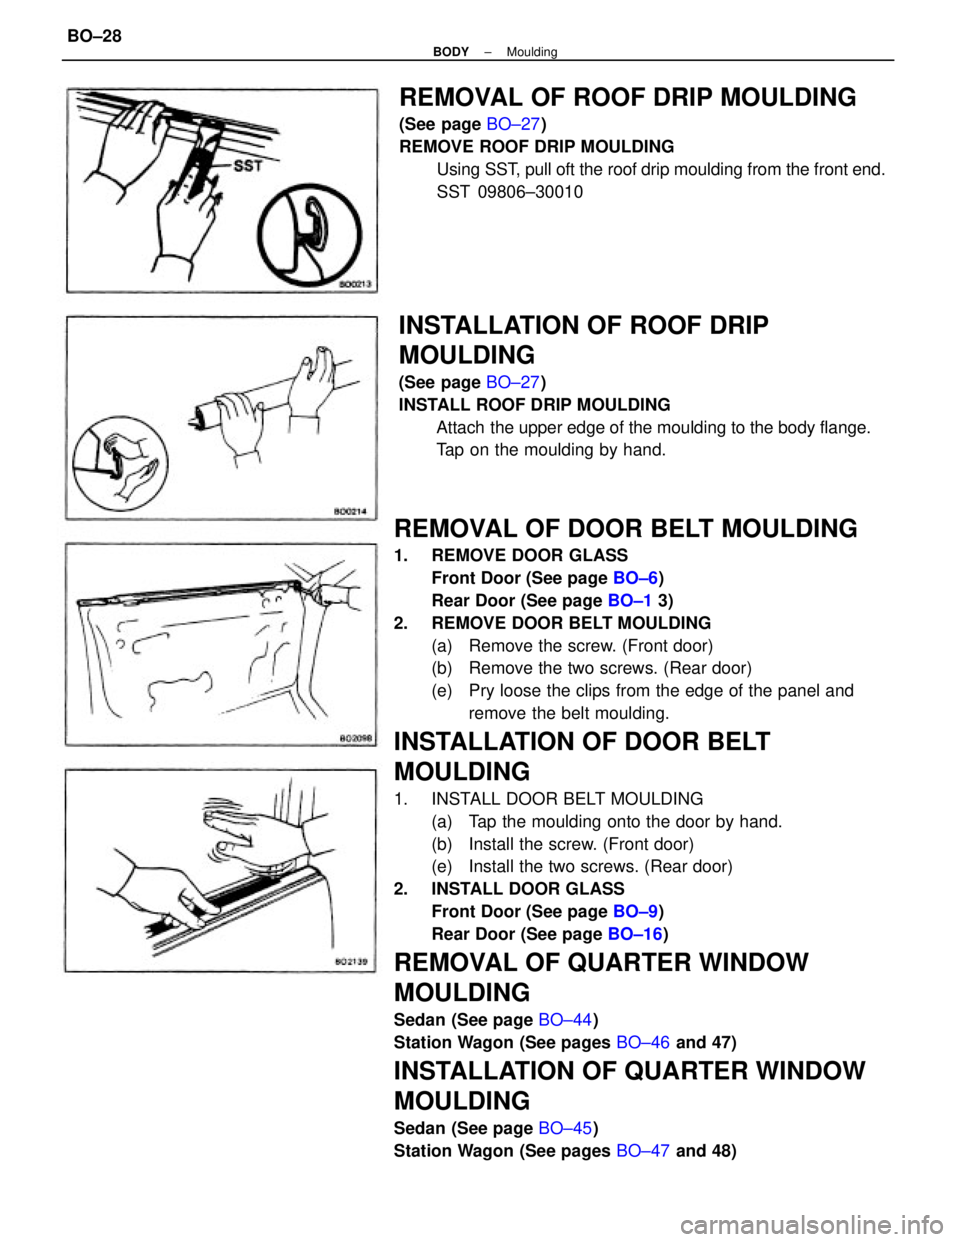
REMOVAL OF DOOR BELT MOULDING
1. REMOVE DOOR GLASS
Front Door (See page BO±6)
Rear Door (See page BO±1 3)
2. REMOVE DOOR BELT MOULDING
(a) Remove the screw. (Front door)
(b) Remove the two screws. (Rear door)
(e) Pry loose the clips from the edge of the panel and
remove the belt moulding.
INSTALLATION OF DOOR BELT
MOULDING
1. INSTALL DOOR BELT MOULDING
(a) Tap the moulding onto the door by hand.
(b) Install the screw. (Front door)
(e) Install the two screws. (Rear door)
2. INSTALL DOOR GLASS
Front Door (See page BO±9)
Rear Door (See page BO±16)
REMOVAL OF QUARTER WINDOW
MOULDING
Sedan (See page BO±44)
Station Wagon (See pages BO±46 and 47)
INSTALLATION OF QUARTER WINDOW
MOULDING
Sedan (See page BO±45)
Station Wagon (See pages BO±47 and 48)
REMOVAL OF ROOF DRIP MOULDING
(See page BO±27)
REMOVE ROOF DRIP MOULDING
Using SST, pull oft the roof drip moulding from the front end.
SST 09806±30010
INSTALLATION OF ROOF DRIP
MOULDING
(See page BO±27)
INSTALL ROOF DRIP MOULDING
Attach the upper edge of the moulding to the body flange.
Tap on the moulding by hand.
± BODYMouldingBO±28
Page 695 of 2389
REMOVAL OF ROCKER PANEL
MOULDING
(See page BO±27)
REMOVE ROCKER PANEL MOULDING
(a) Remove the two screws.
(b) Pry loose the clips with a scraper and remove the
moulding.
HINT: Apply tape to the scraper blade to prevent scratch±
ing the vehicle body.
INSTALLATION OF ROCKER PANEL
MOULDING
(See page BO±27)
INSTALL ROCKER PANEL MOULDING
(a) Align the clip with the body hole and tap it in by hand.
(b) Install the two screws.
± BODYMouldingBO±29
Page 696 of 2389
Precautions for storing moulding material:
wStore in a cool place, avoiding direct sunlight, high
temperatures and dust.
wThe moulding is of polyvinyl chloride, so do not allow it to
come in contact with thinner or other solvent, open flame,
or boiling water.
wThe storage time for the moulding, adhesive and Primer T
is limited to about 9 months.
REMOVAL OF FRONT FENDER FRONT
SIDE AND QUARTER SIDE MOULDING
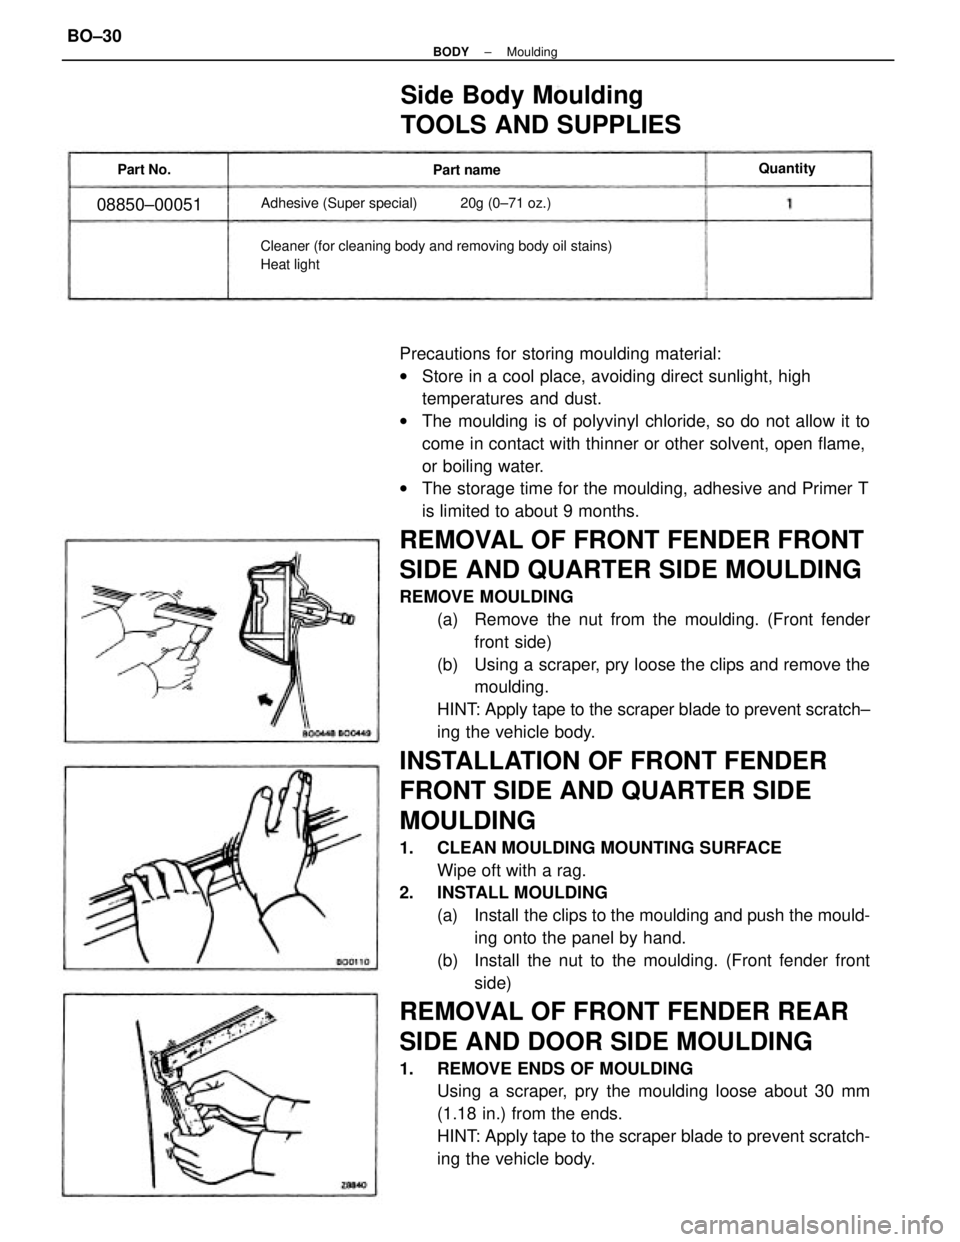
REMOVE MOULDING
(a) Remove the nut from the moulding. (Front fender
front side)
(b) Using a scraper, pry loose the clips and remove the
moulding.
HINT: Apply tape to the scraper blade to prevent scratch±
ing the vehicle body.
INSTALLATION OF FRONT FENDER
FRONT SIDE AND QUARTER SIDE
MOULDING
1. CLEAN MOULDING MOUNTING SURFACE
Wipe oft with a rag.
2. INSTALL MOULDING
(a) Install the clips to the moulding and push the mould-
ing onto the panel by hand.
(b) Install the nut to the moulding. (Front fender front
side)
REMOVAL OF FRONT FENDER REAR
SIDE AND DOOR SIDE MOULDING
1. REMOVE ENDS OF MOULDING
Using a scraper, pry the moulding loose about 30 mm
(1.18 in.) from the ends.
HINT: Apply tape to the scraper blade to prevent scratch-
ing the vehicle body.
Side Body Moulding
TOOLS AND SUPPLIES
Cleaner (for cleaning body and removing body oil stains)
Heat lightAdhesive (Super special) 20g (0±71 oz.)
08850±00051
Quantity
Part name Part No.
± BODYMouldingBO±30
Page 698 of 2389
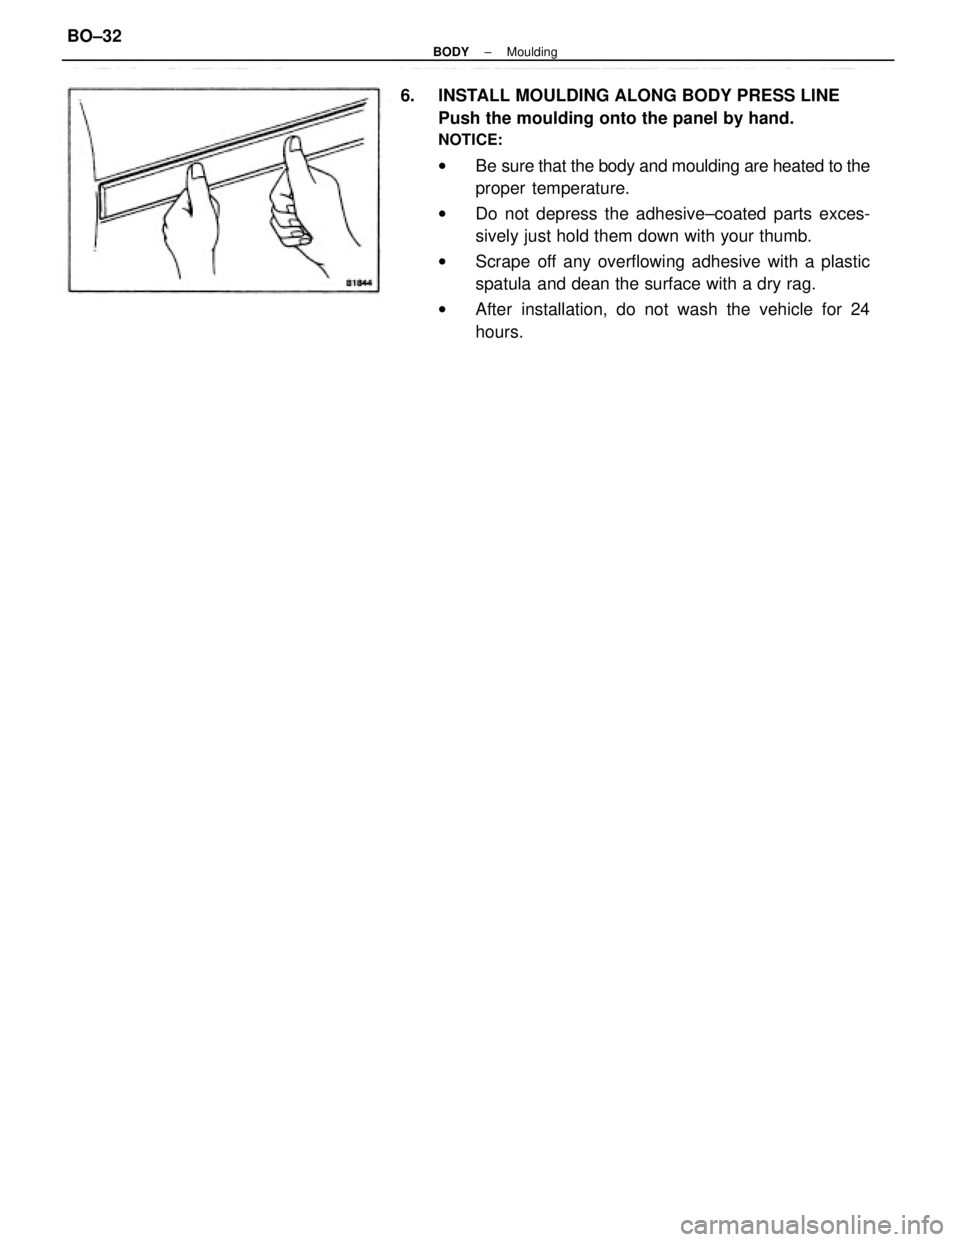
6. INSTALL MOULDING ALONG BODY PRESS LINE
Push the moulding onto the panel by hand.
NOTICE:
wBe sure that the body and moulding are heated to the
proper temperature.
wDo not depress the adhesive±coated parts exces-
sively just hold them down with your thumb.
wScrape off any overflowing adhesive with a plastic
spatula and dean the surface with a dry rag.
wAfter installation, do not wash the vehicle for 24
hours.
± BODYMouldingBO±32
Page 708 of 2389
4. MIX ADHESIVE COATING
NOTICE:
wBe sure that installation of the glass is finished within
usable time. (See step 2 on page BO±37)
wThe mixture should be made in 5 minutes or less.
(a) Thoroughly clean the glass plate and putty spatula
with solvent.
(b) Thoroughly mix 500 g (17.64 oz.) of the main agent
and 75 g (2.65 oz.) of the hardening agent on a glass
plate or like object with a putty spatula.
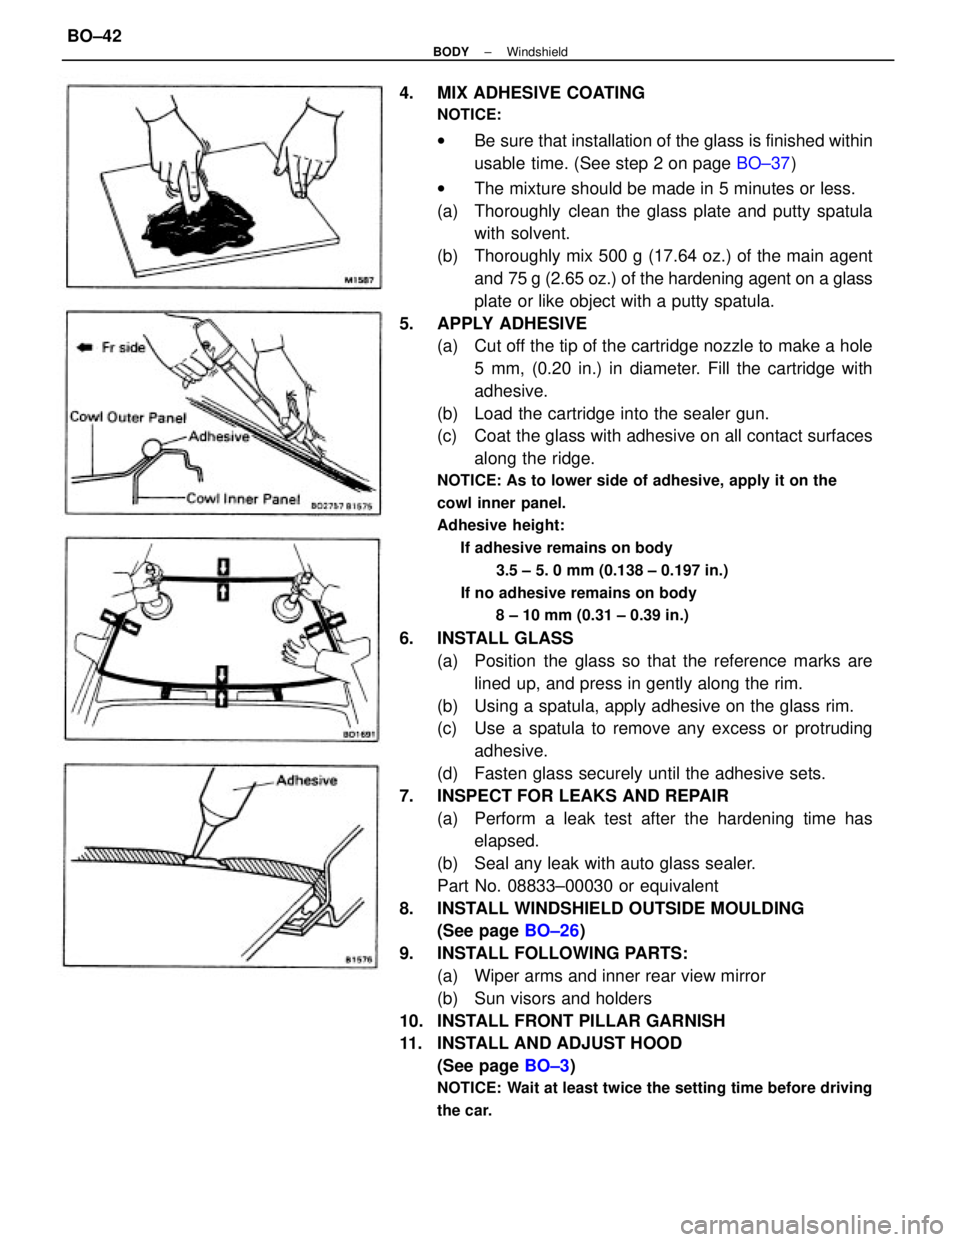
5. APPLY ADHESIVE
(a) Cut off the tip of the cartridge nozzle to make a hole
5 mm, (0.20 in.) in diameter. Fill the cartridge with
adhesive.
(b) Load the cartridge into the sealer gun.
(c) Coat the glass with adhesive on all contact surfaces
along the ridge.
NOTICE: As to lower side of adhesive, apply it on the
cowl inner panel.
Adhesive height:
If adhesive remains on body
3.5 ± 5. 0 mm (0.138 ± 0.197 in.)
If no adhesive remains on body
8 ± 10 mm (0.31 ± 0.39 in.)
6. INSTALL GLASS
(a) Position the glass so that the reference marks are
lined up, and press in gently along the rim.
(b) Using a spatula, apply adhesive on the glass rim.
(c) Use a spatula to remove any excess or protruding
adhesive.
(d) Fasten glass securely until the adhesive sets.
7. INSPECT FOR LEAKS AND REPAIR
(a) Perform a leak test after the hardening time has
elapsed.
(b) Seal any leak with auto glass sealer.
Part No. 08833±00030 or equivalent
8. INSTALL WINDSHIELD OUTSIDE MOULDING
(See page BO±26)
9. INSTALL FOLLOWING PARTS:
(a) Wiper arms and inner rear view mirror
(b) Sun visors and holders
10. INSTALL FRONT PILLAR GARNISH
11. INSTALL AND ADJUST HOOD
(See page BO±3)
NOTICE: Wait at least twice the setting time before driving
the car.
± BODYWindshieldBO±42
Page 720 of 2389
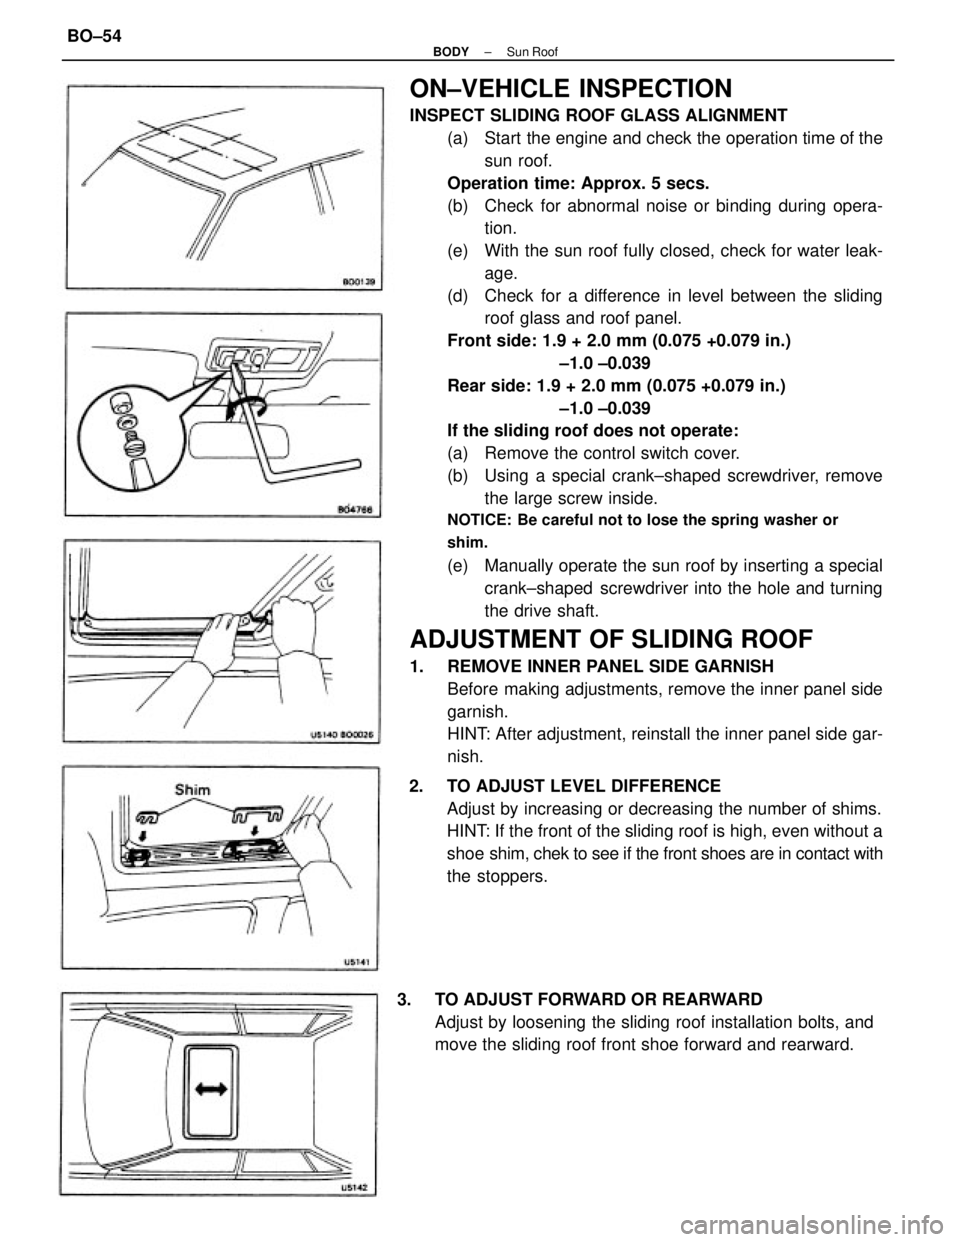
ON±VEHICLE INSPECTION
INSPECT SLIDING ROOF GLASS ALIGNMENT
(a) Start the engine and check the operation time of the
sun roof.
Operation time: Approx. 5 secs.
(b) Check for abnormal noise or binding during opera-
tion.
(e) With the sun roof fully closed, check for water leak-
age.
(d) Check for a difference in level between the sliding
roof glass and roof panel.
Front side: 1.9 + 2.0 mm (0.075 +0.079 in.)
±1.0 ±0.039
Rear side: 1.9 + 2.0 mm (0.075 +0.079 in.)
±1.0 ±0.039
If the sliding roof does not operate:
(a) Remove the control switch cover.
(b) Using a special crank±shaped screwdriver, remove
the large screw inside.
NOTICE: Be careful not to lose the spring washer or
shim.
(e) Manually operate the sun roof by inserting a special
crank±shaped screwdriver into the hole and turning
the drive shaft.
ADJUSTMENT OF SLIDING ROOF
1. REMOVE INNER PANEL SIDE GARNISH
Before making adjustments, remove the inner panel side
garnish.
HINT: After adjustment, reinstall the inner panel side gar-
nish.
2. TO ADJUST LEVEL DIFFERENCE
Adjust by increasing or decreasing the number of shims.
HINT: If the front of the sliding roof is high, even without a
shoe shim, chek to see if the front shoes are in contact with
the stoppers.
3. TO ADJUST FORWARD OR REARWARD
Adjust by loosening the sliding roof installation bolts, and
move the sliding roof front shoe forward and rearward.
± BODYSun RoofBO±54
Page 724 of 2389
DISASSEMBLY OF SUN ROOF
(See page BO±53)
1. REMOVE SUNSHADE TRIM
(a) Remove the screw and sunshade stopper.
(b) Pull the sunshade trim rearward to remove.
3. REMOVE SLIDING ROOF GLASS
Remove the eight nuts and sliding roof glass with the front
and rear shims.
HINT: Note the number of shims in the front and rear
shoes.
4. REMOVE CABLE GUIDE CASING FROM ROOF GUIDE
RAIL
(a) Remove the screw and weatherstrip.
(b) Pull the cable guide casing forward to remove. 2. REMOVE INNER PANEL SIDE GARNISH
Using a screwdriver, remove the side garnish.
HINT: Tape the screwdriver tip before use.
5. REMOVE DRIVE CABLE FROM CABLE GUIDE CASING
Pull the drive cable from the cable guide casing.
± BODYSun RoofBO±58
Page 725 of 2389
5. INSTALL SUNSHADE TRIM
(a) Run the sunshade trim through the guide rail.
HINT: Secure the headlining for adjustment after assembly.
(b) Install the sunshade stopper with the screw.
6. INSTALL INNER PANEL SIDE GARNISH3. INSTALL CABLE GUIDE CASING TO ROOF GUIDE
RAIL
(a) Insert the drive cable into the. rail, and afign it with the
guide casing.
(b) Install the guide rail and guide casing with the screw.
ASSEMBLY OF SUN ROOF
(See page BO±53)
1. APPLY NIP GREASE TO DRIVE CABLE
2. PLACE DRIVE CABLES INTO CABLE GUIDE CASING
4. ASSEMBLE SLIDING ROOF GLASS
Install the sliding roof glass, shims and shoes with the eight
nuts.
HINT: Install the same number of shims that were disas-
sembled.(e) Use butyl tape to cover the cut portion of the weather-
strip at the connection between the guide casing and
guide rail.
± BODYSun RoofBO±59