Page 858 of 2389

OPERATIONAL TEST OF BRAKE
BOOSTER
HINT: If there is leakage or lack of vacuum, repair before
testing. If available, use a brake booster tester to check the
booster operating condition.
1. OPERATING CHECK
(a) Depress the brake pedal several times with the en-
gine stopped, and check that is no change in the ped-
al reserve distance.
(b) Depress the brake pedal and start the engine. If the
pedal goes down slightly, operation is normal.
2. AIR TIGHTNESS CHECK
(a) Start the engine and stop it after one or two minutes.
Depress the brake pedal several times slowly. If the
pedal goes down furtherest the first time, but gradual-
ly rises after the second or third time, the booster is air
tight.
(b) Depress the brake pedal while the engine is running,
and stop it with the pedal depressed. If there is no
change in pedal reserve travel after holding the pedal
for thirty seconds, the booster is air tight.
BLEEDING OF BRAKE SYSTEM
HINT: If any work is done on the brake system or if air is sus-
pected in the brake lines, bleed the system of air.
NOTICE: Do not let brake fluid remain on a painted surface.
Wash it off immediately.
1. FILL BRAKE RESERVOIR WITH BRAKE FLUID
Check the fluid level in the reservoir. If necessary, add
brake fluid. 5. CHECK THAT PEDAL RESERVE DISTANCE IS
CORRECT
Release the parking brake. With engine running, depress
the pedal and measure the pedal reserve distance, as
shown.
Pedal reserve distance from asphalt sheet at 50 kg
(110.2 1b): More than 85 mm, (3.35 in.)
If incorrect, troubleshoot the brake system.
2. BLEED MASTER CYLINDER
HINT: If the master cylinder was disassembled or if the res-
ervoir becomes empty, bleed the air from the master cylin-
der.
(a) Disconnect the brake tubes from the master cylinder.
(b) Depress the brake pedal and hold it.
± BRAKE SYSTEMChecks and AdjustmentsBR±7
Page 859 of 2389

CHECK AND ADJUSTMENT OF PARKING
BRAKE
1. CHECK THAT PARKING BRAKE LEVER TRAVEL IS
CORRECT
Pull the parking brake lever all the way up, and count the num-
ber of clicks.
Parking brake levertravel at 20 kg (44.1 Ib, 196 N):
5 ± 8 clicks
If incorrect, adjust the parking brake.
2. IF NECESSARY, ADJUST PARKING BRAKE LEVER
TRAVEL
HINT: Before adjusting the parking brake, make sure that the
rear brake shoe clearance has been adjusted.
For shoe clearance adjustment, see steps 8 and 9 on page
BR±32 or step 8 on page 48.
(a) Remove the console box.
(b) Loosen the lock nut and turn the adjusting nut until the
lever travel is correct.
(e) Tighten the lock nut.
Torque: 55 kg±cm (48 in.±Ib, 5.4 N±m)
(d) Install the console box. 3. BEGIN BLEEDING AIR FROM BRAKE OR WHEEL
CYLINDER WITH LONGEST HYDRAULIC LINE
(a) Connect the vinyl tube to the brake or wheel cylinder
bleeder plug, and insert the other end of tube in a
halffull container of brake fluid.
(b) Slowly pump the brake pedal several times.
(c) While having an assistant press on the pedal, loosen
the bleeder plug until fluid starts to runout. Then close
the bleeder plug.
(d) Repeat (b) and (c) until there are no more air bubbles
in the fluid.
(e) Tighten the bleeder plug.
Bleeder plug tightening torque:
85 kg±cm (74 in.±!b, 8.3 N±m)
4. REPEAT PROCEDURE FOR EACH WHEEL(c) Block off the outer holes with your fingers, and re-
lease the brake pedal.
(d) Repeat (b) and (c) three or four times.
± BRAKE SYSTEMChecks and AdjustmentsBR±8
Page 977 of 2389

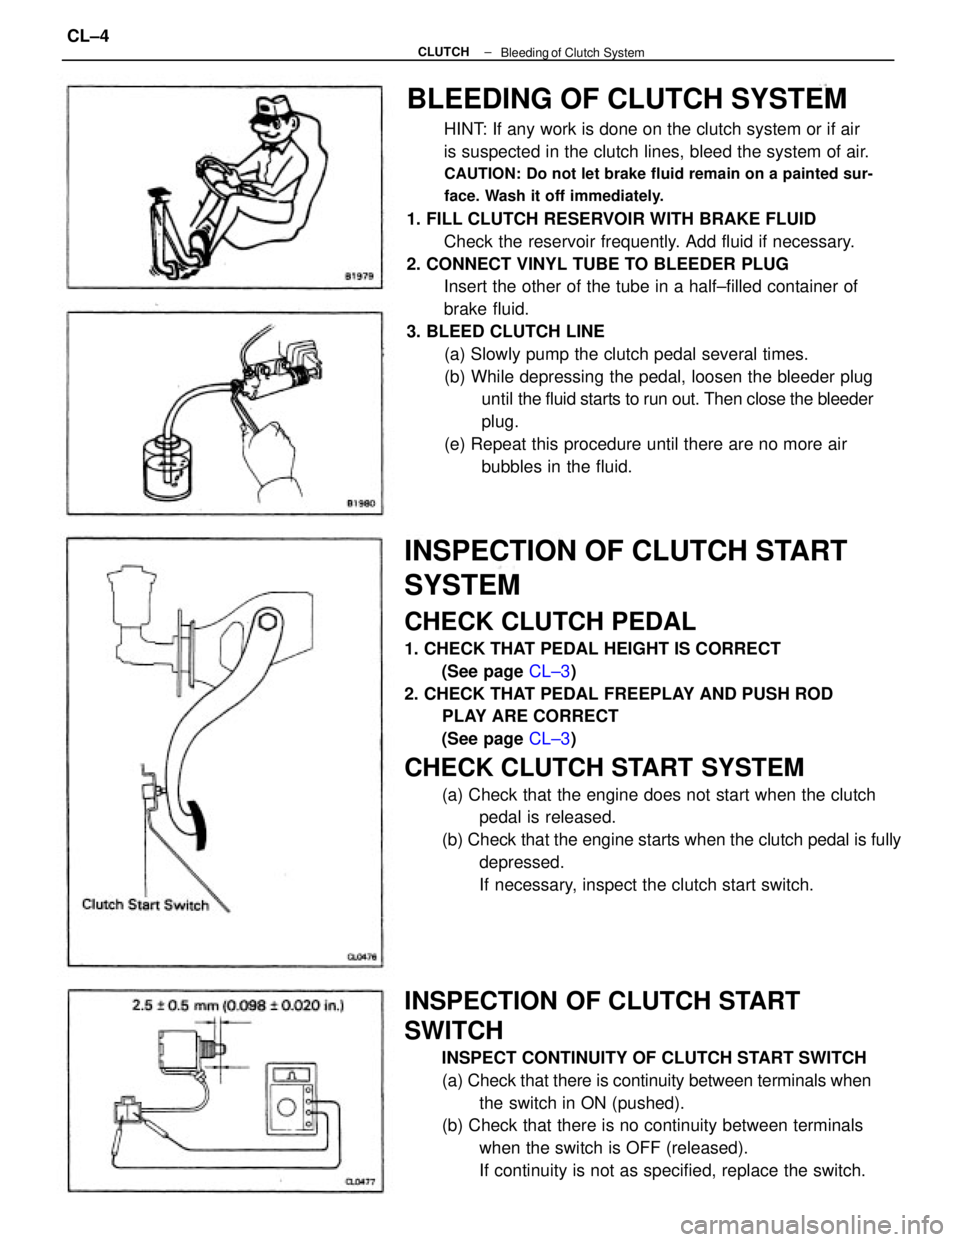
BLEEDING OF CLUTCH SYSTEM
HINT: If any work is done on the clutch system or if air
is suspected in the clutch lines, bleed the system of air.
CAUTION: Do not let brake fluid remain on a painted sur-
face. Wash it off immediately.
1. FILL CLUTCH RESERVOIR WITH BRAKE FLUID
Check the reservoir frequently. Add fluid if necessary.
2. CONNECT VINYL TUBE TO BLEEDER PLUG
Insert the other of the tube in a half±filled container of
brake fluid.
3. BLEED CLUTCH LINE
(a) Slowly pump the clutch pedal several times.
(b) While depressing the pedal, loosen the bleeder plug
until the fluid starts to run out. Then close the bleeder
plug.
(e) Repeat this procedure until there are no more air
bubbles in the fluid.
INSPECTION OF CLUTCH START
SYSTEM
CHECK CLUTCH PEDAL
1. CHECK THAT PEDAL HEIGHT IS CORRECT
(See page CL±3)
2. CHECK THAT PEDAL FREEPLAY AND PUSH ROD
PLAY ARE CORRECT
(See page CL±3)
CHECK CLUTCH START SYSTEM
(a) Check that the engine does not start when the clutch
pedal is released.
(b) Check that the engine starts when the clutch pedal is fully
depressed.
If necessary, inspect the clutch start switch.
INSPECTION OF CLUTCH START
SWITCH
INSPECT CONTINUITY OF CLUTCH START SWITCH
(a) Check that there is continuity between terminals when
the switch in ON (pushed).
(b) Check that there is no continuity between terminals
when the switch is OFF (released).
If continuity is not as specified, replace the switch.
± CLUTCH
Bleeding of Clutch SystemCL±4
Page 978 of 2389

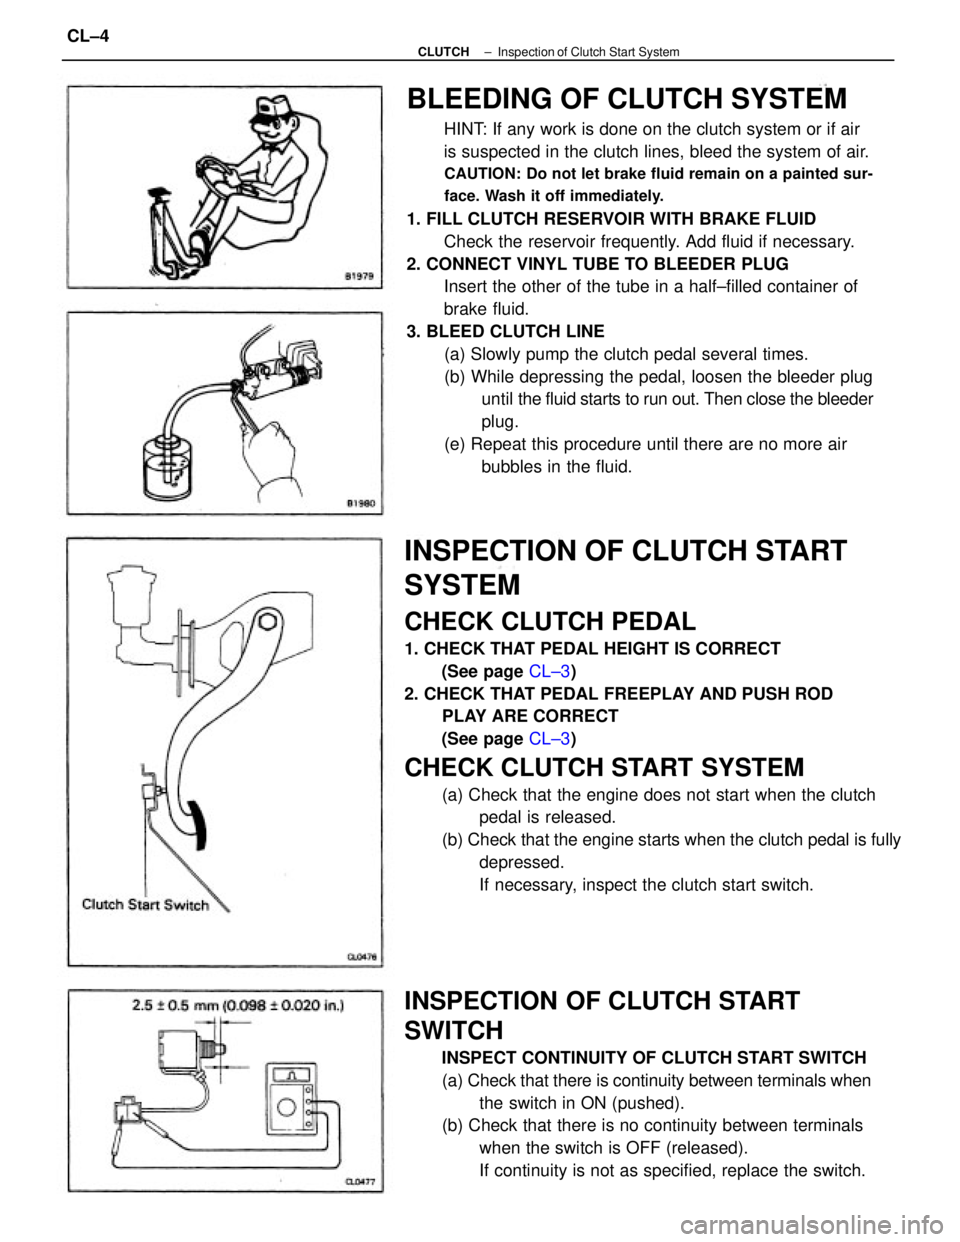
BLEEDING OF CLUTCH SYSTEM
HINT: If any work is done on the clutch system or if air
is suspected in the clutch lines, bleed the system of air.
CAUTION: Do not let brake fluid remain on a painted sur-
face. Wash it off immediately.
1. FILL CLUTCH RESERVOIR WITH BRAKE FLUID
Check the reservoir frequently. Add fluid if necessary.
2. CONNECT VINYL TUBE TO BLEEDER PLUG
Insert the other of the tube in a half±filled container of
brake fluid.
3. BLEED CLUTCH LINE
(a) Slowly pump the clutch pedal several times.
(b) While depressing the pedal, loosen the bleeder plug
until the fluid starts to run out. Then close the bleeder
plug.
(e) Repeat this procedure until there are no more air
bubbles in the fluid.
INSPECTION OF CLUTCH START
SYSTEM
CHECK CLUTCH PEDAL
1. CHECK THAT PEDAL HEIGHT IS CORRECT
(See page CL±3)
2. CHECK THAT PEDAL FREEPLAY AND PUSH ROD
PLAY ARE CORRECT
(See page CL±3)
CHECK CLUTCH START SYSTEM
(a) Check that the engine does not start when the clutch
pedal is released.
(b) Check that the engine starts when the clutch pedal is fully
depressed.
If necessary, inspect the clutch start switch.
INSPECTION OF CLUTCH START
SWITCH
INSPECT CONTINUITY OF CLUTCH START SWITCH
(a) Check that there is continuity between terminals when
the switch in ON (pushed).
(b) Check that there is no continuity between terminals
when the switch is OFF (released).
If continuity is not as specified, replace the switch.
± CLUTCHInspection of Clutch Start SystemCL±4
Page 2350 of 2389
3. CHECK THAT FLUID IN RESERVOIR IS NOT FOAMY
OR CLOUDY AND DOES NOT RISE OVER MAXIMUM
WHEN ENGINE IS STOPPED
Measure the fluid level with the engine running. Stop the
engine and measure the fluid level.
Maximum rise: 5 mm (0.20 in.)
If a problem is found, repeat steps 5 to 8 on page SR±23±
Repair the PS if the problem persists.
BLEEDING OF POWER STEERING
SYSTEM
1. CHECK FLUID LEVEL IN RESERVOIR TANK
Check the fluid level and add fluid if necessary.
Fluid: ATF DEXRON II
HINT: Check that the fluid level is within the HOT LEVEL
of the tank If the fluid is cold, check that it is within the
COLD LEVEL of the tank.
2. START ENGINE AND TURN STEERING WHEEL FROM
LOCK TO LOCK THREE OR FOUR TIMES
With the engine speed below 1,000 rpm, turn the steering
wheel to left or right full lock and keep it there for 2 ± 3
seconds, then turn the wheel to the reverse full lock and
keep it there for 2 3 seconds.
± STEERING± Power Steering (On±Vehicle Inspection)SR±24