Page 205 of 875

GM – CAMARO 1982-1992 – Repair Guide (Checked by WxMax) 205
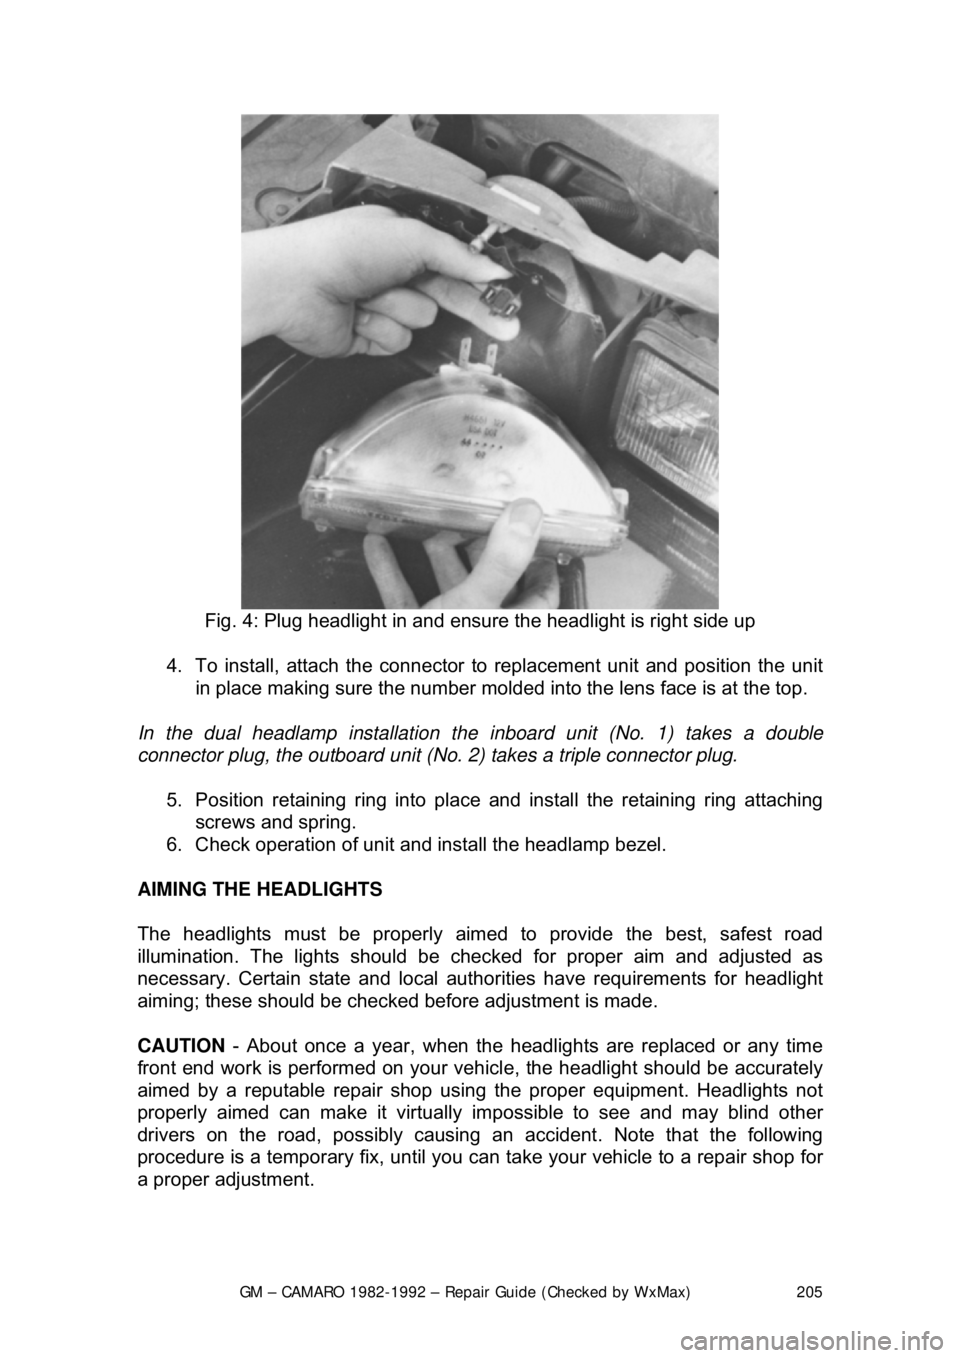
Fig. 4: Plug headlight in and ens ure the headlight is right side up
4. To install, attach the connector to replacement unit and position the unit
in place making sure the number molded in to the lens face is at the top.
In the dual headlamp installation the in board unit (No. 1) takes a double
connector plug, the outboard unit (No. 2) takes a triple connector plug.
5. Position retaining ring into place and install the retaining ring attaching
screws and spring.
6. Check operation of unit and install the headlamp bezel.
AIMING THE HEADLIGHTS
The headlights must be properly aimed to provide the best, safest road
illumination. The lights should be che cked for proper aim and adjusted as
necessary. Certain state and local author ities have requirements for headlight
aiming; these should be check ed before adjustment is made.
CAUTION - About once a year, w hen the headlights are r eplaced or any time
front end work is performed on your vehicl e, the headlight should be accurately
aimed by a reputable repai r shop using the proper equipment. Headlights not
properly aimed can make it virtually impossible to see and may blind other
drivers on the road, possibly causing an accident. Note that the following
procedure is a temporary fix, until you can take your vehicle to a repair shop for
a proper adjustment.
Page 206 of 875

GM – CAMARO 1982-1992 – Repair Guide (Checked by WxMax) 206
Headlight adjustment may
be temporarily made using a wall, as described
below, or on the rear of another vehicle. When adjust ed, the lights should not
glare in oncoming car or truck windshi elds, nor should they illuminate the
passenger compartment of vehi cles driving in front of you. These adjustments
are rough and should always be fine-t uned by a repair shop which is equipped
with headlight aiming t ools. Improper adjustments may be both dangerous and
illegal.
For most of the vehicles covered by th is information, horizontal and vertical
aiming of each sealed beam unit is provided by two adjusting screws which
move the retaining ring and adjusting plat e against the tension of a coil spring.
There is no adjustment for focus; this is done during headlight manufacturing.
Because the composite headlight asse mbly is bolted into position, no
adjustment should be necessary or possibl e. Some applications, however, may
be bolted to an adjuster plate or may be retained by adjusting screws. If so,
follow this procedure when adjusti ng the lights, BUT always have the
adjustment checked by a reputable shop.
Before removing the headlight bulb or di sturbing the headlamp in any way, note
the current settings in order to ease headlight adjustment upon reassembly. If
the high or low beam setting of the old la mp still works, this can be done using
the wall of a garage or a building:
1. Park the vehicle on a level su rface, with the fuel tank about
1/2 full and
with the vehicle empty of all extra cargo (unless normally carried). The
vehicle should be facing a wall whic h is no less than 6 feet (1.8m) high
and 12 feet (3.7m) wide. The front of the vehicle should be about 25 feet
from the wall.
Fig. 5: Location of the aiming screw s on most vehicles with sealed beam
headlights
Page 207 of 875
GM – CAMARO 1982-1992 – Repair Guide (Checked by WxMax) 207
Fig. 6: Dual headlight adjustment screw locations - one side shown here (other
side should be mirror image)
2. If aiming is to be performed outdoors, it is advisable to wait until dusk in
order to properly see t he headlight beams on the wall. If done in a
garage, darken the area around the wall as much as possible by closing
shades or hanging cloth over the windows.
3. Turn the headlights ON and mark the wall at the center of each light's low
beam, then switch on the bright lights and mark the center of each light's
high beam. A short length of masking tape which is visible from the front
of the vehicle may be used. Althoug h marking all four positions is
advisable, marking one position from each light should be sufficient.