1982 CHEVROLET CAMARO engine oil
[x] Cancel search: engine oilPage 455 of 875

GM – CAMARO 1982-1992 – Repair Guide (Checked by WxMax) 455
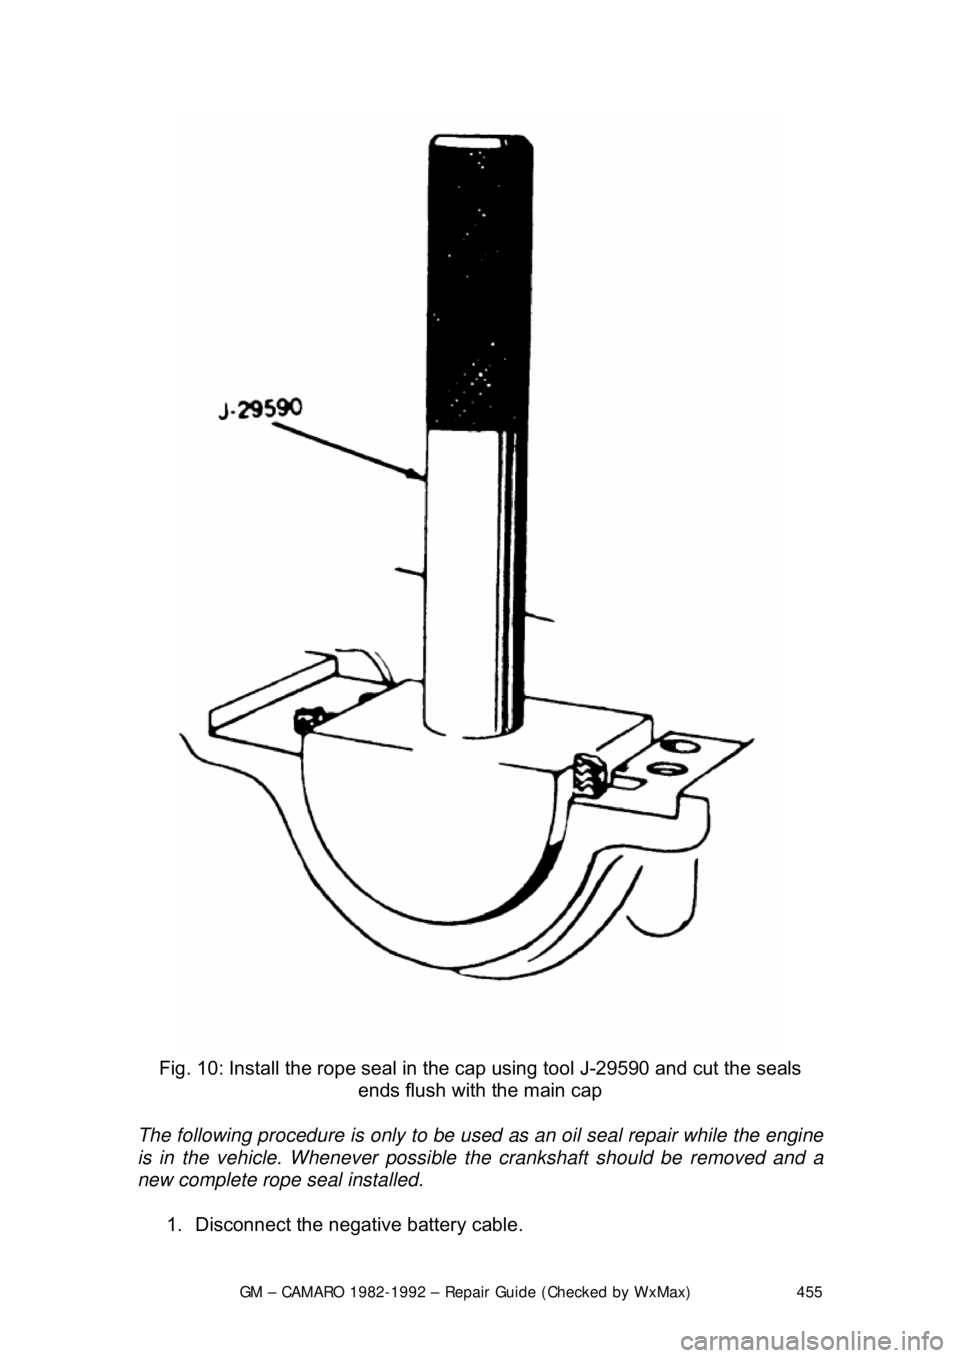
Fig. 10: Install the rope seal in the cap using tool J-29590 and cut the seals
ends flush with the main cap
The following procedure is only to be used as an oil seal repair while the engine
is in the vehicle. Whenever possible the crankshaft should be removed and a
new complete rope seal installed.
1. Disconnect the negative battery cable.
Page 456 of 875

GM – CAMARO 1982-1992 – Repair Guide (Checked by WxMax) 456
2. Drain the engine oil and remove the oil pan.
3. Remove the rear main bearing cap.
4. Insert packing tool J-29114-2 or equi
valent, against 1 end of the seal in
the cylinder block. Drive the old seal gently into the groove until it is
packed tight. This will vary from
1/4 in. (6mm) to 3/4 in. (19mm) depending
on the amount of pack required.
5. Repeat the procedure on t he other end of the seal.
6. Measure the amount the seal wa s driven up on one side and add
1/16 in.
(1.6mm). Using a suitable cutting tool, cut that length from the old seal
removed from the rear main beari ng cap. Repeat the procedure for the
other side. Use the rear main bear ing cap as a holding fixture when
cutting the seal.
7. Install guide tool J-29114-1 or equi valent, onto the cylinder block.
8. Using the packing tool, work the shor t pieces cut in Step 6 into the guide
tool and then pack into the cylinder block. The guide tool and packing
tool are machined to provide a built in stop. Use this procedure for both
sides. It may help to use oil on the short pieces of the rope seal when \
packing them into the cylinder block.
9. Remove the guide tool.
10. Apply Loctite® 414 or equivalent, to the seal groove in the rear main
bearing cap. Within 1 minute, insert a new seal into the groove and push
into place with tool J-29590 until the seal is flush with the block. Cut the
excess seal material with a sharp cu tting tool at the bearing cap parting
line.
11. Apply a thin film of chassis grease to the rope se al. Apply a thin film of
RTV sealant on the bearing cap mati ng surface around the seal groove.
Use the sealer sparingly.
12. Plastigage® the rear main bea ring cap as outlined in MEASURING
REAR MAIN CLEARANCE in this section and check with specification. If
out of specification, check for fr ying of the rope seal which may be
causing the cap to not seat properly.
13. Install all remaining com ponents and inspect for leaks.
FLYWHEEL AND RING GEAR
REMOVAL & INSTALLATION
The ring gear is an integral part of the flywheel and is not replaceable.
1. Remove the transmission.
2. Remove the six bolts attaching t he flywheel to the crankshaft flange.
Remove the flywheel.
3. Inspect the flywheel for cracks, and inspect the ring gear for burrs or
worn teeth. Replace the flywheel if any damage is apparent. Remove
burrs with a mill file.
4. Install the flywheel. Th e flywheel will only attach to the crankshaft in one
position, as the bolt holes are unevenly spaced. Install the bolts and
torque to specification. Tighten bolts in crisscross pattern.
Page 457 of 875

GM – CAMARO 1982-1992 – Repair Guide (Checked by WxMax) 457
EXHAUST SYSTEM
INSPECTION
Safety glasses should be worn at all
times when working on or near the exhaust
system. Older exhaust systems will almost always be covered with loose rust
particles which will shower you when dist urbed. These particles are more than a
nuisance and could injure your eye.
CAUTION - Do NOT perform exhaust repairs or inspection with the engine or
exhaust hot. Allow the system to cool completely before attempting any work.
Exhaust systems are noted for sharp edges , flaking metal and rusted bolts.
Gloves and eye protection ar e required. A healthy supply of penetrating oil and
rags is highly recommended.
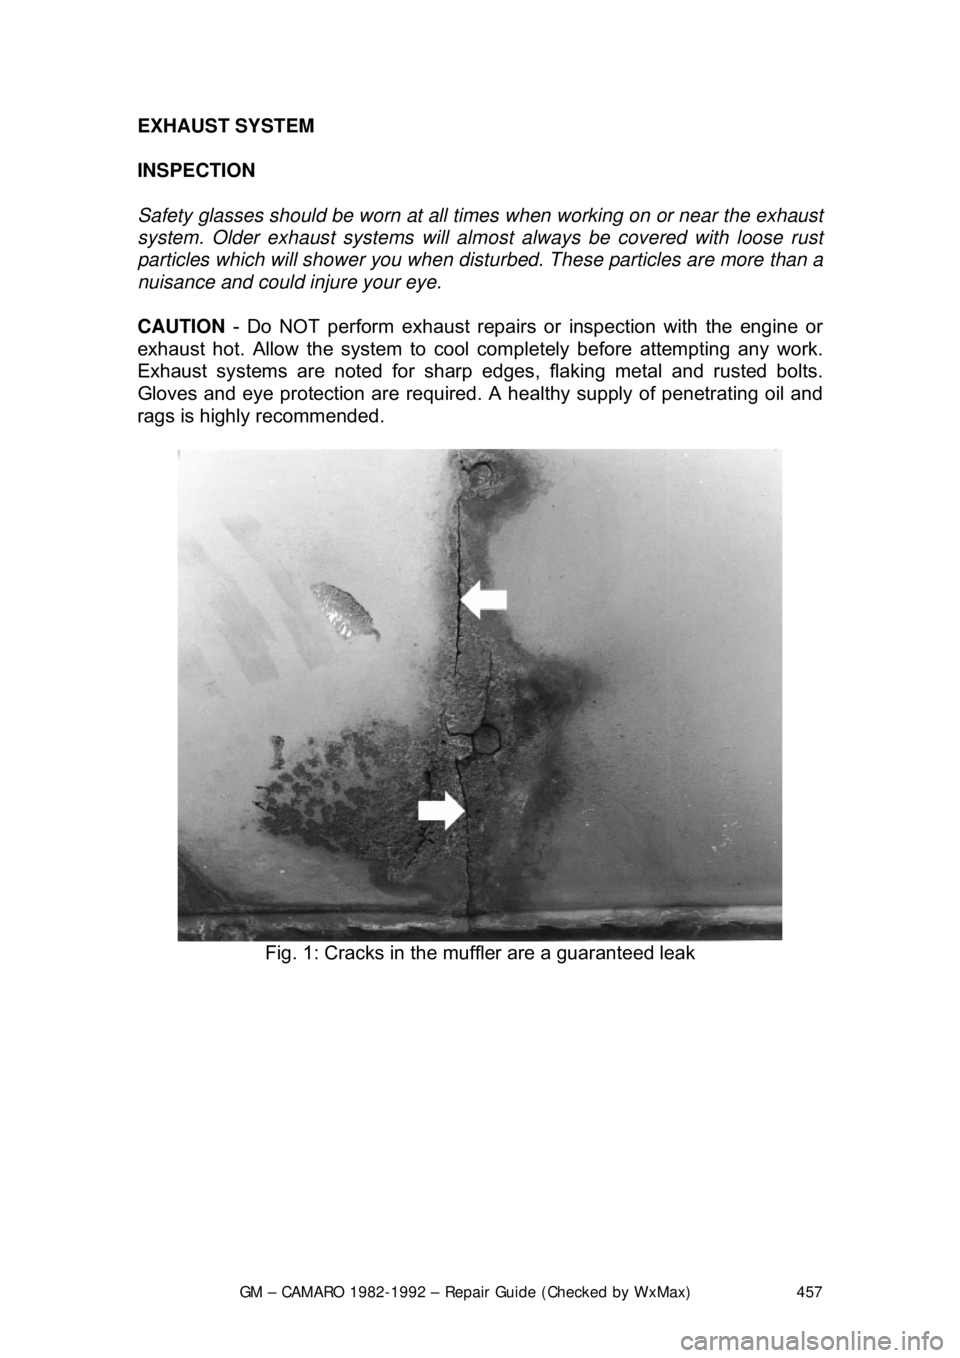
Fig. 1: Cracks in the mu ffler are a guaranteed leak
Page 462 of 875

GM – CAMARO 1982-1992 – Repair Guide (Checked by WxMax) 462
REPLACEMENT
There are basically two types of exhaust sy
stems. One is the flange type where
the component ends are attached with bolts and a gasket in-between. The other
exhaust system is the slip joint type. These components slip into one another
using clamps to retain them together.
CAUTION - Allow the exhaust system to c ool sufficiently before spraying a
solvent exhaust fasteners. Some solvents are highly flammable and could ignite
when sprayed on hot exhaust components.
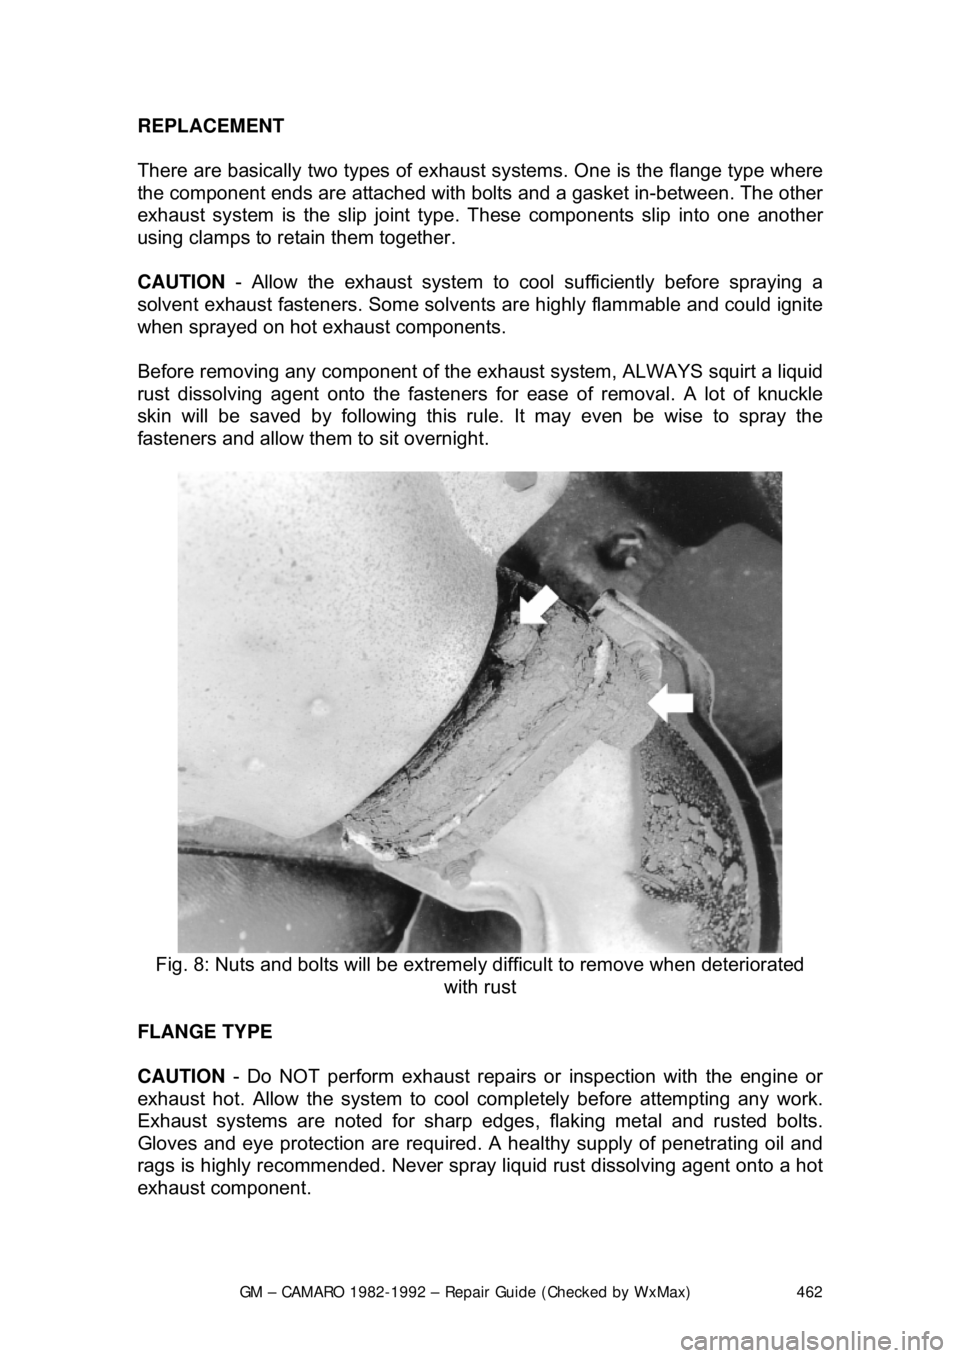
Before removing any component of the ex haust system, ALWAYS squirt a liquid
rust dissolving agent onto the fasteners fo r ease of removal. A lot of knuckle
skin will be saved by following this rule. It may even be wise to spray the
fasteners and allow them to sit overnight.
Fig. 8: Nuts and bolts will be extremely difficult to remove when deteriorated
with rust
FLANGE TYPE
CAUTION - Do NOT perform exhaust repairs or inspection with the engine or
exhaust hot. Allow the system to cool completely before attempting any work.
Exhaust systems are noted for sharp edges , flaking metal and rusted bolts.
Gloves and eye protection ar e required. A healthy supply of penetrating oil and
rags is highly recommended. Never spra y liquid rust dissolving agent onto a hot
exhaust component.
Page 465 of 875

GM – CAMARO 1982-1992 – Repair Guide (Checked by WxMax) 465
Fig. 12: Muffler hanger attachment
ENGINE RECONDITIONING DETE RMINING ENGINE CONDITION
Anything that generates heat and/or friction will eventually burn or wear out (i.e.
a light bulb generates heat, therefore its life span is limited). With this in mind, a
running engine generates trem endous amounts of both; friction is encountered
by the moving and rotating parts inside the engine and heat is created b\
y
friction and combustion of the fuel. Ho wever, the engine has systems designed
to help reduce the effects of heat and fr iction and provide added longevity. The
oiling system reduces the amount of fr iction encountered by the moving parts
inside the engine, while the cooling system reduces heat created by friction and
combustion. If either system is not main tained, a break-down will be inevitable.
Therefore, you can see how regular main tenance can affect the service life of
your vehicle. If you do not drain, flush and refill your cooling system at the
proper intervals, deposits will begin to accumulate in the radiator, thereby
reducing the amount of heat it can extrac t from the coolant. The same applies to
your oil and filter; if it is not changed often enoug h it becomes laden with
contaminates and is unable to properly lubricate the engine. This increases
friction and wear.
There are a number of methods for evaluat ing the condition of your engine. A
compression test can reveal the condition of your pistons, piston rings, cylinder
bores, head gasket(s), valves and valve seat s. An oil pressure test can warn
you of possible engine bearing, or oil pump failures. Excessive oil consumption,
evidence of oil in the engine air intake area and/or bluish smoke from the tail
pipe may indicate worn piston rings, worn valve guides and/or valve seals. As a
general rule, an engine that uses no more than one quart of oil every 1000
miles is in good condi tion. Engines that use one quart of oil or more in less than
1000 miles should first be checked for oil leaks. If any oil leaks are present,
have them fixed before dete rmining how much oil is consumed by the engine,
especially if blue smoke is not visible at the tail pipe.
COMPRESSION TEST
A noticeable lack of engine power, excessive oil consumption and/or poor fuel
mileage measured over an extended period are all indicators of internal engine
Page 466 of 875

GM – CAMARO 1982-1992 – Repair Guide (Checked by WxMax) 466
wear. Worn piston rings, scored or wo
rn cylinder bores, blown head gaskets,
sticking or burnt valves, and worn valve seats are all possible culprits. A check
of each cylinder's compression will help locate the problem.
A screw-in type compression gauge is more accurate than the type you simply
hold against the spark plug hole. Although it takes slightly longer to use, it's
worth the effort to obtain a more accurate reading.
1. Make sure that the proper amount and viscosity of engine oil is in the
crankcase, then ensure the battery is fully charged.
2. Warm-up the engine to normal operat ing temperature, then shut the
engine OFF.
3. Disable the ignition system.
4. Label and disconnect all of the spark plug wires from the plugs.
5. Thoroughly clean the cylinder h ead area around the spark plug ports,
then remove the spark plugs.
6. Set the throttle plate to the fully open (wide-open throttle) position. You
can block the accelerator linkage open for this, or you can have an
assistant fully depress the accelerator pedal.
Fig. 1: A screw-in type compression gauge is more accurate and easier to use
without an assistant
7. Install a screw-in type compression gauge into the No. 1 spark plug hole
until the fitting is snug.
WARNING - Be careful not to crossthread the spark plug hole.
Page 467 of 875

GM – CAMARO 1982-1992 – Repair Guide (Checked by WxMax) 467
8. According to the tool manufacture
r's instructions, connect a remote
starting switch to the starting circuit.
9. With the ignition switch in the OFF position, use the remote starting
switch to crank the engine through at least five compression strokes
(approximately 5 seconds of cranking) and record the highest reading on
the gauge.
10. Repeat the test on each cylinder, cranking the engine approximately the
same number of compression stroke s and/or time as the first.
11. Compare the highest readi ngs from each cylinder to that of the others.
The indicated compression pre ssures are considered within
specifications if the lo west reading cylinder is within 75 percent of the
pressure recorded for the highest readi ng cylinder. For example, if your
highest reading cylinder pressure was 150 psi (1034 kPa), then 75
percent of that would be 113 psi (779 kPa). So the lowest reading
cylinder should be no less than 113 psi (779 kPa).
12. If a cylinder exhibits an unusually low compression reading, pour a
tablespoon of clean engine oil into the cylinder through the spark plug
hole and repeat the compression tes t. If the compression rises after
adding oil, it means that the cylinder's piston rings and/or cylinder bore
are damaged or worn. If the pressure re mains low, the valves may not be
seating properly (a valve job is needed), or the head gasket may be
blown near that cylinder. If compressi on in any two adjacent cylinders is
low, and if the addition of oil doesn' t help raise compression, there is
leakage past the head gasket. Oil and coolant in the combustion
chamber, combined with blue or const ant white smoke from the tail pipe,
are symptoms of this pr oblem. However, don't be alarmed by the normal
white smoke emitted from the tail pipe during engine warm-up or from
cold weather driving. There may be evidence of water droplets on the
engine dipstick and/or oil droplets in the cooling system if a head gasket
is blown.
OIL PRESSURE TEST
Check for proper oil pressu re at the sending unit passage with an externally
mounted mechanical oil pressure gauge (a s opposed to relying on a factory
installed dash-mounted gauge). A tachom eter may also be needed, as some
specifications may require running the engine at a specific rpm.
1. With the engine cold, locate and remo ve the oil pressure sending unit.
2. Following the manufacturer's inst ructions, connect a mechanical oil
pressure gauge and, if necessary, a tachometer to the engine.
3. Start the engine and allow it to idle.
4. Check the oil pressure reading when cold and record the number. You
may need to run the engine at a specified rpm, so check the
specifications chart located earlier in this section.
5. Run the engine until normal operati ng temperature is reached (upper
radiator hose will feel warm).
6. Check the oil pressure reading agai n with the engine hot and record the
number. Turn the engine OFF.
Page 468 of 875

GM – CAMARO 1982-1992 – Repair Guide (Checked by WxMax) 468
7. Compare your hot oil pressure reading
to that given in the chart. If the
reading is low, check the cold pressu re reading against the chart. If the
cold pressure is well above the spec ification, and the hot reading was
lower than the specificat ion, you may have the wr ong viscosity oil in the
engine. Change the oil, making sure to use the proper grade and
quantity, then repeat the test.
Low oil pressure readings could be attributed to internal component wear, pump
related problems, a low oil leve l, or oil viscosity that is too low. High oil pressure
readings could be caused by an overfilled crankcase, too high of an oil viscosity
or a faulty pressure relief valve.
BUY OR REBUILD?
Now that you have determined that your engine is worn out, you must make
some decisions. The question of whether or not an engine is worth rebuilding is
largely a subjective matter and one of per sonal worth. Is the engine a popular
one, or is it an obsolete model? Are parts available? Will it get acceptable gas
mileage once it is rebuilt? Is the car it's being put into worth keeping? Would it
be less expensive to buy a new engine, have your engine rebuilt by a pro,
rebuild it yourself or buy a used engine from a salvage yard? Or would it be
simpler and less expensive to buy another car? If you have considered all these
matters and more, and have still decided to r ebuild the engine, then it is time to
decide how you will rebuild it.
The editors of this information feel that most engine machining should be
performed by a professional machine shop. Don't think of it as wasting money,
rather, as an assurance that the job has been done right the first time. There
are many expensive and spec ialized tools required to perform such tasks as
boring and honing an engine block or having a valve job done on a cylinder
head. Even inspecting the parts requires expensive micrometers and gauges to
properly measure wear and clearances. Al so, a machine shop can deliver to
you clean, and ready to assemble parts, saving you time and aggravation. Your
maximum savings will come from perf orming the removal, disassembly,
assembly and installation of the engine and purchasing or renting only the tools
required to perform the above tasks. Depending on the particular
circumstances, you may save 40 to 60 perc ent of the cost doing these yourself.
A complete rebuild or overhaul of an engine involves replacing all of the moving
parts (pistons, rods, crankshaft, camsha ft, etc.) with new ones and machining
the non-moving wearing surfaces of t he block and heads. Unfortunately, this
may not be cost effective. For instanc e, your crankshaft may have been
damaged or worn, but it can be machined undersize for a minimal fee.
So, as you can see, you can replace ev erything inside the engine, but, it is
wiser to replace only those parts whic h are really needed, and, if possible,
repair the more expensive ones. Later in this section, we will break the engine
down into its two main components: t he cylinder head and the engine block. We
will discuss each component, and the re commended parts to replace during a
rebuild on each.