1980 CHEVROLET CITATION clutch
[x] Cancel search: clutchPage 25 of 95
![CHEVROLET CITATION 1980 1.G Owners Manual Downloaded from www.Manualslib.com manuals search engine SINGLE WIPE
LOW SPEED (PULSE WIPER)
HIGH
SPEED
• Check the washer fluid levelregu]arly. Do it often when the weather
is bad.
• U CHEVROLET CITATION 1980 1.G Owners Manual Downloaded from www.Manualslib.com manuals search engine SINGLE WIPE
LOW SPEED (PULSE WIPER)
HIGH
SPEED
• Check the washer fluid levelregu]arly. Do it often when the weather
is bad.
• U](/manual-img/24/8083/w960_8083-24.png)
Downloaded from www.Manualslib.com manuals search engine SINGLE WIPE
LOW SPEED (PULSE WIPER)
HIGH
SPEED
• Check the washer fluid levelregu]arly. Do it often when the weather
is bad.
• Use a nuid such as OM Optikleen to help prevent freezing damage, and for better cleaning.
• Do not use radiator antifreeze in the 'windshield washer; ifcould cause
paint damage .
• In cold weather, warm the windshield with the defroster before using the washer-to help prevent Icing that my block
the driver's vision.
STARTING THE ENGINE
I.
2.
Apply the parking brake. . .
Automatic Trl!nsaxl..: Move the transaxle shift lever to "P"(Park) or "N" (Neutral) "P" Preferred). A starter safety device is
designed to keep the starter from operating if the shift lever is in any drive position. (If you need to fe-start the engine while the car is moving . move
the shift lever to "N.")
Manuel Transaxle· Press the clutch pedal to the floor and shift the transaxle to Neutral. Hold the clutch pedal to the floor while you are s tarting ,the engine. A starter safety device l,s d esigned to keep the starter
from operating if the clutch pedal is not fully depres sed.
3. Sta'rt the engine as outlined below for different conditions.
NOTICE: 00 not crenk the engil'. for more than 15 seconds at e time. Walt 10 to 15 seconds before trYiog agein.
• COLD ENGINE:
•
L·4 Engine Press the accelerator pedal to the floor and ·i slowly release It. With your foot off the pedal; crank the engine
by turning the ignition key to "Start ." Release the key when the engine
sta rts.
If the engine starts, but fails to run, repeat this procedure. •
• V-6 Engine: Press the accelerator pedal to the floor twice and slowly release it. With your foot off the pedal. crank the engine by turning the ignition key to 'Stan". Release key when engine
s tarts.
If the engine starts, but fails to run, repeat this procedure but press
the accelerat or pedal only
ONCE to the floor . :When the e ngine is
running smoothly (about 30 seconds), you_ can reduce the engine idle speecf by press ing down slightly on the accelerator pedal. then slowly
releasing it.
2-8
Page 27 of 95
Downloaded from www.Manualslib.com manuals search engine AUTOMATIC TRANSAXLES
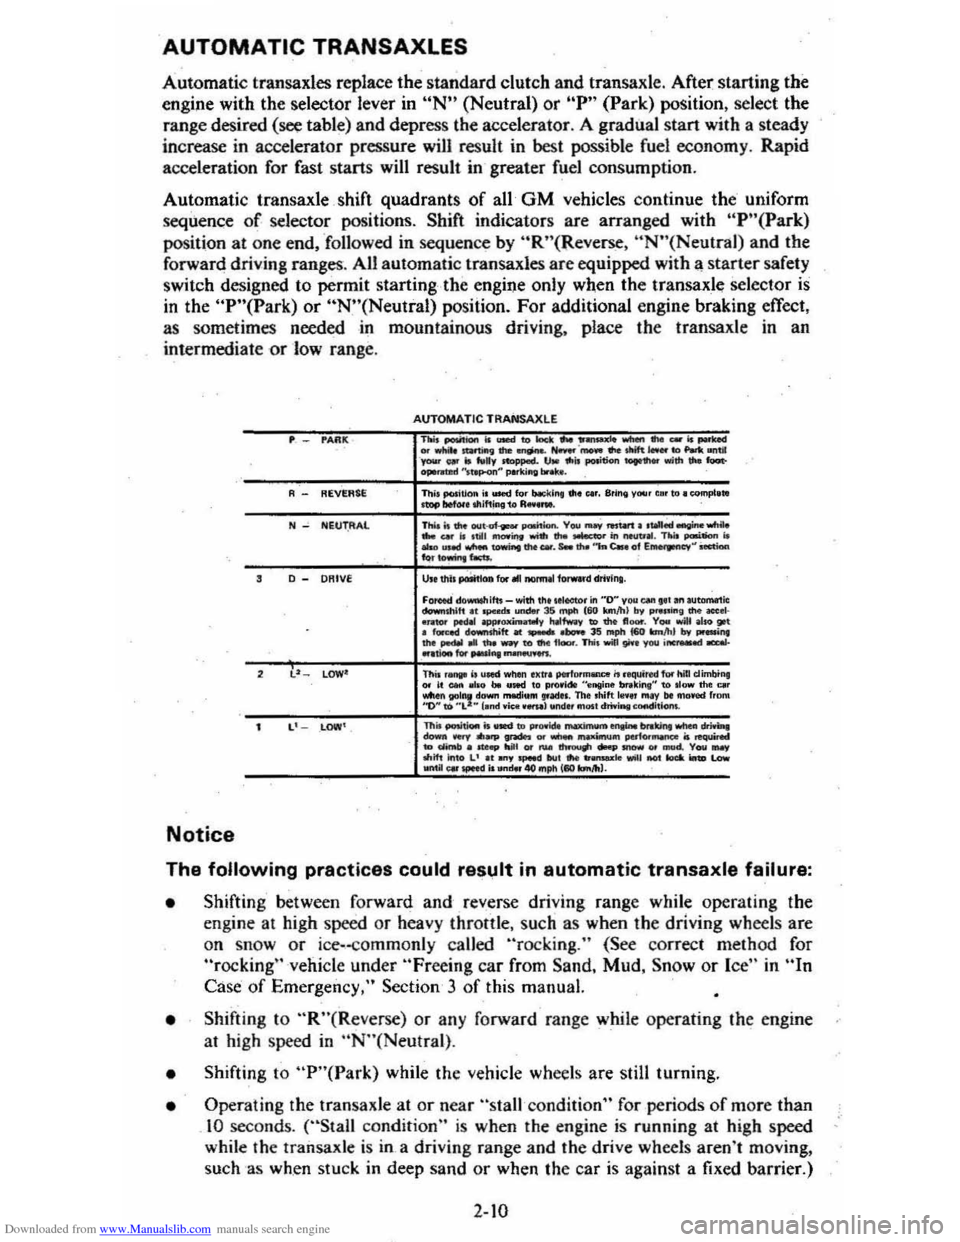
Automatic transaxles replace the standard clutch and transaxlc. After starting the
engine with the selector lever in
uN" (Neutral) or "P" (Park) position, select the
rang e desired (see table) and depress the accelerator. A gradual start with a steady
increase in accelerator pressure will resuh in best possible fuel economy. Rapid
acceleration for fast starts will result in greater fuel consumption.
Automatic transaxle
. shift quadrants of all· GM vehicles continue the' u nifo rm sequence of selector positions. Shift indicators are arranged with "P"(Park)
position at one end . "followed in sequen ce by "R"(Reverse . "N"(Neutral) and the
forward driving ranges. All automatic transaxles are equipped with a starter safety
s witch designed to permit
starting -the engine only when the transaxle selector is in the "P"(Park) or "N"(Neutral) posiiion. For additional engine braking effect,
as sometimes needed in mountainous driving, place the transaxle in an
intermediate
or low range.
"Afll(
REVf.AU
N NEUT.AAl
D _ DRIVE
l' lOW'
Notice
AUTOMATIC TRAHSA XlE TIoit PMitIotn Is ..... to> Iudc ... 11...-10 _ ... _ is ....-....... ~II'e..,.;.,a.'""'·_ ... tItif ...... "' ........ 1iI _ \@ Is .... v """""",. IJM Ito;, pooition .......... "';111 Oo to«-ope...ud "'hp<>n~ pMkiftll br .....
Th .. ,....ltIon i ...... for bocl\lft. III. Clr. Sring y .... r elf to. complnl mop bel .... mifting 1" 1'1,,"_ Thi.o;' die _"' __ paoi'I ..... V .... ..., .... W1 •.......... wItiIo .... "" 10 ,till _irlti ..... !he ....... in ",,",II. TN ...--. is _ uMCI_.--. .... _. s.. .... ',,",c.. "I E~~ Oect;oa ..... owW>e , ......
U .. thl . ~OII for III""nnai f{orwud driYinl. Foroecl do...w.ifto _ .. ith.1'>o III ........ in "D" you ....... ' ."au_ic ......... "'111 ... pcodo undw 35 mpIo (60 konlll) try P .... inl .... _01· ... 101' peOoI _-V Io.fI"...., to .... n_. V .... wiN aloo go! o fur-.cl "-shit! till .-IlooooI 3S .-ph 160 """"'. Iry ......... "",..... .... .....,. ....... ,'-.n.n ..... pyoui __ ,,"Iiooo ............ "'-'"". This ,_ I, u"" .. hili Ixtr. PtrfDfrnonce it roqui red lothill dimbin, .,.. I. _ 01'0 bo U"" '0 pro.l ... "'''IIio& mking" to .Iow tho Clr ~n.r.!rt~~;::: =~':.~::~. ~:~::.::"!=I=.~O_ frDIW
TIl. ~ is ........... 00i6t....,.;,-. ....... ""' ..... _ ....... ...... ...., ... _..-. ... _ --..... .... '.,.._ ir. __ "' ..... _ ....... ""' .............. ..-... .-d. Yow_ ""if! iftlO L' It....,"-" kI' .... -'e "'""..o! .... ionD ~ ___ ~ it """', "I) mph 1110 .... ", •.
The following practices could result in automatic transaxle failure:
• Shifting ' between forward and reverse driving range while operating the
engine at high speed or heav y throttle . such as when the driving wheels are
on
snOw or ice-
• Shifting to "R"(Reverse) or any forwa rd range while operating the engin e
al high speed in "N"(Neulral) .
• Shifting to "P"(Park) while the vehicle wheels are still turning.
• Oper ating the transaxle at or near "stall condition" for periods of more than 10 seconds. ("Stall condition" is when the engine is runnin g at high speed
while the
trailsaxle is in a driving range and the drive wheels aren't moving,
such
as when stuck in deep sand or when the car is against a fixed barrier.)
2-10
Page 28 of 95
Downloaded from www.Manualslib.com manuals search engine • Holding. vehicle on an upgrade with the accelerator pedal. (Use the regular
brakes to hold car on an uphill grade.)
Column Shift Lever
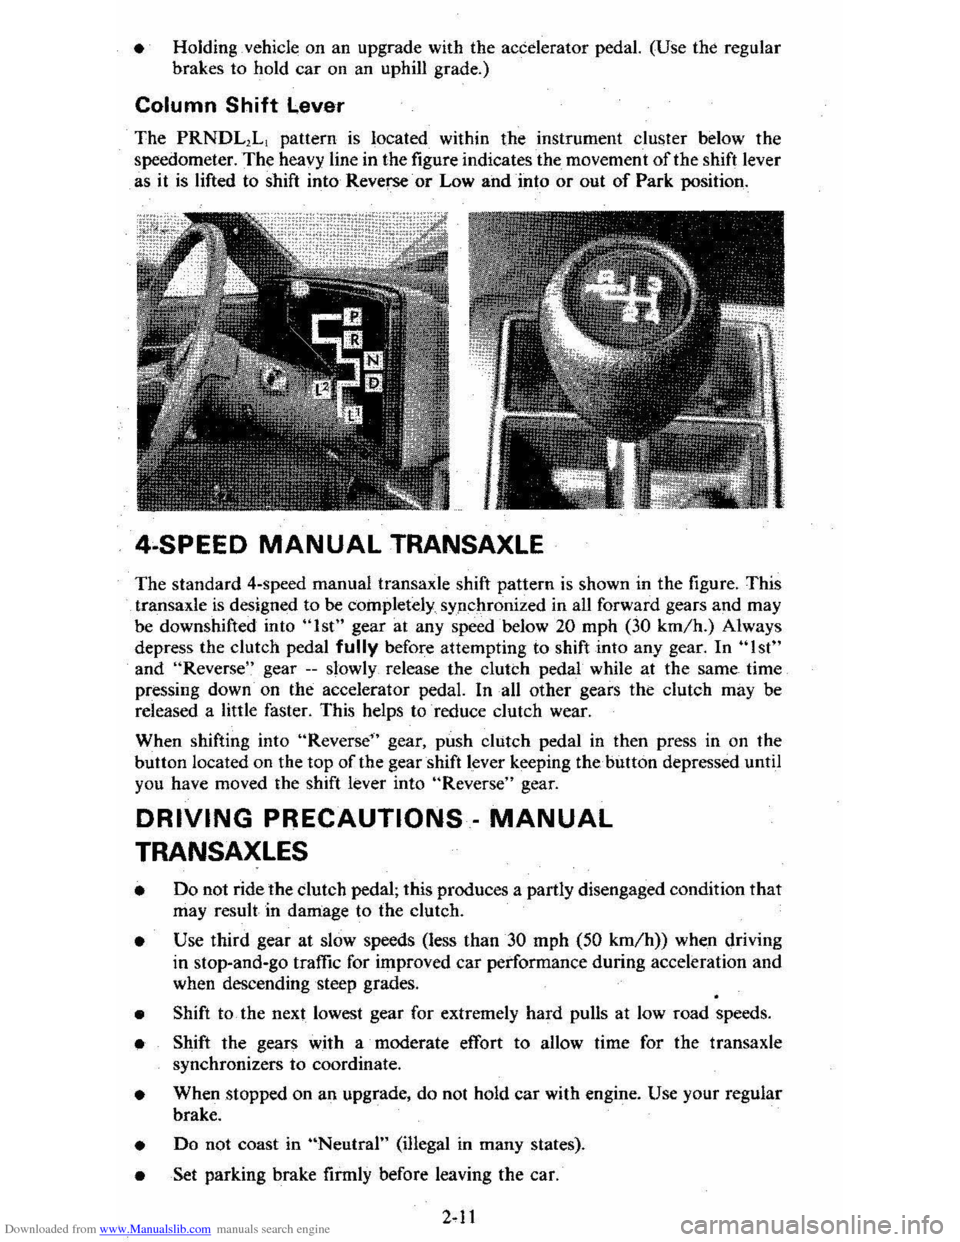
The PRNDL1L1 pattern is located within the instrument cluster below the
speedometer.
The heavy line in the figure indicates the movement of the shift lever
as it
is lifted to shift into Reverse or Low and into or out of Park position.
4·SPEED MANUAL TRANSAXLE
The standard 4-speed manual transaxle shift pattern is shown in the figure. This
transaxle
is designed to be cOinpletely sypchronized in all forward gears and may
be downshifted into "1st" gear at any speed below 20 mph (30 km/h.) Always
depress the clutch pedal
fully before attempting to shift into any gear. In "1st"
and "Reverse " gear --slowly release the clutch pedal while at the same time
pressing down· on the accelerator pedal. In all other gears the clutch may be
released a little faster. This helps to reduce clutch wear.
When shifting into
"Reverse" gear, push clutch pedal in then press in on the
button located on the top of the gearshift lever keeping thehutton depressed until
you have moved the shift
lever into "Reverse" gear.
DRIVING PRECAUTIONS· MANUAL
TRANSAXLES
• Do not ride the dutch pedal; this produces a partly disengaged condition that may result in damage to the clutch.
• Use third gear at slow speeds (less than 30 mph (50 km/h)) when driving
in stop-and-go traffic for improved
car performance during acceleration and
when descending steep grades.
• Shift to the next lowest gear for extremely hard pulls at low road speeds.
• Shift the gears with a moderate effort to allow time for the transaxle
synchronizers to coordinate.
• When stopped on an upgrade, do not hold car with engine. Use your regular
brake.
• Do not coast in "Neutral" (i1legal in many states).
• Set parking brake firmly before leaving the car.
Page 32 of 95
Downloaded from www.Manualslib.com manuals search engine • Never drive-the vehicle _with the parking brake set as this -may overheat the
reaf brakes reducing their effectiveness and causing excessive wear or damage,
DISC BRAKE WEAR INDICATORS
Front disc brakes have built-in wear indicators that are designed to make a
high-pitched
squealing or cricket-like warning sound when the brake linings are
worn 10 where -new linings are needed. The sound will come and go, or be heard
all the time
when the wheels are rolling, and when the brake pedal is pu~hed down
firmly . Expensive damage can result
if linings are not replaced when needed.
See also the brake checks listed in the Maintenance Schedule folder.
CLUTCH .PEDAL
On models equiPPed with a manual transaxle, a clutch pedal is used to engage
or disengage the clutch, thereby connecting
or disconnecting the engine from the
transaxle and drive1ine to the front wheels. -When the pedal is fully extended the
clutch
is engaged, driving the transaxle arid the front wheels.
INSTRUMENT PANEL P.ND CONTROLS
INSTRUMENTS
The instruments, gages and indicator lights conveniently grouped in the
instrument cluster are des igned to
tell you at a glance many important things about
_the perfonnance of your vehicle _, _ The following information will enable you to
more quickly -understand and properly it';:rerpretthese instruments.
Speedometer
The speedometer chand ·indicatt:5 vehicle speed in miles per hour and kilometers
per hour.
Odometer
The group of six figures . in the speedometer lower center section indicates the
accumulated mileage.
Fuel Gage
The fuel gagewiH register the_APPROXIMATE fuel level in the tank, when the
ignition
is in the RUN position.
When the gage registers
EMPTY, some fuel is still available as a reserve. When
the gage registers
FULL. some additional" fuel can"still be added to the tank. The
following conditiqns may be considered normal:
• Gas station _pump may shut off before fuel gage indicates FULL. •
•
Amount of gasoline required for fill-up may not exactly correspond to gage.
• Needle may not move away from FULL until some time after fill·up.
• Needle may !Dove during turns. stops and-accelerations.
When the ignition switch
is turned to the OFF position, the needle will not
necessarily
retiJrn · all the way to the EMPTY mark.
2-15
Page 69 of 95
Downloaded from www.Manualslib.com manuals search engine Front Suspension
Lub rica te fitting s at the interval shc,w n in the Main teua nc e Schedul e with water
r esis tan t EP ChassiS Lubricant which (nee ts GM Specifica tion 6031M.
NOTICE:- Ball joints should not be lubricated unles s their temperature is · '·12"C 11O"F) or highe r. During cold weather, they should be allowed to warm up as necessary • befo re being lubricated or damage to the ball joint cou ld o ccur. .
Manual Transaxle
See Sect io n A of th e Maint enan ce Schedule folde r [Q find out how often the
lu br ica nt level should be check ed.
C heck the fluid level
only when the transaxle is coo l eno ugh to let you rest your
fingers on the tran sax le case. To c heck, carefull y remove the filler plug o n the
d
river's side of the case, above the ax le sh aft.
NOTICE: If the trensaxle is-hot. fluid m ay flow from the filler plug h_ole when you removathe plug. -
When the fluid is coo l (about room tem perature). the fluid should be le vel with the filler plug hole-If nee ded , ad d enoug h automat ic tr a n smissi on fluid (l abeled
DEXRON '-@II) to bring the fluid leve l up to the fiJler plu g hole.
Clutch Adjustm~nt-Manual Trans8xle
The .clut ch ,lin kage is co nstantl y seJf~adjusting with each ped al application.
T herefo
re,clutch adjustment sh ould,'no t be nec essary.
See your dealer if pedal height-d oes not return to n ormal of if pedal is except io nall y
hard t o depress.
Air Cleaner Element
When replacement of'a ir clean er filter element is 'neces sary, an AC a ir filter
e lem ent is rec om me nded.
Ope ra ti o n of vehicl e in dusty a reas will n ec ess itate more fre qu ent rep lace ment.
See yo ur Maint enance Schedul e fo r ch an ge int erva ls. Your dea le r rnn be o f
ass istance in dete rmining the prope r re
placem ent frequency for t he con diti ons
under which you opera te your vehi cle.
5-8
Page 88 of 95
Downloaded from www.Manualslib.com manuals search engine Air Cleaner ...... . Air Conditioner
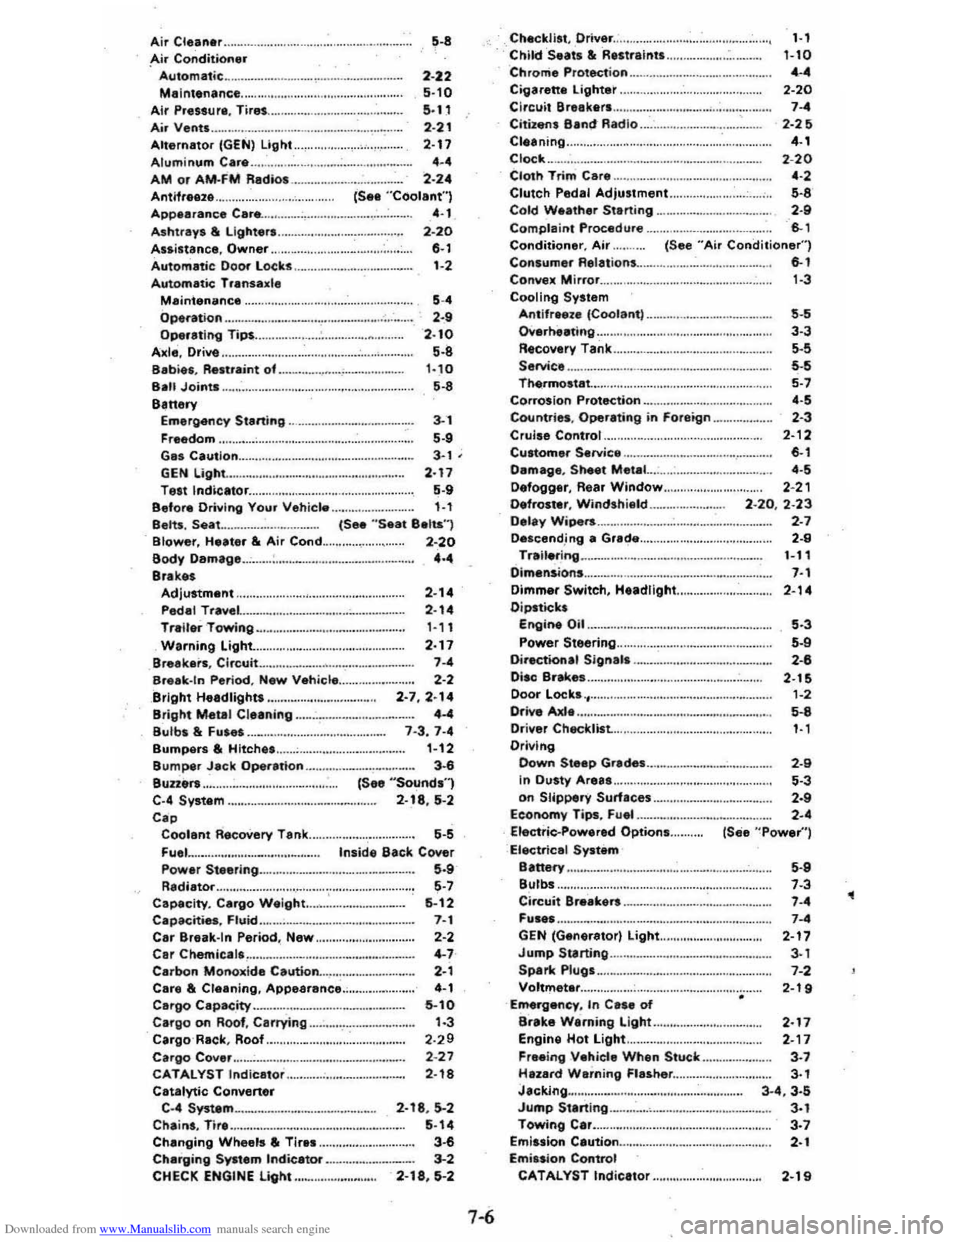
Automat ic ............ . Malnt.nance Air Pre •• ur •. Tire .... A ir Vents ..... Alternator (GEN) Light .. Aluminum Car •.. AM or AM·fM R.dios ..... Antifra.z . ..... ......... .......... . App.aranc. Car ...... Ashtrays & l ighters. Assi.tance. Owner .. Autom.tic DOOf lOCks
Autom.tic: Trann.l. Malnt.mimc. Operation .. Operating Tip$ ..... Axl. , Drive .. Sabies, Reatraint of . San Joints S.ttary
5-8
2 -
22 5·10 5·11 2·21 2·17 .-. 2·24 (S •• "Coolant") '-1 2-20 0-1 1-2
5-. ,-a 2 ·10 5-8 1·10 5-8
Em.rgency SIIHting.. 3-1 Fr •• dom .... 5·9 G •• Caution... 3-1 ; GEN Light ... 2·11 T •• t Indicator... 5·9 Befortl Oriylng Your V.hicle ,., Belt •. Seat .... M. (S .. "Seat Baits",
Blower, H.at.r &. Air Cond.... 2-20 Body Oamag... 4·4 Brak.s Adjustment P.dal Trav.l Traller 'Towing .. Warning Light Bre.ka,., Circuit
Break·ln Period, N.w V.hicl •... Bright Headlights .....
2-14 2·14 1 -11 2·17 7-4 2-' 2·7,2·14 4-4 1 -3.7·4 1-12 3-6 {S •• "Sound"l 2·18, 5-2
Bright Metal CI.aning ......... .. Bl,llbs lit Fu ••• Bumpe ... lit Hitch ••.. 81,1mper Jack Operetion Bun.r •.. C·4 Syst.m .. C •• Coolant RaeoV.ry Tenk .. FI,I.I. Powar St •• ring .... R.diator ..... . Cap.city. Cargo W.ight ... .•. Cap3Cme •. Fluid .. C.r Br.ak·ln Period , N.w ..... . C.r Chemic. I ......... .. C.rbon Monoxid. Caution
'-5 Inside Back Cover .-a '-7 6-12 7-1 2-' '-7 '-1 C.r. &. CI.aning, Appear.nce 4-1 C.rgo Capacity. 5-10 Cargo on Roof, C.rrying.. ......... ............... 1·3 CargoR.ck, Roof ..... 2·29 Cargo Coyer .. ................ ........... 2-27 CATALYST Indic.tor..... 2 ·18 C.t.lytic Conv.n.r C ·4 System ......... . Chains, Tir • ..... Ch.nging Whe.'s • Tiras .. Ch.rging Systam Indicator .... CHECK ENGINE light..
2·18,5--2 5·14 3-6 3-2 2-18, 5-2
7-6
Checklist. Driver ....... . Child Seats lit Ra.traint •.. Chrome Protection .. Cigarette lightar .... Circuit Breakars . Citizens Band Radio ... " .... " .... " .. M ••••••• Cleening .. Clock
Cloth Trim Car." .. Clutch Pedal Adjl,lstment.. .. Cold Welther Stlrting ..... Compla int Procedure ..
1-1 1-10 .-. 2·20 7-' 2·2 ~ 4-1 2·20 .-, 5-8 '-a 6-1
Conditionar, Air ....... (See "Air Conditi on.r") Con.umer Relations... 6-1
Cony.)! Mirror ... C ooling System Antifraet. ICoolant, .. Overheating .. Recovary Tank .. S.rvice .. Thermostat .. CorrOSion Protection Countries. Oper.ting in Foraign ..... Cruise Control .. Cu.tomer Sarvice .. Oamage. Sheet M.tal...-. D.fogger. Rear Window. Defro.hlT , Windshiflld .. Oalay Wipers .. Descend .ing a Grade Trail.ring .. Dimen.ion. Dimmer Switch, H.adlight Dipsticks
Engine Oil .. Power Staering .. Diractional Sign." .... . Oi.c Br~ ••.. Door lock ......
Drrve lOOe
1-3
'-5 3-3 5-S '-5 5-7 .-. 2 -3 2·12 6-1 '-5 2-21 2 -20, 2·23 '-7 '-8 1-11 7-1 2-14
'-3 .-a ,-u 2·1S 1-2 5-8 Driver Checklist.... 1·1 Driving Down Steep Gr.de........ 2·9 In Ou.ty Ar......... 5·3 on Slippery Surfaces ....... .......... ,.... 2·9 Ec;Gnomy Tips , Fu" 2·4 Electric-Powered Option...... (See "Power")
Ele<:tricel System 8IttMY ... ... .
Bulbs ...... .
Circuit Brlak.rs. , .... GEN (Glnerator) light ...... Jump Scarting .. .. Sparil Plugs .. Voltm.ter ... Erne:rg.ncy , In Ca •• of Brak. Warning Light Engine Hot light .. Freeing Vahicle When Stuck ... Hazard Warning Fla.h.r .... J.cking ..... Jump 51anlng._. Towing Clr. Emission Caution .................................. . Emi .. ion Control CAT AL YST Indicator
5-S 7-3 7-. 7-' 2·17 3-1
7-2
2·19
2·17 2·17 3-7
3-1
3 ·4 .3·5 3-1
3-7
'-1
2·19
,
Page 90 of 95
Downloaded from www.Manualslib.com manuals search engine Switch Headlights .... TEMP (Temperature) .. Locks Door ...
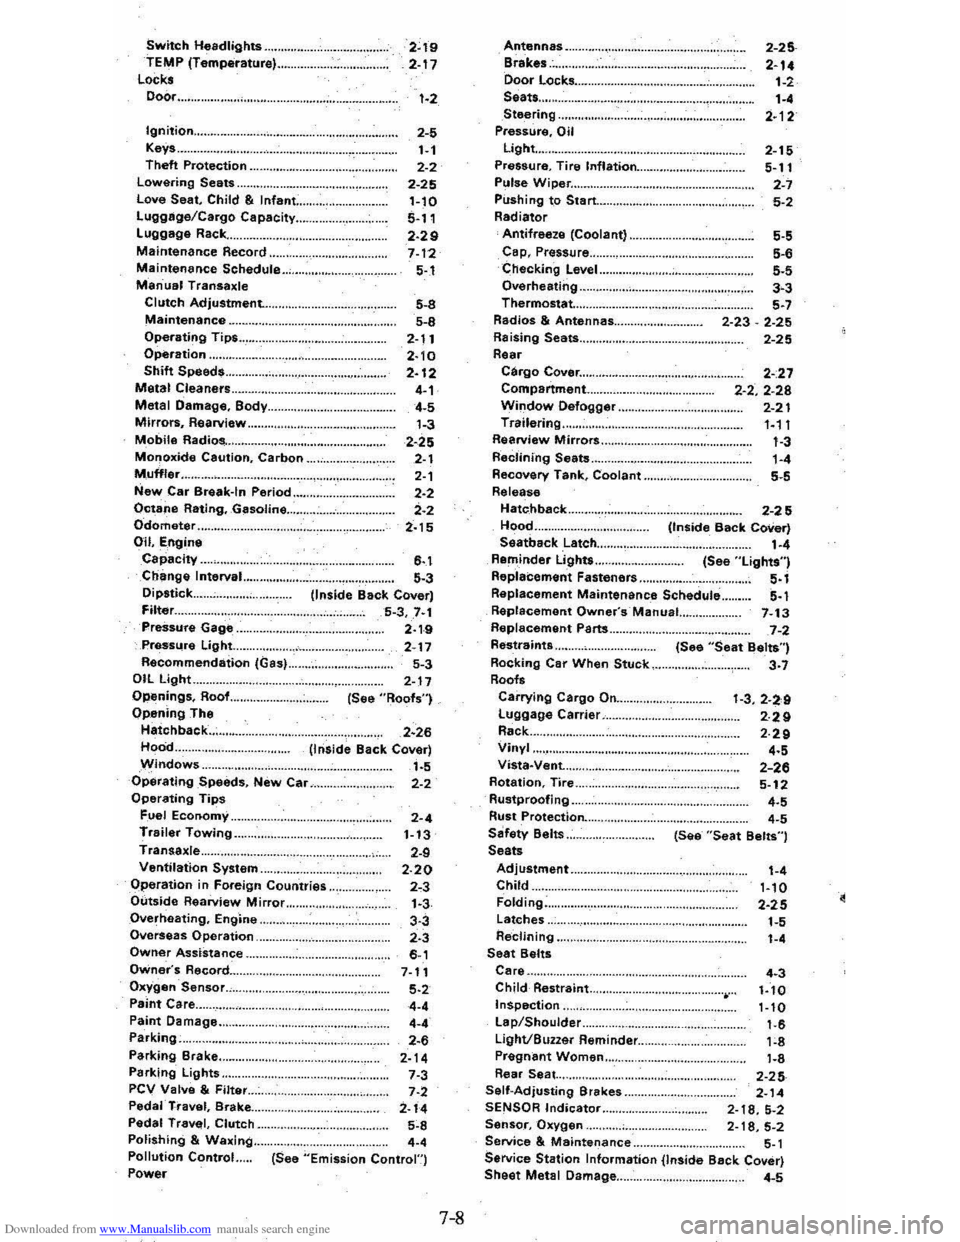
2~19 2-17 1-2
Ignition ............................................. .. 2-5 1-1 2-2
2-25 Keys .. Theft Protection .. Lowering Seats .. Love Seat, Child & Infant: .. Lugglige/Cargo Capacity ... Luggage Rack ... Maintenance Record .. Maintenance Schedule .. Manual Transaxle Clutch Adjustment. .. .
1-10 5-11 2·29 7-12 5-.1
Maintenance ........................................... . 5-8
5-8
2-11
2· 10 2-12 4-1 4-5
1-3
Operating Tips .. Operation .. Shift Speeds. Metal Cleaners .. Metal Damage, Body ... Mirrors, Rearview .. Mobile Radios-. Monoxide Caution, Carbon .. . 2-25 2-1
2-1 2-2
2-2
2-15 Muffler ............................................... . New Car Break-In Period Octane Rating, Gasoline ... Odometer Oil, Engine Capacity .. Change Interval.. Dipstick ... Filter ... PreSsure Gage .. Pressure Light... Recommendation (Gas) .. OIL Light.. Openings, Roof... Opening The Hatchback ... Hood .. Windows ..
6-.1 5-3 (inside Back Cover) 5-3,7·1 2·1-9 2-17
5-3
2-17 (See "Roofs")
2·26 (Inside Back Cover) 1-5 Operating Speeds, New Car... 2-2 Operating Tips Fuel Economy.. 2-4 Trailer Towing.. 1-13 Transaxle... 2-9 Ventilation System.. 2.20 Operation in Foreign Countries.. 2"3 Outside Rearview Mirror.. 1.3 Overheating, Engine.. 3-3 Overseas Operation.. 2.3 Owner Assistance.. 6-1 Owner's Record... 7-11 Oxygen Sensor., 5.2 Paint Care.. 4-4
Paint Damage .. Parking;. Parking Brake .. Parking Lights .. PCV Valve & Filter .. Peda'·TI"avel, Brake ... Pedal Travel, Clutch .. Polishing & Waxing .. Pollution Control Power
4-' 2-. 2-14 7-3 7·2 2-14 5~8
.-. (See "Emission Contron
7-8
Antennas Brakes .. Door Locks .... Seats ... Steering Pressure, Oil Light ... Pressure. Tire Inflation ... Pulse Wiper ...
2-25
2-14
1-2 1-' 2·12
2-15
5-11
2-7
Pushing to Start ................................ .. 5-2 Radiator Antifreeze (Coolant) .. Cap, Prassure .. Checking Level .. Overheating .. Thermostat...
Radios & Antennas ... Raising Seats ... Rear Cargo Cover ...................... .. Compartment .. . Window Defogger .. Trailering .. Rearview Mirrors .. Reclining Seats .. Recovery Tank, Coolant .. Release
Hatc.hback
Hood .. Seatback Latch ... Reminder Lights ....
Replacement Fasteners
5-5 5-. 5-5 3-3 5-7
2-23 -2-25
2-25
2-:27
2-2,2-28 2-21 '·11 1-3 1-' 5-5
2-25 (Inside Back Cover)
1-' (See "Lights") 5-1
5-1 Replacement Maintenance Schedule .. Raplacement Owner's·Manual... 7-13 Replacement Parts ............. ....................... 7-2 Restraints .. Rocking Car When Stuck .. Roofs Carrying Cargo On ... Luggage Carrier .. Rack .. Vinyl .. Vista-Vent. ... Rotation, Tire .. Rustproofing .. Rust Protection ... Sefety Belts .. Seats (See
"Seat Belts") 3-7
1-3,2-2,9 2·29 2·29
'-5 2-26 5-12
'-5 '-5 (See "Seat Belts")
Adjustment.. 1-4 Child... 1-10 Folding.. 2-25 Latches..
1-5 Reclining.... . '-4 Seat Belts Care.. 4.3 Child Restraint ............................................ 1.10 Inspection.. 1-10 Lap/Shoulder.. 1-6 Light/Buzzer Reminder... 1;8 Pregn~nt Women .. Rear Seat. ... Self-Adjusting Brakes .. SENSOR Indicator ..
1-8 2-25 2-14 2-18,5-2 Sensor, Oxygen.... 2-18,5-2 Service & Maintenance.. 5-1 Service Station Information (InSide Back Cover) Sheet Metlll Damage... 4-5