2024 FORD F650/750 oil level
[x] Cancel search: oil levelPage 231 of 386

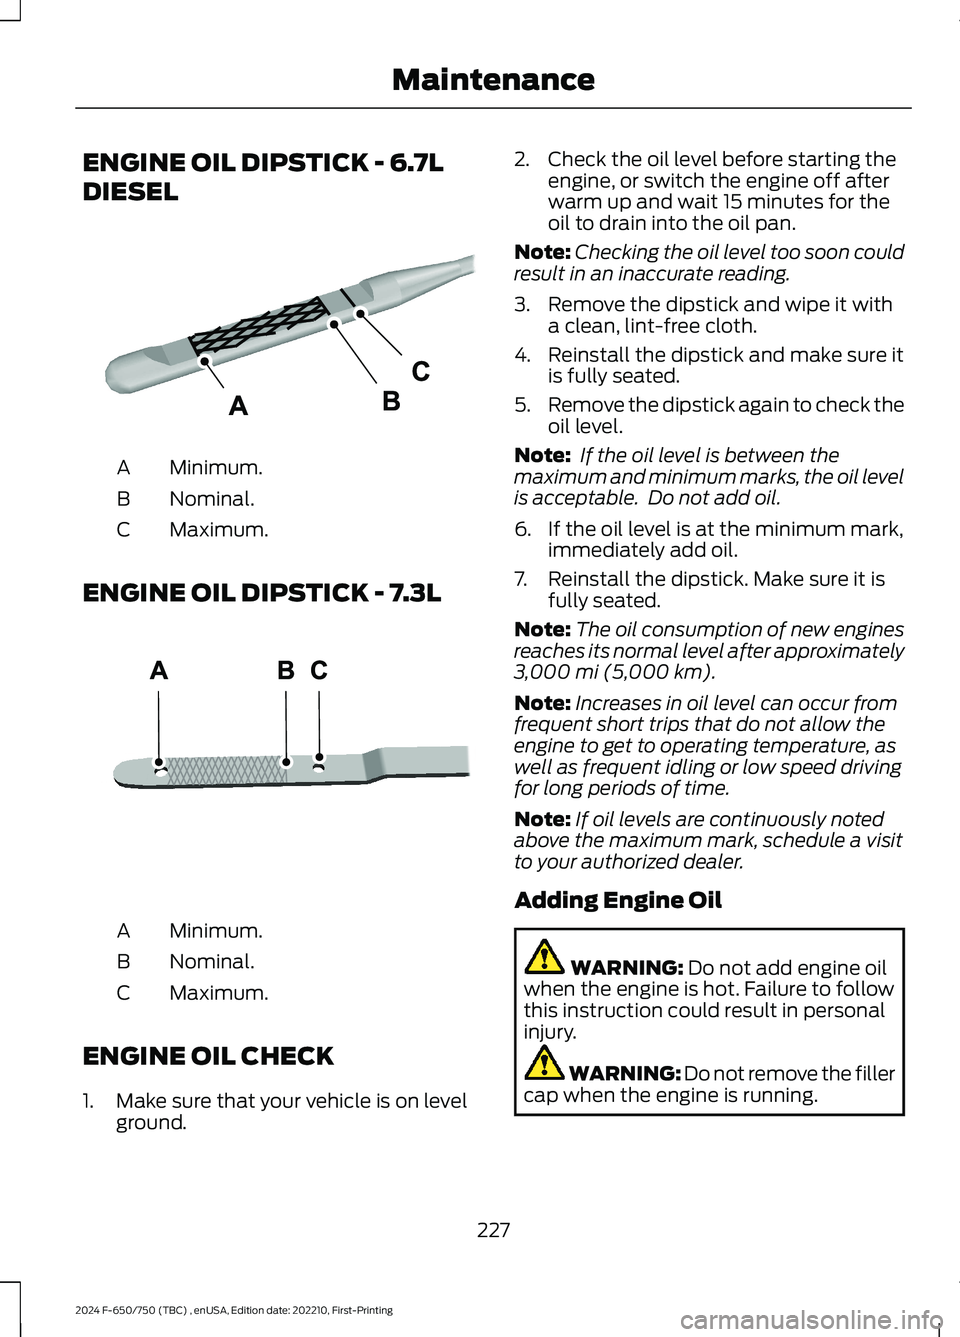
ENGINE OIL DIPSTICK - 6.7L
DIESEL
Minimum.A
Nominal.B
Maximum.C
ENGINE OIL DIPSTICK - 7.3L
Minimum.A
Nominal.B
Maximum.C
ENGINE OIL CHECK
1.Make sure that your vehicle is on levelground.
2.Check the oil level before starting theengine, or switch the engine off afterwarm up and wait 15 minutes for theoil to drain into the oil pan.
Note:Checking the oil level too soon couldresult in an inaccurate reading.
3.Remove the dipstick and wipe it witha clean, lint-free cloth.
4.Reinstall the dipstick and make sure itis fully seated.
5.Remove the dipstick again to check theoil level.
Note: If the oil level is between themaximum and minimum marks, the oil levelis acceptable. Do not add oil.
6.If the oil level is at the minimum mark,immediately add oil.
7.Reinstall the dipstick. Make sure it isfully seated.
Note:The oil consumption of new enginesreaches its normal level after approximately3,000 mi (5,000 km).
Note:Increases in oil level can occur fromfrequent short trips that do not allow theengine to get to operating temperature, aswell as frequent idling or low speed drivingfor long periods of time.
Note:If oil levels are continuously notedabove the maximum mark, schedule a visitto your authorized dealer.
Adding Engine Oil
WARNING: Do not add engine oilwhen the engine is hot. Failure to followthis instruction could result in personalinjury.
WARNING: Do not remove the fillercap when the engine is running.
227
2024 F-650/750 (TBC) , enUSA, Edition date: 202210, First-PrintingMaintenanceE249448 E250320
Page 232 of 386

Do not use supplemental engine oiladditives because they are unnecessaryand could lead to engine damage that thevehicle warranty may not cover.
1.Clean the area surrounding the engineoil filler cap before you remove it.
2.Remove the engine oil filler cap.
3.Add engine oil that meets ourspecifications. See Capacities andSpecifications (page 291).
4.Reinstall the engine oil filler cap. Turnit clockwise until you feel a strongresistance.
Note: Do not add oil further than themaximum mark. Oil levels above themaximum mark may cause engine damage.
Note:Immediately soak up any oil spillagewith an absorbent cloth.
Engine Oil Pressure Warning Lamp
WARNING: If it illuminates whenyou are driving do not continue yourjourney, even if the oil level is correct.Have your vehicle checked.
It illuminates when you switchthe ignition on.
If it illuminates when the engineis running this indicates a malfunction.Stop your vehicle as soon as it is safe todo so and switch the engine off. Check theengine oil level. If the oil level is sufficient,this indicates a system malfunction. Haveyour vehicle checked as soon as possible.
CHANGING THE ENGINE OIL
AND OIL FILTER
WARNING: Do not add engine oilwhen the engine is hot. Failure to followthis instruction could result in personalinjury.
Your vehicle has an Intelligent Oil LifeMonitor™ that calculates the proper oilchange service interval. When theinformation display indicates: OIL CHANGEREQUIRED, change the engine oil and oilfilter. See Information Displays (page71).
The engine oil filter protects your engineby filtering harmful, abrasive or sludgeparticles and particles significantly smallerthan most available will-fit filters. SeeMotorcraft Parts (page 293).
1.Unscrew the oil filter and oil pan drainplug and wait for the oil to drain.
2.Replace the filter.
3.Reinstall the oil pan drain plug.
4.Refill the engine with new oil. SeeEngine Oil Capacity andSpecification (page 299).
5.Reset the Intelligent Oil Life Monitor™.See Information Displays (page 71).
Engine Lubrication for SevereService Operation
The following conditions define severeoperation:
•Frequent or extended idling such asover 10 minutes per hour of normaldriving.
•Low-speed operation or stationary use.
•If the vehicle is operated in sustained,ambient temperatures below -9°F(-23°C) or above 100°F (38°C).
228
2024 F-650/750 (TBC) , enUSA, Edition date: 202210, First-PrintingMaintenanceE67022
Page 252 of 386

the driver that battery protection actionsare active. These messages are only fornotification that an action is taking place,and not intended to indicate an electricalproblem or that the battery requiresreplacement.
Electrical accessory installation
To ensure proper operation of the BMS,any electrical devices that are added tothe vehicle should not have their groundconnection made directly at the negativebattery post. A connection at the negativebattery post can cause inaccuratemeasurements of the battery conditionand potential incorrect system operation.
Note:Electrical or electronic accessoriesadded to the vehicle by the dealer or theowner may adversely affect batteryperformance and durability, and may alsoaffect the performance of other electricalsystems in the vehicle.
When a battery replacement is required,the battery should only be replaced witha Ford recommended replacement batterywhich matches the electrical requirementsof the vehicle. After battery replacement,or in some cases after charging the batterywith the external charger, the BMS requireseight hours of vehicle sleep time (key offwith doors closed) to relearn the newbattery state of charge. Prior to relearningthe state of charge, the BMS may disableelectrical features (to protect the battery)earlier than normal.
ADJUSTING THE HEADLAMPS
Vertical Aim Adjustment
The headlamps on your vehicle areproperly aimed at the assembly plant. Ifyour vehicle has been in an accident, thealignment of your headlamps should bechecked by your authorized dealer.
Headlamp Aiming Target
8 ft (2.4 m)A
Center height of lamp to groundB
25 ft (7.6 m)C
Horizontal reference lineD
Vertical Aim Adjustment Procedure
1.Park the vehicle directly in front of awall or screen on a level surface,approximately 25 ft (7.6 m) away.
2.Measure the height of the headlampbulb center from the ground and markan 8 ft (2.4 m) horizontal reference lineon the vertical wall or screen at thisheight.
Note:To see a clearer light pattern foradjusting, you may want to block the lightfrom one headlamp while adjusting theother.
3.Turn on the low beam headlamps toilluminate the wall or screen and openthe hood.
248
2024 F-650/750 (TBC) , enUSA, Edition date: 202210, First-PrintingMaintenanceE142592
Page 264 of 386

•Maintaining proper steering gear andpower steering pump lubricant levels.
•Checking steering column joint boltsand steering linkage, particularly forbody-to-chassis clearance.
Steering Column Joint Bolts
As a good maintenance practice, checksteering column joint bolt tightness every60,000 mi (96,000 km) or annually,whichever occurs first. Do not overtightenthe bolts.
Hydraulic System
Whenever draining and refilling the powersteering's hydraulic system for any reason,bleed air from the system before returningthe vehicle to service. Failure to bleed thehydraulic system properly can result indegradation of power system performance.
Consult an authorized dealer who is awareof the proper procedures for filling andbleeding the system.
SUSPENSION SYSTEM
INSPECTION (IF EQUIPPED)
Note:Do not adjust air suspension heightto any setting other than the specifiedsetting. Altering the height setting changesthe driveline angle and may result inunwarrantable component damage, suchas transmission component damage.
Verify drive axle air suspension height andheight control valve performance at engineoil change intervals.
Periodically check:
•Condition of spring leaves for evidenceof fatigue, bending or breakage.
•Condition of suspension mountingbrackets and bushings.
•Torque rod mounting fasteners fortightness.
•For proper suspension alignment.Maintain proper alignment at all times.
•U-bolts. After the chassis has beenoperating under load for 1,000 mi(1,600 km) or six months (whichevercomes first), the U-bolt nuts must bere-torqued. Re-torque the U-bolt nutsevery 37,000 mi (60,000 km)thereafter. Clean and lubricate theU-bolt and nut threads and seats tomake sure a like new condition whenre-torqueing. See Spring U-BoltCheck (page 261).
FRAME AND TOW HOOK
INSPECTION
Your vehicle's chassis is manufacturedwith frame rails of either HSLA steel orheat-treated steel. Handle each in aspecific manner to make sure maximumservice life. Consult the service manual oran authorized dealer before attemptingframe repair or modification.
It is important, particularly on vehicles thatuse tow hooks frequently, to inspect thefront and rear tow hooks for damage or aloose mounting.
REAR AXLE FLUID CHECK
Your rear axle may have an optionalsynthetic lubricant that allows the use ofextended service intervals. A tag on thefiller plug identifies the use of the syntheticlubricant.
Only use a lubricant that meetsmanufacturer specifications. Use of anon-approved rear axle lubricant maycause internal axle component damage.See Rear Axle Fluid Capacity andSpecification (page 311).
Checking the Fluid Level
1.Park your vehicle on level ground.
260
2024 F-650/750 (TBC) , enUSA, Edition date: 202210, First-PrintingMaintenance
Page 272 of 386

Cooling system
•Protect against freezing temperatures.
•When removing your vehicle fromstorage, check coolant fluid level.Confirm that there are no coolingsystem leaks and that fluid is at therecommended level.
Disconnecting Your 12 Volt Battery
•Check and recharge as necessary. Keepconnections clean.
•If storing your vehicle for more than 30days without recharging the battery,we recommend that you disconnectthe battery cables to maintain batterycharge for quick starting.
Note:It is necessary to reset memoryfeatures if you disconnect the batterycables.
Brakes
•Make sure the brakes and parking brakerelease fully.
Tires
•Maintain recommended air pressure.
Miscellaneous
•Make sure all linkages, cables, leversand pins under your vehicle are coveredwith grease to prevent rust.
•Move vehicles at least 25 ft (7.5 m)every 15 days to lubricate working partsand prevent corrosion.
Removing Vehicle From Storage
When your vehicle is ready to come out ofstorage, do the following:
•Wash your vehicle to remove any dirtor grease film build-up on windowsurfaces.
•Check windshield wipers for anydeterioration.
•Check under the hood for any foreignmaterial that may have collectedduring storage such as mice or squirrelnests.
•Check the exhaust for any foreignmaterial that may have collectedduring storage.
•Check tire pressures and set tireinflation per the Tire Label.
•Check brake pedal operation. Driveyour vehicle 15 ft (4.5 m) back andforth to remove rust build-up.
•Check fluid levels (including coolant,oil and gas) to make sure there are noleaks, and fluids are at recommendedlevels.
•If you remove the battery, clean thebattery cable ends and check fordamage.
Contact an authorized dealer if you haveany concerns or issues.
268
2024 F-650/750 (TBC) , enUSA, Edition date: 202210, First-PrintingVehicle Care
Page 300 of 386

BULB SPECIFICATION CHART
Replacement bulbs are specified in thechart below. Headlamp bulbs must bemarked with an authorized “D.O.T.” for
North America and an “E” for Europe toensure lamp performance, light brightnessand pattern and safe visibility. The correctbulbs will not damage the lamp assemblyor void the lamp assembly warranty andwill provide quality bulb illumination time.
Trade nameNumber of BulbsFunction
H13/90082Headlamps
W5W2Side marker lamp - front
3157NA2Park/Turn lamp- front
31572Tail/stop/turn/side marker
31572Reverse
31571License plate lamp
9121High-mount brake lamp
12V6W2Map lamp
5783Dome/reading lamps
28252Interior visor lamp
28252Mirror turn signal
28252Mirror clearance lamp
1945Front clearance lamps andfront identification lamps
Note:To replace instrument panel lights,see an authorized dealer.
ENGINE OIL CAPACITY AND
SPECIFICATION - 6.7L DIESEL
Use oil that meets the definedspecification and viscosity grade.
If you do not use oil that meets the definedspecification and viscosity grade, it couldresult in:
•Component damage that your vehiclewarranty does not cover.
•Longer engine cranking periods.
•Increased emission levels.
•Reduced vehicle performance.
•Reduced fuel economy.
296
2024 F-650/750 (TBC) , enUSA, Edition date: 202210, First-PrintingCapacities and Specifications
Page 303 of 386

Materials
SpecificationName
WSS-M2C171-F1Motorcraft® SAE 5W-40 Full Synthetic Diesel MotorOil(U.S.)(Canada)XO-5W40-5Q3SD(U.S.)
WSS-M2C171-F1Motorcraft® SAE 15W-40 Super Duty Diesel MotorOil(U.S.)Motorcraft® Super Duty Motor Oil SAE 15W-40 /Huile moteur Super Duty SAE 15W-40 Motor-craft®(Canada)XO-15W40-QSDF(U.S.)CXO-15W40-LSD12(Canada)
Alternative Engine Oil for SevereDuty Service
Materials
SpecificationName
WSS-M2C171-F1Motorcraft® SAE 5W-40 Full Synthetic Diesel MotorOil(U.S.)(Canada)XO-5W40-5Q3SD(U.S.)
ENGINE OIL CAPACITY AND
SPECIFICATION - 7.3L
Use oil that meets the definedspecification and viscosity grade.
If you do not use oil that meets the definedspecification and viscosity grade, it couldresult in:
•Component damage that your vehiclewarranty does not cover.
•Longer engine cranking periods.
•Increased emission levels.
•Reduced vehicle performance.
•Reduced fuel economy.
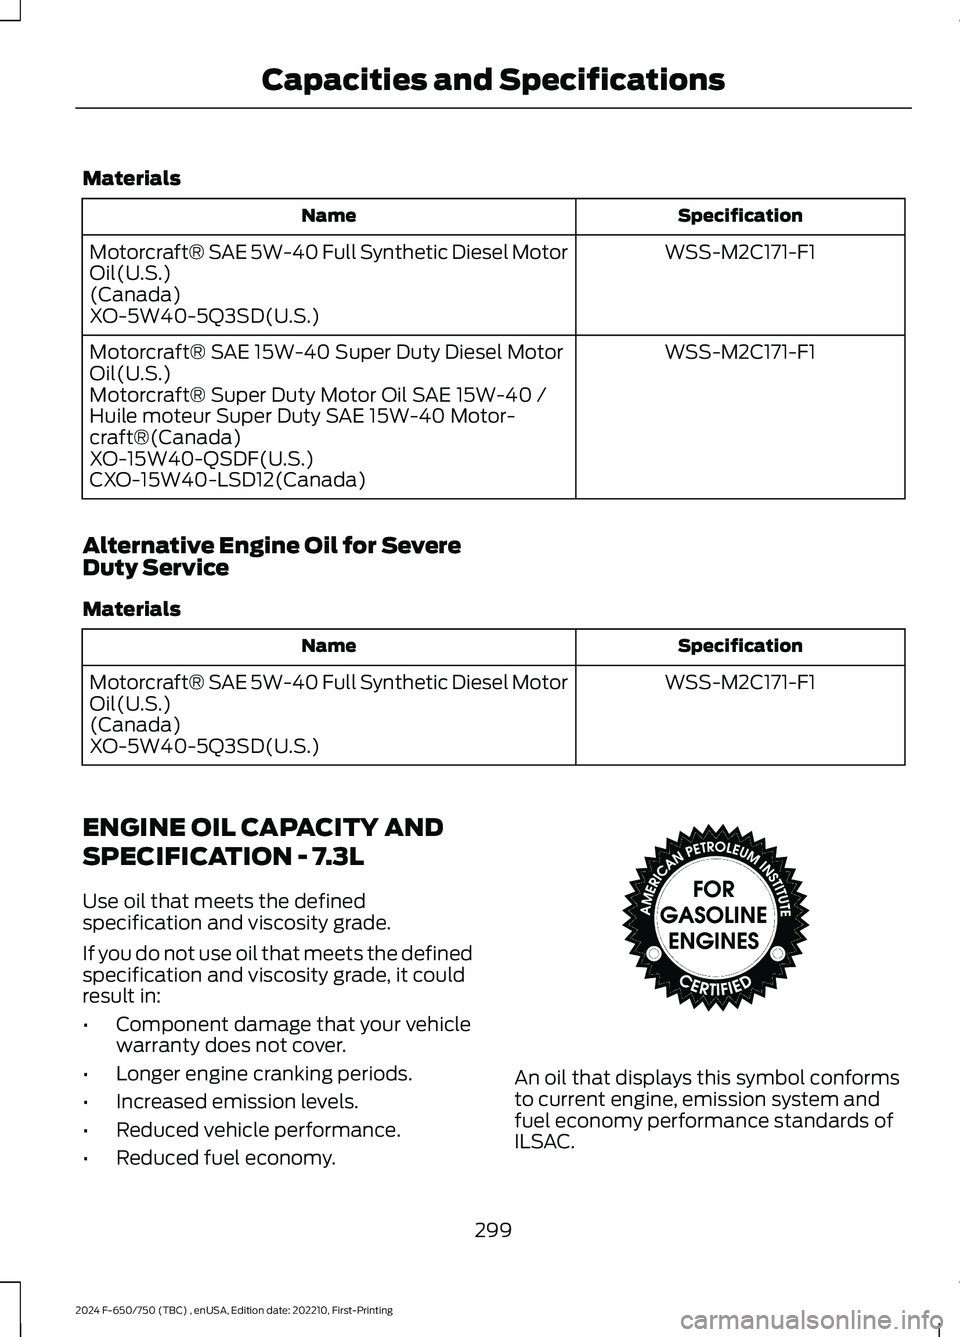
An oil that displays this symbol conformsto current engine, emission system andfuel economy performance standards ofILSAC.
299
2024 F-650/750 (TBC) , enUSA, Edition date: 202210, First-PrintingCapacities and SpecificationsE142732
Page 316 of 386

HYDRAULIC POWER
STEERING FLUID CAPACITY
AND SPECIFICATION
Use oil and fluid that meets the definedspecification and viscosity grade.
If you do not use oil and fluid that meetsthe defined specification and viscositygrade, it could result in:
•Component damage that your vehiclewarranty does not cover.
•Longer engine cranking periods.
•Increased emission levels.
•Reduced engine performance.
•Reduced fuel economy.
•Reduced brake performance.
Capacities
QuantityVariant
5.2 qt (4.9 L)With air brakes.
6.1 qt (5.8 L)With hydraulic brakes.
Materials
SpecificationName
WSS-M2C938-AMERCON® LV,Motorcraft® MERCON® LV Automatic TransmissionFluid(U.S.)Motorcraft® MERCON® LV Automatic TransmissionFluid / Huile pour boîte automatique MERCON® LVMotorcraft®(Canada)XT-10-QLVC(U.S.)CXT-10-LV6(Canada)
312
2024 F-650/750 (TBC) , enUSA, Edition date: 202210, First-PrintingCapacities and Specifications