2024 FORD F650/750 warning
[x] Cancel search: warningPage 226 of 386
GENERAL INFORMATION
WARNING: Making modificationsto various parts, components andsystems of the vehicle, such as brake andsteering systems, can adversely affectthe quality, reliability and operation ofyour vehicle and could result in propertydamage, personal injury or death. Suchmodifications must be avoided.
WARNING: Failure to properlyperform maintenance and servicingprocedures could result in vehicledamage, personal injury or death.
WARNING: Take care whenperforming any maintenance, systemcheck or service on your vehicle. Someof the materials may also be hazardousif used, serviced or handled improperlyand could result in property damage,personal injury or death.
If the owner or operator of the vehicle is askilled technician and intends onperforming the vehicle maintenance andservice, he is strongly urged to purchase aservice manual.
Always use care when performing vehiclemaintenance, repairs or system checks.Improper or incomplete service could resultin your vehicle not working properly whichmay result in personal injury or damage toyour vehicle or equipment. It is theoperator’s responsibility to see that yourvehicle receives proper care andmaintenance. If you have any questionsabout performing service, have the servicedone by a qualified technician.
To help you service your vehicle, weprovide scheduled maintenanceinformation which makes tracking routineservice easy. See ScheduledMaintenance (page 325).
If your vehicle requires professional service,an authorized dealer can provide thenecessary parts and service. Check yourwarranty information to find out whichparts and services are covered.
Use only recommended fuels, lubricants,fluids and service parts conforming tospecifications. Motorcraft® parts aredesigned and built to provide the bestperformance in your vehicle.
Servicing Guidelines
WARNING: The use of inferior partscan adversely affect the quality andreliability of your vehicle and could resultin property damage, personal injury ordeath.
When servicing your vehicle:
•Always wear safety glasses for eyeprotection.
•Always set the parking brake or chockthe wheels.
•Always use support stands, not a jack,when working under a raised vehicle.
•Always turn off the ignition unless aprocedure requires the engine to berunning.
•Always avoid contact with hot metalparts. Allow the components to coolbefore working with, or around, them.
•Always operate the engine in awell-ventilated area.
•Do not wear loose-fitting clothing,hanging jewelry, watches or rings.
•Do not smoke.
•Do not work on the brakes or the clutchunless you take the proper precautionsto avoid inhaling friction material dust.
222
2024 F-650/750 (TBC) , enUSA, Edition date: 202210, First-PrintingMaintenance
Page 227 of 386
Quality service parts are available throughan authorized dealer. If dealer parts are notused, make sure the replacement parts areof equivalent quality.
Working with the Engine Off
1.Set the parking brake and shift toneutral (N) or park (P).
2.Switch off the engine.
3.Block the wheels.
Working with the Engine On
WARNING: To reduce the risk ofvehicle damage and/or personal burninjuries, do not start your engine with theair cleaner removed and do not removeit while the engine is running.
1.Set the parking brake and shift toneutral (N) or park (P).
2.Block the wheels
Supporting Your Vehicle forService
WARNING: Do not use a jack whenworking under a vehicle. It may give way,causing the vehicle to fall and result inproperty damage, personal injury ordeath. Always use floor stands tosupport the vehicle.
Prepare your vehicle for service repairs bydoing the following:
1.Park your vehicle on a level, concretefloor.
2.Set the parking brake and block thewheels to prevent your vehicle frommoving.
3.Select a jack with a rated capacitysufficient to lift and hold up yourvehicle.
4.Raise your vehicle with the jack appliedto the axle(s). Do not use the bumperas a lifting point.
5.Support your vehicle with floor standsunder the axle(s). When servicing theaxle or the suspension, support yourvehicle with floor stands under theframe side-members, preferablybetween the axles.
OPENING AND CLOSING THE
HOOD
WARNING: Before opening thehood, fully apply the parking brake, shiftinto park (P) or neutral (N) and switchthe ignition off.
WARNING: Do not stand under thehood when you raise or lower it. Failureto follow this warning could result inserious personal injury or death.
WARNING: If the engine is runningwhile the hood is open, stay clear ofmoving engine components. Failure tofollow this warning could result in seriouspersonal injury or death.
223
2024 F-650/750 (TBC) , enUSA, Edition date: 202210, First-PrintingMaintenance
Page 231 of 386
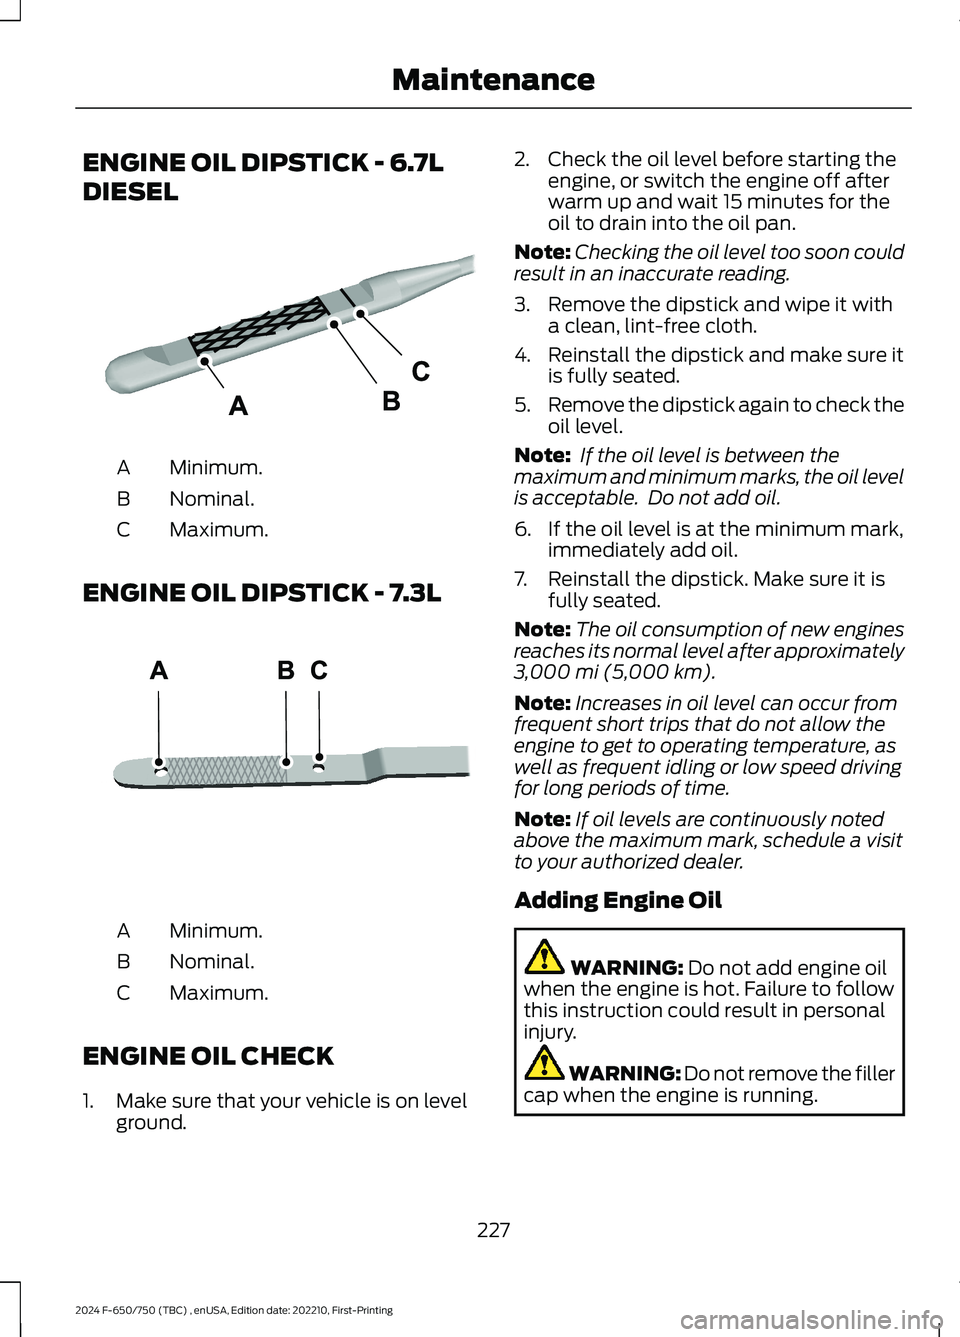
ENGINE OIL DIPSTICK - 6.7L
DIESEL
Minimum.A
Nominal.B
Maximum.C
ENGINE OIL DIPSTICK - 7.3L
Minimum.A
Nominal.B
Maximum.C
ENGINE OIL CHECK
1.Make sure that your vehicle is on levelground.
2.Check the oil level before starting theengine, or switch the engine off afterwarm up and wait 15 minutes for theoil to drain into the oil pan.
Note:Checking the oil level too soon couldresult in an inaccurate reading.
3.Remove the dipstick and wipe it witha clean, lint-free cloth.
4.Reinstall the dipstick and make sure itis fully seated.
5.Remove the dipstick again to check theoil level.
Note: If the oil level is between themaximum and minimum marks, the oil levelis acceptable. Do not add oil.
6.If the oil level is at the minimum mark,immediately add oil.
7.Reinstall the dipstick. Make sure it isfully seated.
Note:The oil consumption of new enginesreaches its normal level after approximately3,000 mi (5,000 km).
Note:Increases in oil level can occur fromfrequent short trips that do not allow theengine to get to operating temperature, aswell as frequent idling or low speed drivingfor long periods of time.
Note:If oil levels are continuously notedabove the maximum mark, schedule a visitto your authorized dealer.
Adding Engine Oil
WARNING: Do not add engine oilwhen the engine is hot. Failure to followthis instruction could result in personalinjury.
WARNING: Do not remove the fillercap when the engine is running.
227
2024 F-650/750 (TBC) , enUSA, Edition date: 202210, First-PrintingMaintenanceE249448 E250320
Page 232 of 386

Do not use supplemental engine oiladditives because they are unnecessaryand could lead to engine damage that thevehicle warranty may not cover.
1.Clean the area surrounding the engineoil filler cap before you remove it.
2.Remove the engine oil filler cap.
3.Add engine oil that meets ourspecifications. See Capacities andSpecifications (page 291).
4.Reinstall the engine oil filler cap. Turnit clockwise until you feel a strongresistance.
Note: Do not add oil further than themaximum mark. Oil levels above themaximum mark may cause engine damage.
Note:Immediately soak up any oil spillagewith an absorbent cloth.
Engine Oil Pressure Warning Lamp
WARNING: If it illuminates whenyou are driving do not continue yourjourney, even if the oil level is correct.Have your vehicle checked.
It illuminates when you switchthe ignition on.
If it illuminates when the engineis running this indicates a malfunction.Stop your vehicle as soon as it is safe todo so and switch the engine off. Check theengine oil level. If the oil level is sufficient,this indicates a system malfunction. Haveyour vehicle checked as soon as possible.
CHANGING THE ENGINE OIL
AND OIL FILTER
WARNING: Do not add engine oilwhen the engine is hot. Failure to followthis instruction could result in personalinjury.
Your vehicle has an Intelligent Oil LifeMonitor™ that calculates the proper oilchange service interval. When theinformation display indicates: OIL CHANGEREQUIRED, change the engine oil and oilfilter. See Information Displays (page71).
The engine oil filter protects your engineby filtering harmful, abrasive or sludgeparticles and particles significantly smallerthan most available will-fit filters. SeeMotorcraft Parts (page 293).
1.Unscrew the oil filter and oil pan drainplug and wait for the oil to drain.
2.Replace the filter.
3.Reinstall the oil pan drain plug.
4.Refill the engine with new oil. SeeEngine Oil Capacity andSpecification (page 299).
5.Reset the Intelligent Oil Life Monitor™.See Information Displays (page 71).
Engine Lubrication for SevereService Operation
The following conditions define severeoperation:
•Frequent or extended idling such asover 10 minutes per hour of normaldriving.
•Low-speed operation or stationary use.
•If the vehicle is operated in sustained,ambient temperatures below -9°F(-23°C) or above 100°F (38°C).
228
2024 F-650/750 (TBC) , enUSA, Edition date: 202210, First-PrintingMaintenanceE67022
Page 234 of 386
Action and DescriptionMessage
Oil Life: 100%
When the oil change indic-ator resets, the instrumentcluster displays 100%.
Repeat the process if the oilchange indicator does notreset.
CHANGING THE ENGINE AIR
FILTER - 6.7L DIESEL
Air Filter Restriction Gauge
WARNING: To reduce the risk ofvehicle damage and personal burninjuries, do not start your engine with theair cleaner removed and do not removeit while the engine is running.
Note:Operating your vehicle in heavysnowfall or extreme rain conditions mayallow excessive amounts of snow or waterinto the air intake system. This could plugor soak the air filter and cause the engine tolose power or shut down.
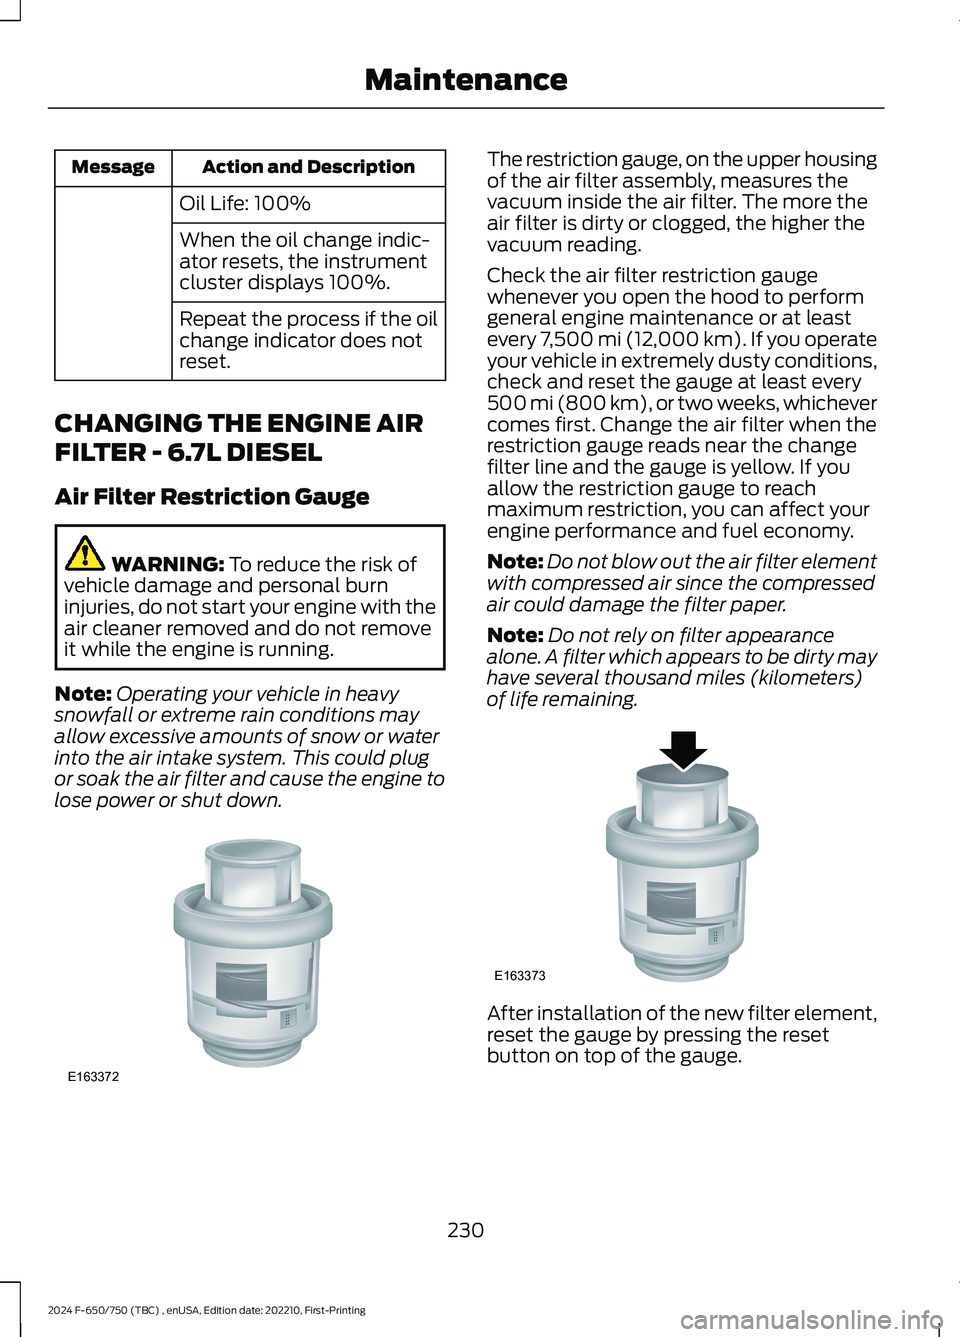
The restriction gauge, on the upper housingof the air filter assembly, measures thevacuum inside the air filter. The more theair filter is dirty or clogged, the higher thevacuum reading.
Check the air filter restriction gaugewhenever you open the hood to performgeneral engine maintenance or at leastevery 7,500 mi (12,000 km). If you operateyour vehicle in extremely dusty conditions,check and reset the gauge at least every500 mi (800 km), or two weeks, whichevercomes first. Change the air filter when therestriction gauge reads near the changefilter line and the gauge is yellow. If youallow the restriction gauge to reachmaximum restriction, you can affect yourengine performance and fuel economy.
Note:Do not blow out the air filter elementwith compressed air since the compressedair could damage the filter paper.
Note:Do not rely on filter appearancealone. A filter which appears to be dirty mayhave several thousand miles (kilometers)of life remaining.
After installation of the new filter element,reset the gauge by pressing the resetbutton on top of the gauge.
230
2024 F-650/750 (TBC) , enUSA, Edition date: 202210, First-PrintingMaintenanceE163372 E163373
Page 236 of 386
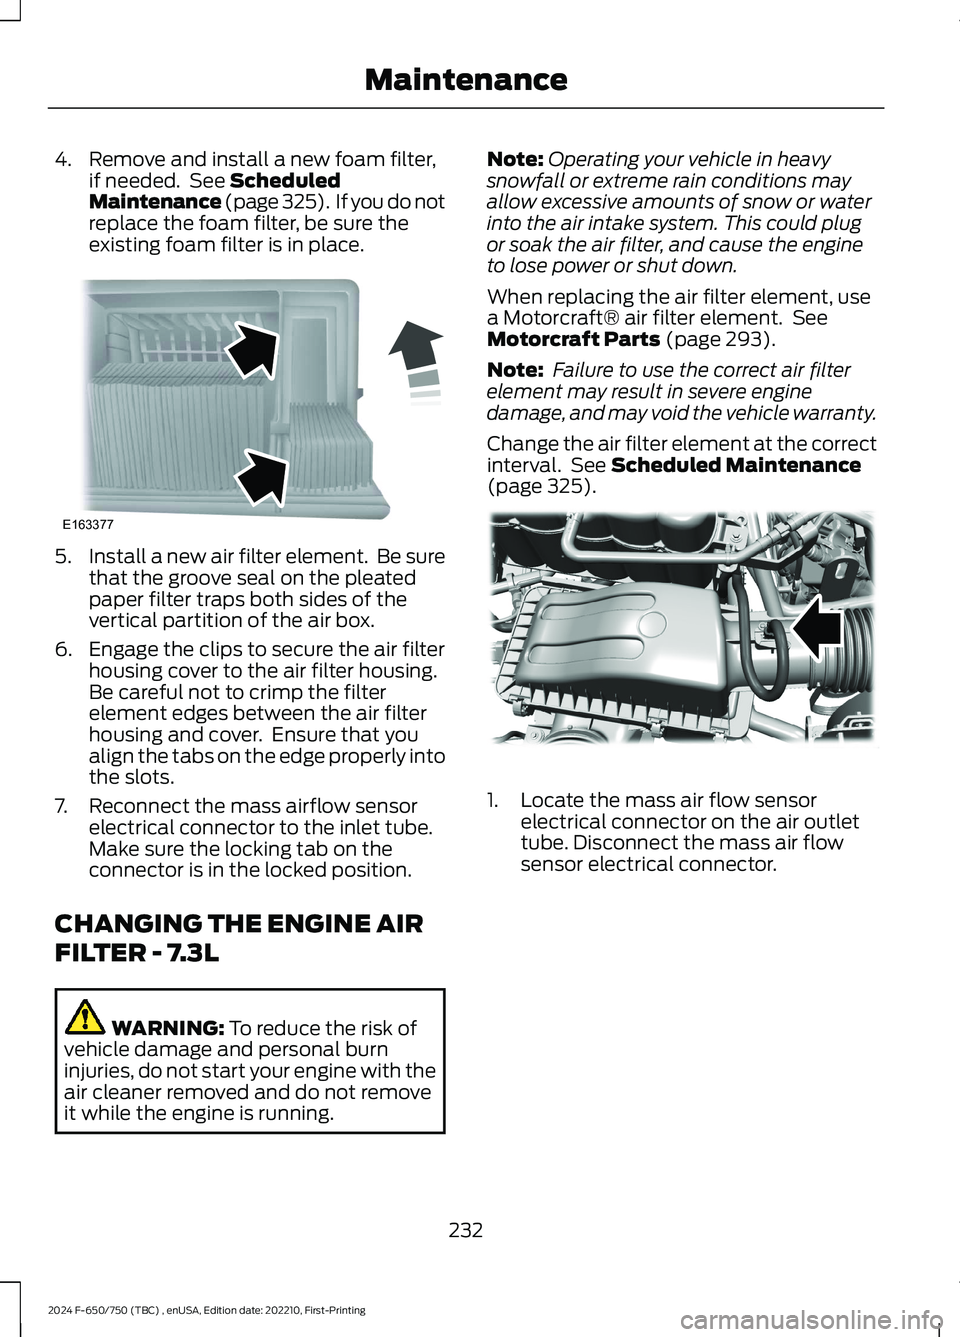
4.Remove and install a new foam filter,if needed. See ScheduledMaintenance (page 325). If you do notreplace the foam filter, be sure theexisting foam filter is in place.
5.Install a new air filter element. Be surethat the groove seal on the pleatedpaper filter traps both sides of thevertical partition of the air box.
6.Engage the clips to secure the air filterhousing cover to the air filter housing.Be careful not to crimp the filterelement edges between the air filterhousing and cover. Ensure that youalign the tabs on the edge properly intothe slots.
7.Reconnect the mass airflow sensorelectrical connector to the inlet tube.Make sure the locking tab on theconnector is in the locked position.
CHANGING THE ENGINE AIR
FILTER - 7.3L
WARNING: To reduce the risk ofvehicle damage and personal burninjuries, do not start your engine with theair cleaner removed and do not removeit while the engine is running.
Note:Operating your vehicle in heavysnowfall or extreme rain conditions mayallow excessive amounts of snow or waterinto the air intake system. This could plugor soak the air filter, and cause the engineto lose power or shut down.
When replacing the air filter element, usea Motorcraft® air filter element. SeeMotorcraft Parts (page 293).
Note: Failure to use the correct air filterelement may result in severe enginedamage, and may void the vehicle warranty.
Change the air filter element at the correctinterval. See Scheduled Maintenance(page 325).
1.Locate the mass air flow sensorelectrical connector on the air outlettube. Disconnect the mass air flowsensor electrical connector.
232
2024 F-650/750 (TBC) , enUSA, Edition date: 202210, First-PrintingMaintenanceE163377 E317615
Page 238 of 386
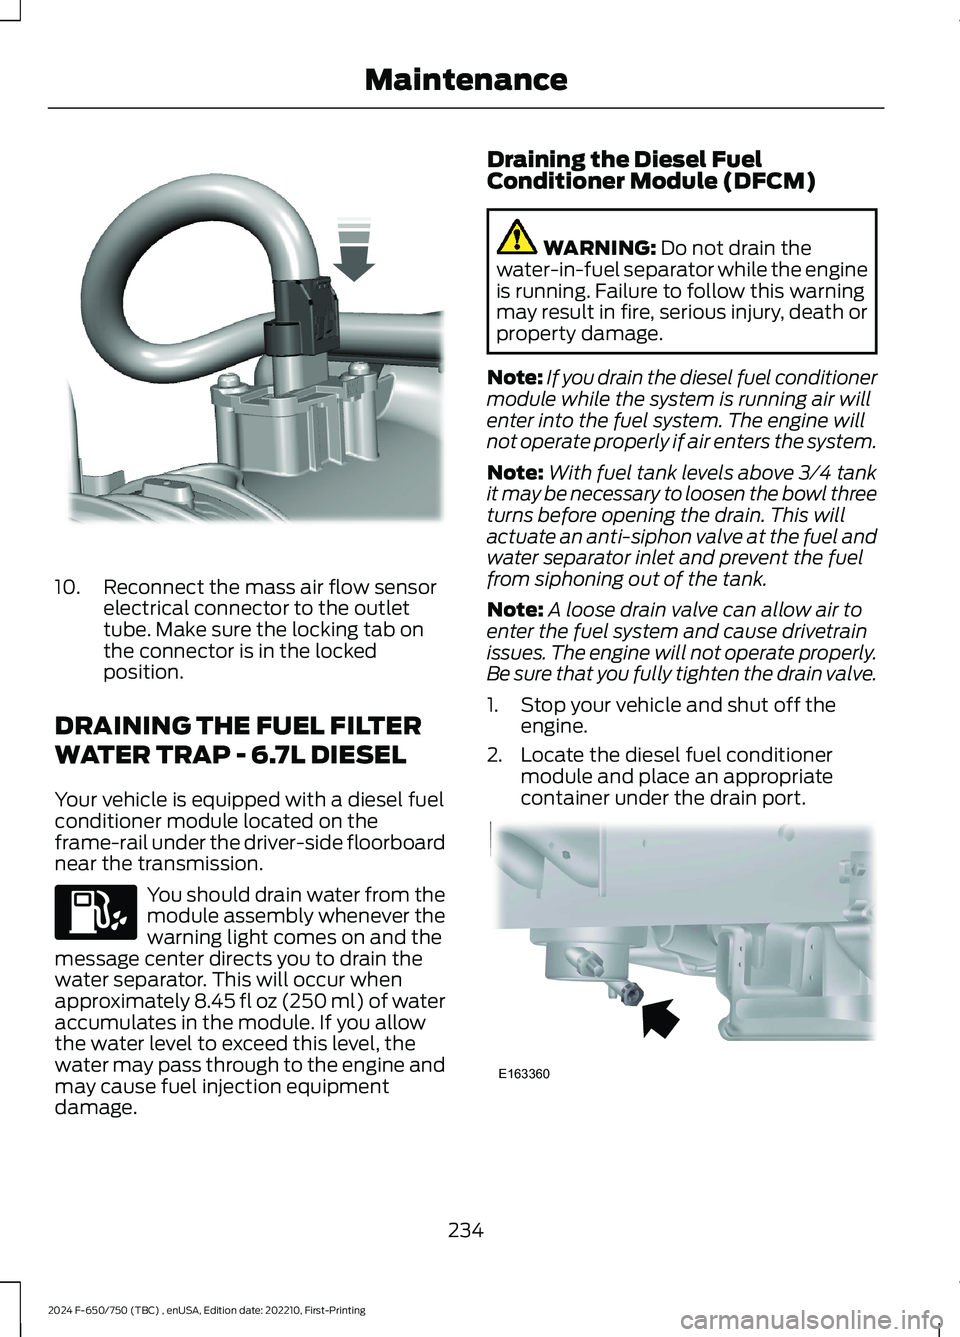
10.Reconnect the mass air flow sensorelectrical connector to the outlettube. Make sure the locking tab onthe connector is in the lockedposition.
DRAINING THE FUEL FILTER
WATER TRAP - 6.7L DIESEL
Your vehicle is equipped with a diesel fuelconditioner module located on theframe-rail under the driver-side floorboardnear the transmission.
You should drain water from themodule assembly whenever thewarning light comes on and themessage center directs you to drain thewater separator. This will occur whenapproximately 8.45 fl oz (250 ml) of wateraccumulates in the module. If you allowthe water level to exceed this level, thewater may pass through to the engine andmay cause fuel injection equipmentdamage.
Draining the Diesel FuelConditioner Module (DFCM)
WARNING: Do not drain thewater-in-fuel separator while the engineis running. Failure to follow this warningmay result in fire, serious injury, death orproperty damage.
Note:If you drain the diesel fuel conditionermodule while the system is running air willenter into the fuel system. The engine willnot operate properly if air enters the system.
Note:With fuel tank levels above 3⁄4 tankit may be necessary to loosen the bowl threeturns before opening the drain. This willactuate an anti-siphon valve at the fuel andwater separator inlet and prevent the fuelfrom siphoning out of the tank.
Note:A loose drain valve can allow air toenter the fuel system and cause drivetrainissues. The engine will not operate properly.Be sure that you fully tighten the drain valve.
1.Stop your vehicle and shut off theengine.
2.Locate the diesel fuel conditionermodule and place an appropriatecontainer under the drain port.
234
2024 F-650/750 (TBC) , enUSA, Edition date: 202210, First-PrintingMaintenanceE317619 E163360
Page 239 of 386
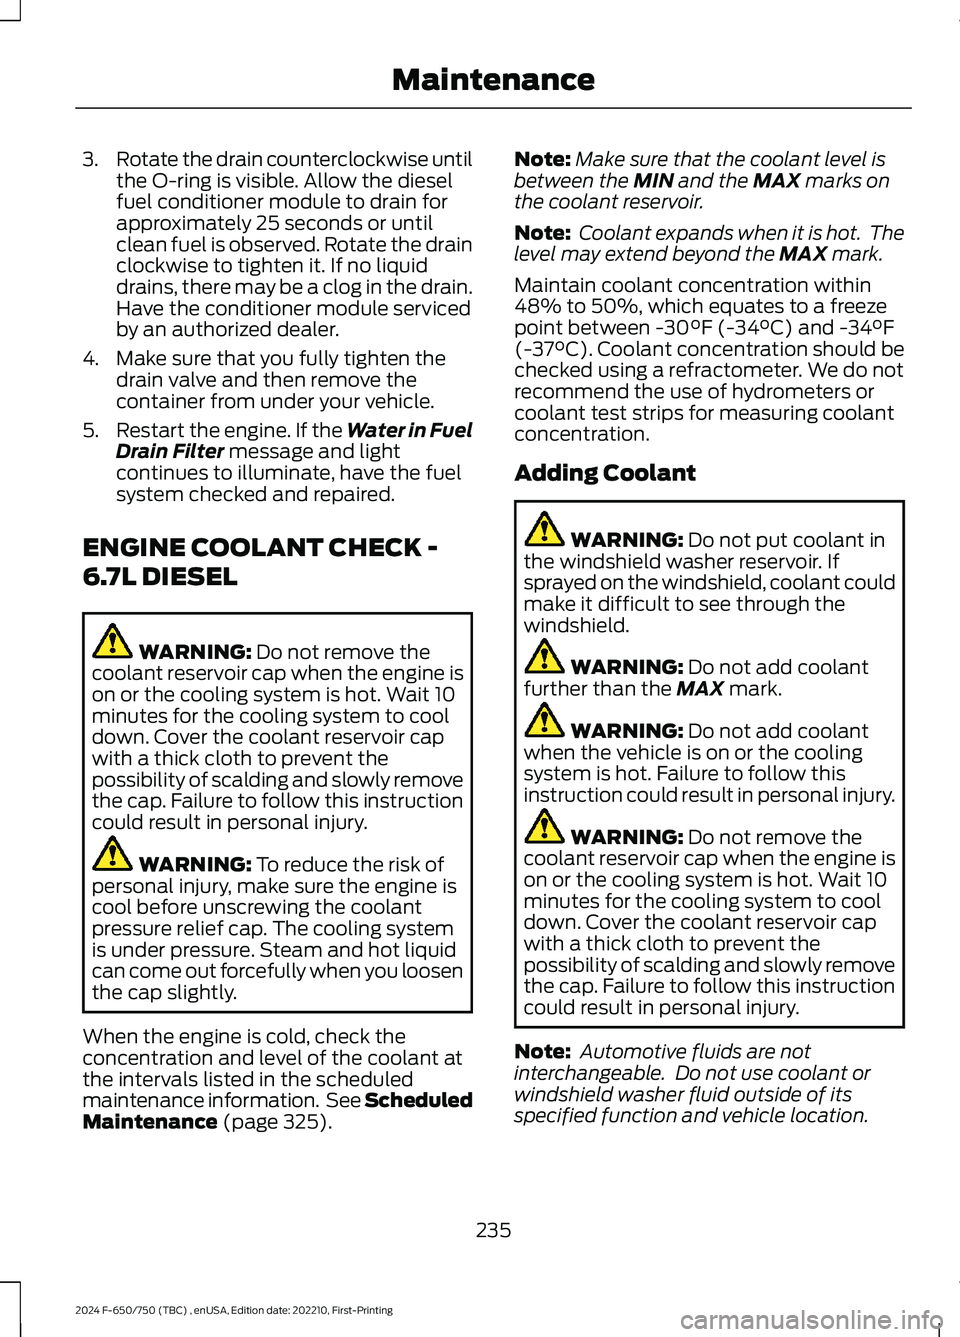
3.Rotate the drain counterclockwise untilthe O-ring is visible. Allow the dieselfuel conditioner module to drain forapproximately 25 seconds or untilclean fuel is observed. Rotate the drainclockwise to tighten it. If no liquiddrains, there may be a clog in the drain.Have the conditioner module servicedby an authorized dealer.
4.Make sure that you fully tighten thedrain valve and then remove thecontainer from under your vehicle.
5.Restart the engine. If the Water in FuelDrain Filter message and lightcontinues to illuminate, have the fuelsystem checked and repaired.
ENGINE COOLANT CHECK -
6.7L DIESEL
WARNING: Do not remove thecoolant reservoir cap when the engine ison or the cooling system is hot. Wait 10minutes for the cooling system to cooldown. Cover the coolant reservoir capwith a thick cloth to prevent thepossibility of scalding and slowly removethe cap. Failure to follow this instructioncould result in personal injury.
WARNING: To reduce the risk ofpersonal injury, make sure the engine iscool before unscrewing the coolantpressure relief cap. The cooling systemis under pressure. Steam and hot liquidcan come out forcefully when you loosenthe cap slightly.
When the engine is cold, check theconcentration and level of the coolant atthe intervals listed in the scheduledmaintenance information. See ScheduledMaintenance (page 325).
Note:Make sure that the coolant level isbetween the MIN and the MAX marks onthe coolant reservoir.
Note: Coolant expands when it is hot. Thelevel may extend beyond the MAX mark.
Maintain coolant concentration within48% to 50%, which equates to a freezepoint between -30°F (-34°C) and -34°F(-37°C). Coolant concentration should bechecked using a refractometer. We do notrecommend the use of hydrometers orcoolant test strips for measuring coolantconcentration.
Adding Coolant
WARNING: Do not put coolant inthe windshield washer reservoir. Ifsprayed on the windshield, coolant couldmake it difficult to see through thewindshield.
WARNING: Do not add coolantfurther than the MAX mark.
WARNING: Do not add coolantwhen the vehicle is on or the coolingsystem is hot. Failure to follow thisinstruction could result in personal injury.
WARNING: Do not remove thecoolant reservoir cap when the engine ison or the cooling system is hot. Wait 10minutes for the cooling system to cooldown. Cover the coolant reservoir capwith a thick cloth to prevent thepossibility of scalding and slowly removethe cap. Failure to follow this instructioncould result in personal injury.
Note: Automotive fluids are notinterchangeable. Do not use coolant orwindshield washer fluid outside of itsspecified function and vehicle location.
235
2024 F-650/750 (TBC) , enUSA, Edition date: 202210, First-PrintingMaintenance