2024 CHEVROLET SILVERADO EV horn
[x] Cancel search: hornPage 97 of 429
Chevrolet Silverado EV Owner Manual (GMNA-Localizing-U.S./Canada-
16702912) - 2024 - CRC - 1/13/23
96 Instruments and Controls
Instruments and Controls
Controls
Steering Wheel Adjustment . . . . . . . . . . . . 97
Heated Steering Wheel . . . . . . . . . . . . . . . . . 97
Horn . . . . . . . . . . . . . . . . . . . . . . . . . . . . . . . . . . . 98
Pedestrian Safety Signal . . . . . . . . . . . . . . . . 98
Windshield Wiper/Washer . . . . . . . . . . . . . 98
Clock . . . . . . . . . . . . . . . . . . . . . . . . . . . . . . . . . . . 99
Power Outlets . . . . . . . . . . . . . . . . . . . . . . . . . . 99
Onboard Generator . . . . . . . . . . . . . . . . . . . . 101
Wireless Charging . . . . . . . . . . . . . . . . . . . . . 104
On-Screen Controls . . . . . . . . . . . . . . . . . . . . 107
Warning Lights, Gauges, and Indicators
Warning Lights, Gauges, andIndicators . . . . . . . . . . . . . . . . . . . . . . . . . . . . 107
Instrument Cluster (Base Level) . . . . . . . . 107
Instrument Cluster (Uplevel) . . . . . . . . . . . 109
Speedometer . . . . . . . . . . . . . . . . . . . . . . . . . . 110
Odometer . . . . . . . . . . . . . . . . . . . . . . . . . . . . . . 110
Trip Odometer . . . . . . . . . . . . . . . . . . . . . . . . . 110
Battery Gauge (High Voltage) . . . . . . . . . 110
Power Indicator Gauge . . . . . . . . . . . . . . . . . 111
Speed Limiter Indicator . . . . . . . . . . . . . . . . . 112
Seat Belt Reminders . . . . . . . . . . . . . . . . . . . . 112
Airbag Readiness Light . . . . . . . . . . . . . . . . . 113
Passenger Airbag Status Indicator . . . . . . 114
Charging System Light . . . . . . . . . . . . . . . . . 114
Low State of Charge Light . . . . . . . . . . . . . 114 Charge Cord Connected Light . . . . . . . . . . 114
Battery Fault Light . . . . . . . . . . . . . . . . . . . . . 115
Propulsion Power is Limited Light . . . . . . 115
Service Vehicle Soon Light (Propulsion
System Failure) . . . . . . . . . . . . . . . . . . . . . . . 115
Brake System Warning Light . . . . . . . . . . . 115
Electric Parking Brake Light . . . . . . . . . . . . 116
Service Electric Parking Brake Light . . . . 116
Antilock Brake System (ABS) Warning Light . . . . . . . . . . . . . . . . . . . . . . . . . . . . . . . . . 116
Four-Wheel-Drive Light . . . . . . . . . . . . . . . . . 117
Lane Keep Assist (LKA) Light . . . . . . . . . . . 117
Automatic Emergency Braking (AEB) Disabled Light . . . . . . . . . . . . . . . . . . . . . . . . 117
Vehicle Ahead Indicator . . . . . . . . . . . . . . . . 117
Pedestrian Ahead Indicator . . . . . . . . . . . . . 118
Traction Off Light . . . . . . . . . . . . . . . . . . . . . . 118
Traction Control System (TCS)/Electronic Stability Control Light . . . . . . . . . . . . . . . . 118
Electronic Stability Control (ESC) Off Light . . . . . . . . . . . . . . . . . . . . . . . . . . . . . . . . . 119
Driver Mode Control Light . . . . . . . . . . . . . 119
Four-Wheel Steering Light . . . . . . . . . . . . . 119
Air Suspension Light . . . . . . . . . . . . . . . . . . . 119
Tire Pressure Light . . . . . . . . . . . . . . . . . . . . . 120
Security Light . . . . . . . . . . . . . . . . . . . . . . . . . . 121
Vehicle Ready Light . . . . . . . . . . . . . . . . . . . . 121
One-Pedal Driving Light . . . . . . . . . . . . . . . . 121
High-Beam On Light . . . . . . . . . . . . . . . . . . . . 121
Lamps On Reminder . . . . . . . . . . . . . . . . . . . . 121 Cruise Control Light . . . . . . . . . . . . . . . . . . . . 122
Driver Attention Assist Light . . . . . . . . . . . 122
Door Ajar Light . . . . . . . . . . . . . . . . . . . . . . . . 122
Information Displays
Charging . . . . . . . . . . . . . . . . . . . . . . . . . . . . . . . 123
Driver Information Center (DIC) (Base
Level) . . . . . . . . . . . . . . . . . . . . . . . . . . . . . . . . 129
Driver Information Center (DIC) (Uplevel) . . . . . . . . . . . . . . . . . . . . . . . . . . . . . 130
Vehicle Status . . . . . . . . . . . . . . . . . . . . . . . . . 132
Head-Up Display (HUD) . . . . . . . . . . . . . . . . 133
Vehicle Messages
Vehicle Messages . . . . . . . . . . . . . . . . . . . . . . 135
Propulsion Power Messages . . . . . . . . . . . 136
Vehicle Speed Messages . . . . . . . . . . . . . . . 137
Universal Remote System
Universal Remote System . . . . . . . . . . . . . . 137
Universal Remote System Programming . . . . . . . . . . . . . . . . . . . . . . . . 137
Universal Remote System Operation . . . 138
Page 99 of 429
Chevrolet Silverado EV Owner Manual (GMNA-Localizing-U.S./Canada-
16702912) - 2024 - CRC - 1/13/23
98 Instruments and Controls
The heated steering wheel will turn on
when the auto heated seat is activated. The
heated steering wheel indicator will display
the state of the steering wheel heat.
SeeHeated and Ventilated Front Seats 047.
To turn this feature on or off, select
Settings > Vehicle > Comfort and
Convenience > Heated Steering Wheel >
Select ON or OFF.
Horn
To sound the horn, pressaon the
steering wheel.
Pedestrian Safety Signal
The vehicle is equipped with automatic
sound generation. The automatic sound is
generated to indicate the vehicle presence
to pedestrians. The sound changes if the
vehicle is speeding up or slowing down. It is
activated when the vehicle is shifted into a
forward gear, N (Neutral), or R (Reverse), up
to driving speeds of 34 km/h (21 mph).
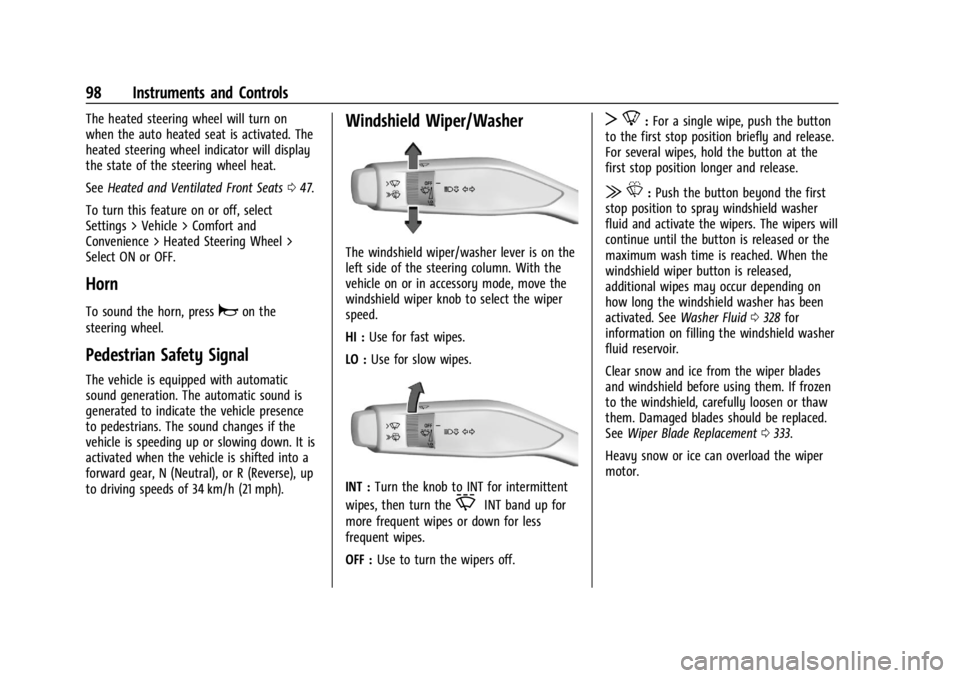
Windshield Wiper/Washer
The windshield wiper/washer lever is on the
left side of the steering column. With the
vehicle on or in accessory mode, move the
windshield wiper knob to select the wiper
speed.
HI : Use for fast wipes.
LO : Use for slow wipes.
INT : Turn the knob to INT for intermittent
wipes, then turn the
OINT band up for
more frequent wipes or down for less
frequent wipes.
OFF : Use to turn the wipers off.
T8:For a single wipe, push the button
to the first stop position briefly and release.
For several wipes, hold the button at the
first stop position longer and release.
| L:Push the button beyond the first
stop position to spray windshield washer
fluid and activate the wipers. The wipers will
continue until the button is released or the
maximum wash time is reached. When the
windshield wiper button is released,
additional wipes may occur depending on
how long the windshield washer has been
activated. See Washer Fluid0328 for
information on filling the windshield washer
fluid reservoir.
Clear snow and ice from the wiper blades
and windshield before using them. If frozen
to the windshield, carefully loosen or thaw
them. Damaged blades should be replaced.
See Wiper Blade Replacement 0333.
Heavy snow or ice can overload the wiper
motor.
Page 129 of 429
Chevrolet Silverado EV Owner Manual (GMNA-Localizing-U.S./Canada-
16702912) - 2024 - CRC - 1/13/23
128 Instruments and Controls
delete the schedule, simply touch the Delete
Schedule button, at which point you will be
prompted to confirm your decision.
Charge Settings
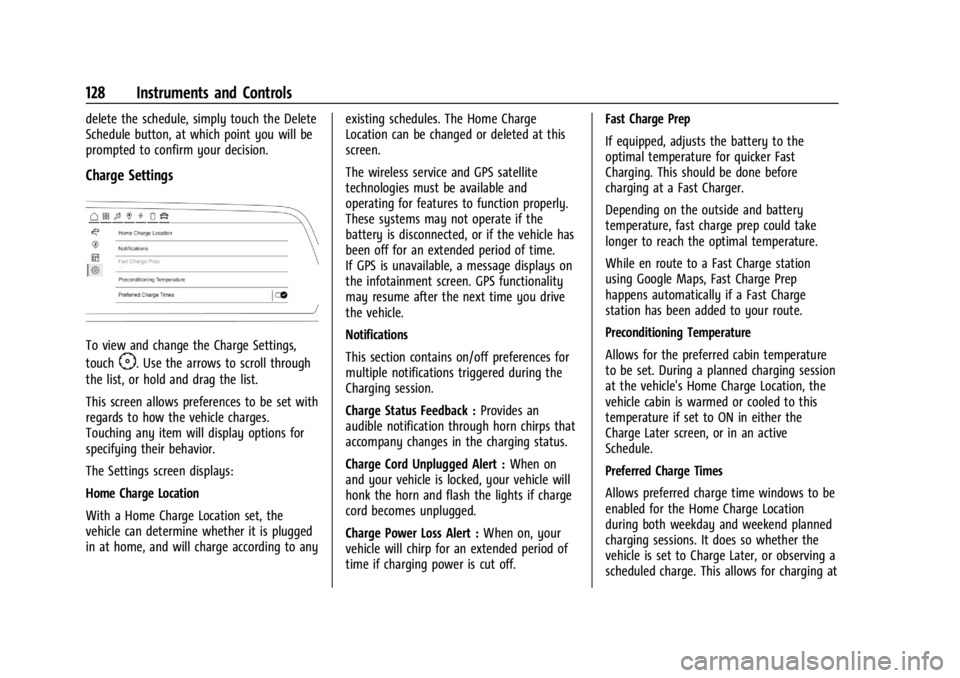
To view and change the Charge Settings,
touch
F. Use the arrows to scroll through
the list, or hold and drag the list.
This screen allows preferences to be set with
regards to how the vehicle charges.
Touching any item will display options for
specifying their behavior.
The Settings screen displays:
Home Charge Location
With a Home Charge Location set, the
vehicle can determine whether it is plugged
in at home, and will charge according to any existing schedules. The Home Charge
Location can be changed or deleted at this
screen.
The wireless service and GPS satellite
technologies must be available and
operating for features to function properly.
These systems may not operate if the
battery is disconnected, or if the vehicle has
been off for an extended period of time.
If GPS is unavailable, a message displays on
the infotainment screen. GPS functionality
may resume after the next time you drive
the vehicle.
Notifications
This section contains on/off preferences for
multiple notifications triggered during the
Charging session.
Charge Status Feedback :
Provides an
audible notification through horn chirps that
accompany changes in the charging status.
Charge Cord Unplugged Alert : When on
and your vehicle is locked, your vehicle will
honk the horn and flash the lights if charge
cord becomes unplugged.
Charge Power Loss Alert : When on, your
vehicle will chirp for an extended period of
time if charging power is cut off. Fast Charge Prep
If equipped, adjusts the battery to the
optimal temperature for quicker Fast
Charging. This should be done before
charging at a Fast Charger.
Depending on the outside and battery
temperature, fast charge prep could take
longer to reach the optimal temperature.
While en route to a Fast Charge station
using Google Maps, Fast Charge Prep
happens automatically if a Fast Charge
station has been added to your route.
Preconditioning Temperature
Allows for the preferred cabin temperature
to be set. During a planned charging session
at the vehicle's Home Charge Location, the
vehicle cabin is warmed or cooled to this
temperature if set to ON in either the
Charge Later screen, or in an active
Schedule.
Preferred Charge Times
Allows preferred charge time windows to be
enabled for the Home Charge Location
during both weekday and weekend planned
charging sessions. It does so whether the
vehicle is set to Charge Later, or observing a
scheduled charge. This allows for charging at
Page 199 of 429
Chevrolet Silverado EV Owner Manual (GMNA-Localizing-U.S./Canada-
16702912) - 2024 - CRC - 1/17/23
198 Driving and Operating
If the vehicle must be shut off in an
emergency:1. Brake using firm and steady pressure. Do not pump the brakes repeatedly. This
may deplete power assist, requiring
increased brake pedal force.
2. Shift the vehicle to N (Neutral). This can be done while the vehicle is moving.
After shifting to N (Neutral), firmly apply
the brakes and steer the vehicle to a
safe location.
3. Come to a complete stop, shift to P (Park), and turn the vehicle off.
4. Set the parking brake. See Electric
Parking Brake 0205.
{Warning
Turning off the vehicle while moving may
disable the airbags. While driving, only
shut the propulsion system off in an
emergency.
If a drive mode is entered where
fis
present while moving, the vehicle can be
shut off while driving. Press
fand follow
the instructions displayed in the Driver
Information Center (DIC) to confirm that
vehicle off mode is desired. Climate control functions, such as defrost,
heating, and air conditioning are only
available while the vehicle is powered on.
Turning the vehicle off will turn off all
climate controls.
If a collision is detected an additional
emergency vehicle off display will be shown
and can be pressed to turn the vehicle off.
Keeping Vehicle On After Driver Exit
{Warning
It is dangerous to get out of the vehicle
if the P (Park) button is not pressed with
the parking brake set. The vehicle
can roll.
Do not leave the vehicle when the
propulsion system is running. If you have
left the propulsion system running, the
vehicle can move suddenly. You or others
could be injured. To be sure the vehicle
will not move, even when you are on
fairly level ground, always set the
parking brake and press the P (Park)
button.
Press
gon the infotainment display to
keep the vehicle on after a driver exit is
detected.
gneeds to be selected each
time the vehicle is shifted to P (Park) to be
active. The vehicle will remain on for a set
time displayed in a notification upon
activation.
gcan be reselected to restart
the time interval.
Before exiting the vehicle, press the P (Park)
button and the Electric Parking Brake (EPB)
switch, then activate
g. See Shifting Into
Park 0199.
Using
gwill reduce the charge level of
the high voltage battery. Ensure your
battery has sufficient charge before
activating
g. See Battery Gauge (High
Voltage) 0110.
gshould only be used when the vehicle
is attended. A horn chirp will sound if the
vehicle turns off during the set time
interval.
Page 314 of 429
Chevrolet Silverado EV Owner Manual (GMNA-Localizing-U.S./Canada-
16702912) - 2024 - CRC - 1/17/23
Driving and Operating 313
a maximum of two minutes to detect and
label each TTPMS sensor. After each sensor
is learned, a check mark appears next to the
tire, the vehicle horn sounds, the vehicle
brake lamps flash, and all working trailer
lamps flash.
The recommended tire pressure must be
entered for the trailer tires. An alert appears
when a trailer tire's pressure is high or low.
Tool Method: A TTPMS activation tool can
be purchased separately to learn the trailer
TTPMS sensor locations.
Manual Method: Without the TTPMS
activation tool, the air pressure can be
increased or decreased in each tire for
10 seconds. Do not exceed the maximum
inflation pressure found on the tire
sidewalls. Make sure to readjust tire
pressure to the recommended level when
the process is complete.
Sensor Learning Steps
To complete the sensor-to-vehicle learn
process:1. Touch Start on the Learn Sensors screen. The horn chirps twice and the Learning
Active screen appears on the
infotainment display. 2. Start with the driver side front
trailer tire.
3. Activate the tool near the valve stem or adjust the air pressure of this tire until
the horn chirps and all working vehicle
and trailer lights flash.
The process stops without saving the
sensor locations if this step takes more
than two minutes.
4. Move to the next tire and repeat Step 3 for each sensor. The horn chirps twice
when all sensors are completed.
5. Return to the vehicle to complete the setup.
Maintenance Reminders
To set up maintenance reminders, touch the
Trailer Maintenance icon. Follow the
on-screen prompts. The maximum number
of reminders is 50.
Camera Views and Guides
To set up the trailer camera and guideline
features, if equipped, touch the Camera
Views and Guides icon.
1. Select the number of axles on the trailer.
2. Select the wheel location on the trailer (inboard or outboard). 3. Enter the trailer dimensions as prompted.
Follow the on-screen instructions to
complete setup for available features.
Certain trailer features require a compatible
trailer profile be configured and selected.
A compatible trailer is a box-type trailer
(cargo, camper, etc.) with a conventional
hitch.
Transparent Trailer Setup
If equipped, the rear trailer camera must be
mounted on the trailer and electrically
connected to the vehicle before transparent
trailer feature can be used. See Assistance
Systems for Parking or Backing 0246.
Follow the on-screen instructions to enter
the trailer dimensions.
Trailer dimensions must be in range and
transparent trailer must be calibrated
before use.
.Trailer Length: Measure from center of
coupler to furthest rear point on the
trailer.
.Trailer Total Width: Measure from the left
most edge of trailer, including the wheels,
to the right most edge.
Page 341 of 429
Chevrolet Silverado EV Owner Manual (GMNA-Localizing-U.S./Canada-
16702912) - 2024 - CRC - 1/13/23
340 Vehicle Care
FusesUsage
F66 –
F67 EMB/GRILL LIGHT
F68 HDLP_LT
F69 MIDGATE LEFT MOTOR F70 EBCM 1 F71 DC/AC INV
F72 Spare
F73 –
F74 –
F75 Spare
F76 HDLP_RT F77 –
F78 MIDGATE CROSS BAR MOTOR 2
MIDGATE CROSS BAR
MOTOR 1
F79 PCV_PEEV_ALD FR RADAR/VIRTUAL KEY
F80 IECR 2 F81 IECL 1 Fuses
Usage
F82 –
F83 –
F84 V2LIM F85 Spare HVS (HIGH VOLTAGE
SERVICE DISCONNECT)
F86 HORN F87 FRT WSHR PMP
F88 –
F89 –
F90 –
F91 –Instrument Panel Fuse Block (Left)
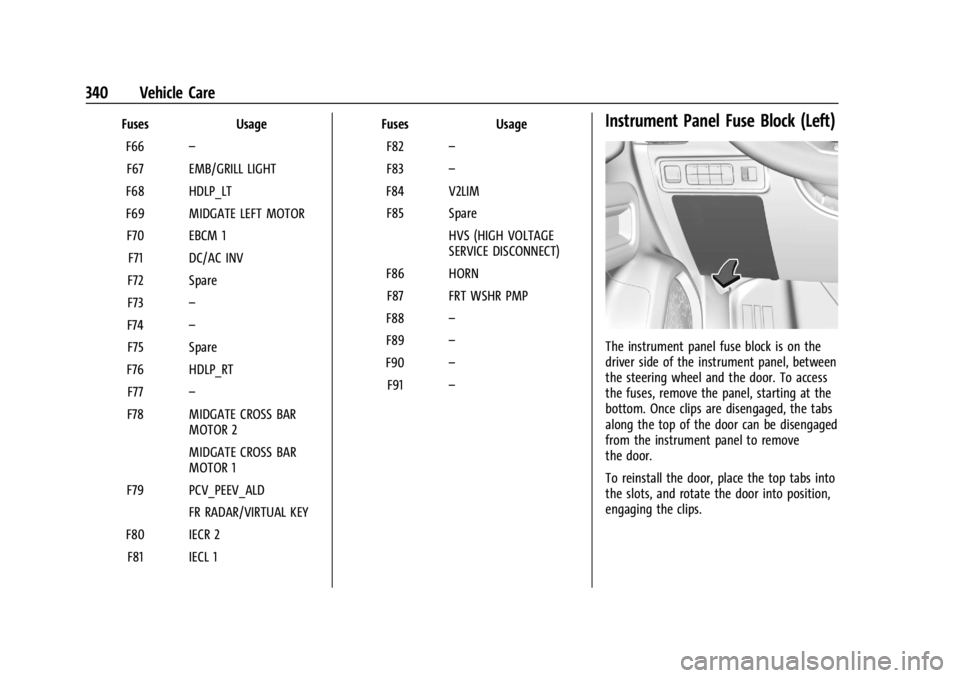
The instrument panel fuse block is on the
driver side of the instrument panel, between
the steering wheel and the door. To access
the fuses, remove the panel, starting at the
bottom. Once clips are disengaged, the tabs
along the top of the door can be disengaged
from the instrument panel to remove
the door.
To reinstall the door, place the top tabs into
the slots, and rotate the door into position,
engaging the clips.
Page 354 of 429
Chevrolet Silverado EV Owner Manual (GMNA-Localizing-U.S./Canada-
16702912) - 2024 - CRC - 1/13/23
Vehicle Care 353
.The TPMS sensor matching process was
not done or not completed successfully
after rotating the tires. The malfunction
light and the DIC message should go off
after successfully completing the sensor
matching process. See "TPMS Sensor
Matching Process" later in this section.
.One or more TPMS sensors are missing or
damaged. The malfunction light and the
DIC message should go off when the
TPMS sensors are installed and the sensor
matching process is performed
successfully. See your dealer for service.
.Replacement tires or wheels do not match
the original equipment tires or wheels.
Tires and wheels other than those
recommended could prevent the TPMS
from functioning properly. SeeBuying
New Tires 0358.
.Operating electronic devices or being near
facilities using radio wave frequencies
similar to the TPMS could cause the TPMS
sensors to malfunction.
If the TPMS is not functioning properly it
cannot detect or signal a low tire pressure
condition. See your dealer for service if the
TPMS malfunction light and DIC message
come on and stay on.
Tire Fill Alert (If Equipped)
This feature provides visual and audible
alerts outside the vehicle to help when
inflating an underinflated tire to the
recommended cold tire pressure.
When the low tire pressure warning light
comes on: 1. Park the vehicle in a safe, level place.
2. Set the parking brake firmly.
3. Place the vehicle in P (Park).
4. Add air to the tire that is underinflated. The turn signal lamp will flash.
When the recommended pressure is
reached, the horn sounds once and the
turn signal lamp will stop flashing and
briefly turn solid.
Repeat these steps for all underinflated tires
that have illuminated the low tire pressure
warning light.
{Warning
Overinflating a tire could cause the tire
to rupture and you or others could be
injured. Do not exceed the maximum (Continued)
Warning (Continued)
pressure listed on the tire sidewall. See
Tire Sidewall Labeling0346 and
Vehicle Load Limits 0193.
If the tire is overinflated by more than
35 kPa (5 psi), the horn will sound multiple
times and the turn signal lamp will continue
to flash for several seconds after filling
stops. To release and correct the pressure,
while the turn signal lamp is still flashing,
briefly press the center of the valve stem.
When the recommended pressure is reached,
the horn sounds once.
If the turn signal lamp does not flash within
15 seconds after starting to inflate the tire,
the tire fill alert has not been activated or is
not working.
If the hazard warning flashers are on, the
tire fill alert visual feedback will not work
properly.
The TPMS will not activate the tire fill alert
properly under the following conditions:
.There is interference from an external
device or transmitter.
.The air pressure from the inflation device
is not sufficient to inflate the tire.
Page 355 of 429
Chevrolet Silverado EV Owner Manual (GMNA-Localizing-U.S./Canada-
16702912) - 2024 - CRC - 1/13/23
354 Vehicle Care
.There is a malfunction in the TPMS.
.There is a malfunction in the horn or turn
signal lamps.
.The identification code of the TPMS
sensor is not registered to the system.
.The battery of the TPMS sensor is low.
If the tire fill alert does not operate due to
TPMS interference, move the vehicle about
1 m (3 ft) back or forward and try again.
If the tire fill alert feature is not working,
use a tire pressure gauge to confirm tire
pressure.
TPMS Sensor Matching Process —Auto
Learn Function
Each TPMS sensor has a unique
identification code. The identification code
needs to be matched to a new tire/wheel
position after rotating the tires or replacing
one or more of the TPMS sensors. When a
tire is installed, the vehicle must be
stationary for about 20 minutes before the
system recalculates. The following relearn
process takes up to 10 minutes, driving at a
minimum speed of 20 km/h (12 mph). A dash (-) or pressure value will display in
the DIC. See
Driver Information Center (DIC)
(Base Level) 0129 or
Driver Information Center (DIC) (Uplevel)
0 130. A warning message displays in the
DIC if a problem occurs during the relearn
process.
Trailer Tire Pressure Monitoring
Operation
If equipped, the Trailer Tire Pressure
Monitoring System (TTPMS) is designed to
monitor the pressure of the trailer tires and
warn the driver when a low pressure
condition exists. TTPMS sensors for four tires
are provided. The system can accommodate
a trailer with up to six tires if additional
sensors are purchased from the dealer. Also,
the system can be paired with up to five
individual trailers.
Prior to use, the vehicle must learn the
sensors by following the learning process.
See Trailering App 0310.
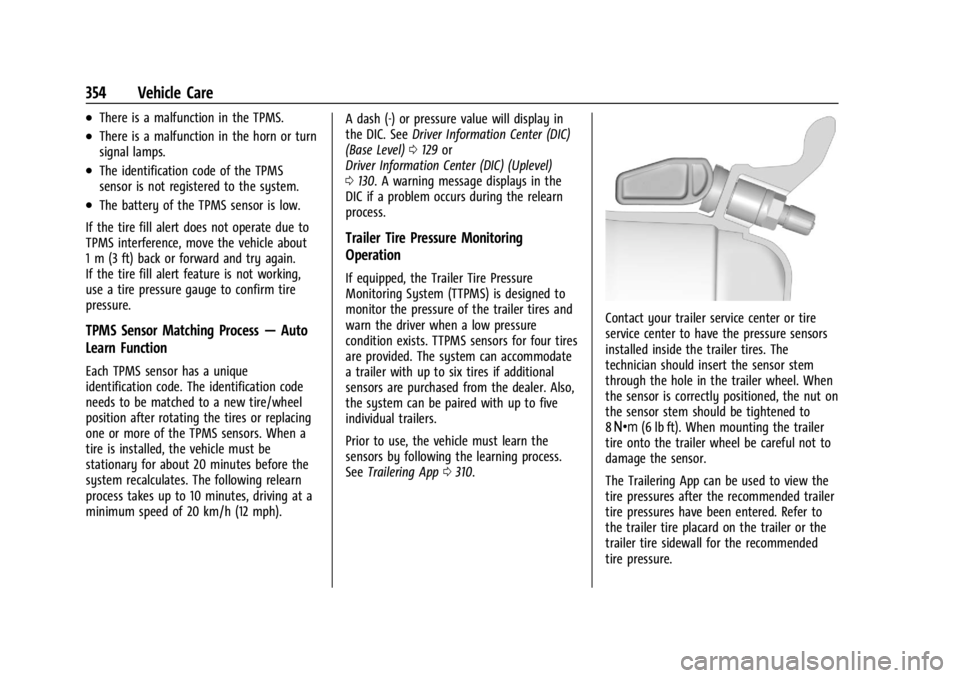
Contact your trailer service center or tire
service center to have the pressure sensors
installed inside the trailer tires. The
technician should insert the sensor stem
through the hole in the trailer wheel. When
the sensor is correctly positioned, the nut on
the sensor stem should be tightened to
8Y (6 lb ft). When mounting the trailer
tire onto the trailer wheel be careful not to
damage the sensor.
The Trailering App can be used to view the
tire pressures after the recommended trailer
tire pressures have been entered. Refer to
the trailer tire placard on the trailer or the
trailer tire sidewall for the recommended
tire pressure.