Page 362 of 560
3625-4. Using the other interior features
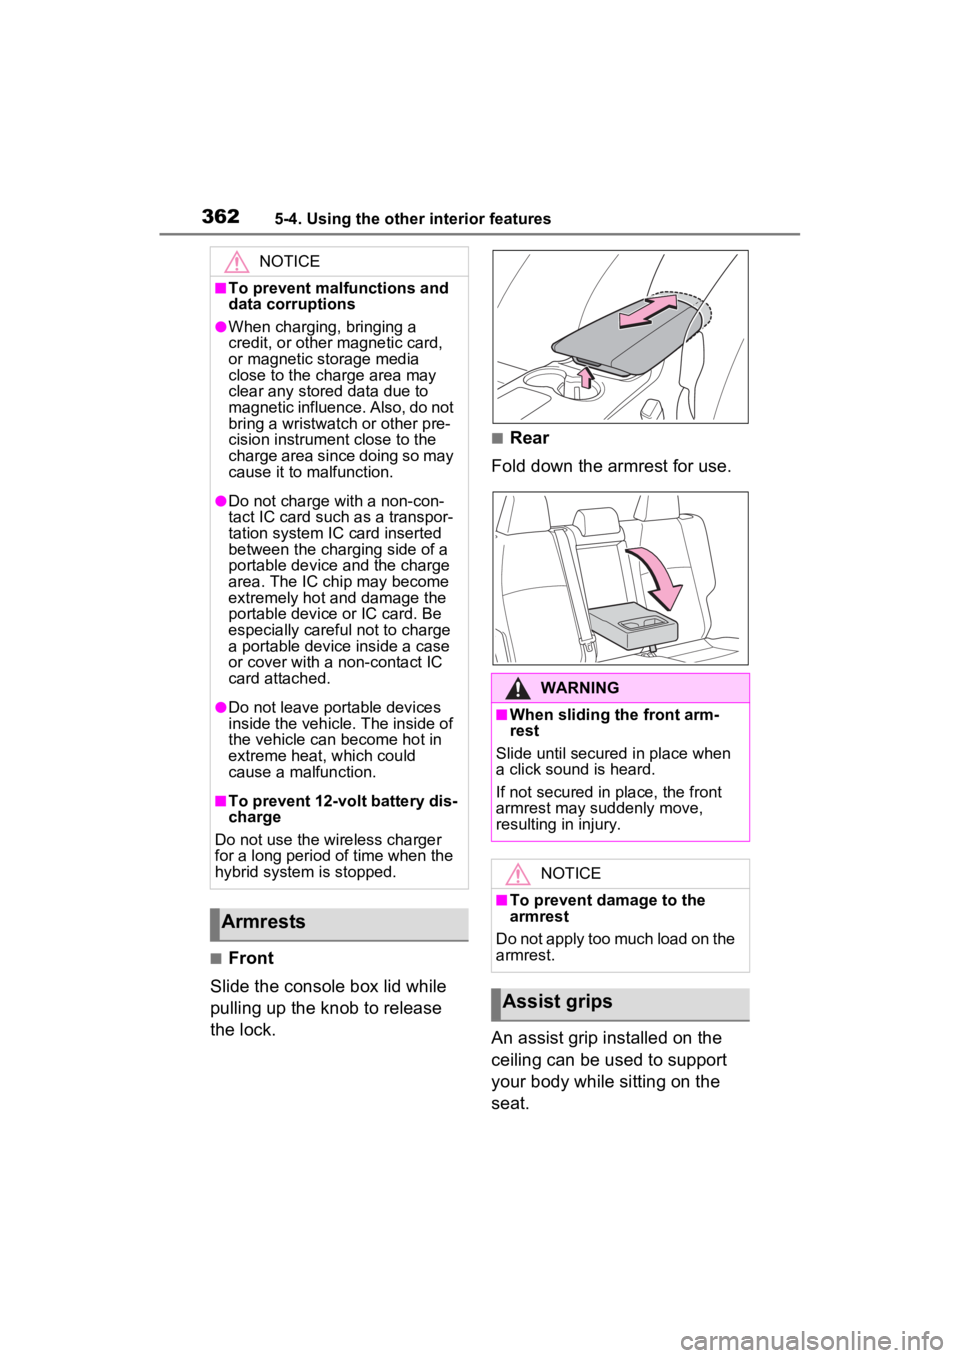
■Front
Slide the console box lid while
pulling up the knob to release
the lock.
■Rear
Fold down the armrest for use.
An assist grip installed on the
ceiling can be used to support
your body while sitting on the
seat.
NOTICE
■To prevent malfunctions and
data corruptions
●When charging, bringing a
credit, or other magnetic card,
or magnetic storage media
close to the charge area may
clear any stored data due to
magnetic influence. Also, do not
bring a wristwatch or other pre-
cision instrument close to the
charge area since doing so may
cause it to malfunction.
●Do not charge with a non-con-
tact IC card such as a transpor-
tation system IC card inserted
between the charging side of a
portable device and the charge
area. The IC chip may become
extremely hot and damage the
portable device or IC card. Be
especially careful not to charge
a portable device inside a case
or cover with a non-contact IC
card attached.
●Do not leave portable devices
inside the vehicle. The inside of
the vehicle can become hot in
extreme heat, which could
cause a malfunction.
■To prevent 12-volt battery dis-
charge
Do not use the wireless charger
for a long period of time when the
hybrid system is stopped.
Armrests
WARNING
■When sliding the front arm-
rest
Slide until secured in place when
a click sound is heard.
If not secured in place, the front
armrest may suddenly move,
resulting in injury.
NOTICE
■To prevent damage to the
armrest
Do not apply too much load on the
armrest.
Assist grips
Page 364 of 560
3645-4. Using the other interior features
*: If equipped
■HomeLink® programming pro-
cedure
The programming procedures can
also be found at the following URL.
Website: www.hom elink.com/toyota
For support, contact customer sup-
port at the following.
Help Line: 1-800-355-3515
The HomeLink® wireless control
system in your vehicle has 3
buttons which can be pro-
grammed to operate 3 different
devices. Refer to the program-
ming methods on the following
pages to determine the method
which is appropriate for the device.
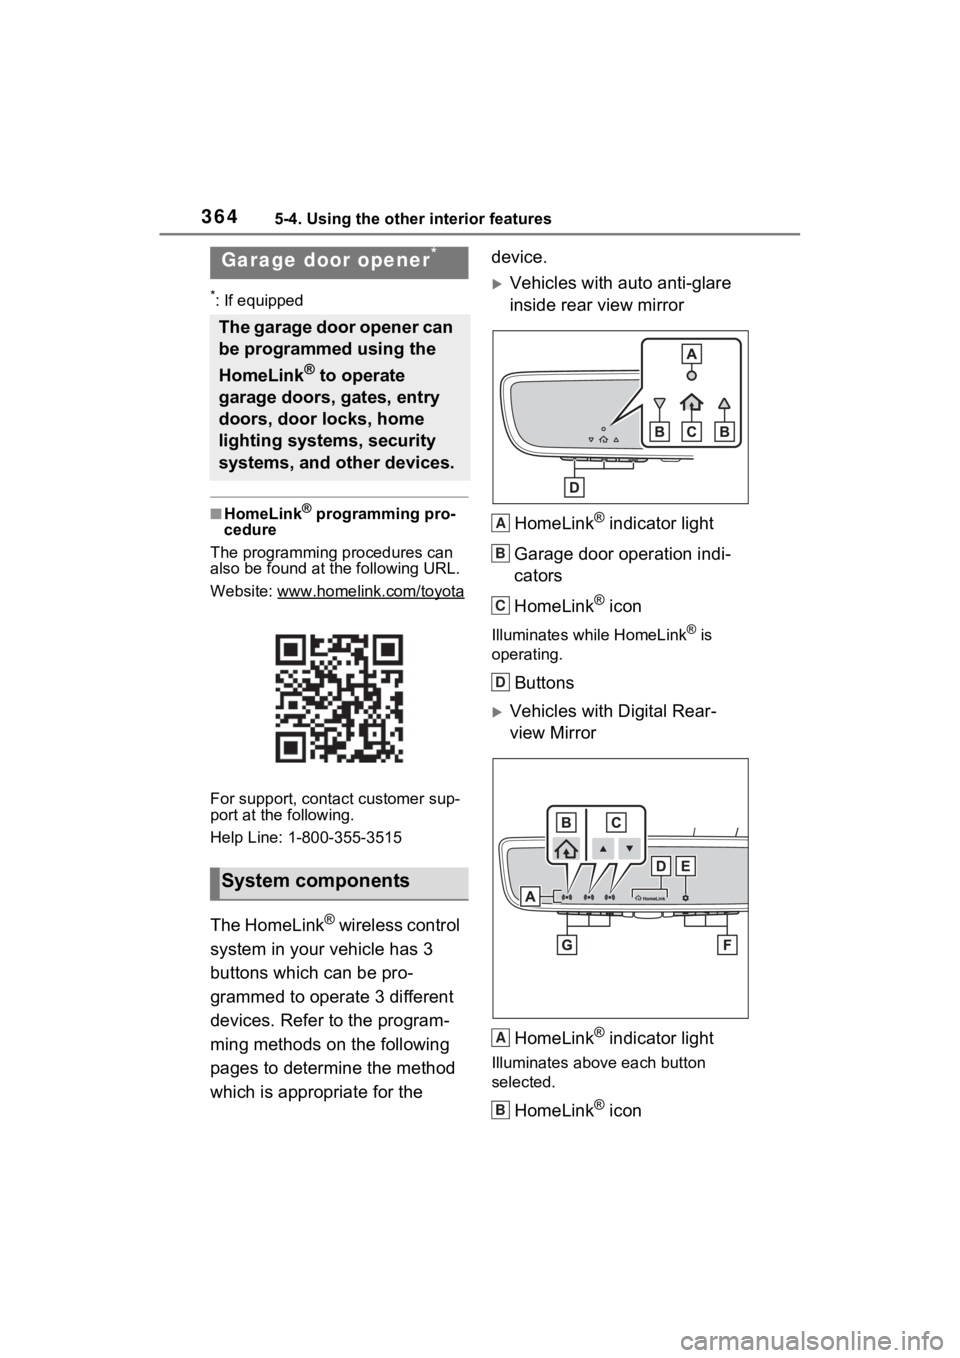
Vehicles with auto anti-glare
inside rear view mirror
HomeLink
® indicator light
Garage door operation indi-
cators
HomeLink
® icon
Illuminates while HomeLink® is
operating.
Buttons
Vehicles with Digital Rear-
view Mirror
HomeLink
® indicator light
Illuminates above each button
selected.
HomeLink® icon
Garage door opener*
The garage door opener can
be programmed using the
HomeLink
® to operate
garage doors, gates, entry
doors, door locks, home
lighting systems, security
systems, and other devices.
System components
A
B
C
D
A
B
Page 381 of 560
3816-2. Maintenance
6
Maintenance and care
General maintenance
Listed below are the general
maintenance items that
should be performed at the
intervals specified in the
“Owner’s Warranty Informa-
tion Booklet” or “Owner’s
Manual Supplement/Sched-
uled Maintenance Guide”. It
is recommended that any
problem you notice should
be brought to the attention
of your Toyota dealer or
qualified service shop for
advice.
WARNING
■If the hybrid system is run-
ning
Turn the hybrid system off and
ensure that there is adequate
ventilation before performing
maintenance checks.
Engine compartment
ItemsCheck points
Brake fluid
Is the brake fluid at
the correct level?
( P.394)
Engine/power
control unit
coolant
Is the
engine/power con-
trol unit coolant at
the correct level?
( P.393)
Engine oil
Is the engine oil at
the correct level?
( P.390)
Exhaust sys-
temThere should not
be any fumes or
strange sounds.
Radiator/con-
denser
The radiator and
condenser should
be free from for-
eign objects.
( P.394)
Washer fluid
Is there sufficient
washer fluid?
( P.396)
Luggage compartment
ItemsCheck points
12-volt batteryCheck the connec-
tions. ( P.397)
Vehicle interior
ItemsCheck points
Accelerator
pedal
• The accelerator
pedal should
move smoothly
(without uneven
pedal effort or
catching).
Hybrid trans-
mission “Park”
mechanism
• When parked on a slope and the
shift position is in
P, is the vehicle
securely
stopped?
ItemsCheck points
Page 382 of 560
3826-2. Maintenance
Brake pedal
• Does the brake pedal move
smoothly?
• Does the brake pedal have
appropriate
clearance from
the floor?
• Does the brake pedal have the
correct amount
of free play?
Brakes
• The vehicle should not pull to
one side when
the brakes are
applied.
• The brakes should work
effectively.
• The brake pedal should not feel
spongy.
• The brake pedal should not get
too close to the
floor when the
brakes are
applied.
Head
restraints
• Do the head restraints move
smoothly and
lock securely?
Indica-
tors/buzzers
• Do the indica-tors and buzzers
function prop-
erly?
ItemsCheck points
Lights
• Do all the lights come on?
• Are the head- lights aimed cor-
rectly?( P.429)
Parking brake
• Does the park-
ing brake oper-
ate normally?
• When parked on a slope and the
parking brake is
on, is the vehicle
securely
stopped?
Seat belts
• Do the seat belts operate
smoothly?
• The seat belts should not be
damaged.
Seats
• Do the seat con-trols operate
properly?
Steering wheel
• Does the steer-ing wheel rotate
smoothly?
• Does the steer- ing wheel have
the correct
amount of free
play?
• There should not be any strange
sounds coming
from the steer-
ing wheel.
ItemsCheck points
Page 387 of 560
3876-3. Do-it-yourself maintenance
6
Maintenance and care
1Pull the hood lock release
lever.
The hood will pop up slightly.
2Push the auxiliary catch lever
to the left and lift the hood. 3
Hold the hood open by insert-
ing the supporting rod into
the slot.
Hood
Release the lock from the
inside of the vehicle to open
the hood.
Opening the hood
WARNING
■Pre-driving check
Check that the hood is fully closed
and locked.
If the hood is not locked properly,
it may open while the vehicle is in
motion and cause an accident,
which may result i n death or seri-
ous injury.
■To prevent injuries
The support rod may be hot after
driving the vehicle. Touching the
hot support rod may lead to burns
or other serious injuries.
■After installing the support
rod into the slot
Make sure the rod supports the
hood securely fro m falling down
on to your head or body.
■When closing the hood
When closing the hood, take extra
care to prevent your fingers etc.
from being caught.
Page 422 of 560
4226-3. Do-it-yourself maintenance
Stopper
Claw
2 Remove the 2 metal plates
from the wiper insert pulled
out, and install the plates to a
new wiper insert.
Make sure that the cutout location
and warp direction of the metal
blades are same as the original.
3Install the wiper insert to the
wiper blade from the side
without the stopper.
4 Secure the stopper of the
wiper insert with the claw of
the wiper blade.
1 Lift up the rear window wiper
arm head cap.
2 Move the wiper blade until a
click sound can be heard and the claw detaches, and then
remove the wiper blade from
the wiper arm.
3 Pull the wiper insert out past
the stopper on the wiper
blade, and then continue to
pull until it is completely
removed.
Lightly grasp between the claws of
the wiper blade to allow the wiper
insert to lift up, making it easier to
remove.
4 Remove the 2 metal plates
from the old wiper insert and
Rear window wiper
A
B
Page 428 of 560
4286-3. Do-it-yourself maintenance
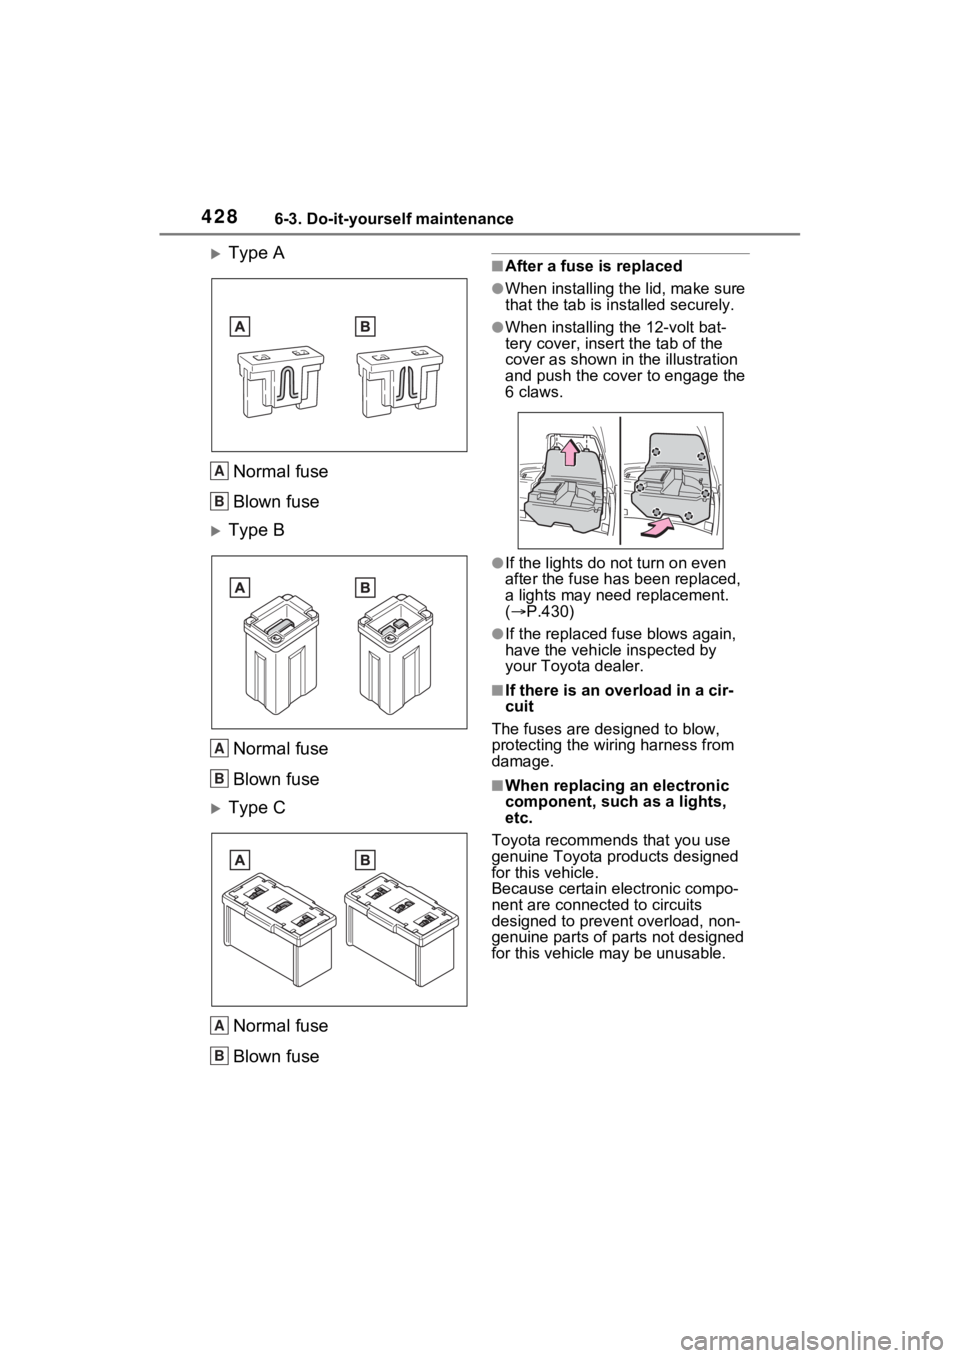
Type A
Normal fuse
Blown fuse
Type BNormal fuse
Blown fuse
Type CNormal fuse
Blown fuse
■After a fuse is replaced
●When installing the lid, make sure
that the tab is ins talled securely.
●When installing the 12-volt bat-
tery cover, insert the tab of the
cover as shown in the illustration
and push the cover to engage the
6 claws.
●If the lights do not turn on even
after the fuse has been replaced,
a lights may need replacement.
( P.430)
●If the replaced fuse blows again,
have the vehicle inspected by
your Toyota dealer.
■If there is an ove rload in a cir-
cuit
The fuses are designed to blow,
protecting the wiring harness from
damage.
■When replacing an electronic
component, such as a lights,
etc.
Toyota recommends that you use
genuine Toyota products designed
for this vehicle.
Because certain electronic compo-
nent are connected to circuits
designed to prevent overload, non-
genuine parts of parts not designed
for this vehicle may be unusable.
A
B
A
B
A
B
Page 433 of 560
4337-1. Essential information
7
When trouble arises
1Steadily step on the brake
pedal with both feet and
firmly depress it.
Do not pump the brake pedal
repeatedly as this will increase the
effort required to slow the vehicle.
2Shift the shift lever to N.
If the shift lever is shifted to N
3 After slowing down, stop the
vehicle in a safe place by the
road.
4 Stop the hybrid system.
If the shift lever cannot be
shifted to N
3 Keep depressing the brake
pedal with both feet to reduce
vehicle speed as much as
possible.
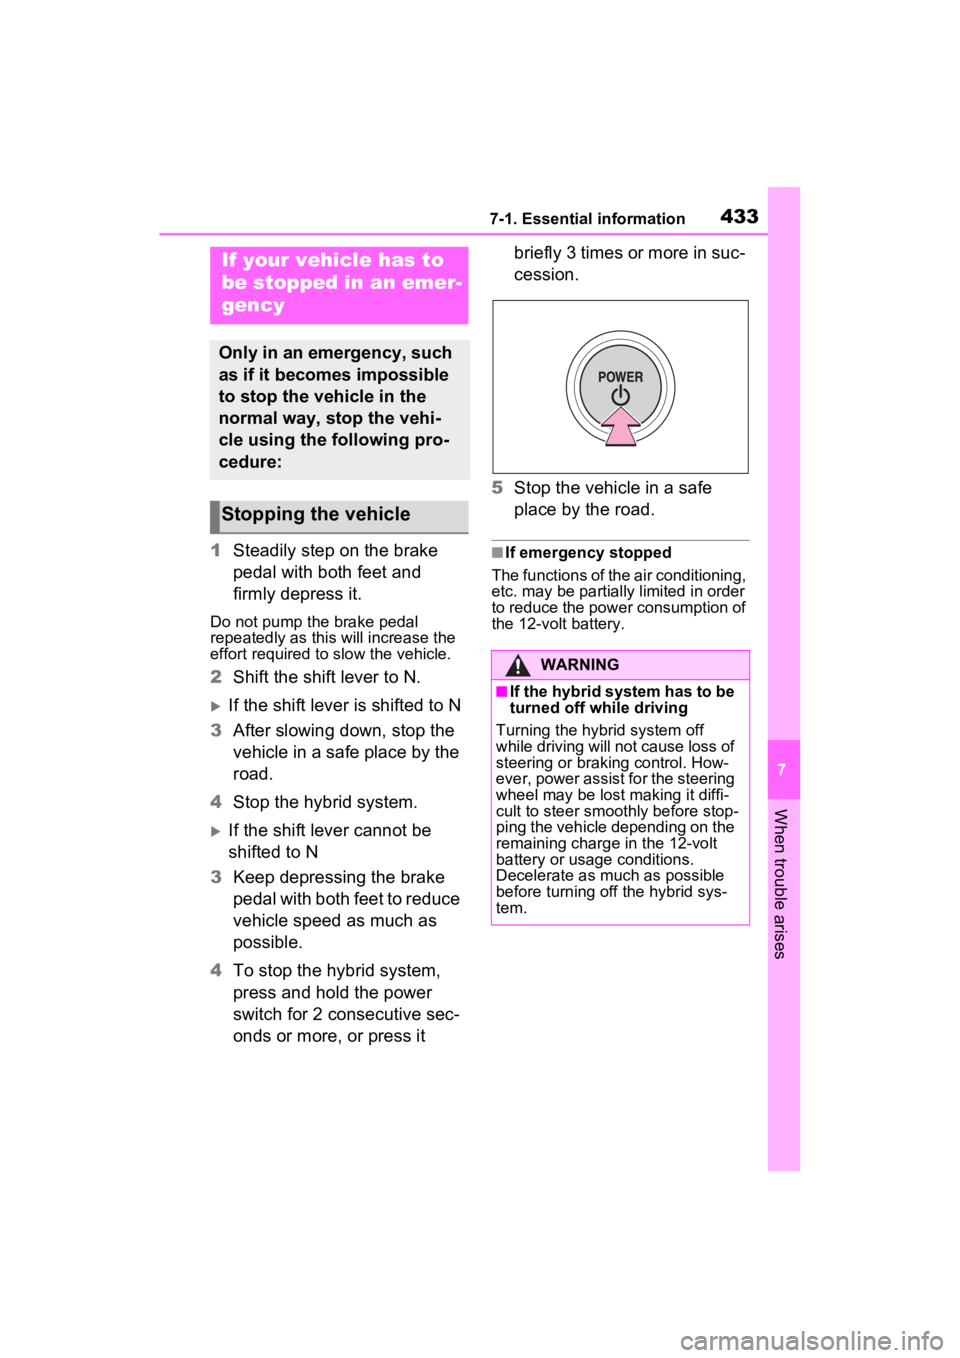
4 To stop the hybrid system,
press and hold the power
switch for 2 consecutive sec-
onds or more, or press it briefly 3 times or more in suc-
cession.
5 Stop the vehicle in a safe
place by the road.
■If emergency stopped
The functions of the air conditioning,
etc. may be partially limited in order
to reduce the power consumption of
the 12-volt battery.
If your vehicle has to
be stopped in an emer-
gency
Only in an emergency, such
as if it becomes impossible
to stop the vehicle in the
normal way, stop the vehi-
cle using the following pro-
cedure:
Stopping the vehicle
WARNING
■If the hybrid system has to be
turned off while driving
Turning the hybrid system off
while driving will not cause loss of
steering or braking control. How-
ever, power assist for the steering
wheel may be lost making it diffi-
cult to steer smoothly before stop-
ping the vehicle depending on the
remaining charge in the 12-volt
battery or usage conditions.
Decelerate as mu ch as possible
before turning off the hybrid sys-
tem.