2023 TOYOTA 86 display
[x] Cancel search: displayPage 259 of 449
2594-6. Using other driving systems
4
Driving
Use snow mode for accelerating
and driving on slippery road sur-
faces such as snow.
The snow mode indicator comes
on.
■Sport mode
●In sport mode, lower gears are
used and gears change at a
higher engine speed.
●In the following situations, it may
not be possible to change to sport
mode. When the mode cannot be
changed to sport mode, a buzzer
will sound and a message will be
displayed on the multi-information
display.
• When the Adaptive Cruise Control or Conventional Cruise Control is
operating
• When the engine is cold
■Snow mode
To prevent slipping, 1st gear cannot
be selected when in snow mode.
■Automatic deactivation of sport
mode and snow mode
In the following si tuations, the driv-
ing mode is autom atically deacti-
vated:
●When the engine is turned off after
driving in sport mode or snow
mode.
●When the Adaptive Cruise Control
or Conventional Cruise Control is
activated while driving in sport
mode.
●When in sport mode and stop-
ping/starting off is automatically
performed in second gear.
( P.150)
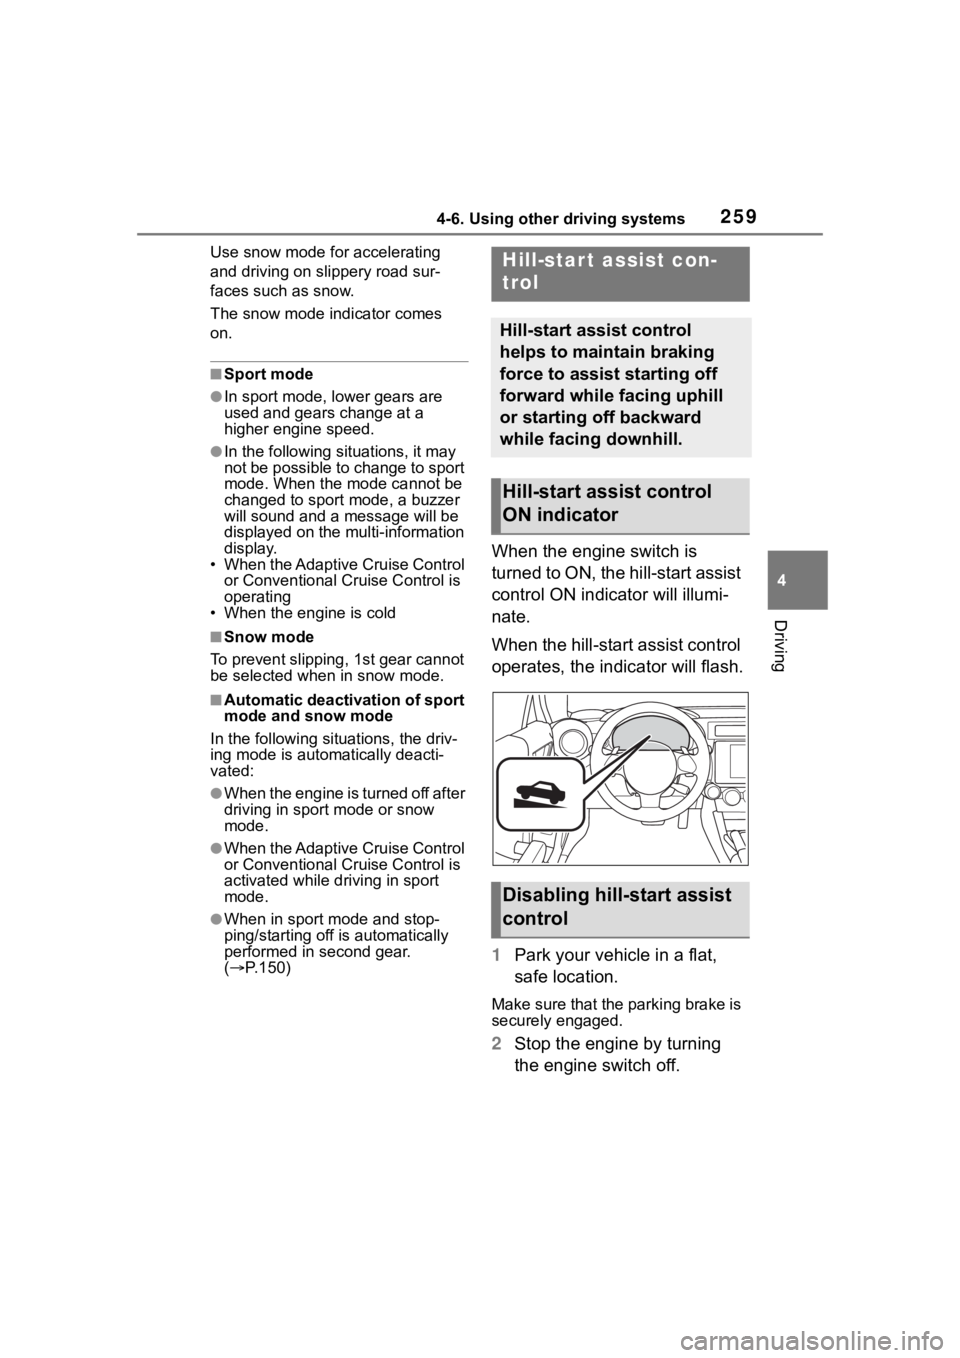
When the engine switch is
turned to ON, the hill-start assist
control ON indicator will illumi-
nate.
When the hill-start assist control
operates, the indicator will flash.
1 Park your vehicle in a flat,
safe location.
Make sure that the parking brake is
securely engaged.
2Stop the engine by turning
the engine switch off.
Hill-star t assist con-
trol
Hill-start assist control
helps to maintain braking
force to assist starting off
forward while facing uphill
or starting off backward
while facing downhill.
Hill-start assist control
ON indicator
Disabling hill-start assist
control
Page 263 of 449
2634-6. Using other driving systems
4
Driving
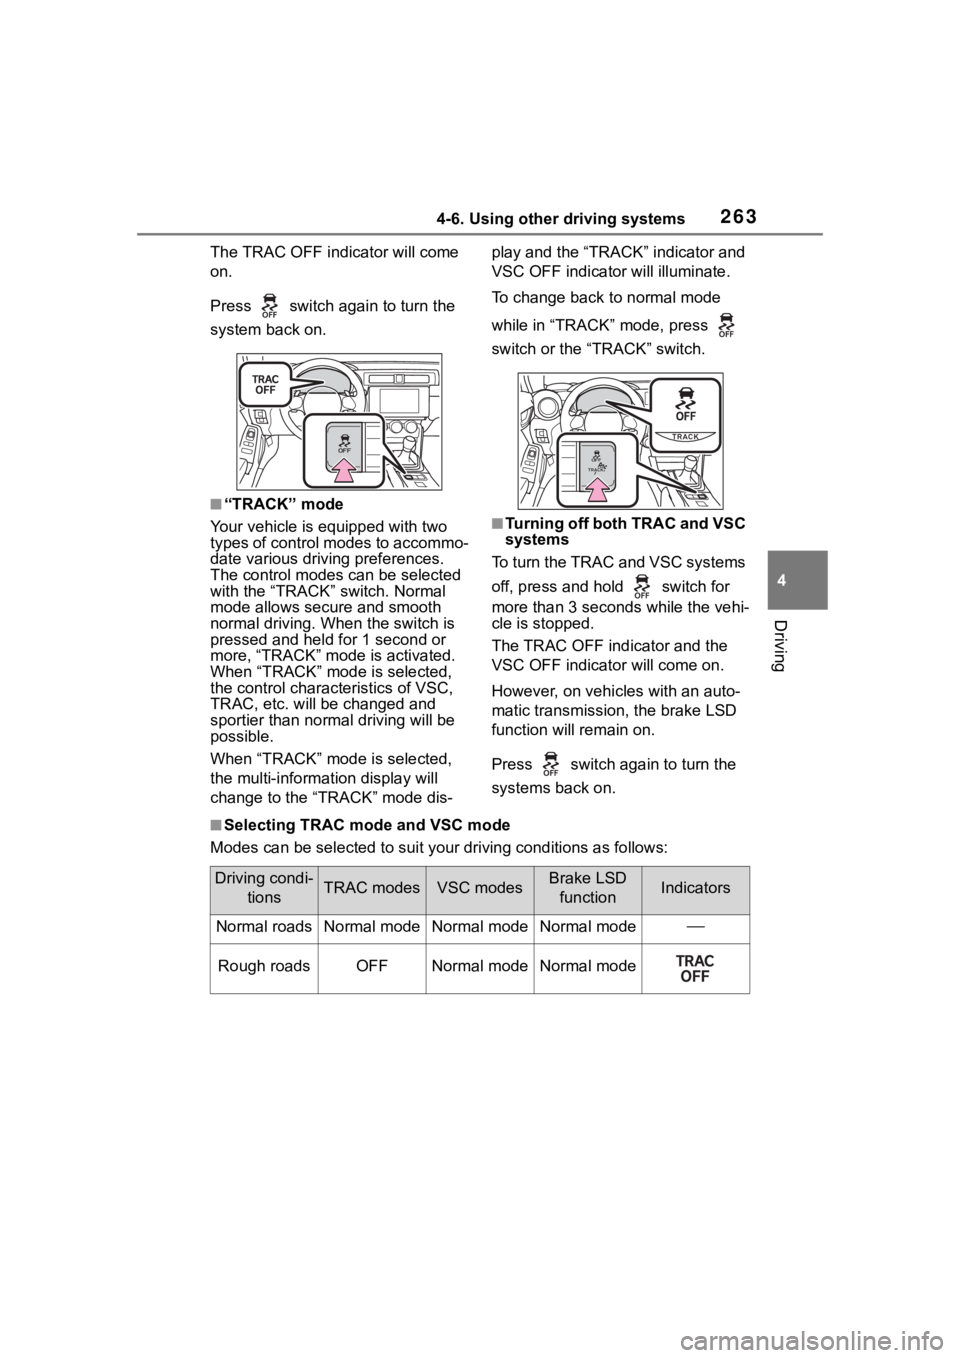
The TRAC OFF indicator will come
on.
Press switch again to turn the
system back on.
■“TRACK” mode
Your vehicle is equipped with two
types of control modes to accommo-
date various drivi ng preferences.
The control modes can be selected
with the “TRACK” switch. Normal
mode allows secure and smooth
normal driving. W hen the switch is
pressed and held for 1 second or
more, “TRACK” mode is activated.
When “TRACK” mode is selected,
the control characteristics of VSC,
TRAC, etc. will be changed and
sportier than normal driving will be
possible.
When “TRACK” mode is selected,
the multi-informat ion display will
change to the “TRACK” mode dis- play and the “TRACK” indicator and
VSC OFF indicato
r will illuminate.
To change back to normal mode
while in “TRACK” mode, press
switch or the “TRACK” switch.
■Turning off both TRAC and VSC
systems
To turn the TRAC and VSC systems
off, press and hold switch for
more than 3 seconds while the vehi-
cle is stopped.
The TRAC OFF ind icator and the
VSC OFF indicator will come on.
However, on vehicles with an auto-
matic transmission, the brake LSD
function will remain on.
Press switch again to turn the
systems back on.
■Selecting TRAC mode and VSC mode
Modes can be selected to suit your driving conditions as follow s:
Driving condi-
tionsTRAC modesVSC modesBrake LSD functionIndicators
Normal roadsNormal modeNormal modeNormal mode
Rough roadsOFFNormal modeNormal mode
Page 270 of 449

2705-1. Using the air conditioning system
5-1.Using the air conditioning system
Left-hand side temperature setting display
Left-hand side temperature control switch
Climate control mode display
Fan speed control switch
Right-hand side temperature control switch
Right-hand side temperature setting display
“MAX A/C” switch
“SYNC” switch
Outside/recirculated air mode switch
“A/C” switch
Airflow mode control switch
Rear window defogger and outside rear view mirror defoggers
switch
“ON/OFF” switch
Windshield defogger switch
Automatic mode switch
Automatic air conditioning system
Air outlets are automatically selected and fan speed is auto-
matically adjusted according to the set temperature setting.
Air conditioning controls
A
C
D
Page 272 of 449

2725-1. Using the air conditioning system
■Fast cooling function
Press the “MAX A/C” switch.
When the switch is turned on, the
air conditioning will turn on, the
temperature will be set to LO, the
fan speed will be set to MAX, the air
outlets will be set to upper body,
and the air mode will change to
recirculated air mode automatically.
To turn off fast cooling function and
return the previous setting, press
the “MAX A/C” s witch again.
■Suspend function
Press the “ON/OFF” switch.
While the air conditioning system is
being used, when the “ON/OFF”
switch is pressed, the air condition-
ing system will st op and the tem-
perature setting display, etc. will
turn off.
If the “ON/OFF” switch is pushed
and turned on, the air conditioning
system will operate in the operating
state it was in when turned off.
However, if the fast cooling function
was operating when the air condi-
tioning system was turned off, it will
operate in the operating state it was
in before the fast cooling function
was turned on.
■Defogging the windshield
Defoggers are used to defog the
windshield and front side win-
dows.
Press the windshield defogger
switch.
Set the outside/recirculated air
mode switch to outside air mode if
the recirculated a ir mode is used.
(Changes automatically) To defog the windshield and the
side windows quickly, turn the air
flow and temperature up.
To return to the previous mode,
press the windshield defogger
switch again when the windshield is
defogged.
When the windshield defogger
switch is on, the
indicator illumi-
nates on the windshield defogger
switch.
■Defogging the rear window
and outside rear view mir-
rors
Defoggers are used to defog the
rear window, and to remove
raindrops, dew and frost from
the outside rear view mirrors.
Press the rear window and out-
side rear view mirror defoggers
switch.
The defoggers will automatically
turn off afte r approximately 15 min-
utes.
When the rear window and outside
rear view mirror defoggers switch is
on, the indicator illuminates on the
rear window and outside rear view
mirror defoggers switch.
■Fogging up of the windows
●The windows will easily fog up
when the humidity in the vehicle is
high. Turning “A/C” on will dehu-
midify the air from the outlets and
defog the windshield effectively.
●If you turn “A/C” off, the windows
may fog up more easily.
●The windows may fog up if the
recirculated air mode is used.
Page 315 of 449

3156-3. Do-it-yourself maintenance
6
Maintenance and care
Front
To equalize tire wear and extend
tire life, Toyota recommends that
tire rotation is carried out at the
same interval as tire inspection.
Your vehicle is equipped with a
tire pressure warning system
that uses tire pressure warning
valves and transmitters to detect
low tire inflation pressure before
serious problems arise.
The tire pressure detected by
the tire pressure warning sys-
tem can be displayed on the
multi-information display.
If the tire pressure drops
below a predetermined level,
the driver is warned by a screen display and a warning
light. (
P.354)
■Routine tire inflation pressure
checks
The tire pressure warning system
does not replace routine tire inflation
pressure checks . Make sure to
check tire inflation pressure as part
of your routine o f daily vehicle
checks.
■Tire inflation pressure
●It may take a few minutes to dis-
play the tire inflation pressure
after the engine switch is turned to
ON. It may also take a few min-
utes to display the tire inflation
pressure after infl ation pressure
has been adjusted.
●Tire inflation pressure changes
with temperature. The displayed
values may also be different from
the values measured using a tire
pressure gauge.
■Situations in which the tire
pressure warning system may
not operate properly
●In the following cases, the tire
pressure warning system may not
operate properly.
• If non-genuine Toyota wheels are used.
• A tire has been replaced with a
tire that is not an OE (Original
Equipment) tire.
• A tire has been replaced with a
tire that is not of the specified size.
• Tire chains, etc. are equipped.
• An auxiliary-support ed run-flat tire
Tire pressure warning
system
A
Page 316 of 449
3166-3. Do-it-yourself maintenance
is equipped.
• If a window tint that affects the radio wave signals is installed.
• If there is a lot of snow or ice on the vehicle, particularly around the
wheels or wheel housings.
• If the tire inflation pressure is extremely higher than the speci-
fied level.
• If tires not equipped with tire pres- sure warning valves and transmit-
ters are used.
• If the ID code on the tire pressure warning valves and transmitters is
not registered in the tire pressure
warning computer.
●Performance may be affected in
the following situations.
• When driving near a TV tower, electric power plant, gas station,
radio station, large display, airport
or other facility that generates
strong radio waves or electrical
noise
• When carrying a portable radio, cellular phone, cordless phone or
other wireless communication
device
If tire position information is not cor-
rectly displayed due to the radio
wave conditions, the display may be
corrected by driving and changing
the radio wave conditions.
●When the vehicle is parked, the
time taken for the warning to start
or go off could be extended.
●When tire inflation pressure
declines rapidly for example when
a tire has burst, the warning may
not function.
■Warning performance of the tire
pressure warning system
The warning of the tire pressure
warning system will change in
accordance with driving conditions.
For this reason, the system may
give a warning even if the tire pres-
sure does not reach a low enough
level, or if the p ressure is higher
than the pressure that was adjusted
to when the system was initialized.
When replacing tires or wheels,
tire pressure warning valves and
transmitters must also be
installed.
When new tire pressure warning
valves and transmitters are
installed, new ID codes must be
registered in the tire pressure
warning computer and the tire
pressure warning system must
be initialized. Have tire pressure
warning valve and transmitter ID
codes registered by your Toyota
dealer. ( P.318)
■Replacing tires and wheels
If the ID code of the tire pressure
warning valve and tr ansmitter is not
registered, the tire pressure warning
system will not work properly. After
driving for about 20 minutes, the tire
pressure warning light blinks for 1
minute and stays on to indicate a
system malfunction.
Installing tire pressure
warning valves and trans-
mitters
NOTICE
■Repairing or replacing tires,
wheels, tire pressure warn-
ing valves, transmitters and
tire valve caps
●When removing or fitting the
wheels, tires or the tire pressure
warning valves and transmit-
ters, contact your Toyota dealer
as the tire pressure warning
valves and transmitters may be
damaged if not handled cor-
rectly.
Page 323 of 449
3236-3. Do-it-yourself maintenance
6
Maintenance and care
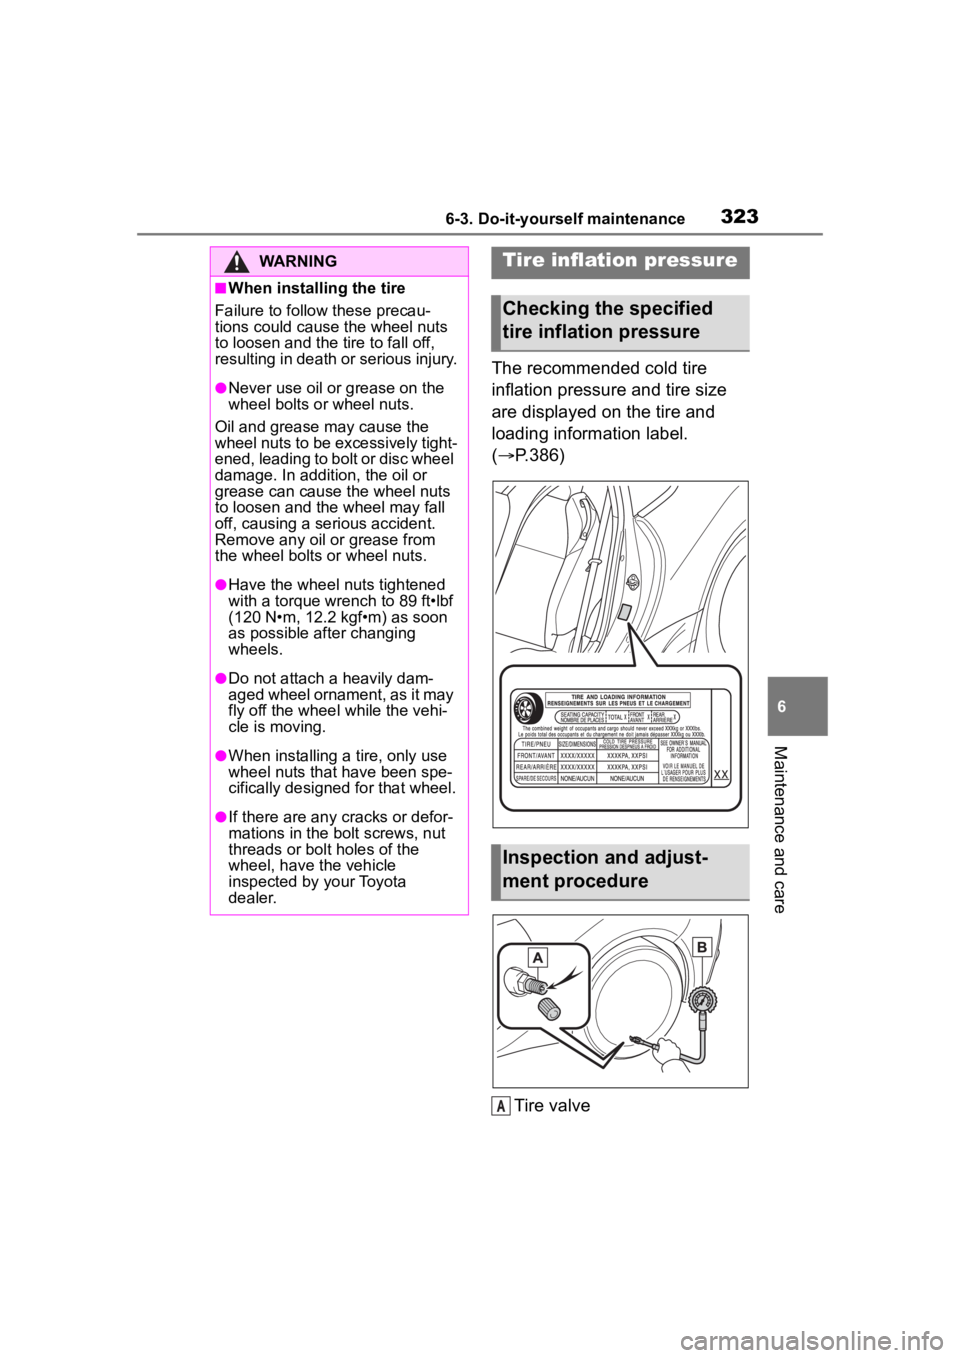
The recommended cold tire
inflation pressure and tire size
are displayed on the tire and
loading information label.
(P.386)
Tire valve
WARNING
■When installing the tire
Failure to follow these precau-
tions could caus e the wheel nuts
to loosen and the tire to fall off,
resulting in death or serious injury.
●Never use oil or grease on the
wheel bolts or wheel nuts.
Oil and grease may cause the
wheel nuts to be excessively tight-
ened, leading to bolt or disc wheel
damage. In addition, the oil or
grease can cause the wheel nuts
to loosen and the wheel may fall
off, causing a serious accident.
Remove any oil or grease from
the wheel bolts or wheel nuts.
●Have the wheel nuts tightened
with a torque wrench to 89 ft•lbf
(120 N•m, 12.2 kgf•m) as soon
as possible after changing
wheels.
●Do not attach a heavily dam-
aged wheel ornament, as it may
fly off the whee l while the vehi-
cle is moving.
●When installing a tire, only use
wheel nuts that have been spe-
cifically designed for that wheel.
●If there are any cracks or defor-
mations in the bolt screws, nut
threads or bolt holes of the
wheel, have the vehicle
inspected by your Toyota
dealer.
Tire inflation pressure
Checking the specified
tire inflation pressure
Inspection and adjust-
ment procedure
A
Page 357 of 449
3577-2. Steps to take in an emergency
7
When trouble arises
■Warning messages
The warning messages explained
below may differ from the actual
messages according to operation
conditions and vehicle specifica-
tions.
■Warning buzzer
In some cases, the buzzer may not
be heard due to being in a noisy
location or audio sound.
■If “Check Owner’s Manual” is
displayed
●If the following messages are
shown, following the instructions,
accordingly.
• “High Coolant Temperature” ( P.375)
• “Transmission Oil Temperature” ( P.149)
●If any of the following messages
are shown on the multi-informa-
tion display, it may indicate a mal-
function. Have the vehicle
inspected by your Toyota dealer
immediately.
• “EyeSight OFF”
• “Headlights Disabled”
• “ABS”
• “Steering System”
• “Vehicle Stability Control”
• “Transmission”
• “Low Tire Pressure”
• “RAB Disabled”
• “BSD/RCTA Disabled”
• “Keyless Access System Dis- abled”
• “Auto Headlight Leveler Disabled”
• “SRH Disabled”
●If any of the following messages
are shown on the multi-informa-
tion display, it may indicate a mal-
function. Immediately stop the
vehicle and contact your Toyota
dealer.
• “Brake System”
• “Check Engine”
• “SRS Airbag System”
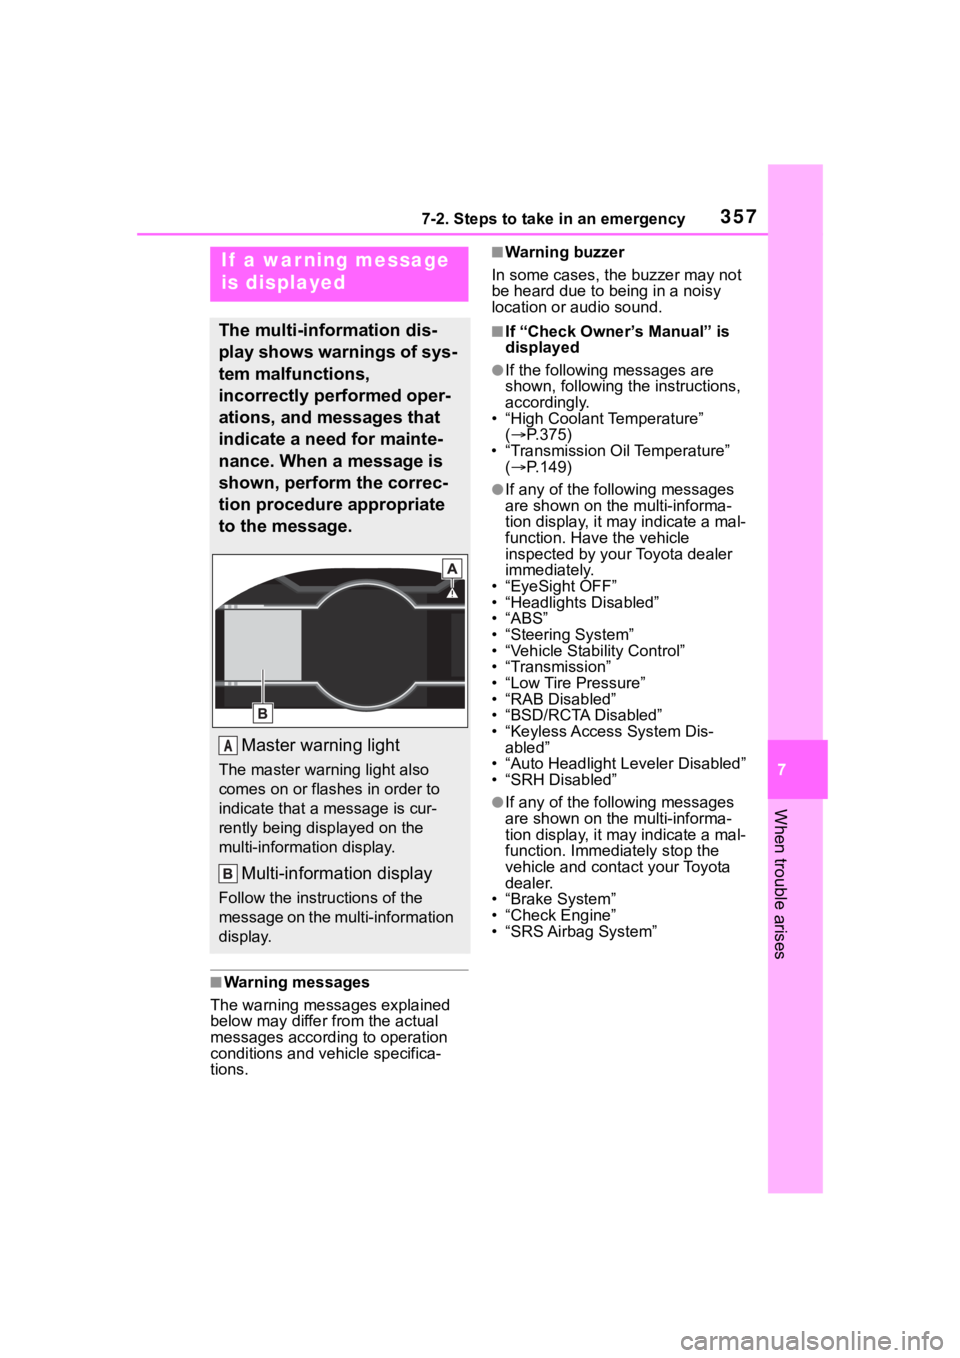
If a war ning message
is displayed
The multi-information dis-
play shows warnings of sys-
tem malfunctions,
incorrectly performed oper-
ations, and messages that
indicate a need for mainte-
nance. When a message is
shown, perform the correc-
tion procedure appropriate
to the message.
Master warning light
The master warning light also
comes on or flashes in order to
indicate that a message is cur-
rently being displayed on the
multi-information display.
Multi-information display
Follow the instru ctions of the
message on the multi-information
display.
A