2023 HYUNDAI IONIQ 5 Mph
[x] Cancel search: MphPage 556 of 680

Driver Assistance System
7-154•
'Agree' must be selected on the
infotainment system screen and the
infotainment system has to operate
properly to use Remote Operation function.
• Method (2) can be used after the
vehicle has been driven above 3
mph (5 km/h).
• If the function is turned on again
after parallel parking is completed
by Remote Smart Parking Assist,
Remote Operation function can be
used with Method (2).
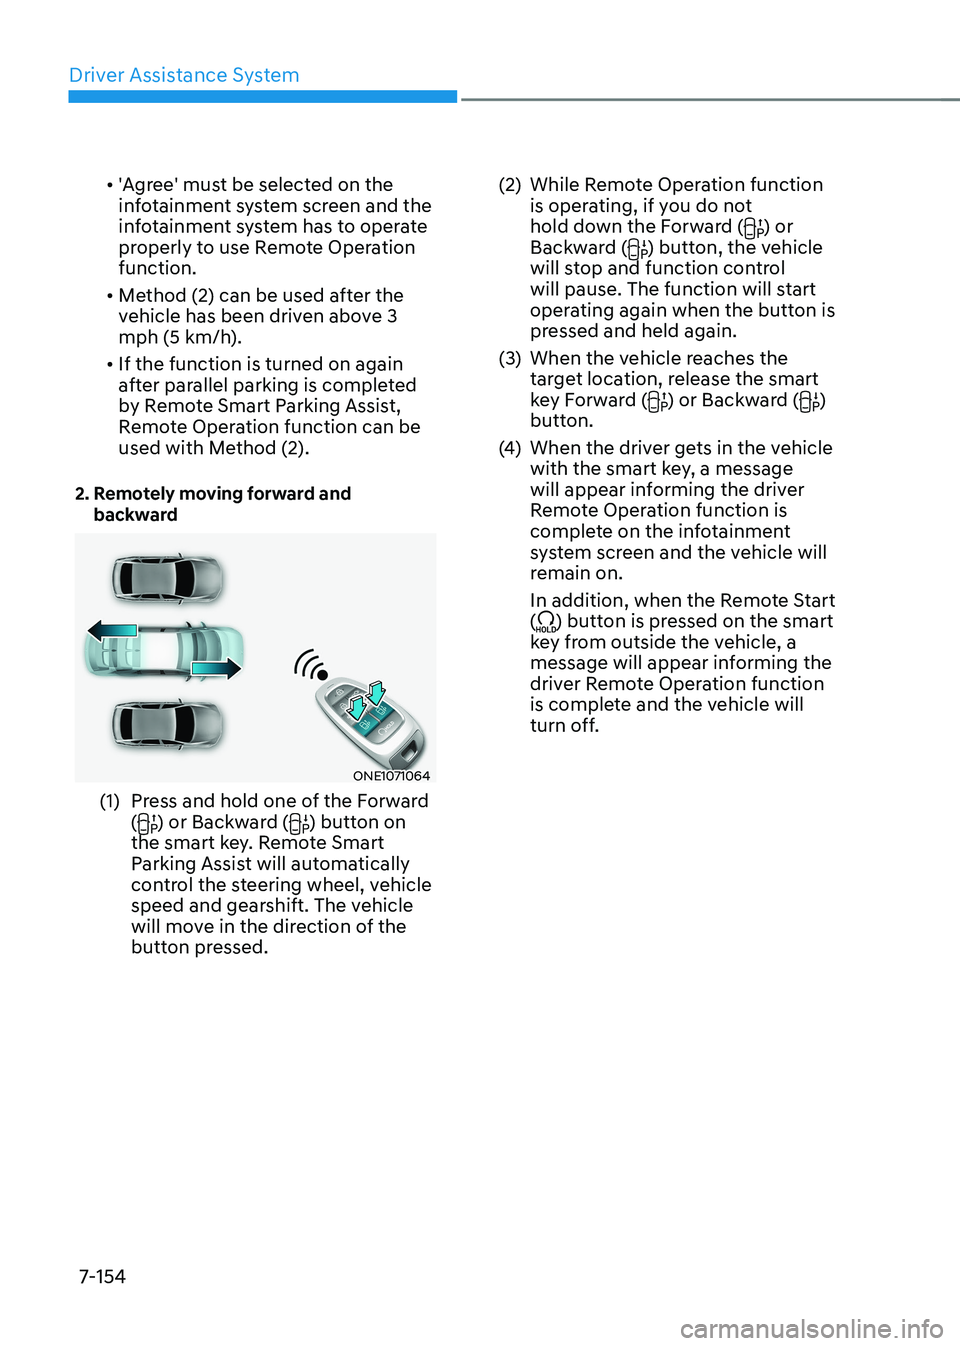
2. Remotely moving forward and backward
ONE1071064
(1) Press and hold one of the Forward (
) or Backward () button on
the smart key. Remote Smart
Parking Assist will automatically
control the steering wheel, vehicle
speed and gearshift. The vehicle
will move in the direction of the
button pressed. (2) While Remote Operation function
is operating, if you do not
hold down the Forward (
) or
Backward () button, the vehicle
will stop and function control
will pause. The function will start
operating again when the button is
pressed and held again.
(3) When the vehicle reaches the target location, release the smart
key Forward (
) or Backward ()
button.
(4) When the driver gets in the vehicle
with the smart key, a message
will appear informing the driver
Remote Operation function is
complete on the infotainment
system screen and the vehicle will
remain on.
In addition, when the Remote Start (
) button is pressed on the smart
key from outside the vehicle, a
message will appear informing the
driver Remote Operation function
is complete and the vehicle will
turn off.
Page 560 of 680

Driver Assistance System
7-158
Smart Parking, Remote Smart
Parking
Operating order
Parking function operates in the
following order:
1. Getting ready for parking
2. Searching for parking space
3. Select parking type and operating
mode
4. Smart Parking
5. Remote Smart Parking• Parking function includes Smart
Parking and Remote Smart Parking.
1. Getting ready for parking
ONE1071040
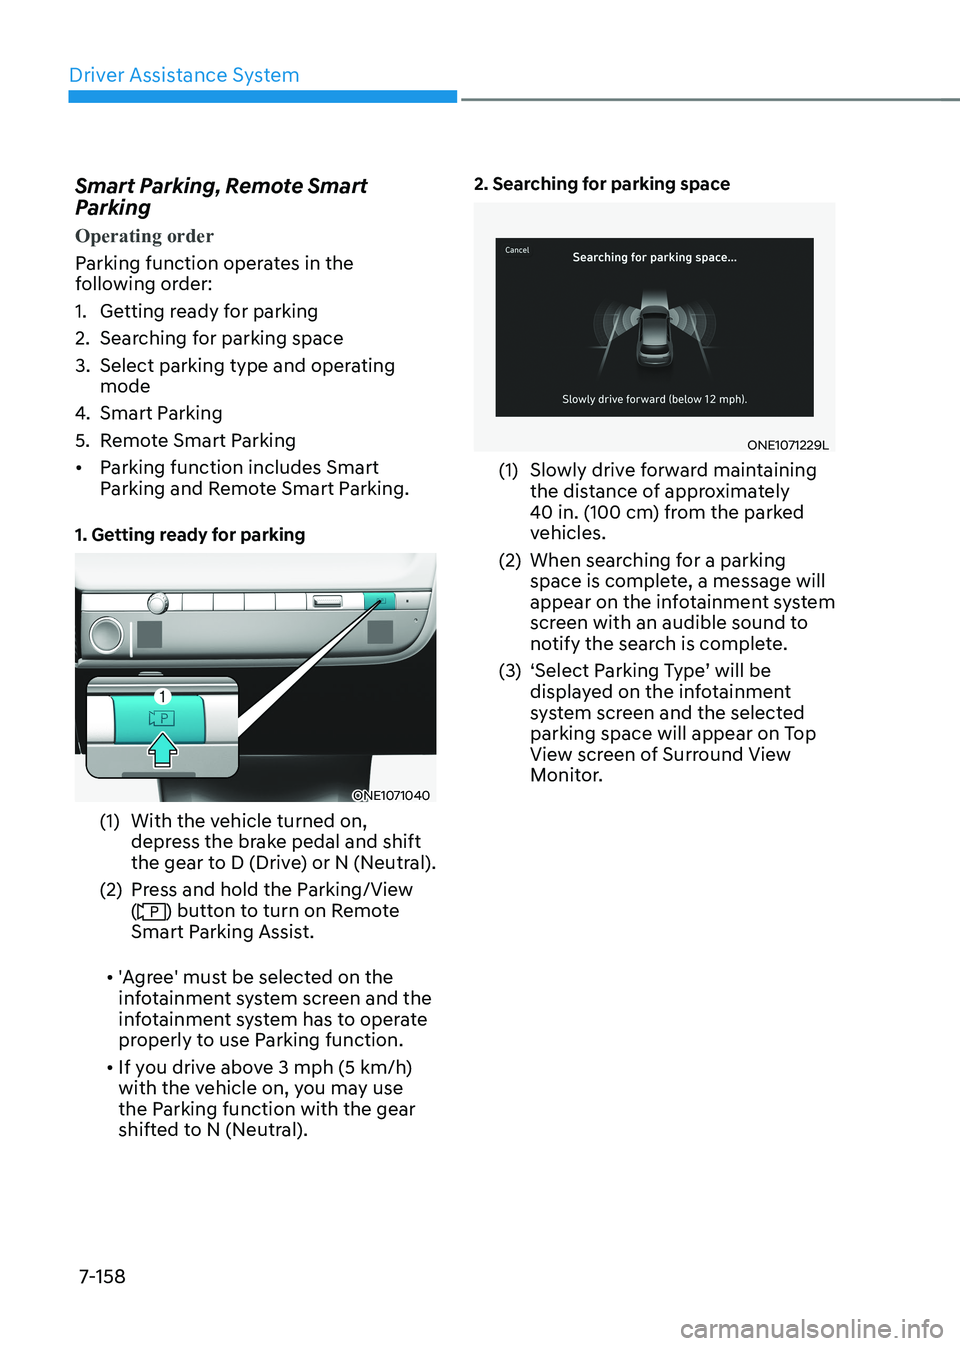
(1) With the vehicle turned on, depress the brake pedal and shift
the gear to D (Drive) or N (Neutral).
(2) Press and hold the Parking/View (
) button to turn on Remote
Smart Parking Assist.
• 'Agree' must be selected on the
infotainment system screen and the
infotainment system has to operate
properly to use Parking function.
• If you drive above 3 mph (5 km/h)
with the vehicle on, you may use
the Parking function with the gear
shifted to N (Neutral). 2. Searching for parking space
ONE1071229L
(1) Slowly drive forward maintaining the distance of approximately
40 in. (100 cm) from the parked
vehicles.
(2) When searching for a parking space is complete, a message will
appear on the infotainment system
screen with an audible sound to
notify the search is complete.
(3) ‘Select Parking Type’ will be displayed on the infotainment
system screen and the selected
parking space will appear on Top
View screen of Surround View
Monitor.
Page 561 of 680

07
7-159
•
Remote Smart Parking Assist
searches for parking spaces that are
next to parked vehicles, or parking
spaces with parked vehicles in front
or rear.
• While searching for a parking space,
when vehicle speed is above 12 mph
(20 km/h), a message will appear
on the infotainment system screen
informing you to slow down. When
vehicle speed is above 18 mph (30
km/h), Parking function will turn off.
• Searching for a parking space will
be completed when there is enough
space to move the vehicle in
addition to the parking space.
• Even if an audible sound is heard
to notify that searching for a
parking space is complete, search
completion can be canceled
immediately depending on
surroundings.
Information
OJX1070232N
[A] : Searching for parking space • If the distance is below 20 in. (50 cm)
or over 59 in. (150 cm), Remote Smart
Parking Assist may not be able to
search for a parking space.
• If you do not maintain a certain
distance from the parked vehicle, the
performance to search for a parking
space may reduce.
• Even if a diagonal parking space is
searched as a parking space, parking is
not assisted properly.
• Due to abnormal performance of the
ultrasonic sensor or the influence of
the surroundings, Parking function
may not be able to search for a parking
space even if there is a parking space,
or may search for a space that is not
suitable for parking.
Page 568 of 680

Driver Assistance System
7-166
•
Remote Smart Parking
- The steering wheel is steered
- The gear is shifted
- Operating EPB while the vehicle is moving
- The hood is open
- The brake pedal or accelerator pedal is depressed when all the
doors are closed
- The smart key is outside the vehicle when the brake pedal is depressed
while the driver's door is open.
- Rapid acceleration occurs
- Vehicle skid occurs
- The wheel is stuck by an obstacle and cannot move
- There are pedestrians, animals or objects at the front and rear of the
vehicle at the same time
- Approximately 3 minutes and 50 seconds have past after Remote
Smart Parking function has started
to operate
- The slope of the road exceeds the operational range
- The function is paused for more than 1 minute
- The steering wheel, gearshift, braking, and drive controls are not
working properly
- There is a problem with the smart key or the smart key battery is low
- ABS, TCS or ESC system operates due to slippery road conditions
- The alarm of the Theft Alarm System sounds
- The Charging door opens
- The EV mode is utility mode
When Remote Smart Parking function is
canceled, the vehicle will automatically
stop, shift the gear to P (Park) and
engage EPB (Electronic Parking Brake). Smart Exit
Operating order
Smart Exit function operates in the
following order:
1. Getting ready for exit
2. Checking space
3. Select exit direction
4.
Smart Exit
1. Getting ready for exit
ONE1071040
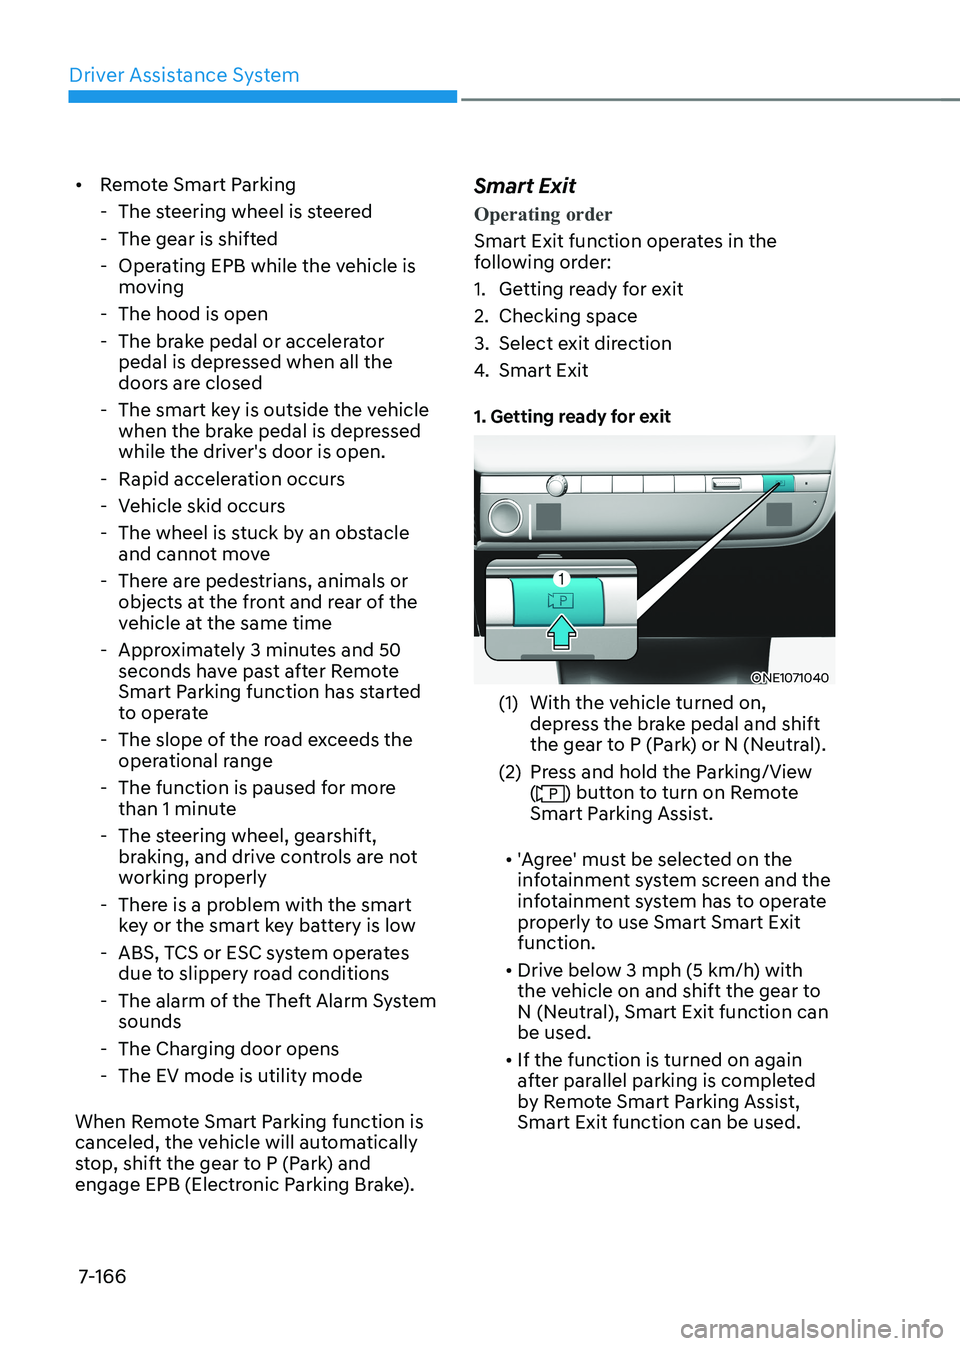
(1) With the vehicle turned on, depress the brake pedal and shift
the gear to P (Park) or N (Neutral).
(2) Press and hold the Parking/View (
) button to turn on Remote
Smart Parking Assist.
• 'Agree' must be selected on the
infotainment system screen and the
infotainment system has to operate
properly to use Smart Smart Exit function.
• Drive below 3 mph (5 km/h) with
the vehicle on and shift the gear to
N (Neutral), Smart Exit function can be used.
• If the function is turned on again
after parallel parking is completed
by Remote Smart Parking Assist, Smart Exit function can be used.
Page 587 of 680

08
8-9
Low Tire Pressure
Warning Light
Low Tire Pressure Position and
Tire Pressure Telltale
ONE1081021L
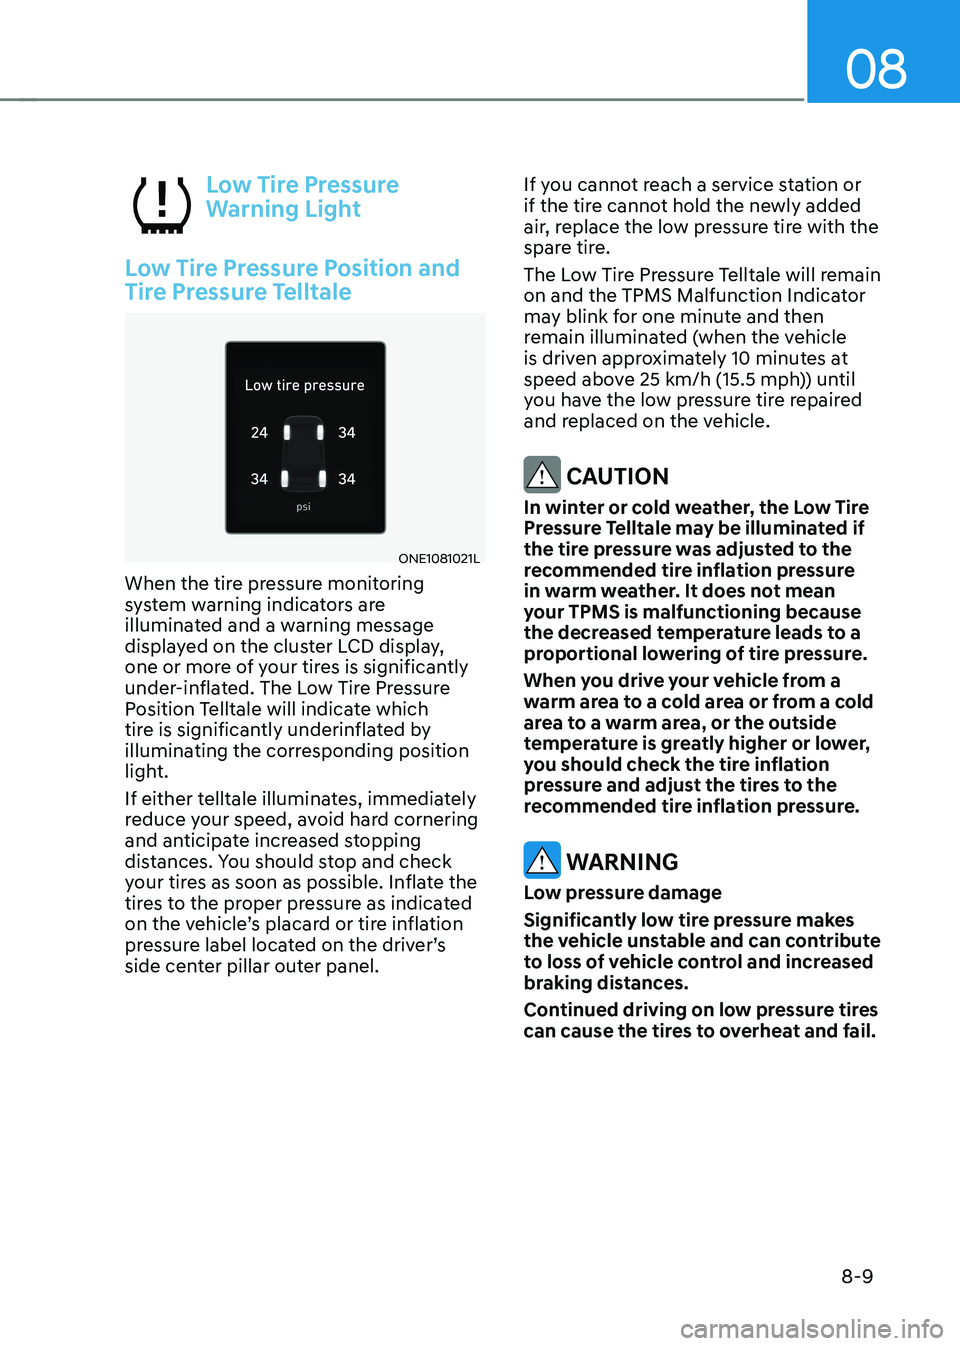
When the tire pressure monitoring
system warning indicators are
illuminated and a warning message
displayed on the cluster LCD display,
one or more of your tires is significantly
under-inflated. The Low Tire Pressure
Position Telltale will indicate which
tire is significantly underinflated by
illuminating the corresponding position
light.
If either telltale illuminates, immediately
reduce your speed, avoid hard cornering
and anticipate increased stopping
distances. You should stop and check
your tires as soon as possible. Inflate the
tires to the proper pressure as indicated
on the vehicle’s placard or tire inflation
pressure label located on the driver’s
side center pillar outer panel. If you cannot reach a service station or
if the tire cannot hold the newly added
air, replace the low pressure tire with the
spare tire.
The Low Tire Pressure Telltale will remain
on and the TPMS Malfunction Indicator
may blink for one minute and then
remain illuminated (when the vehicle
is driven approximately 10 minutes at
speed above 25 km/h (15.5 mph)) until
you have the low pressure tire repaired
and replaced on the vehicle.
CAUTION
In winter or cold weather, the Low Tire
Pressure Telltale may be illuminated if
the tire pressure was adjusted to the
recommended tire inflation pressure
in warm weather. It does not mean
your TPMS is malfunctioning because
the decreased temperature leads to a
proportional lowering of tire pressure.
When you drive your vehicle from a
warm area to a cold area or from a cold
area to a warm area, or the outside
temperature is greatly higher or lower,
you should check the tire inflation
pressure and adjust the tires to the
recommended tire inflation pressure.
WARNING
Low pressure damage
Significantly low tire pressure makes
the vehicle unstable and can contribute
to loss of vehicle control and increased
braking distances.
Continued driving on low pressure tires
can cause the tires to overheat and fail.
Page 588 of 680

Emergency Situations
8-10
TPMS (Tire Pressure
Monitoring System)
Malfunction Indicator
The TPMS Malfunction Indicator
will illuminate after it blinks for
approximately one minute when there
is a problem with the Tire Pressure
Monitoring System.
Have the system checked by an
authorized HYUNDAI dealer as soon as possible.
NOTICE
If there is a malfunction with the TPMS,
the Low Tire Pressure Position Telltale
will not be displayed even though the
vehicle has an under-inflated tire.
NOTICE
The TPMS Malfunction Indicator may
illuminate after blinking for one minute
if the vehicle is near electric power
supply cables or radio transmitters
such as police stations, government
and public offices, broadcasting
stations, military installations, airports,
transmitting towers, etc.
Additionally, the TPMS Malfunction
Indicator may illuminate if snow chains
are used or electronic devices such as
computers, chargers, remote starters,
navigation, etc. This may interfere with
normal operation of the TPMS.
Changing a Tire with TPMS
If you have a flat tire, the Low Tire
Pressure and Position telltales will come
on. Have the flat tire repaired by an
authorized HYUNDAI dealer as soon as
possible or replace the flat tire with the
spare tire.
NOTICE
It is recommended that you do not use a
puncture-repairing agent not approved
by an authorized HYUNDAI dealer or the
equivalent specified for your vehicle
to repair and/or inflate a low pressure
tire. Tire sealant not approved by an
authorized HYUNDAI dealer or the
equivalent specified for your vehicle
may damage the tire pressure sensor.
The spare tire (if equipped) does not
come with a tire pressure monitoring
sensor. When the low pressure tire or
the flat tire is replaced with the spare
tire, the Low Tire Pressure Telltale will
remain on. Also, the TPMS Malfunction
Indicator will illuminate after blinking
for one minute if the vehicle is driven
at speed above 25 km/h (15.5 mph) for
approximately 10 minutes. Once the original wheel equipped with
a tire pressure monitoring sensor is
reinflated to the recommended pressure
and reinstalled on the vehicle, the
Low Tire Pressure Telltale and TPMS
Malfunction Indicator will go off within a
few minutes of driving.
If the indicators do not extinguish after
a few minutes, consult an authorized
HYUNDAI dealer.
Page 590 of 680

Emergency Situations
8-12
ONE1081007
For safe operation, carefully read and
follow the instructions in this manual
before use.
(1) Compressor
(2) Sealant bottle
The tire mobility kit is a temporary fix
to the tire, have the tire inspected by
an authorized HYUNDAI dealer or the
equivalent approved for your vehicle as soon as possible.
CAUTION
When two or more tires are flat, do not
use the tire mobility kit because the
supported one sealant of Tire Mobility
Kit is only used for one flat tire.
WARNING
Do not use the Tire Mobility Kit to repair
punctures in the tire walls. This can
result in an accident due to tire failure.
WARNING
Have your tire repaired as soon as
possible. The tire may lose air pressure
at any time after inflating with the Tire
Mobility Kit.
Introduction
With the Tire Mobility Kit you stay mobile
even after experiencing a tire puncture.
The compressor and sealing compound
system effectively and comfortably seals
most punctures in a passenger car tire
caused by nails or similar objects and
reinflates the tire.
After you ensure that the tire is properly
sealed you can drive cautiously on the
tire (distance up to 120 miles (200 km))
at a max. speed of ( 50 mph (80 km/h))
in order to reach a service station or tire
dealer for the tire replacement.
It is possible that some tires, especially
with larger punctures or damage to the
sidewall, cannot be sealed completely.
Air pressure loss in the tire may adversely
affect tire performance.
For this reason, you should avoid abrupt
steering or other driving maneuvers,
especially if the vehicle is heavily loaded
or if a trailer is in use.
The Tire Mobility Kit is not designed
or intended as a permanent tire repair
method and is to be used for one tire
only.
This instruction shows you step by step
how to temporarily seal the puncture
simply and reliably.
Read the section “Notes on the safe use
of the Tire Mobility Kit”.
WARNING
Do not use the TMK if a tire is severely
damaged by driving run flat or with
insufficient air pressure.
Only punctured areas located within the
tread region of the tire can be sealed using the TMK.
if you haVe a flat tire (with tire mobility Kit,
if equipped)
Page 594 of 680

Emergency Situations
8-16
ONE1081010
5. Plug the compressor power cord (4) into the vehicle power outlet.
NOTICE
Only use the front passenger side
power outlet when connecting the
power cord.
6. With the vehicle ON (
indicator ON), switch on
the compressor and let it run for
approximately 5~7 minutes to fill the
sealant up to proper pressure. (refer
to the Tire and Wheels, chapter 2).
The inflation pressure of the tire after
filling is unimportant and will be
checked/corrected later.
Be careful not to overinflate the tire
and stay away from the tire when filling it.
CAUTION
Tire pressure
Do not attempt to drive your vehicle if
the tire pressure is below 200 kPa (29
psi). This could result in an accident due
to sudden tire failure. 7.
Switch off the compressor.
8. Detach the hoses from the sealant bottle connector and from the tire
valve.
Return the Tire Mobility Kit to its storage
location in the vehicle.
OLMF064106
9. Immediately drive approximately 4~6
miles (7~10 km or, about 10min) to
evenly distribute the sealant in the
tire.
Do not exceed a speed of 50 mph (80
km/h). If possible, do not fall below a
speed of 12 mph (20 km/h).
While driving, if you experience any
unusual vibration, ride disturbance or
noise, reduce your speed and drive with
caution until you can safely pull off of the
side of the road.
Call for road side service or towing.