2022 TOYOTA SUPRA steering
[x] Cancel search: steeringPage 71 of 498
69
3
3-1. CONTROLS
CONTROLS
• A language must be set using
Toyota Supra Command that is
supported by the voice control
system. To select the language,
see page 71.
• Always say the commands in the
language of the voice control
system.
1 Press the button on the
steering wheel.
2 Wait for the acoustic signal.
3 Say the command.
It is possible that no further spoken
commands are available. In this
case, switch to Toyota Supra Com-
mand to operate the function.
Most of the menu items on the Con-
trol Display can be said as com-
mands.
Commands from other menus can
be spoken as well.
Some list entries, for example tele-
phone book entries, can also be
selected using the voice control
system. When doing this, say the
list entries exactly as they are
shown in the relevant list.
The following is displayed in the
upper area of the Control Display:
• Some of the possible commands
for the current menu.
• Some of the possible commands
from other menus.
• Voice recognition status.
• Encrypted connection unavail-
able.
The commands for the menu items
are spoken exactly as they are
selected using the Controller.
1 If necessary, switch on enter-
tainment audio output.
2 Press the button on the
steering wheel.
3 ›Media and radio‹
4 ›Sound‹
• To have voice command options
read aloud, say: ›Voice com-
Operating requirements
Activating the voice control
system
This symbol indicates that the
voice control system is
active.
Switching off the voice con-
trol system
Press the button on the steer-
ing wheel or say ›Cancel‹.
Possible commands
General
Displaying possible commands
An example: calling up sound set-
tings
Help with the voice control system
Page 96 of 498
943-1. CONTROLS
1Hold the back of the remote
control against the mark on the
steering column. Pay attention
to the display in the instrument
cluster.
2 If the remote control is detected:
Switch on drive-ready state
within 10 seconds.
If the remote control is not
detected, change the position of the
remote control slightly and repeat
the procedure.
What provisions can be made to
enable a vehicle to be opened if the
remote control has accidentally
been locked inside the vehicle?
• The Remote Services of the
Toyota Supra Connect app can
be used to lock and unlock a
vehicle.
This requires an active Toyota Supra
Connect contract and the Toyota Supra
Connect app must be installed on a
smartphone.
• Unlocking of the vehicle can be
requested via the Concierge Ser-
vices.
This requires an active Toyota Supra
Connect contract.
With the integrated key, the driver's
door can be unlocked and locked
without the remote control.
The integrated key also fits in the
glove box.
Use the integrated key to operate
the key switch for front passenger
airbags, see page 202.
Frequently Asked Questions
Integrated key
General
Safety notes
WA R N I N G
With some country specifications,
unlocking from the inside is only pos-
sible with special knowledge.
There is a risk of injury or danger to
life if persons remain in the vehicle for extended periods and are exposed to
extreme temperatures as a result. Do
not lock the vehicle from the outside when there is someone inside it.
NOTICE
The door lock is firmly connected to
the door. The door handle can be moved. Pulling the door handle when
the integrated key is inserted can
damage the paint or the integrated key. There is a danger of damage to
property. Pull out the integrated key
before pulling on the outer door han- dle.
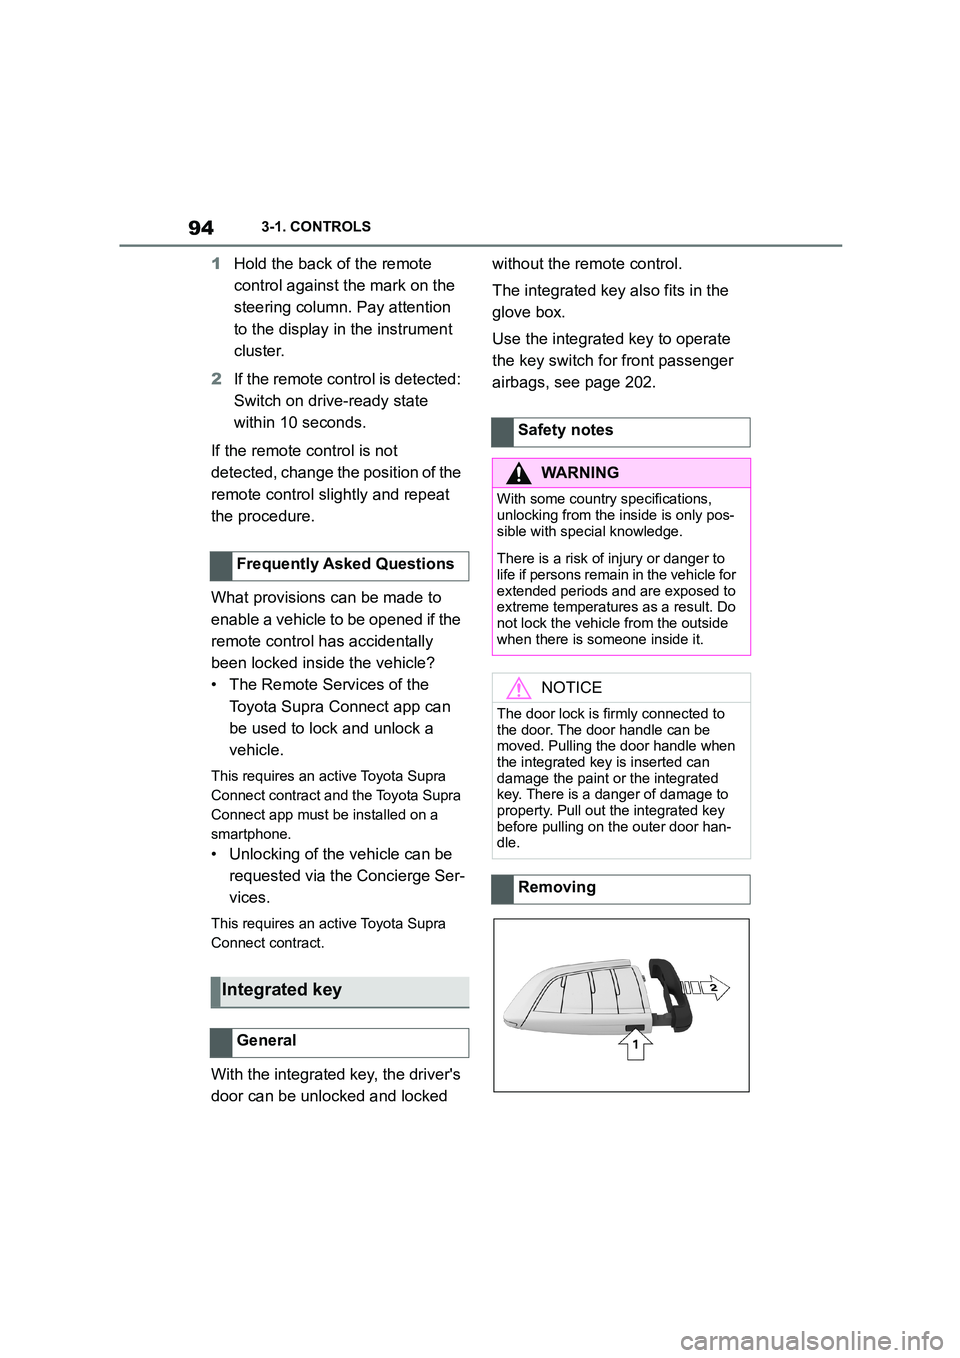
Removing
Page 116 of 498
1143-1. CONTROLS
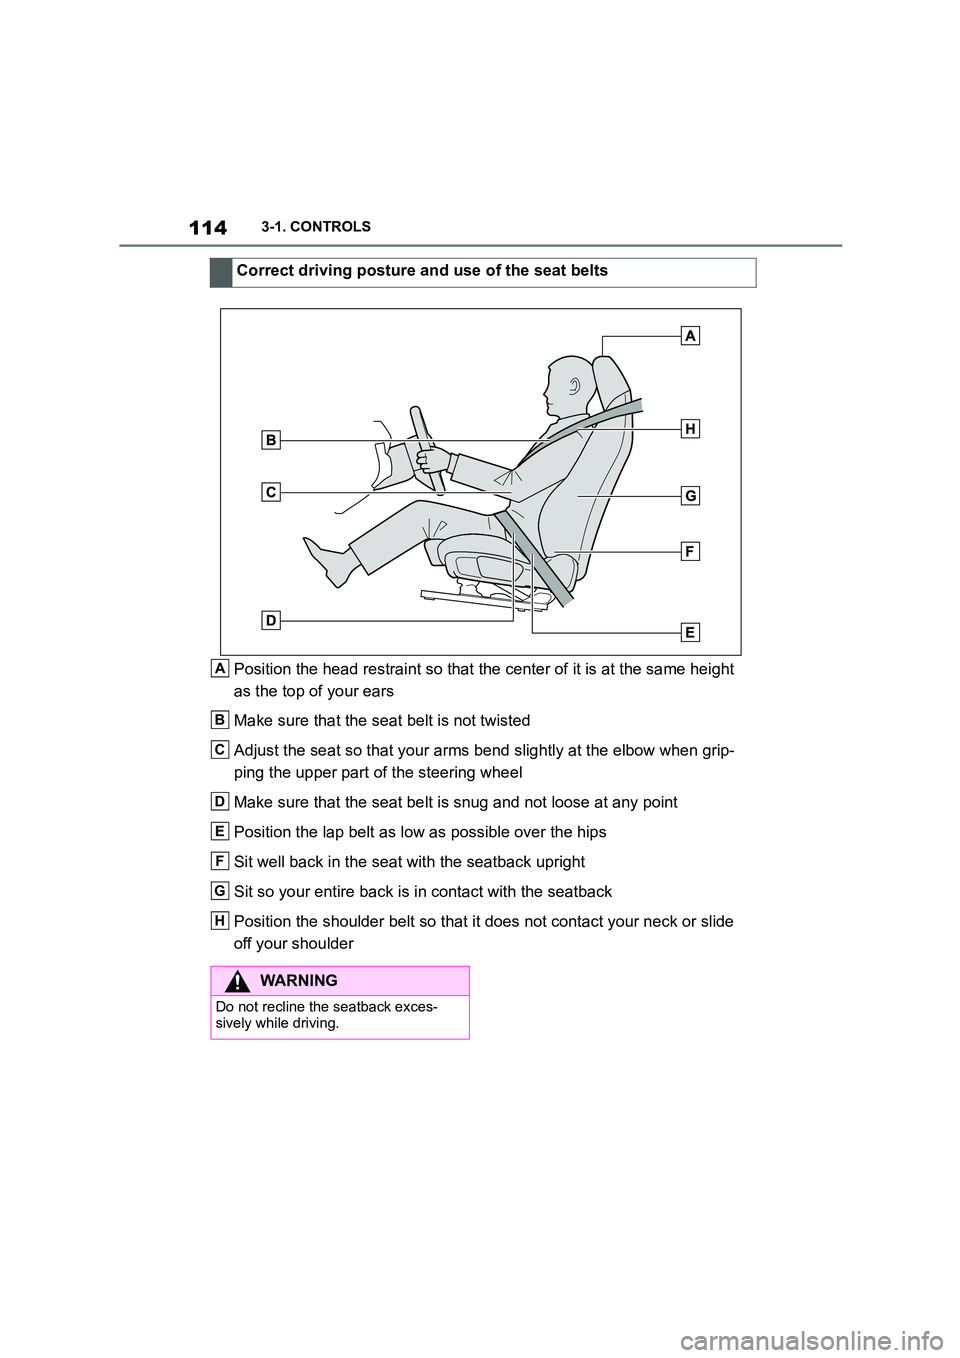
Position the head restraint so that the center of it is at the same height
as the top of your ears
Make sure that the seat belt is not twisted
Adjust the seat so that your arms bend slightly at the elbow when grip-
ping the upper part of the steering wheel
Make sure that the seat belt is snug and not loose at any point
Position the lap belt as low as possible over the hips
Sit well back in the seat with the seatback upright
Sit so your entire back is in contact with the seatback
Position the shoulder belt so that it does not contact your neck or slide
off your shoulder
Correct driving posture and use of the seat belts
A
B
C
D
E
F
G
H
WA R N I N G
Do not recline the seatback exces-
sively while driving.
Page 121 of 498
119
3
3-1. CONTROLS
CONTROLS
• Keep the photocells clean.
• Do not obstruct the zone
between the rear-view mirror and
the windscreen.
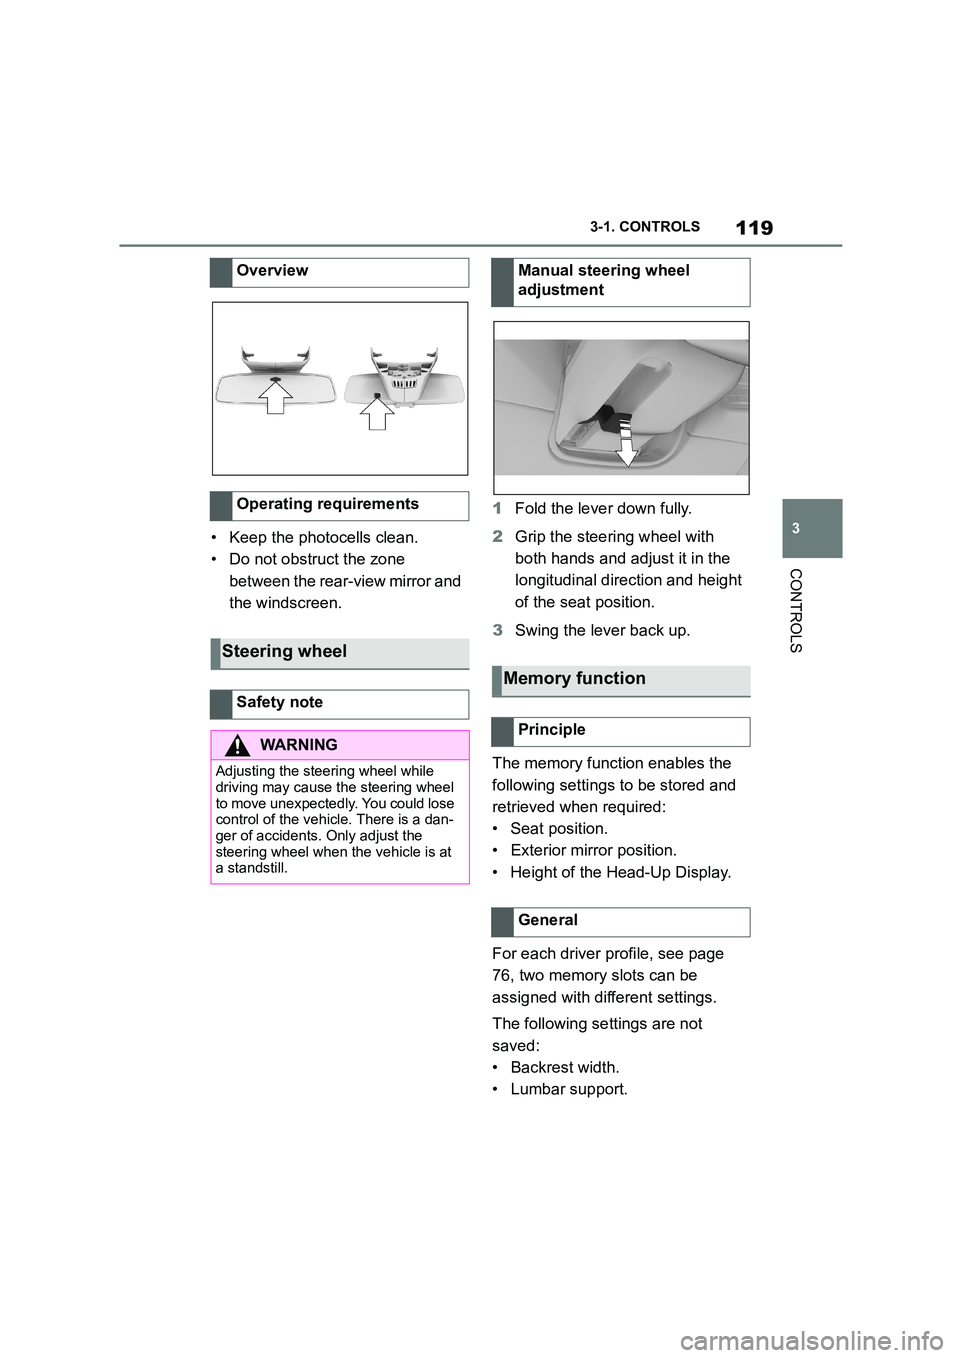
1 Fold the lever down fully.
2 Grip the steering wheel with
both hands and adjust it in the
longitudinal direction and height
of the seat position.
3 Swing the lever back up.
The memory function enables the
following settings to be stored and
retrieved when required:
• Seat position.
• Exterior mirror position.
• Height of the Head-Up Display.
For each driver profile, see page
76, two memory slots can be
assigned with different settings.
The following settings are not
saved:
• Backrest width.
• Lumbar support.
Overview
Operating requirements
Steering wheel
Safety note
WA R N I N G
Adjusting the steering wheel while
driving may cause the steering wheel
to move unexpectedly. You could lose control of the vehicle. There is a dan-
ger of accidents. Only adjust the
steering wheel when the vehicle is at a standstill.
Manual steering wheel
adjustment
Memory function
Principle
General
Page 122 of 498
1203-1. CONTROLS
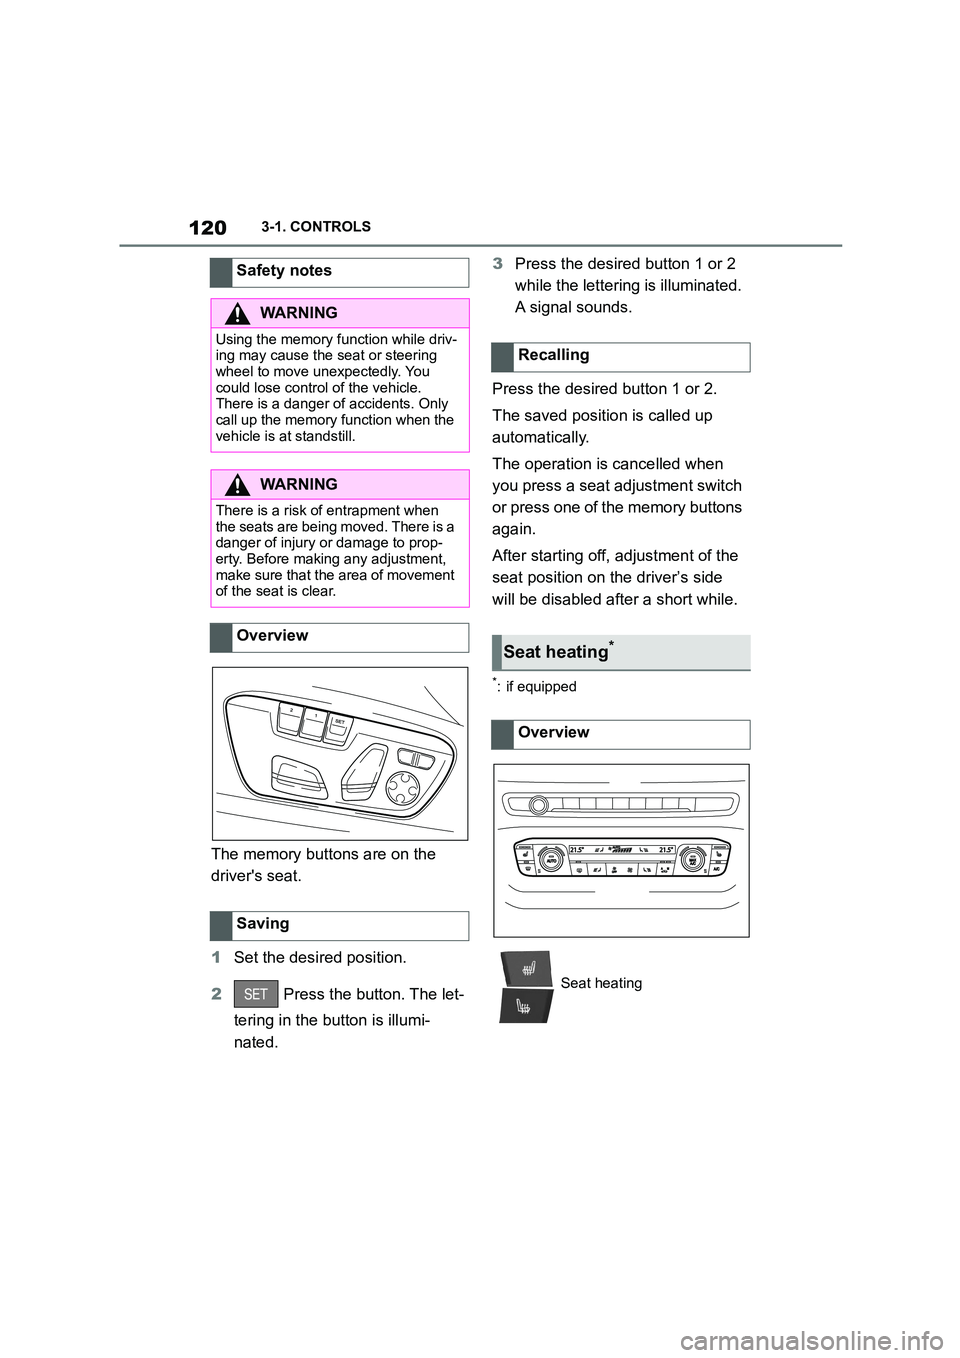
The memory buttons are on the
driver's seat.
1 Set the desired position.
2 Press the button. The let-
tering in the button is illumi-
nated.
3 Press the desired button 1 or 2
while the lettering is illuminated.
A signal sounds.
Press the desired button 1 or 2.
The saved position is called up
automatically.
The operation is cancelled when
you press a seat adjustment switch
or press one of the memory buttons
again.
After starting off, adjustment of the
seat position on the driver’s side
will be disabled after a short while.
*: if equipped
Safety notes
WA R N I N G
Using the memory function while driv-
ing may cause the seat or steering wheel to move unexpectedly. You
could lose control of the vehicle.
There is a danger of accidents. Only call up the memory function when the
vehicle is at standstill.
WA R N I N G
There is a risk of entrapment when the seats are being moved. There is a
danger of injury or damage to prop-
erty. Before making any adjustment, make sure that the area of movement
of the seat is clear.
Overview
Saving
Recalling
Seat heating*
Overview
Seat heating
Page 148 of 498
1463-1. CONTROLS
On steep downward gradients.
Brake not pressed strongly
enough.
High outside temperature and
operation of the automatic air
conditioning.
Interior not heated or cooled to
the desired temperature.
Where there is a risk of conden-
sation when the automatic air
conditioning is switched on.
Engine or other parts not at oper-
ating temperature.
Engine cooling is required.
Sharp steering angle or steering
operation.
Vehicle battery is heavily dis-
charged.
At high altitudes.
Bonnet is unlocked.
Park Assistant is activated.
Stop-and-go traffic.
Selector lever position in N or R.
After reversing.
Use of fuel with high ethanol
content.
For driving off, the engine automati-
cally starts under the following con-
ditions:
By releasing the brake pedal.
After starting the engine, accelerate
as normal.
After an automatic shut down, the
engine will not rest art automatically,
if one of the following conditions is
met:
Driver's seat belt unbuckled and
driver's door open.
Bonnet has been unlocked.
Several indicator lamps illuminate
for various lengths of time.
The engine can only be started
using the start/stop button.
Even if you do not want to drive off,
the engine restarts automatically in
the following situations:
Very high temperature in the
interior when the cooling function
is switched on.
Very low temperature in the inte-
rior when the heating is switched
on.
Where there is a risk of conden-
sation when the automatic air
conditioning is switched on.
When the steering wheel is
turned.
Shift from selector lever position
D to N or R.
Engine start
Operating requirements
Driving off
Safety function
System limits
Page 159 of 498
157
3
3-1. CONTROLS
CONTROLS
3 Depress the brake pedal.
4 Touch the selector lever lock
and engage selector lever posi-
tion N.
5 Switch off drive-ready state.
Standby state then remains switched
on and a vehicle message is shown.
The vehicle can now roll.
Selector lever position P is auto-
matically engaged after approxi-
mately 35 minutes.
If there is a fault, it may not be pos-
sible to change the selector lever
position.
Unlock the transmission lockout
electronically if necessary, see
page 158.
Kick-down enables you to achieve
maximum performance.
Press the accelerator pedal down
beyond the regular full-throttle posi-
tion; resistance will be felt.
The gears can be changed manu-
ally in manual operation.
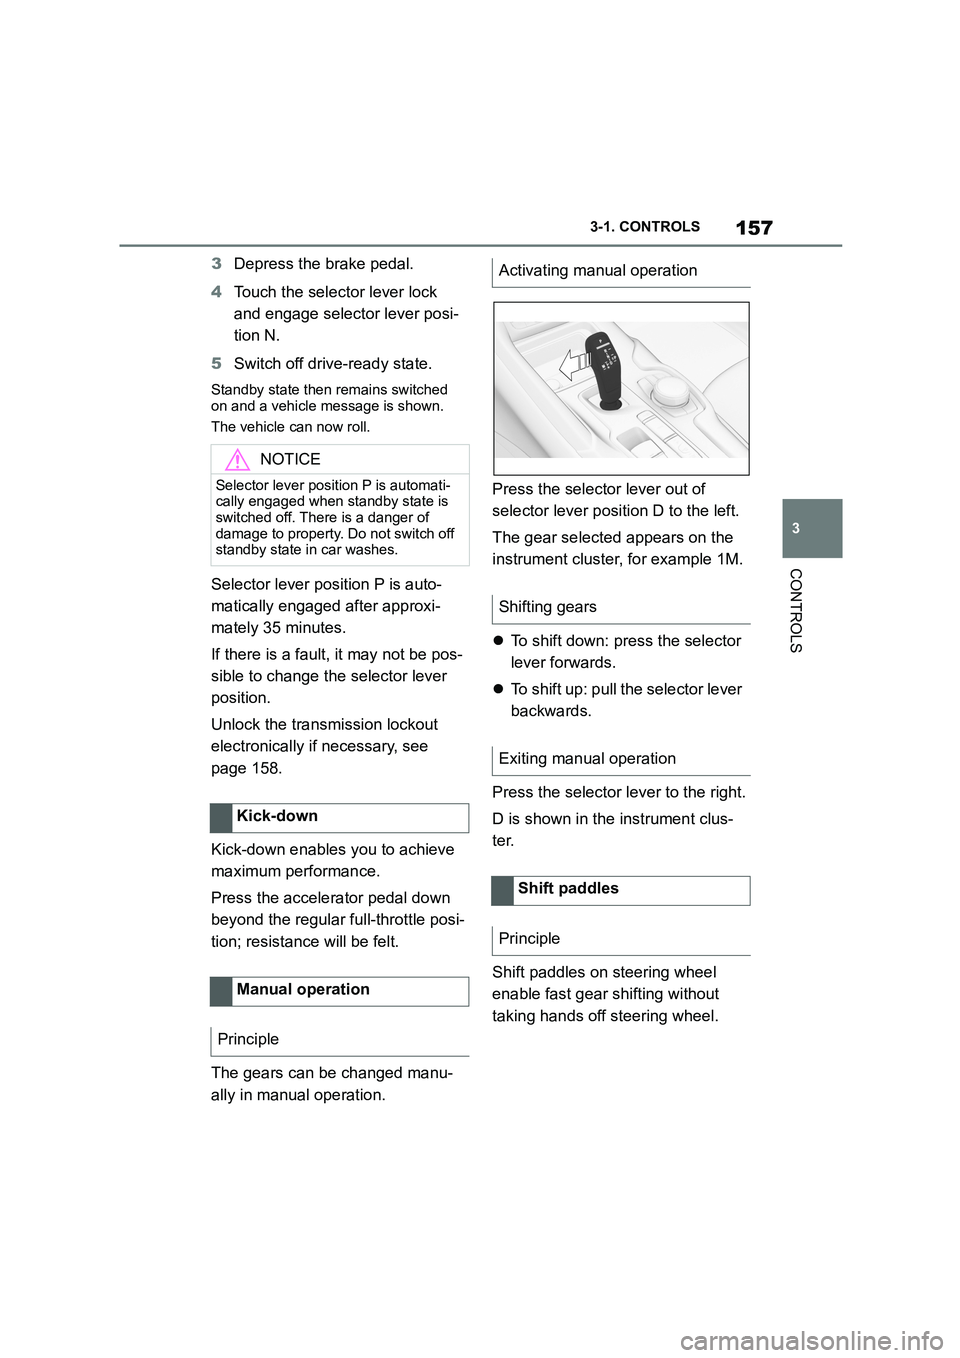
Press the selector lever out of
selector lever position D to the left.
The gear selected appears on the
instrument cluster, for example 1M.
To shift down: press the selector
lever forwards.
To shift up: pull the selector lever
backwards.
Press the selector lever to the right.
D is shown in the instrument clus-
ter.
Shift paddles on steering wheel
enable fast gear shifting without
taking hands off steering wheel.
NOTICE
Selector lever position P is automati- cally engaged when standby state is
switched off. There is a danger of
damage to property. Do not switch off standby state in car washes.
Kick-down
Manual operation
Principle
Activating manual operation
Shifting gears
Exiting manual operation
Shift paddles
Principle
Page 161 of 498
159
3
3-1. CONTROLS
CONTROLS
can turn the engine.
Before the transmission lockout is
released, apply the parking brake
to prevent the ve hicle from rolling
away.
1 Apply the brakes and keep them
applied.
2 Press the start/stop button. The
starter must be heard to start
turning. Press and hold the
start/stop button.
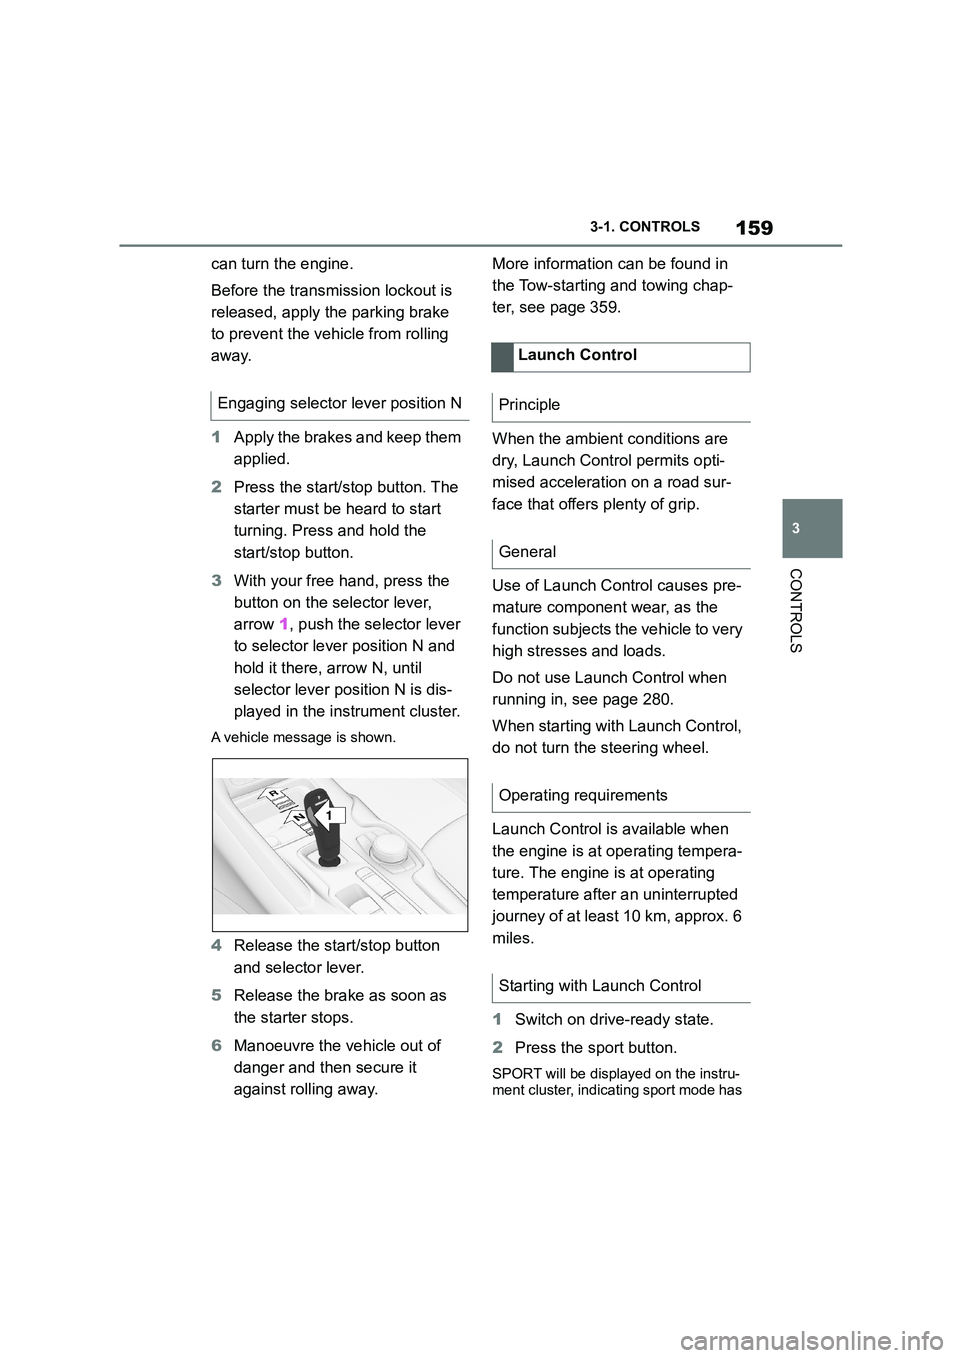
3 With your free hand, press the
button on the selector lever,
arrow 1, push the selector lever
to selector lever position N and
hold it there, arrow N, until
selector lever position N is dis-
played in the instrument cluster.
A vehicle message is shown.
4 Release the start/stop button
and selector lever.
5 Release the brake as soon as
the starter stops.
6 Manoeuvre the vehicle out of
danger and then secure it
against rolling away.
More information can be found in
the Tow-starting and towing chap-
ter, see page 359.
When the ambient conditions are
dry, Launch Control permits opti-
mised acceleration on a road sur-
face that offers plenty of grip.
Use of Launch Control causes pre-
mature component wear, as the
function subjects t he vehicle to very
high stresses and loads.
Do not use Launch Control when
running in, see page 280.
When starting with Launch Control,
do not turn the steering wheel.
Launch Control is available when
the engine is at operating tempera-
ture. The engine is at operating
temperature after an uninterrupted
journey of at least 10 km, approx. 6
miles.
1 Switch on drive-ready state.
2 Press the sport button.
SPORT will be displayed on the instru-
ment cluster, indicating sport mode has
Engaging selector lever position N
1
R
N
Launch Control
Principle
General
Operating requirements
Starting with Launch Control