2022 TOYOTA COROLLA steering
[x] Cancel search: steeringPage 95 of 678
93
2
2-1. Instrument cluster
Vehicle status information and indicators
■Display
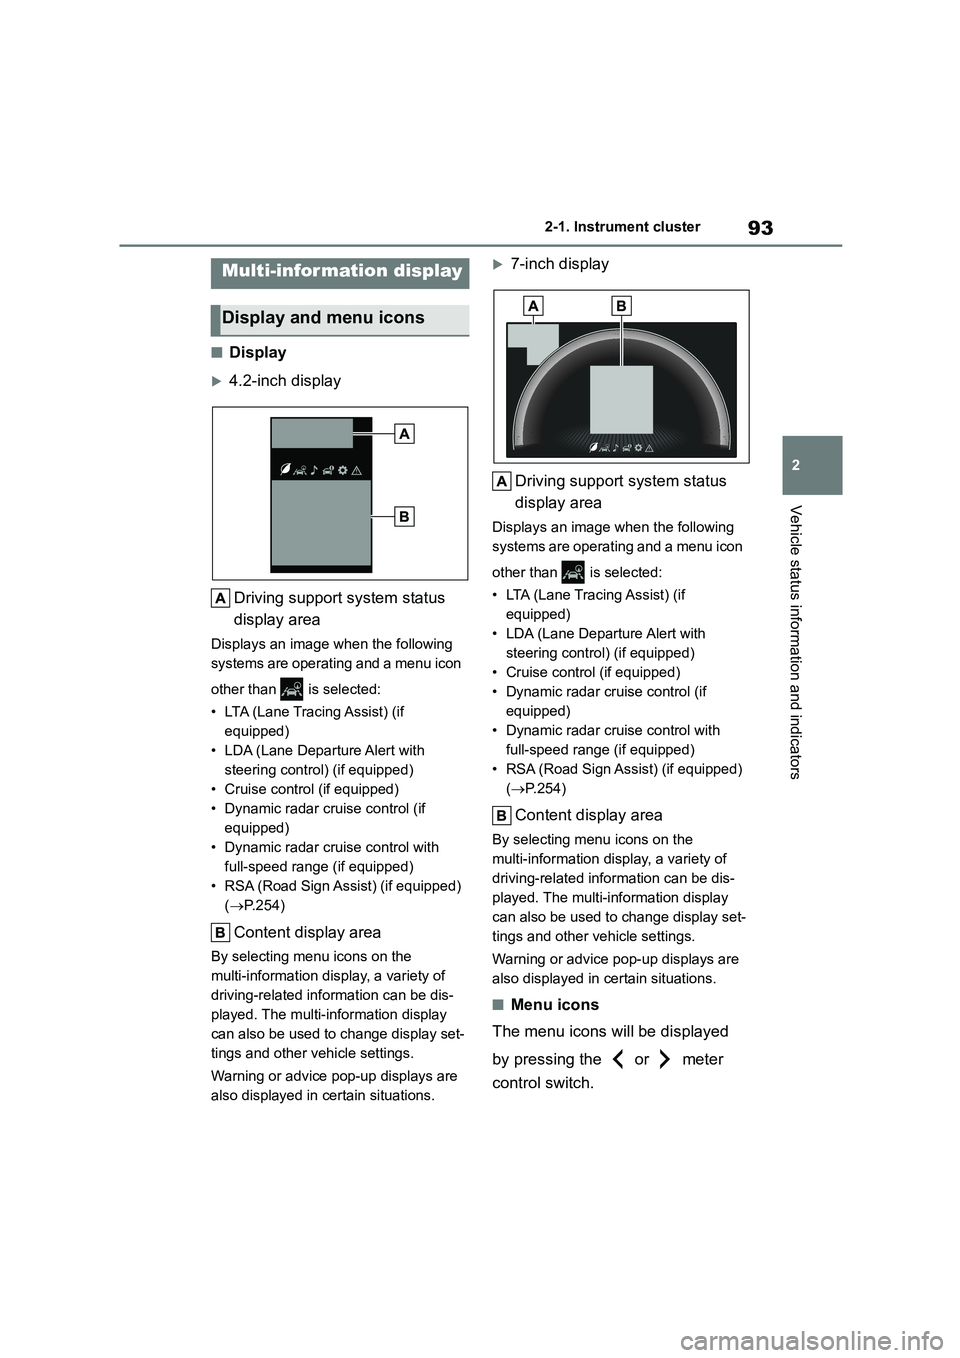
4.2-inch display
Driving support system status
display area
Displays an image when the following
systems are operating and a menu icon
other than is selected:
• LTA (Lane Tracing Assist) (if
equipped)
• LDA (Lane Departure Alert with
steering control) (if equipped)
• Cruise control (if equipped)
• Dynamic radar cruise control (if
equipped)
• Dynamic radar cruise control with
full-speed range (if equipped)
• RSA (Road Sign Assist) (if equipped)
( P.254)
Content display area
By selecting menu icons on the
multi-information display, a variety of
driving-related information can be dis-
played. The multi-information display
can also be used to change display set-
tings and other vehicle settings.
Warning or advice pop-up displays are
also displayed in certain situations.
7-inch display
Driving support system status
display area
Displays an image when the following
systems are operating and a menu icon
other than is selected:
• LTA (Lane Tracing Assist) (if
equipped)
• LDA (Lane Departure Alert with
steering control) (if equipped)
• Cruise control (if equipped)
• Dynamic radar cruise control (if
equipped)
• Dynamic radar cruise control with
full-speed range (if equipped)
• RSA (Road Sign Assist) (if equipped)
( P.254)
Content display area
By selecting menu icons on the
multi-information display, a variety of
driving-related information can be dis-
played. The multi-information display
can also be used to change display set-
tings and other vehicle settings.
Warning or advice pop-up displays are
also displayed in certain situations.
■Menu icons
The menu icons will be displayed
by pressing the or meter
control switch.
Multi-information display
Display and menu icons
Page 99 of 678
97
2
2-1. Instrument cluster
Vehicle status information and indicators
■Driving support system infor-
mation
Select to display the operational
status of the following systems:
LTA (Lane Tracing Assist) (if
equipped) ( P.209)
LDA (Lane Departure Alert with
steering control) (if equipped)
( P.219)
Cruise control (if equipped)
( P.249)
Dynamic radar cruise control (if
equipped) ( P.238)
Dynamic radar cruise control
with full-speed range (if
equipped) ( P.227)
■Navigation system-linked dis-
play (if equipped)
Select to display the following navi-
gation system-linked information:
Route guidance to destination
Compass display (heading-up
display)
■Route guidance to destination dis-
play
When the route guidance to destination
display is enabled on the head-up dis-
play, it will not be displayed on the multi-information display. ( P.101)
Select to enable selection of an
audio source or track on the meter
using the meter control switches.
This menu icon can be set to be dis-
played/not displayed in .
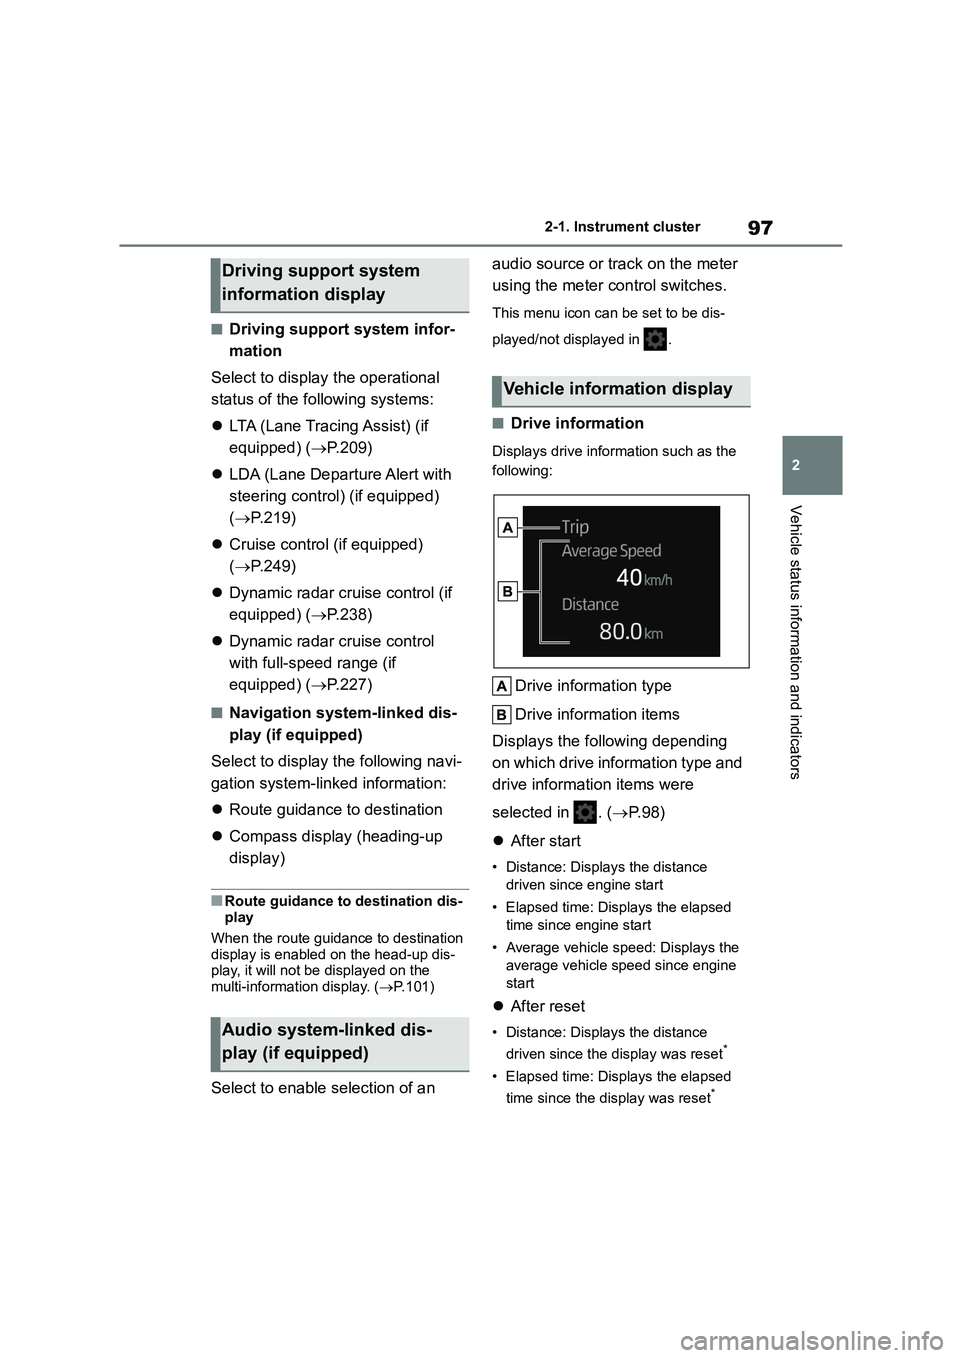
■Drive information
Displays drive information such as the
following:
Drive information type
Drive information items
Displays the following depending
on which drive information type and
drive information items were
selected in . ( P. 9 8 )
After start
• Distance: Displays the distance
driven since engine start
• Elapsed time: Displays the elapsed
time since engine start
• Average vehicle speed: Displays the
average vehicle speed since engine
start
After reset
• Distance: Displays the distance
driven since the display was reset*
• Elapsed time: Displays the elapsed
time since the display was reset*
Driving support system
information display
Audio system-linked dis-
play (if equipped)
Vehicle information display
Page 104 of 678
1022-1. Instrument cluster
head-up display.
■Enabling/disabling of the head-up
display
If the head-up display is disabled, it will
remain disabled when the engine switch
is turned off then back to ON.
■Display brightness
The brightness of the head-up display
can be adjusted on of the
multi-information display. Also, it is auto- matically adjusted according to the
ambient brightness.
■Driving support system status
display
Displays the operational status of
the following systems:
Dynamic radar cruise control
with full-speed range (if
equipped) ( P.227)
Dynamic radar cruise control (if
equipped) ( P.238)
LTA (Lane Tracing Assist) (if
equipped) ( P.209)
LDA (Lane Departure Alert with
steering control) (if equipped)
( P.219)
Details of content displayed on the
head-up display may differ from that
displayed on the multi-information dis-
play. For details, refer to the explana-
tion of each system.
■Navigation system-linked dis-
play area (if equipped)
Displays the following items which
are linked to the navigation system:
Street name
Route guidance to destination
Compass (heading-up display)
Pop-up displays for the following
systems will be displayed when
necessary:
■Driving support systems
Displays a warning/sugges-
tion/advice message or the operat-
ing state of a relevant system.
PCS (Pre-Collision System)
( P.202)
Brake Override System
WA R N I N G
■Caution for changing settings of
the head-up display
If the engine is running when chang-
ing the display settings, ensure that
the vehicle is parked in a place with adequate ventilation. In a closed area
such as a garage, exhaust gases
including harmful carbon monoxide (CO) may collect and enter the vehi-
cle. This may lead to death or a seri-
ous health hazard.
NOTICE
■When changing the settings of
the head-up display
To prevent battery discharge, ensure that the engine is running while
changing the settings of the head-up
display.
Driving support system sta-
tus/navigation sys-
tem-linked display area (if
equipped)
Pop-up display
Page 105 of 678
103
2
2-1. Instrument cluster
Vehicle status information and indicators
( P.146)
Drive-Start Control (if equipped)
( P.146)
Details of content displayed on the
head-up display may differ from that
displayed on the multi-information dis-
play. For details, refer to the explana-
tion of each system.
■ icon
Displayed when a warning mes-
sage is displayed on the multi-infor-
mation display. ( P.480)
■Warning message
Some warning messages are dis-
played when necessary, according
to certain conditions.
Details of content displayed on the
head-up display may differ from that
displayed on the multi-information dis-
play.
■Audio system operation status
(if equipped)
Displayed when an audio remote
control switch on the steering wheel
is operated.
■Hands-free system status (if
equipped)
Displayed when the hands-free
system is operated.
■When a pop-up display is displayed
When a pop-up display is displayed, a
current display may no longer be dis-
played. In this case, the display will return after the pop-up display disap-
pears.
■Tachometer
Displays the engine speed in revo-
lutions per minute.
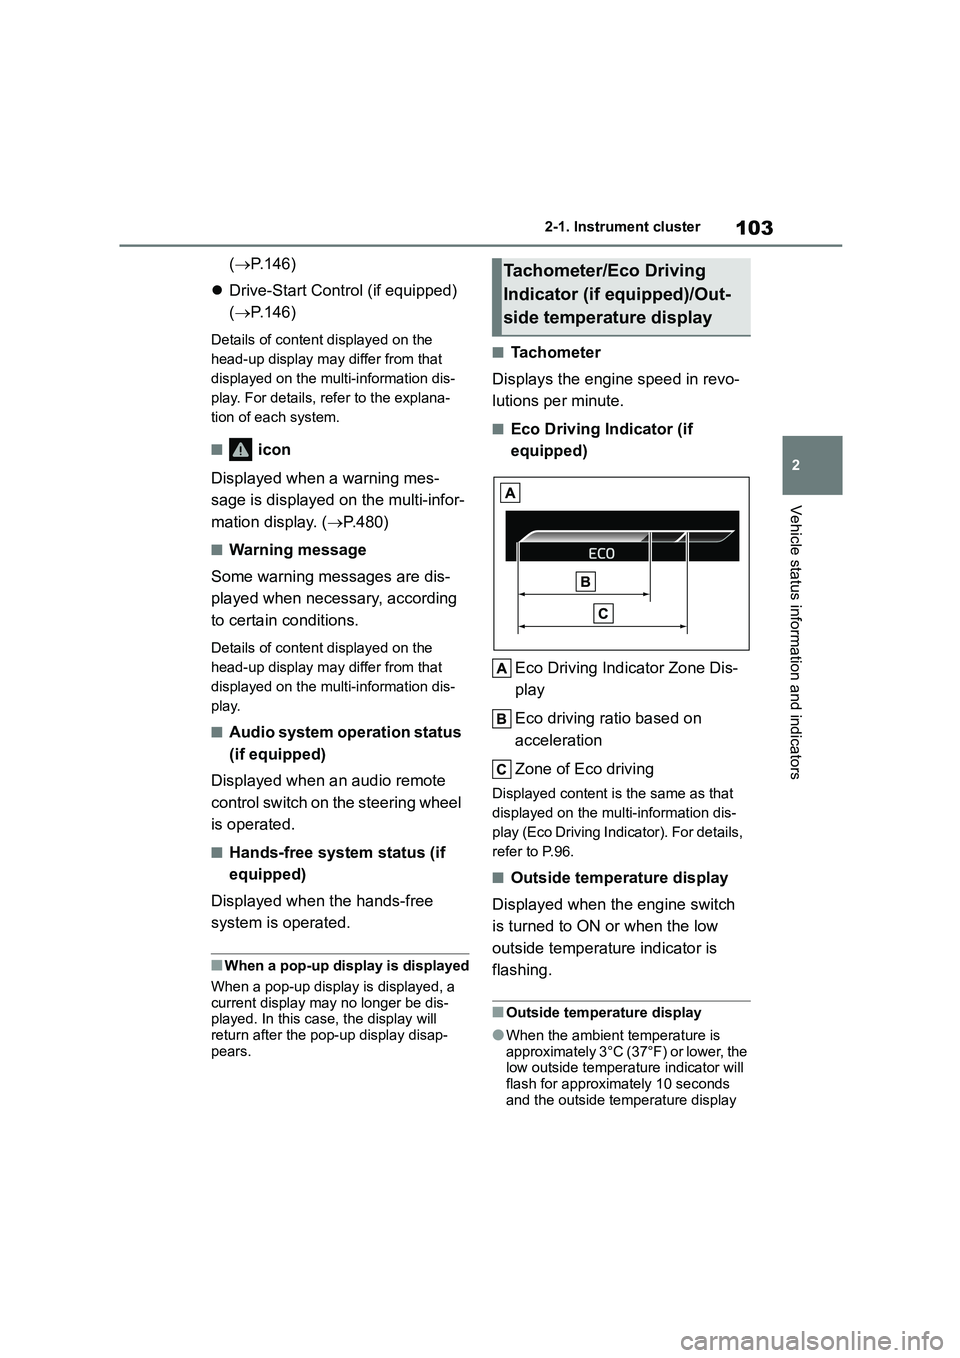
■Eco Driving Indicator (if
equipped)
Eco Driving Indicator Zone Dis-
play
Eco driving ratio based on
acceleration
Zone of Eco driving
Displayed cont ent is the same as that
displayed on the multi-information dis-
play (Eco Driving Indicator). For details,
refer to P.96.
■Outside temperature display
Displayed when the engine switch
is turned to ON or when the low
outside temperature indicator is
flashing.
■Outside temperature display
●When the ambient temperature is
approximately 3°C (37°F) or lower, the low outside temperature indicator will
flash for approximately 10 seconds
and the outside temperature display
Tachometer/Eco Driving
Indicator (if equipped)/Out-
side temperature display
Page 109 of 678
3
107
3
Before driving
Before driving
.3-1. Key information
Keys.................................. 108
3-2. Opening, closing and locking
the doors
Doors ................................ 113
Trunk................................. 118
Smart entry & start system
....................................... 121
3-3. Adjusting the seats
Front seats........................ 126
Rear seats ........................ 127
Head restraints ................. 128
3-4. Adjusting the steering wheel
and mirrors
Steering wheel .................. 131
Inside rear view mirror ...... 132
Outside rear view mirrors
....................................... 133
3-5. Opening and closing the win-
dows
Power windows................. 136
Moon roof ......................... 139
Page 133 of 678
131
3
3-4. Adjusting the steering wheel and mirrors
Before driving
3-4.Adjusting the steering wheel and mirrors
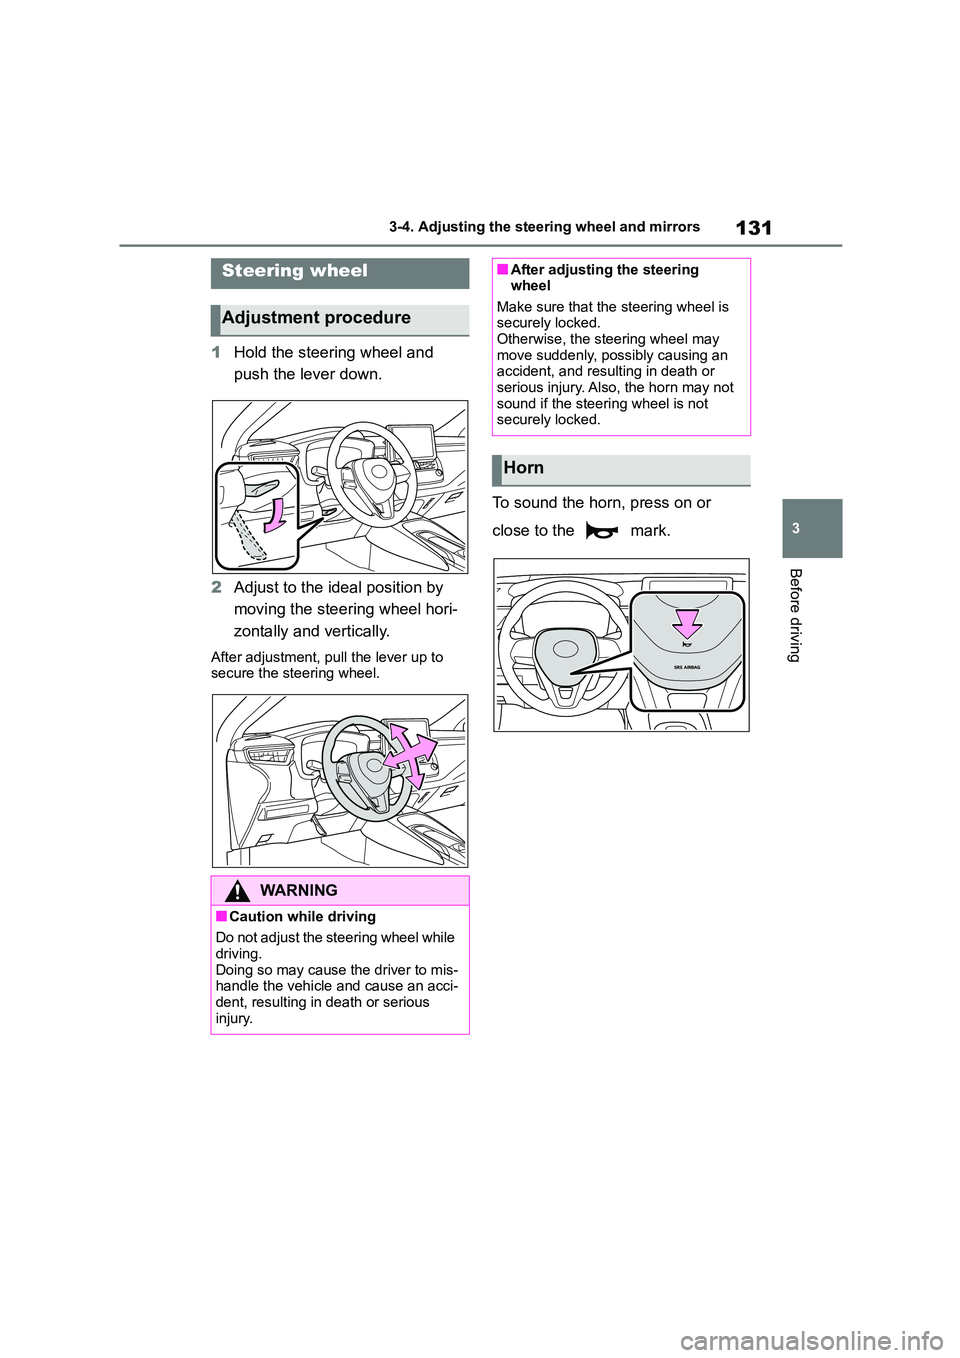
1 Hold the steering wheel and
push the lever down.
2 Adjust to the ideal position by
moving the steering wheel hori-
zontally and vertically.
After adjustment, pull the lever up to
secure the steering wheel.
To sound the horn, press on or
close to the mark.
Steering wheel
Adjustment procedure
WA R N I N G
■Caution while driving
Do not adjust the steering wheel while driving.
Doing so may cause the driver to mis-
handle the vehicle and cause an acci- dent, resulting in death or serious
injury.
■After adjusting the steering wheel
Make sure that the steering wheel is
securely locked. Otherwise, the steering wheel may
move suddenly, possibly causing an
accident, and resulting in death or serious injury. Also, the horn may not
sound if the steering wheel is not
securely locked.
Horn
Page 134 of 678
1323-4. Adjusting the steering wheel and mirrors
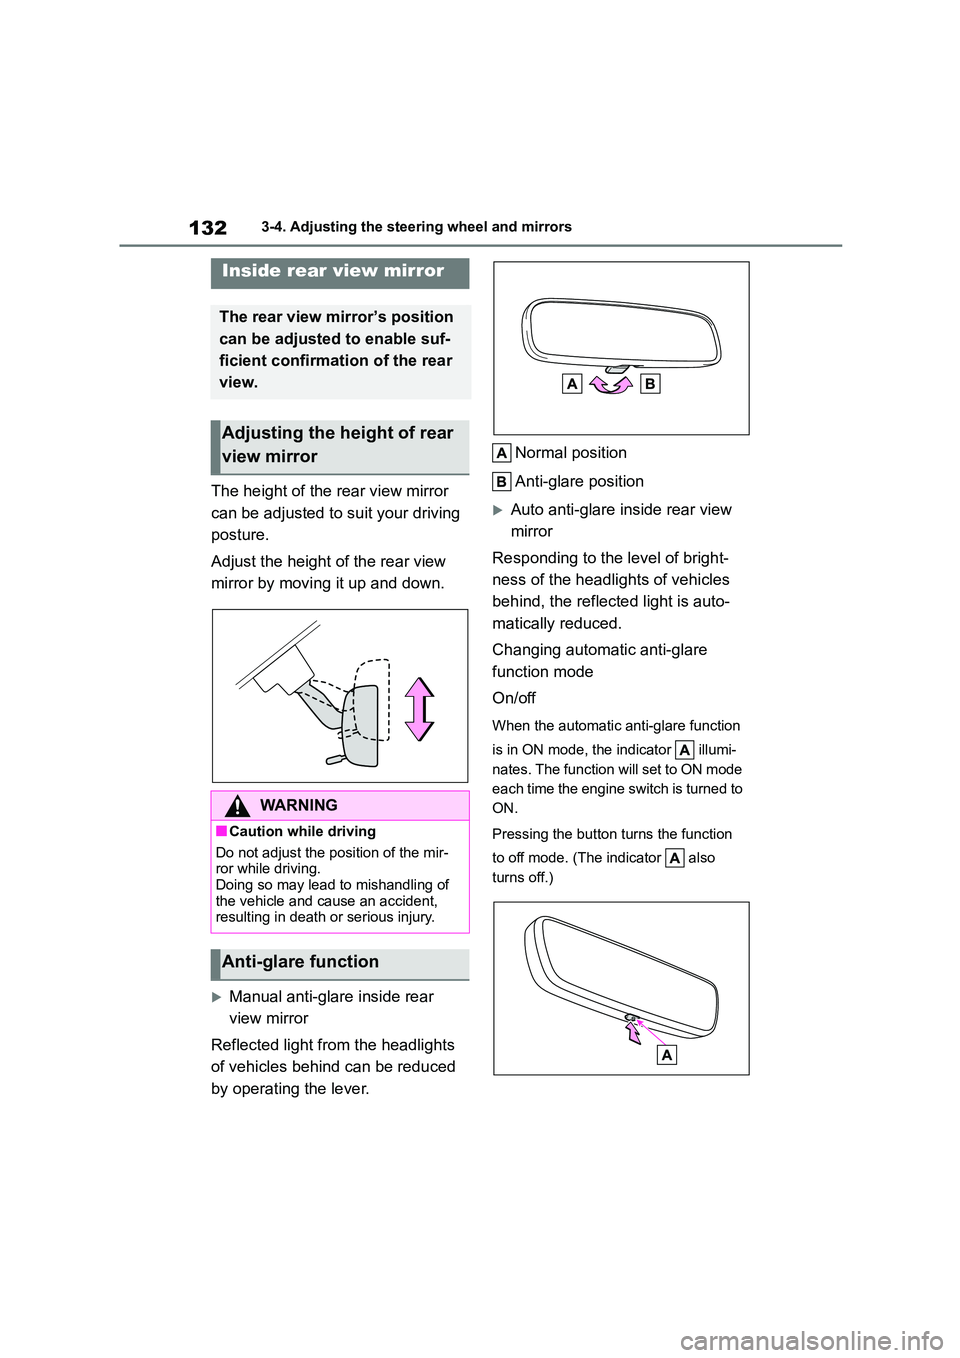
The height of the rear view mirror
can be adjusted to suit your driving
posture.
Adjust the height of the rear view
mirror by moving it up and down.
Manual anti-glare inside rear
view mirror
Reflected light from the headlights
of vehicles behind can be reduced
by operating the lever.
Normal position
Anti-glare position
Auto anti-glare inside rear view
mirror
Responding to the level of bright-
ness of the headlig hts of vehicles
behind, the reflected light is auto-
matically reduced.
Changing automatic anti-glare
function mode
On/off
When the automatic anti-glare function
is in ON mode, the indicator illumi-
nates. The function will set to ON mode
each time the engine switch is turned to
ON.
Pressing the button turns the function
to off mode. (The indicator also
turns off.)
Inside rear view mirror
The rear view mirror’s position
can be adjusted to enable suf-
ficient confirmation of the rear
view.
Adjusting the height of rear
view mirror
WA R N I N G
■Caution while driving
Do not adjust the position of the mir-
ror while driving. Doing so may lead to mishandling of
the vehicle and cause an accident,
resulting in death or serious injury.
Anti-glare function
Page 135 of 678

133
3
3-4. Adjusting the steering wheel and mirrors
Before driving
■To prevent sensor error (vehicles with an auto anti-glare inside rear
view mirror)
To ensure that the sensors operate properly, do not touch or cover them.
1 To select a mirror to adjust, turn
the switch.
Left
Right
Outside rear view mir-
rors
The rear view mirror’s position
can be adjusted to enable suf-
ficient confirmation of the rear
view.
WA R N I N G
■Important points while driving
Observe the following precautions
while driving.
Failure to do so may result in loss of control of the vehicle and cause an
accident, resulting in death or serious
injury.
●Do not adjust the mirrors while driv-
ing.
●Do not drive with the mirrors folded.
●Both the driver and passenger side
mirrors must be extended and prop-
erly adjusted before driving.
Adjustment procedure