Page 353 of 586

Note:A coolant concentration of 40%provides improved overheat protection.Coolant concentrations below 40% decreasethe overheat and corrosion protectioncharacteristics of the coolant and couldcause engine damage.
Coolant Change
WARNING: Do not dispose of coolantin the household refuse or the publicsewage system. Use an authorized wastedisposal facility.
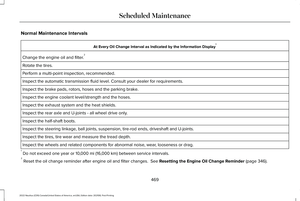
Change the coolant at specific mileageintervals. Refer to the scheduledmaintenance information. See NormalScheduled Maintenance (page 467).
Note:Dispose of used coolant in theappropriate manner.
Follow your community's regulations andstandards for recycling and disposing ofautomotive fluids.
Fail-Safe Cooling
Fail-safe cooling allows you to temporarilydrive your vehicle before any incrementalcomponent damage occurs. The fail-safedistance depends on ambient temperature,vehicle load and terrain.
How Fail-Safe Cooling Works
If the engine begins to overheat,the coolant temperature gaugemoves toward the red zone:
A warning lamp illuminates and amessage may appear in theinformation display.
If the engine reaches a presetover-temperature condition, the engineautomatically switches to alternating cylinderoperation. Each disabled cylinder acts as anair pump and cools the engine.
When this occurs, your vehicle still operates,however:
•Engine power is limited.
•The air conditioning system turns off.
Continued operation increases the enginetemperature, causing the engine tocompletely shut down. Your steering andbraking effort increases in this situation.
When the engine temperature cools, you canre-start the engine. Have your vehiclechecked as soon as possible to minimizeengine damage.
When Fail-Safe Mode Is Activated
WARNING: Fail-safe mode is for useduring emergencies only. Operate yourvehicle in fail-safe mode only as long asnecessary to bring your vehicle to rest ina safe location and seek immediate repairs.When in fail-safe mode, your vehicle willhave limited power, will not be able tomaintain high-speed operation, and maycompletely shut down without warning,potentially losing engine power, powersteering assist, and power brake assist,which may increase the possibility of acrash resulting in serious injury.
349
2022 Nautilus (CD9) Canada/United States of America, enUSA, Edition date: 202108, First-PrintingMaintenance
Page 354 of 586

WARNING: Do not remove thecoolant reservoir cap when the engine ison or the cooling system is hot. Wait 10minutes for the cooling system to cooldown. Cover the coolant reservoir cap witha thick cloth to prevent the possibility ofscalding and slowly remove the cap.Failure to follow this instruction could resultin personal injury.
Your vehicle has limited engine power whenin the fail-safe mode, drive your vehicle withcaution. Your vehicle does not maintainhigh-speed operation and the engine couldoperate poorly.
Remember that the engine is capable ofautomatically shutting down to preventengine damage. In this situation:
1.Pull off the road as soon as safelypossible and switch the engine off.
2.If you are a member of a roadsideassistance program, we recommend thatyou contact your roadside assistanceservice provider.
3.If this is not possible, wait for a shortperiod of time for the engine to cool.
4.Check the coolant level. If the coolantlevel is at or below the minimum mark,add prediluted coolant immediately.
5.When the engine temperature cools, youcan re-start the engine. Have your vehiclechecked as soon as possible to minimizeengine damage.
Note:Driving your vehicle without repairincreases the chance of engine damage.
Engine Coolant TemperatureManagement (If Equipped)
WARNING: To reduce the risk ofcrash and injury, be prepared that thevehicle speed may reduce and the vehiclemay not be able to accelerate with fullpower until the coolant temperaturereduces.
If you tow a trailer with your vehicle, theengine may temporarily reach a highertemperature during severe operatingconditions, for example ascending a long orsteep grade in high ambient temperatures.
At this time, you may notice the coolanttemperature gauge moves toward the redzone and a message may appear in theinformation display.
You may notice a reduction in vehicle speedcaused by reduced engine power in orderto manage the engine coolant temperature. Your vehicle may enter this mode if certainhigh-temperature and high-load conditionstake place. The amount of speed reductiondepends on vehicle loading, grade andambient temperature. If this occurs, there isno need to stop your vehicle. You cancontinue to drive.
The air conditioning may automatically turnon and off during severe operatingconditions to protect the engine fromoverheating. When the coolant temperaturedecreases to the normal operatingtemperature, the air conditioning turns on.
350
2022 Nautilus (CD9) Canada/United States of America, enUSA, Edition date: 202108, First-PrintingMaintenance
Page 355 of 586

If the coolant temperature gauge moves fullyinto the red zone, or if the coolanttemperature warning or service engine soonmessages appear in your information display,do the following:
1.Stop your vehicle as soon as it is safe todo so. Fully apply the parking brake, shiftinto park (P) or neutral (N).
2.Leave the engine running until thecoolant temperature gauge needlereturns to the normal position. If thetemperature does not drop after severalminutes, follow the remaining steps.
3.Switch the engine off and wait for it tocool. Check the coolant level.
4.If the coolant level is at or below theminimum mark, add prediluted coolantimmediately.
5.If the coolant level is normal, restart theengine and continue.
CHANGING THE ENGINE AIR
FILTER
WARNING: To reduce the risk ofvehicle damage and personal burn injuries,do not start your engine with the aircleaner removed and do not remove itwhile the engine is running.
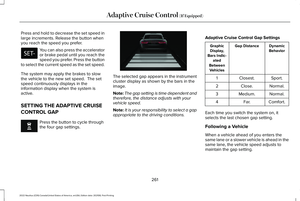
When changing the air filter element, useonly the air filter element listed. SeeCapacities and Specifications (page 404).
For turbocharged equipped vehicles: Whenservicing the air cleaner, it is important thatno foreign material enter the air inductionsystem. The engine and turbocharger aresusceptible to damage from even smallparticles.
Change the air filter element at the properinterval. See Scheduled Maintenance (page463).
Note: Failure to use the correct air filterelement may result in severe enginedamage. The customer warranty may bevoid for any damage to the engine if thecorrect air filter element is not used.
1.Release the clamps that secure the airfilter housing cover.
2.Carefully lift the air filter housing cover.
3.Remove the air filter element from the airfilter housing.
4.Wipe any dirt or debris from the air filterhousing and cover to make sure no dirtgets in the engine and to make sure youhave a good seal.
351
2022 Nautilus (CD9) Canada/United States of America, enUSA, Edition date: 202108, First-PrintingMaintenanceE144365
Page 356 of 586
5.Install a new air filter element. Be carefulnot to crimp the filter element edgesbetween the air filter housing and cover.This could cause filter damage and allowunfiltered air to enter the engine if notproperly seated.
6.Install the air filter housing cover.
7.Engage the clamps to secure the air filterhousing cover to the air filter housing.
CHANGING THE FUEL FILTER
Your vehicle has a lifetime fuel filter thatintegrates with the fuel tank. It does not needregular maintenance or replacement.
DRIVE BELT ROUTING OVERVIEW
- 2.0L
A.The long drive belt is on the first pulleygroove closest to the engine.
B.The short drive belt is on the secondpulley groove farthest from the engine.
DRIVE BELT ROUTING OVERVIEW
- 2.7L
352
2022 Nautilus (CD9) Canada/United States of America, enUSA, Edition date: 202108, First-PrintingMaintenance E161383 E191903
Page 357 of 586

CHANGING THE 12V BATTERY
WARNING: Batteries normallyproduce explosive gases which can causepersonal injury. Therefore, do not allowflames, sparks or lighted substances tocome near the battery. When working nearthe battery, always shield your face andprotect your eyes. Always provide correctventilation.
WARNING: When lifting aplastic-cased battery, excessive pressureon the end walls could cause acid to flowthrough the vent caps, resulting in personalinjury and damage to the vehicle or battery.Lift the battery with a battery carrier or withyour hands on opposite corners.
WARNING: Keep batteries out ofreach of children. Batteries contain sulfuricacid. Avoid contact with skin, eyes orclothing. Shield your eyes when workingnear the battery to protect against possiblesplashing of acid solution. In case of acidcontact with skin or eyes, flush immediatelywith water for a minimum of 15 minutes andget prompt medical attention. If acid isswallowed, call a physician immediately.
WARNING: Battery posts, terminalsand related accessories contain lead andlead compounds, chemicals known to theState of California to cause cancer andreproductive harm. Wash your hands afterhandling.
WARNING: This vehicle may havemore than one battery. Removing thebattery cables from only one battery doesnot disconnect your vehicle electricalsystem. Make sure you disconnect thebattery cables from all batteries whendisconnecting power. Failure to do so maycause serious personal injury or propertydamage.
The battery is in the engine compartment.See Under Hood Overview (page 341).
Your vehicle has a maintenance-free battery. It does not require additional water duringservice.
For longer, trouble-free operation, keep thetop of the battery clean and dry and thebattery cables tightly fastened to the batteryterminals. If any corrosion is present on thebattery or terminals, remove the cables fromthe terminals and clean with a wire brush. You can neutralize the acid with a solutionof baking soda and water.
353
2022 Nautilus (CD9) Canada/United States of America, enUSA, Edition date: 202108, First-PrintingMaintenance
Page 358 of 586

We recommend that you disconnect thenegative battery cable terminal from thebattery if you plan to store your vehicle foran extended period.
Note:If you only disconnect the negativebattery cable terminal, make sure it isisolated or placed away from the batteryterminal to avoid unintended connection orarcing.
To maintain correct operation of the batterymanagement system, if you add anyelectrical devices to your vehicle, do notconnect the ground connection directly tothe negative battery terminal. A connectionat the negative battery terminal can causeinaccurate measurements of the batterycondition and potential incorrect systemoperation.
Note:If you add electrical accessories orcomponents to your vehicle this mayadversely affect battery performance,durability and the performance of otherelectrical systems on your vehicle.
If you replace the battery make sure itmatches the electrical requirements of yourvehicle.
If you disconnect or replace the battery andyour vehicle has an automatic transmission,it must relearn its adaptive strategy. Becauseof this, the transmission may shift firmly whenfirst driven. This is normal operation whilethe transmission fully updates its operationto optimum shift feel.
Remove and Reinstall the Battery
To disconnect or remove the battery, do thefollowing:
1.Apply the parking brake and switch theignition off.
2.Switch all electrical equipment off, forexample lights and radio.
3.Wait a minimum of two minutes beforedisconnecting the battery.
Note:The engine management system hasa power hold function and remains poweredfor a period of time after you switch theignition off. This is to allow diagnostic andadaptive tables to be stored. Disconnectingthe battery without waiting can causedamage not covered by the vehicleWarranty.
4.Disconnect the negative battery cableterminal.
5.Disconnect the positive battery cableterminal.
6.Remove the battery securing clamp.
7.Remove the battery.
8.To install, reverse the removal procedure.
Note:Before reconnecting the battery, makesure the ignition remains switched off.
Note:Make sure the battery cable terminalsare fully tightened.
Note:After cleaning or replacing the battery,make sure you reinstall the battery cover orshield.
If you disconnect or replace the vehiclebattery, you must reset the followingfeatures:
•Window bounce-back. See Windows(page 131).
•Clock Settings.
•Pre-set radio stations.
•Steering Angle Sensor.
354
2022 Nautilus (CD9) Canada/United States of America, enUSA, Edition date: 202108, First-PrintingMaintenance
Page 359 of 586

Note:To calibrate the steering angle sensor,drive the vehicle above 30 mph (50 km/h)for a minimum of 1.2 mi (2 km). Make sure todrive straight ahead for a minimum of 30seconds. Several vehicle functions aredisabled and a warning light could appearuntil the sensor is calibrated.
Note:The battery sensor must be reset whena new battery is installed. Install only abattery approved by Ford for use in thevehicle. Use the following procedure toperform the battery sensor reset:
1.1. Turn ignition to on and leave engineoff. Steps 2 and 3 must be completedwithin 10 seconds.
2.2. Flash the high beams 5 times, endingwith the high beams off.
3.3. Press and release the brake pedal 3times.
The battery warning light on the cluster willflash 3 times to confirm that the reset wassuccessful.
Battery Management System
The battery management system monitorsbattery conditions and takes actions toextend battery life. If excessive battery drainis detected, the system temporarily disablessome of the following features:
•Heated rear window.
•Heated seats.
•Climate control.
•Heated steering wheel.
•Audio unit.
•Navigation system.
A message may appear in the informationdisplay to alert you that battery protectionactions are active.
After battery replacement, or in some casesafter charging the battery with an externalcharger, the battery management systemrequires eight hours of vehicle sleep time torelearn the battery state of charge. Duringthis time your vehicle must remain fullylocked with the ignition off.
Note:If you add electrical accessories orcomponents to the vehicle, it may adverselyaffect battery performance and durability.This may also affect the performance ofother electrical systems in the vehicle.
Battery Disposal
Make sure that you dispose of oldbatteries in an environmentallyfriendly way. Seek advice fromyour local authority about recycling oldbatteries.
ADJUSTING THE HEADLAMPS
Vertical Aim Adjustment
The headlamps on your vehicle are properlyaimed at the assembly plant. If your vehiclehas been involved in a crash, have the aimof the headlamp beam checked by anauthorized dealer.
355
2022 Nautilus (CD9) Canada/United States of America, enUSA, Edition date: 202108, First-PrintingMaintenanceE107998
Page 360 of 586

Headlamp Aiming Target
8 ft (2.4 m).A
Center height of lamp to ground.B
25 ft (7.6 m).C
Horizontal reference line.D
Vertical Aim Adjustment Procedure
1.Park the vehicle directly in front of a wallor screen on a level surface,approximately 25 ft (7.6 m) away.
2.Measure the height of the headlamp bulbcenter from the ground and mark an 8 ft(2.4 m) horizontal reference line on thevertical wall or screen at this height.
Note:To see a clearer light pattern foradjusting, you may want to block the lightfrom one headlamp while adjusting theother.
3.Turn on the low beam headlamps toilluminate the wall or screen and openthe hood.
4.On the wall or screen you will observe aflat zone of high intensity light at the topof the right hand portion of the beampattern. If the top edge of the highintensity light zone is not at the horizontalreference line, the headlamp needs tobe adjusted.
356
2022 Nautilus (CD9) Canada/United States of America, enUSA, Edition date: 202108, First-PrintingMaintenanceE142592 E142465