2022 HYUNDAI KONA EV display
[x] Cancel search: displayPage 251 of 548
05
5-67
OOSEV040306CZ
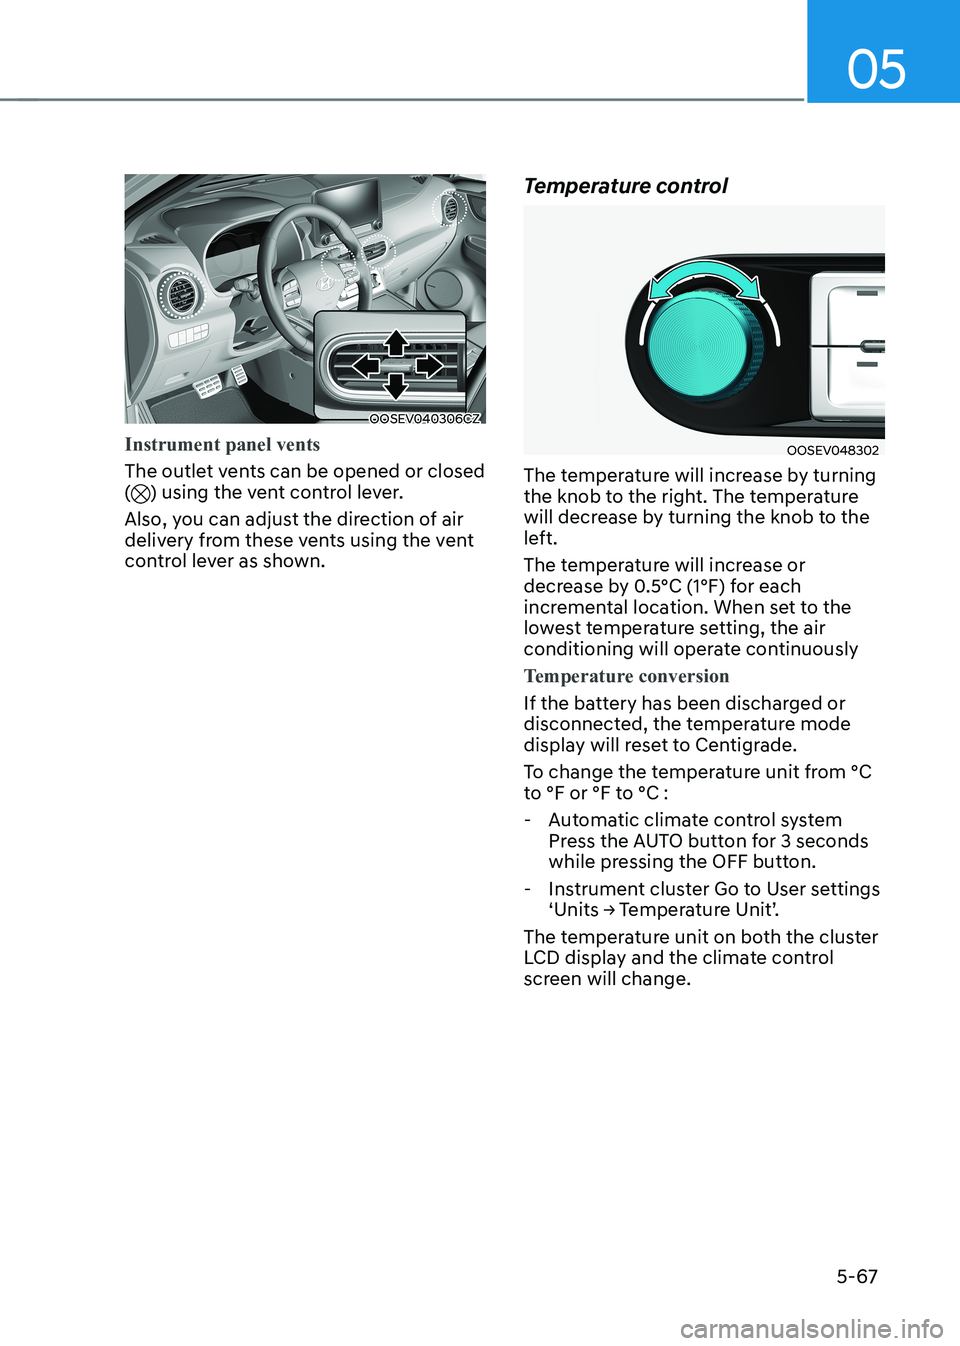
Instrument panel vents
The outlet vents can be opened or closed () using the vent control lever.
Also, you can adjust the direction of air
delivery from these vents using the vent
control lever as shown. Temperature control
OOSEV048302
The temperature will increase by turning
the knob to the right. The temperature
will decrease by turning the knob to the
left.
The temperature will increase or
decrease by 0.5°C (1°F) for each
incremental location. When set to the
lowest temperature setting, the air
conditioning will operate continuously
Temperature conversion
If the battery has been discharged or
disconnected, the temperature mode
display will reset to Centigrade.
To change the temperature unit from °C
to °F or °F to °C :
- Automatic climate control system Press the AUTO button for 3 seconds
while pressing the OFF button.
- Instrument cluster Go to User settings ‘Units → Temperature Unit’.
The temperature unit on both the cluster
LCD display and the climate control
screen will change.
Page 255 of 548
05
5-71
Climate control information screen
selection button
OOSEV048309
Push the climate control information
screen selection button to display
climate control information on the audio
or AVN screen. OFF mode
OOSEV048311
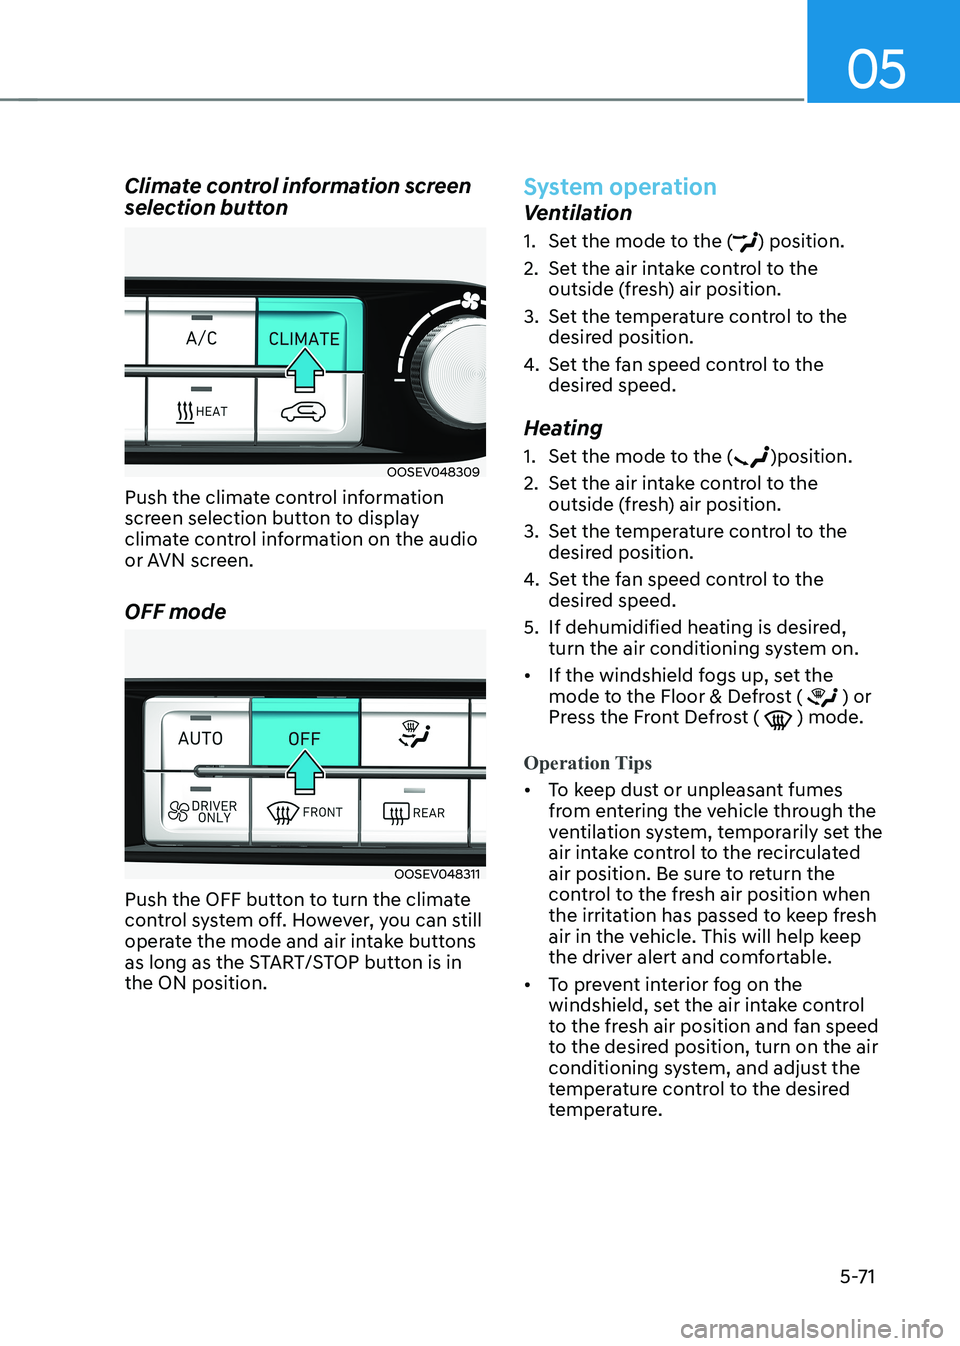
Push the OFF button to turn the climate
control system off. However, you can still
operate the mode and air intake buttons
as long as the START/STOP button is in the ON position.
System operation
Ventilation
1. Set the mode to the (
) position.
2. Set the air intake control to the outside (fresh) air position.
3. Set the temperature control to the desired position.
4. Set the fan speed control to the
desired speed.
Heating
1. Set the mode to the (
)position.
2. Set the air intake control to the outside (fresh) air position.
3. Set the temperature control to the desired position.
4. Set the fan speed control to the
desired speed.
5. If dehumidified heating is desired, turn the air conditioning system on.
• If the windshield fogs up, set the
mode to the Floor & Defrost (
) or
Press the Front Defrost ( ) mode.
Operation Tips
• To keep dust or unpleasant fumes
from entering the vehicle through the
ventilation system, temporarily set the
air intake control to the recirculated
air position. Be sure to return the
control to the fresh air position when
the irritation has passed to keep fresh
air in the vehicle. This will help keep
the driver alert and comfortable.
• To prevent interior fog on the
windshield, set the air intake control
to the fresh air position and fan speed
to the desired position, turn on the air
conditioning system, and adjust the
temperature control to the desired
temperature.
Page 260 of 548
Convenient features
5 -76
WARNING
Windshield heating
Do not use the (
) or () position
during cooling operation in extremely
humid weather. The difference between
the temperature of the outside air and
that of the windshield could cause the
outer surface of the windshield to fog
up, causing loss of visibility. In this case,
set the mode selection knob or button
to the (
) position and fan speed
control knob or button to lower speed. • For maximum windshield defrosting,
set the temperature control knob to
the highest temperature setting and
the fan control knob to the highest fan
speed. Select the front defrost button
on the climate control display.
• If warm air to the floor is desired while
defrosting or defogging, set the mode
to the floor-defrost position.
• Before driving, clear all snow and ice
from the windshield, rear window,
outside rear view mirrors, and all side
windows.
• Clear all snow and ice from the
hood and air inlet in the cowl grill
to improve heater and defroster
efficiency and to reduce the
probability of fogging up inside of the windshield.
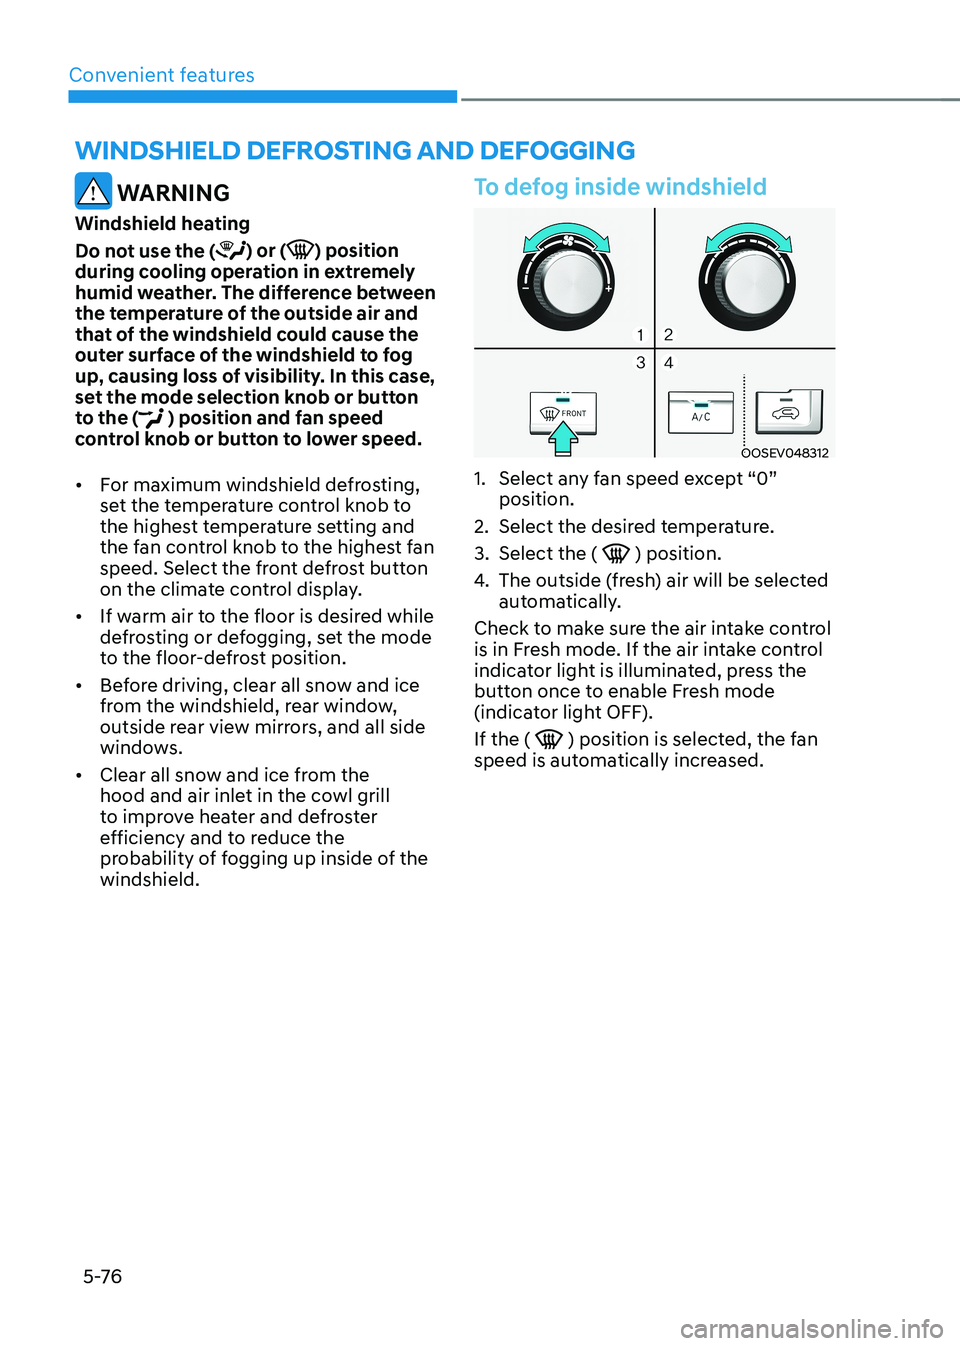
To defog inside windshield
OOSEV048312
1. Select any fan speed except “0” position.
2. Select the desired temperature.
3. Select the (
) position.
4. The outside (fresh) air will be selected
automatically.
Check to make sure the air intake control
is in Fresh mode. If the air intake control
indicator light is illuminated, press the
button once to enable Fresh mode
(indicator light OFF). If the (
) position is selected, the fan
speed is automatically increased.
winDshielD DeFrosting AnD DeFogging
Page 271 of 548
![HYUNDAI KONA EV 2022 Owners Manual 05
5-87
Wireless cellular phone charging
system (if equipped)
OOSEV041034N
[A] : Indicator light, [B] : Charging pad
There is a wireless cellular phone charger
inside the front console.
The sy HYUNDAI KONA EV 2022 Owners Manual 05
5-87
Wireless cellular phone charging
system (if equipped)
OOSEV041034N
[A] : Indicator light, [B] : Charging pad
There is a wireless cellular phone charger
inside the front console.
The sy](/manual-img/35/56171/w960_56171-270.png)
05
5-87
Wireless cellular phone charging
system (if equipped)
OOSEV041034N
[A] : Indicator light, [B] : Charging pad
There is a wireless cellular phone charger
inside the front console.
The system is available when all doors
are closed, and when the START/STOP
button is in the ON position (1).
After use, to close the cover, slightly pull
down the cover.
The system is available when all doors
are closed, and when the START/STOP
button is in the ON or START position.
To charge a cellular phone
The wireless cellular phone charging
system charges only the Qi-enabled cellular phones (
). Read the label on
the cellular phone accessory cover or
visit your cellular phone manufacturer’s
website to check whether your cellular
phone supports the Qi technology.
The wireless charging process starts
when you put a Qi-enabled cellular
phone on the wireless charging unit.
1. Remove other items, including the smart key, from the wireless charging
unit. If not, the wireless charging
process may be interrupted. Place
the cellular phone on the center of
charging pad.
2. The indicator light is orange when the cellular phone is charging. The
indicator light turns green when
phone charging is complete. 3. You can turn ON or OFF the wireless
charging function in the User Settings
mode on the instrument cluster. For
further information, refer to the “User
setting mode” in chapter 4.
If your cellular phone is not charging: - Slightly change the position of the cellular phone on the charging pad.
- Make sure the indicator light is orange.
The indicator light will blink orange for 10
seconds if there is a malfunction in the
wireless charging system.
In this case, temporarily stop the
charging process, and re-attempt to
wirelessly charge your cellular phone again.
The system warns you with a message
on the LCD display if the cellular phone
is still on the wireless charging unit after
the vehicle is turned OFF and the front door is opened. • High speed wireless charging can
be activated only when the cellular
phones equipped with a wireless
charging function is on the charging pad. Information
For some manufacturers’ cellular phones, the system may not warn you even though
the cellular phone is left on the wireless
charging unit. This is due to the particular
characteristic of the cellular phone and
not a malfunction of the wireless charging.
Page 273 of 548
05
5-89
Clock
WARNING
Do not adjust the clock while driving.
You may lose your steering control
and cause severe personal injury or
accidents.
Vehicles with Audio system
Select the Setting menu on the audio
system → Select [Date/Time].
• Set time: Set the time displayed on
the audio screen.
• Time format: Choose between 12-hour
and 24-hour time formats.
Vehicles with Navigation system
Select the Settings menu on the AVN
screen → Select [Date/Time].
• GPS time: Displays time according to
the received GNSS time.
• 24-hour: Switches to 12 hour or 24
hour.
For more details, please refer to the
separate manual that was supplied with
your vehicle.
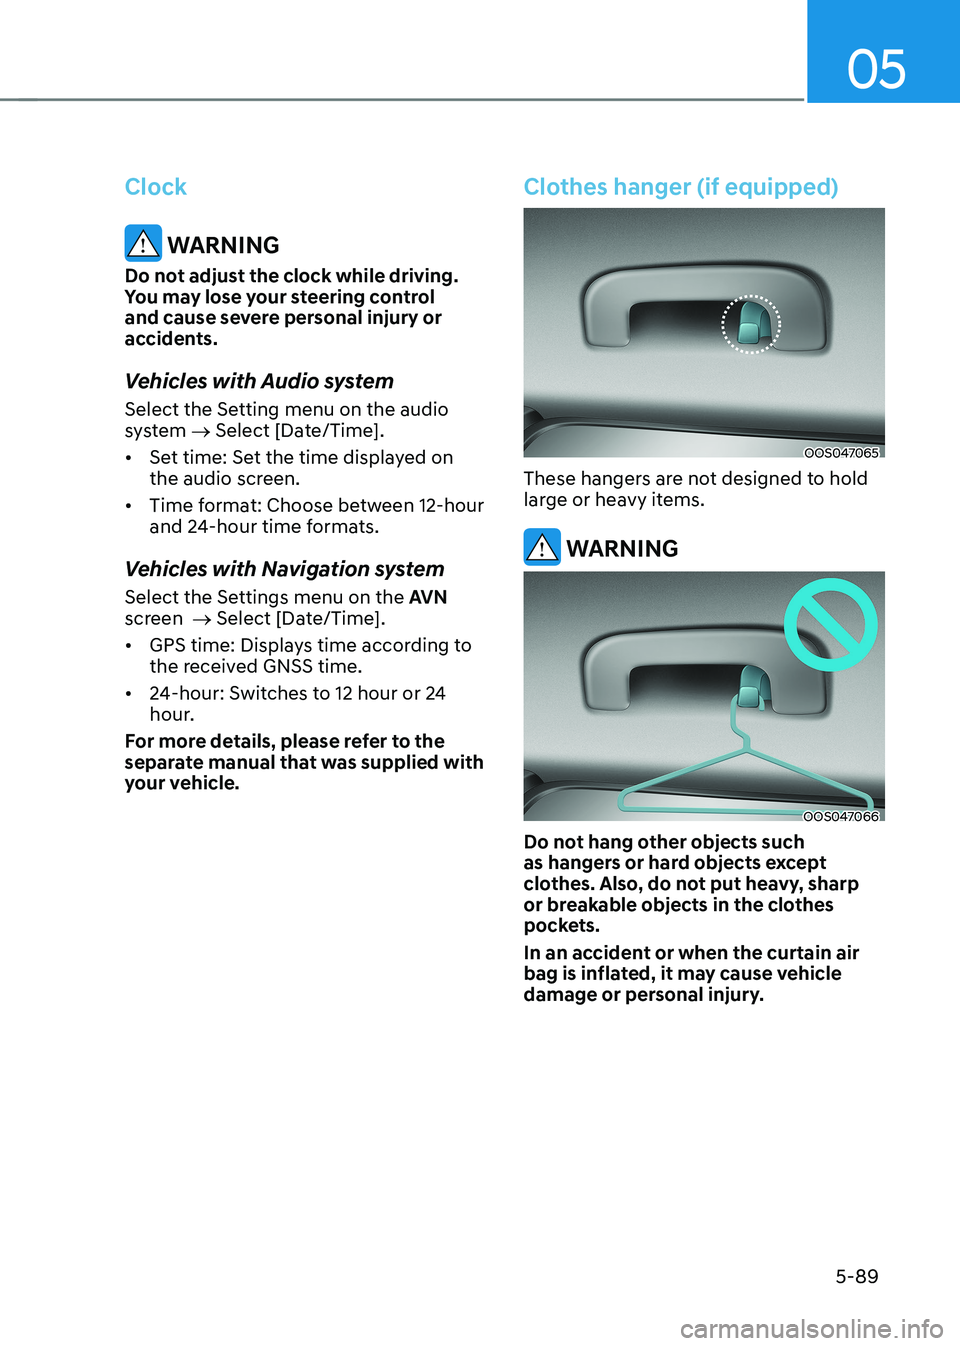
Clothes hanger (if equipped)
OOS047065
These hangers are not designed to hold
large or heavy items.
WARNING
OOS047066
Do not hang other objects such
as hangers or hard objects except
clothes. Also, do not put heavy, sharp
or breakable objects in the clothes
pockets.
In an accident or when the curtain air
bag is inflated, it may cause vehicle
damage or personal injury.
Page 281 of 548
6
Before driving .................................................................................................... 6-3
Before entering the vehicle ........................................................................................ 6-3
Before starting ............................................................................................................. 6-3
START/STOP button .......................................................................................... 6-4
START/STOP button positions ..................................................................................... 6-5
Starting the vehicle ..................................................................................................... 6-6
Turning off the vehicle ................................................................................................. 6 -7
Reduction gear .................................................................................................. 6-8
Reduction gear operation .......................................................................................... 6-8
LCD display messages ............................................................................................... 6-10
Good driving practices ............................................................................................... 6-13
Regenerative braking system .......................................................................... 6-14
Regenerative braking (Paddle shifter) ...................................................................... 6-14
One pedal driving ....................................................................................................... 6-15
Smart recuperation system
(if equipped with smart cruise control system) ............................................6-16
System setting ............................................................................................................ 6-16
To activate smart recuperation system..................................................................... 6-16
Smart recuperation system will be temporarily cancelled when: ..........................6-18
To resume smart recuperation system ..................................................................... 6-18
To turn smart recuperation system off ..................................................................... 6-18
Vehicle-to-vehicle distance recognition sensor (front radar) .................................6-18
System malfunction ................................................................................................... 6-19
Limitations of the system .......................................................................................... 6-19
Braking system ................................................................................................ 6-22
Power brakes ............................................................................................................. 6-22
Disc brakes wear indicator ........................................................................................ 6-22
Electronic Parking Brake (EPB) .................................................................................. 6-23
Auto Hold .................................................................................................................... 6-27
Anti-Lock Brake System (ABS) ................................................................................... 6-31
Electronic Stability Control (ESC) ............................................................................. 6-32
Vehicle Stability Management (VSM) ....................................................................... 6-35
Hill-Start Assist Control (FAC) .................................................................................. 6-36
Good braking practices ............................................................................................. 6-37
Drive mode integrated control system ..........................................................6-38
Initial setting for each drive mode ............................................................................ 6-39
6. Driving your vehicle
Page 283 of 548
06
6-3
Before entering the vehicle
• Be sure all windows, outside mirror(s),
and outside lights are clean and
unobstructed.
• Remove frost, snow, or ice.
• Visually check the tires for uneven
wear and damage.
• Check under the vehicle for any sign
of leaks.
• Be sure there are no obstacles behind
you if you intend to back up.
Before starting
• Make sure the hood, the tailgate, and
the doors are securely closed and
locked.
• Adjust the position of the seat and
steering wheel.
• Adjust the inside and outside rearview
mirrors.
• Verify all the lights work.
• Fasten your seat belt. Check that all
passengers have fastened their seat belt.
• Check the gauges and indicators
in the instrument panel and the
messages on the instrument display
when the START/STOP button is in the ON position.
• Check that any items you are carrying
are stored properly or fastened down
securely.
WARNING
To reduce the risk of SERIOUS INJURY or
DEATH, take the following precautions: • ALWAYS wear your seat belt. All
passengers must be properly belted
whenever the vehicle is moving.
For more information, refer to “Seat
Belts” in chapter 3.
• Always drive defensively. Assume
other drivers or pedestrians may be
careless and make mistakes.
• Stay focused on the task of driving.
Driver distraction can cause
accidents.
• Leave plenty of space between you
and the vehicle in front of you.
WARNING
NEVER drink or take drugs and drive. Drinking or taking drugs and driving
is dangerous and may result in an
accident and SERIOUS INJURY or
DEATH. Drunk driving is the number one
contributor to the highway death
toll each year. Even a small amount
of alcohol will affect your reflexes,
perceptions and judgment. Just
one drink can reduce your ability to
respond to changing conditions and
emergencies and your reaction time
gets worse with each additional drink.
Driving while under the influence
of drugs is as dangerous or more
dangerous than driving under the
influence of alcohol.
You are much more likely to have a
serious accident if you drink or take
drugs and drive. If you are drinking or
taking drugs, don’t drive. Do not ride
with a driver who has been drinking
or taking drugs. Choose a designated
driver or call a taxi.
BEFORE DRIVING
Page 288 of 548
Driving your vehicle
6-8
REDuCTION GEAR
Reduction gear operation
WARNING
To reduce the risk of serious injury or
death: • ALWAYS check the surrounding
areas near your vehicle for people,
especially children, before shifting a
vehicle into D (Drive) or R (Reverse).
• Before leaving the driver's seat,
always make sure the gear is in
the P (Park) position, then set the
parking brake, and place the START/
STOP button in the OFF position.
Unexpected and sudden vehicle
movement can occur if these
precautions are not followed.
OOSEV058004L
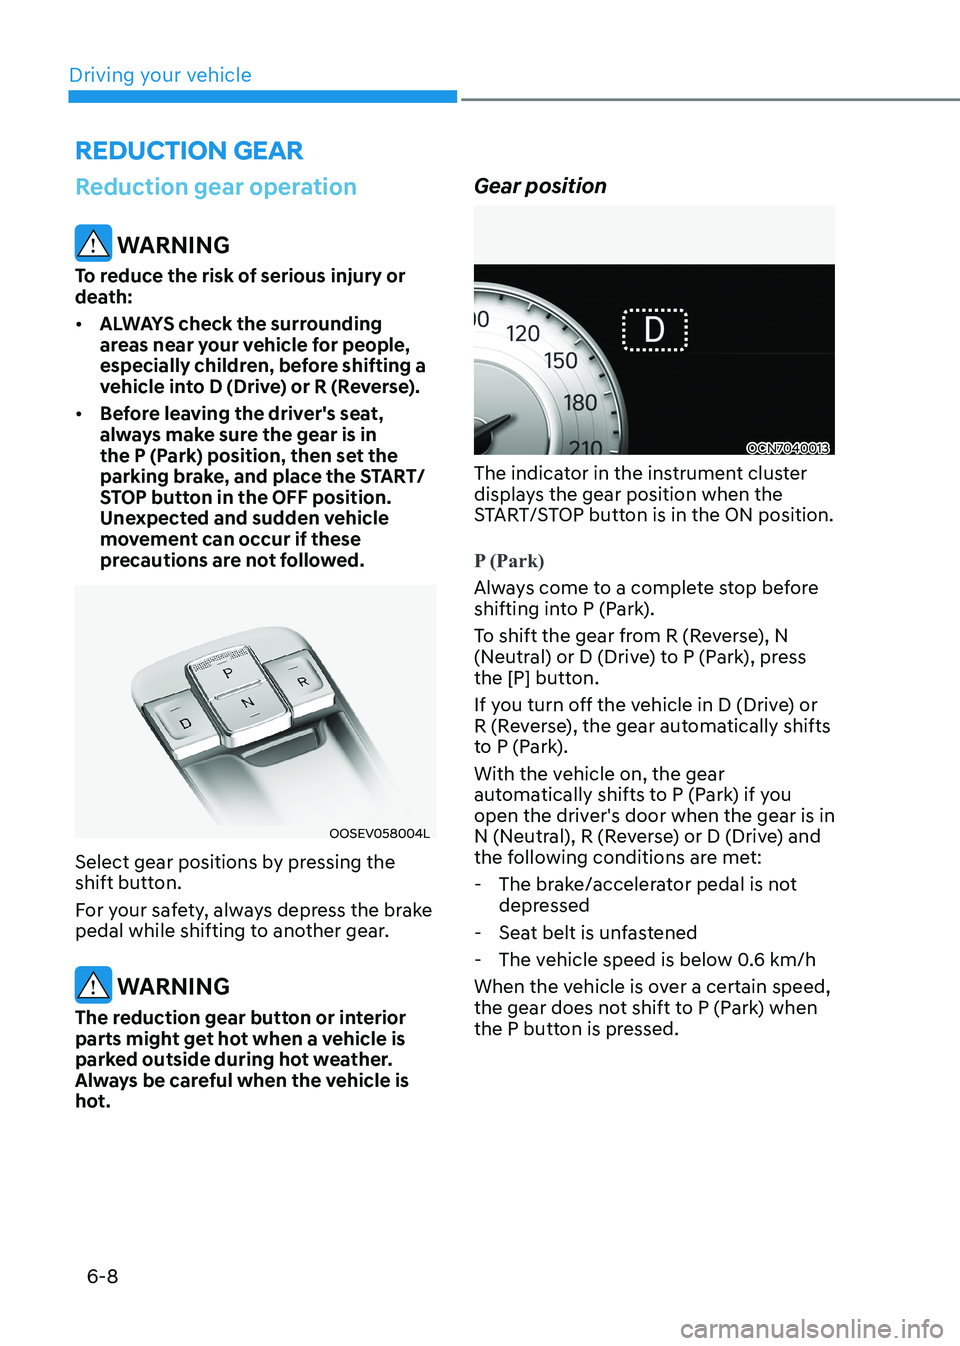
Select gear positions by pressing the
shift button.
For your safety, always depress the brake
pedal while shifting to another gear.
WARNING
The reduction gear button or interior
parts might get hot when a vehicle is
parked outside during hot weather.
Always be careful when the vehicle is
hot. Gear position
OCN7040013
The indicator in the instrument cluster
displays the gear position when the
START/STOP button is in the ON position.
P (Park)
Always come to a complete stop before
shifting into P (Park).
To shift the gear from R (Reverse), N
(Neutral) or D (Drive) to P (Park), press
the [P] button.
If you turn off the vehicle in D (Drive) or
R (Reverse), the gear automatically shifts
to P (Park).
With the vehicle on, the gear
automatically shifts to P (Park) if you
open the driver's door when the gear is in
N (Neutral), R (Reverse) or D (Drive) and
the following conditions are met:
- The brake/accelerator pedal is not depressed
- Seat belt is unfastened
- The vehicle speed is below 0.6 km/h
When the vehicle is over a certain speed,
the gear does not shift to P (Park) when
the P button is pressed.