2022 HYUNDAI KONA EV display
[x] Cancel search: displayPage 182 of 548
04
4-39
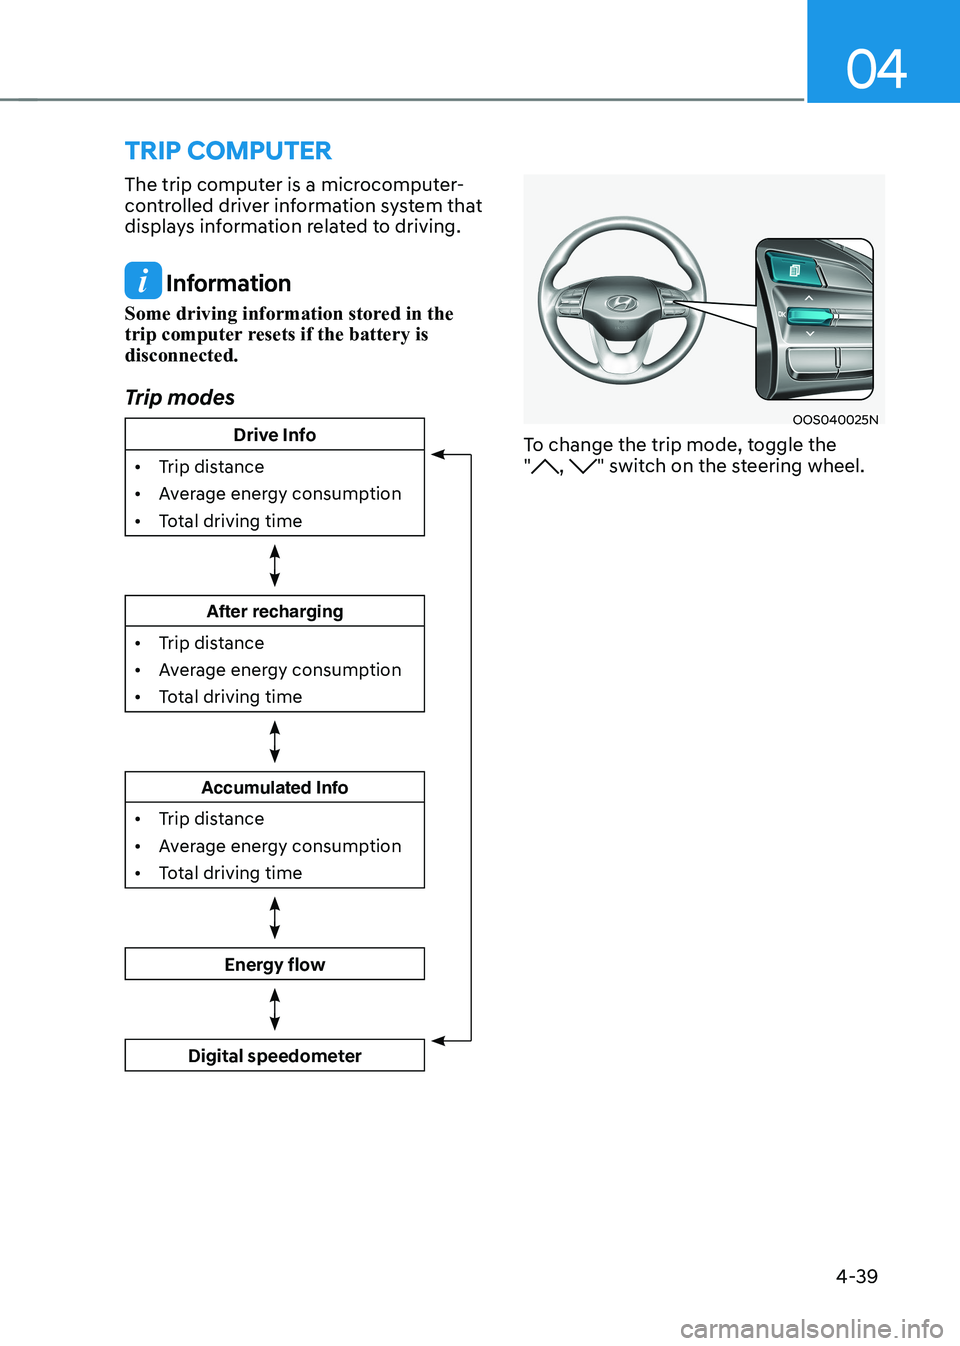
trIp computer
The trip computer is a microcomputer-
controlled driver information system that
displays information related to driving.
Information
Some driving information stored in the
trip computer resets if the battery is disconnected.
Trip modes
Drive Info
• Trip distance
• Average energy consumption
• Total driving time
After recharging
• Trip distance
• Average energy consumption
• Total driving time
Accumulated Info
• Trip distance
• Average energy consumption
• Total driving time
Energy flow
Digital speedometer
OOS040025N
To change the trip mode, toggle the "
, " switch on the steering wheel.
Page 183 of 548
Instrument cluster
4-40
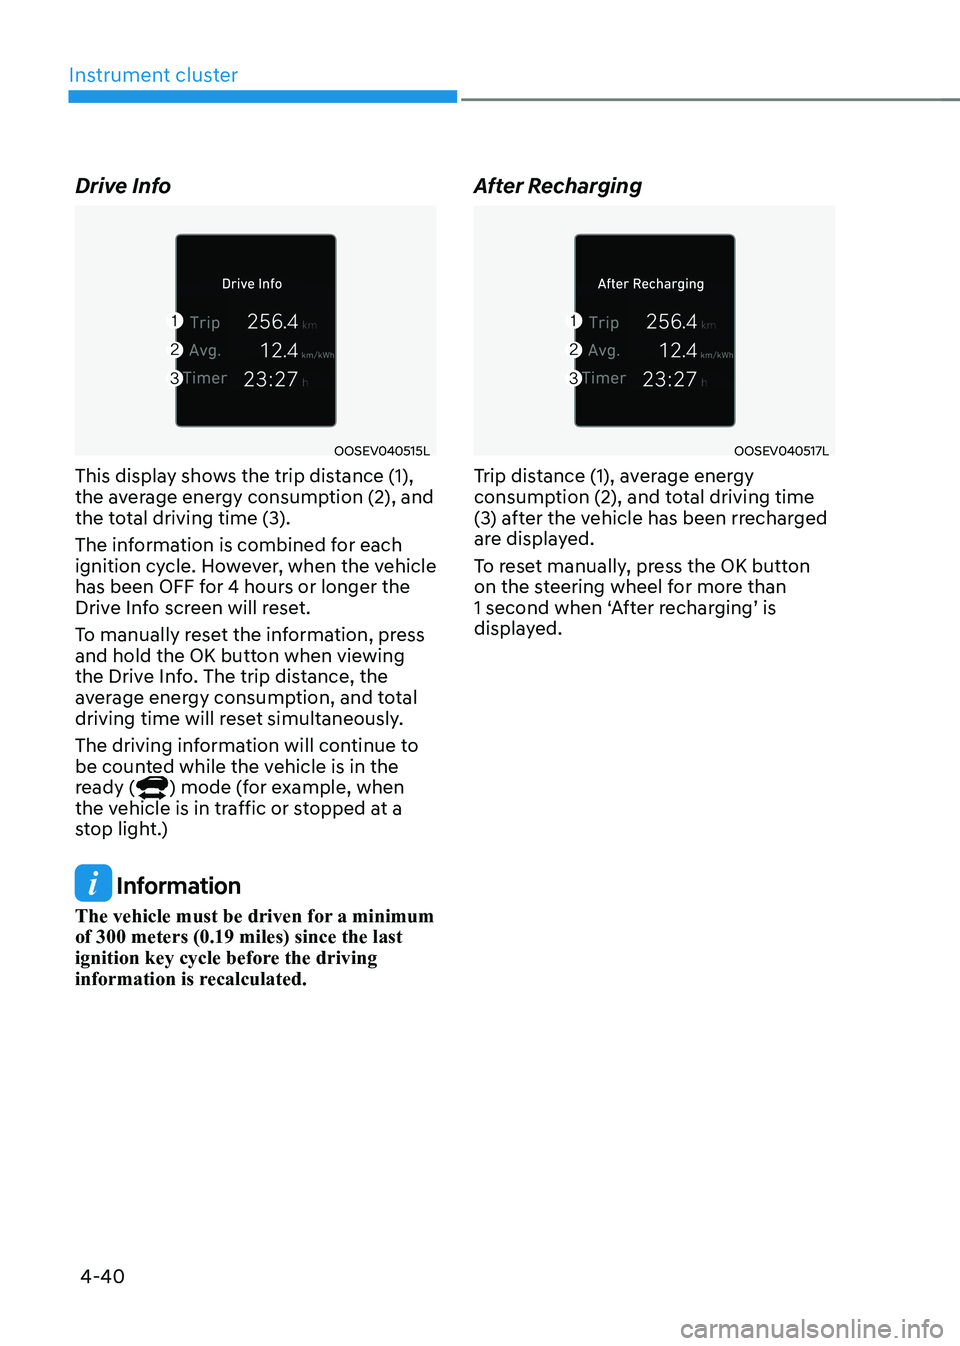
Drive Info
OOSEV040515L
This display shows the trip distance (1),
the average energy consumption (2), and
the total driving time (3).
The information is combined for each
ignition cycle. However, when the vehicle
has been OFF for 4 hours or longer the
Drive Info screen will reset.
To manually reset the information, press
and hold the OK button when viewing
the Drive Info. The trip distance, the
average energy consumption, and total
driving time will reset simultaneously.
The driving information will continue to
be counted while the vehicle is in the
ready (
) mode (for example, when
the vehicle is in traffic or stopped at a
stop light.)
Information
The vehicle must be driven for a minimum of 300 meters (0.19 miles) since the last
ignition key cycle before the driving
information is recalculated. After Recharging
OOSEV040517L
Trip distance (1), average energy
consumption (2), and total driving time
(3) after the vehicle has been rrecharged
are displayed.
To reset manually, press the OK button
on the steering wheel for more than
1 second when ‘After recharging’ is
displayed.
Page 184 of 548
04
4-41
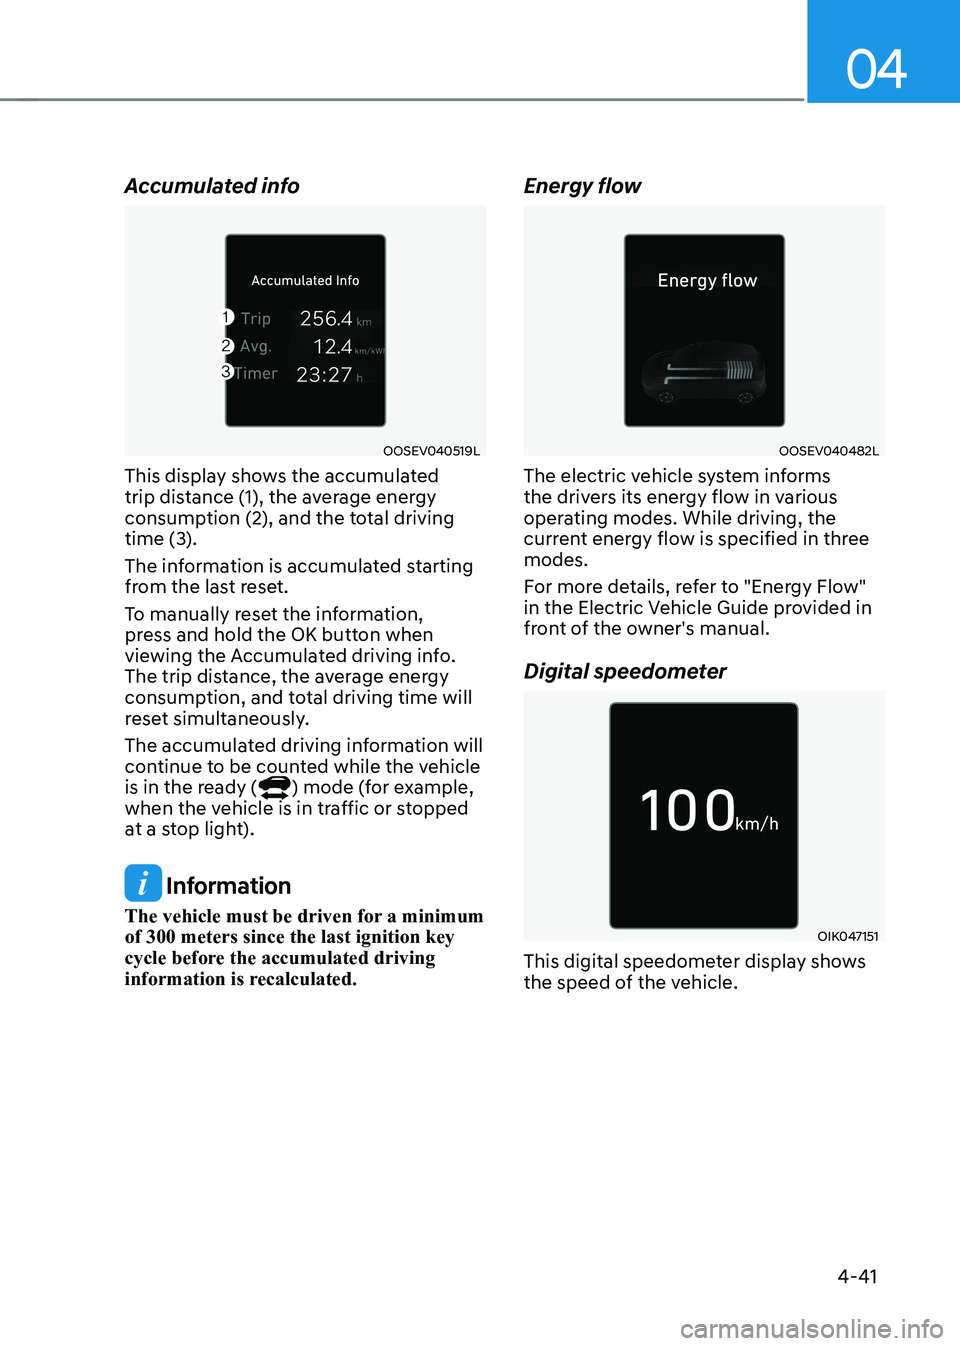
Accumulated info
OOSEV040519L
This display shows the accumulated
trip distance (1), the average energy
consumption (2), and the total driving
time (3).
The information is accumulated starting
from the last reset.
To manually reset the information,
press and hold the OK button when
viewing the Accumulated driving info.
The trip distance, the average energy
consumption, and total driving time will
reset simultaneously.
The accumulated driving information will
continue to be counted while the vehicle
is in the ready (
) mode (for example,
when the vehicle is in traffic or stopped
at a stop light).
Information
The vehicle must be driven for a minimum of 300 meters since the last ignition key
cycle before the accumulated driving
information is recalculated. Energy flow
OOSEV040482L
The electric vehicle system informs
the drivers its energy flow in various
operating modes. While driving, the
current energy flow is specified in three modes.
For more details, refer to "Energy Flow"
in the Electric Vehicle Guide provided in
front of the owner's manual.
Digital speedometer
OIK047151
This digital speedometer display shows
the speed of the vehicle.
Page 185 of 548
5
Accessing your vehicle ..................................................................................... 5-4
Smart key .................................................................................................................... 5-4
Immobilizer system ...................................................................................................... 5-9
Door locks .................................................................................................................. 5-10
Operating door locks from outside the vehicle........................................................ 5-10
Operating door locks from inside the vehicle ...........................................................5-11
Auto door lock/unlock features..................................................................................5-13
Child-protector rear door locks ................................................................................. 5-14
Rear Occupant Alert (ROA) ....................................................................................... 5-14
Theft-alarm system .......................................................................................... 5-15
Steering wheel ................................................................................................. 5-16
Electric power steering (EPS) .................................................................................... 5-16
Tilt steering/Telescopic steering ................................................................................ 5-17
Heated steering wheel ............................................................................................... 5-18
Horn............................................................................................................................. 5-18
Mirrors .............................................................................................................. 5-19
Inside rearview mirror ................................................................................................ 5-19
Outside rearview mirror ............................................................................................. 5-30
Windows .......................................................................................................... 5-33
Power windows .......................................................................................................... 5-33
Sunroof ............................................................................................................. 5-37
Sunroof opening and closing .................................................................................... 5-38
Sliding the sunroof ..................................................................................................... 5-38
Tilting the sunroof ...................................................................................................... 5-39
Sunshade .................................................................................................................... 5-39
Resetting the sunroof ................................................................................................ 5-39
Sunroof open warning .............................................................................................. 5-40
Exterior features ............................................................................................... 5-41
Hood ............................................................................................................................ 5-41
Tailgate ........................................................................................................................ 5-43
Charging door ............................................................................................................. 5-45
Head Up Display (HUD) .................................................................................. 5-46
Precautions while using the head up display ..........................................................5-46
Head Up Display ON/OFF .......................................................................................... 5-47
Head Up Display Information .................................................................................... 5-47
Head Up Display Setting ............................................................................................ 5-47
5. Convenient features
Page 197 of 548
05
5-13
WARNING
Do not leave children or animals
unattended in your vehicle. An enclosed
vehicle can become extremely hot,
causing death or serious injury to
unattended children or animals who
cannot escape the vehicle. Children
might operate features of the vehicle
that could injure them, or they could
encounter other harm, possibly from
someone gaining entry to the vehicle.
WARNING
Leaving your vehicle unlocked increases
the potential risk to you or others from
someone hiding in your vehicle.
To secure your vehicle, while
depressing the brake, move the shift
lever to the P (Park) position, engage
the parking brake, and place the START/
STOP button OFF position, close all
windows, lock all doors, and always
take the key with you.
CAUTION
Opening a door when something is
approaching may cause damage or
injury. Be careful when opening doors
and watch for vehicles, motorcycles,
bicycles or pedestrians approaching the
vehicle in the path of the door.
WARNING
If you stay in the vehicle for a long time
while the weather is very hot or cold,
there are risks of injuries or danger to
life. Do not lock the vehicle from the
outside when someone is in the vehicle.
Auto door lock/unlock features
Impact sensing door unlock system (if equipped)
All doors will be automatically unlocked
when an impact causes the air bags to
deploy.
Speed sensing door lock system (if equipped)
All doors will be automatically locked
when vehicle speed exceeds 15 km/h
(9 mph).
You can activate or deactivate the Auto
Door Lock/Unlock features from the User
Settings mode on the LCD display. For
more details, refer to “LCD Display” in
this chapter.
Page 208 of 548
Convenient features
5-24
3) Two-Way Communication
Programming (For select garage door
openers)
If your garage door opener has the
'myQ' logo on its side, your opener
likely has Two-Way Communication
capability. HomeLink has the capability
to establish Two-Way Communication
with your garage door opener. HomeLink
can receive and display "closing"
or "opening" status messages from
compatible garage door openers. At
any time, Home-Link can also recall
and display the last recorded status
communicated by the garage door
opener to indicate your garage door being "closed" or "opened".
To check if your garage door opener is
compatible with this feature, refer to
www.homelink.com/compatible/ Two-
way-Communication. If your garage
door opener has this functionality, AND
the Two-Way Communication indicators
(4), (6) in the mirror appear while the
garage door is opening/closing, then
no further steps are needed. Two-Way
Communication Programming is already
complete.
However, if your garage door opener
has this functionality, AND the Two-
Way Communication indicators (4), (6)
in the mirror DO NOT appear while the
garage door is opening/closing, use
the following instructions to enable this
functionality. 1. In your vehicle, press and hold the
programmed HomeLink button for 2
seconds, then release. Confirm that
the garage door is moving. AFTER it
stops, you will have one minute to
complete the following steps:
à A ladder and/or second person may
simplify the following steps.
2. On your garage door opener in your garage, locate the "Learn" button
(usually near where the hanging
antenna wire is attached to the garage
door opener). If there is difficulty
locating this button, reference the
device's owner's manual.
3. Press and release the "Learn" button.
4. A light on your garage door opener
may flash, and your Two-Way
Communication indicators (4), (6) in
your vehicle may flash, confirming
completion of the process.
5. Return to the vehicle and firmly press and release the programmed
HomeLink button to activate
your garage door. The Two-Way
Communication indicators (4), (6)
flash in orange when the door is
moving. Do not make any additional
button presses until AFTER the garage
door has come to a complete stop.
6. Your Two-Way Communication programming is now complete.
Information
If your garage door opener has Two-
Way Communication functionality,
it is possible for HomeLink to stop
functioning the garage door shortly
after initial programming, IF the Two-
Way Communication Programming
wasn’t properly completed. This
usually happens after the first 10 times
a programmed HomeLink button is
pressed. If you experience this, completing
the "Programming a New HomeLink
Button" and "Two-Way Communication
Programming" will restore door operation.
Page 209 of 548
05
5-25
4) Canadian Programming
Canadian radio-frequency laws require
transmitter remote signals to "time-
out" (or quit) after a couple seconds of
transmission, which may not be long
enough for HomeLink to pick up the signal
during programming.
If you live in Canada or you are having
difficulties programming a gate operator
or garage door opener by using the
programming procedures, replace
"Programming a New HomeLink Button"
step 3 with the following:
While the HomeLink indicator light (7) is
flashing orange, press and release ("cycle")
your device's handheld remote every two
seconds until the HomeLink indicator light
(7) changes from orange to green. You may
now release the hand-held remote button.
Then proceed with "Programming a New
HomeLink Button" step 4.
2. Operating HomeLink
®
1) Operating HomeLink®
OOS040095N
1. Press and release the desired programmed HomeLink button (1, 2
or 3).
Information
The HomeLink indicator (7) should
light green, solid or flashing, and your
programmed device should operate.
If your device does not operate, the
HomeLink programming was not
successful, and you'll need to reprogram the button.
2) Two-Way Communication Display Behavior
OOS047099N
1. Press and release one of the programmed HomeLink buttons (1, 2
or 3).
OOS047411N
2. The indicator (4) and (6) operates as below, if your garage door opener
has Two-Way Communication
functionality.
Page 216 of 548
Convenient features
5-32
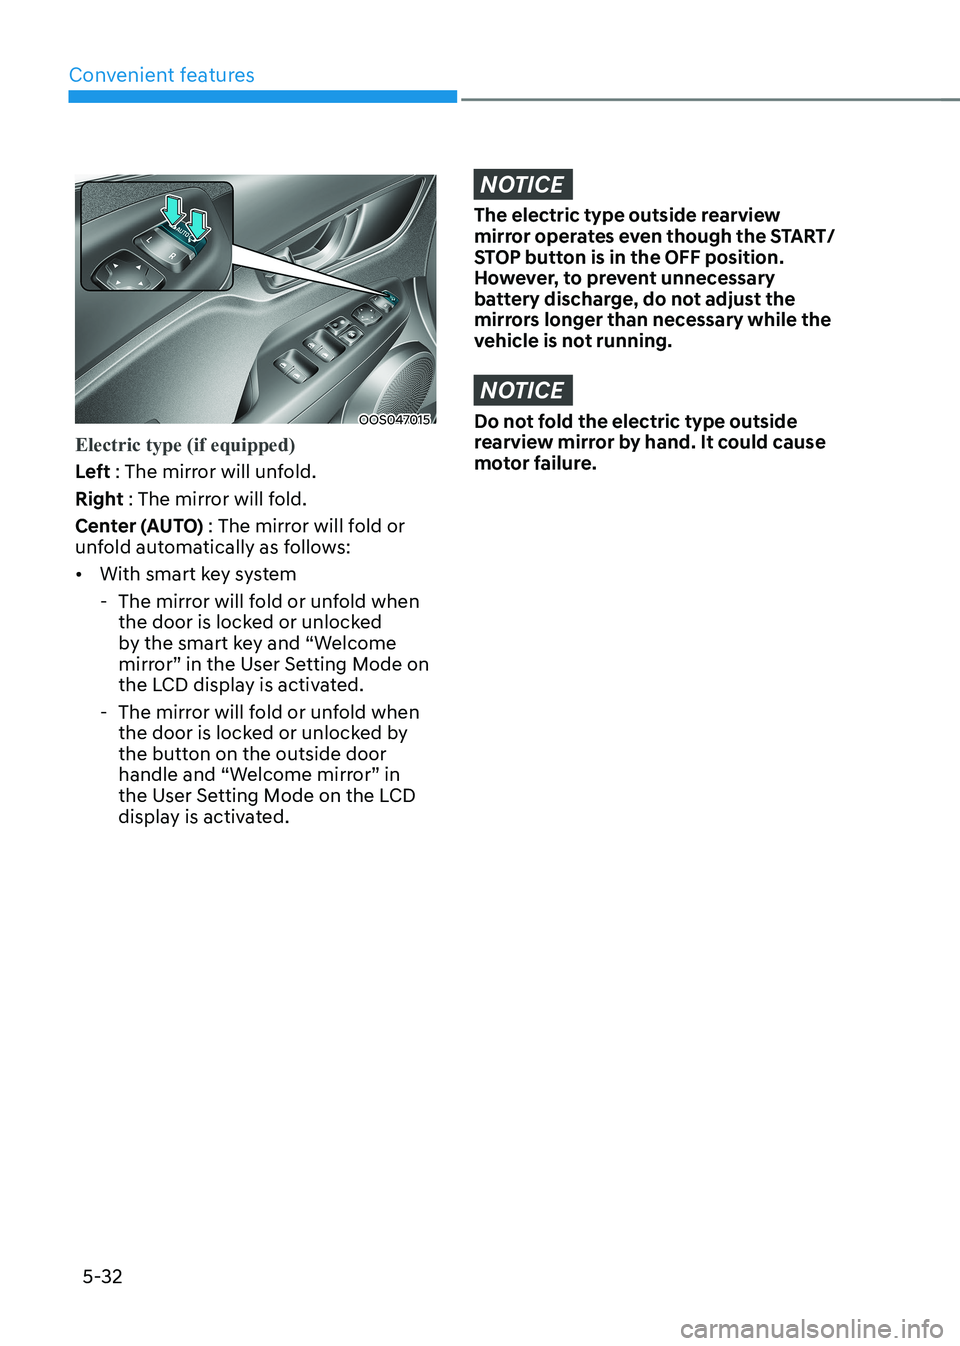
OOS047015
Electric type (if equipped)
Left : The mirror will unfold.
Right : The mirror will fold.
Center (AUTO) : The mirror will fold or
unfold automatically as follows: • With smart key system
- The mirror will fold or unfold when the door is locked or unlocked
by the smart key and “Welcome
mirror” in the User Setting Mode on
the LCD display is activated.
- The mirror will fold or unfold when the door is locked or unlocked by
the button on the outside door
handle and “Welcome mirror” in
the User Setting Mode on the LCD
display is activated.
NOTICE
The electric type outside rearview
mirror operates even though the START/
STOP button is in the OFF position.
However, to prevent unnecessary
battery discharge, do not adjust the
mirrors longer than necessary while the
vehicle is not running.
NOTICE
Do not fold the electric type outside
rearview mirror by hand. It could cause
motor failure.