2021 VOLVO V90 CROSS COUNTRY reset
[x] Cancel search: resetPage 426 of 683
||
STARTING AND DRIVING
* Option/accessory.
424 The ECO gauge indicates how economical current driving is:
A low reading in the green area of thegauge indicates economical driving.
A high reading is shown when driving isnot economical, e.g. heavy braking orrapid acceleration.
The ECO gauge also has an indicator showinghow a reference driver would drive in the samedriving situation. This is shown by the shortpointer in the gauge.
ECO ClimateIn Eco mode, ECO climate is automatically
activated in the passenger compartment to help reduce energy consumption.
NOTE
When the Eco drive mode is activated, set-
tings for certain climate system and elec- tricity consuming functions are reduced.Some of these settings can be reset man-ually, but full functionality will only be restored by switching off
Eco mode or
adapting the Individual* drive mode to full
climate system functionality.
If condensation forms on the windows, tap the max defroster button, which will function nor-mally.
Related information
Changing drive mode
* (p. 421)
Activating and deactivating Eco drivemode using the function button (p. 424)
Drive modes
* (p. 419)
Economical driving (p. 435)
Start/Stop function (p. 425)
Activating and deactivating Eco drive mode using the functionbutton There is a function button for
Eco drive mode
in the center display's Function view if the vehicle is not equipped with a drive modecontrol in the tunnel console.
When the engine is switched off, Eco mode is
deactivated and must therefore be reactivated each time the engine is started. ECO will be
displayed in the instrument panel when thefunction is activated.
Selecting Eco drive mode in the center display's Function view
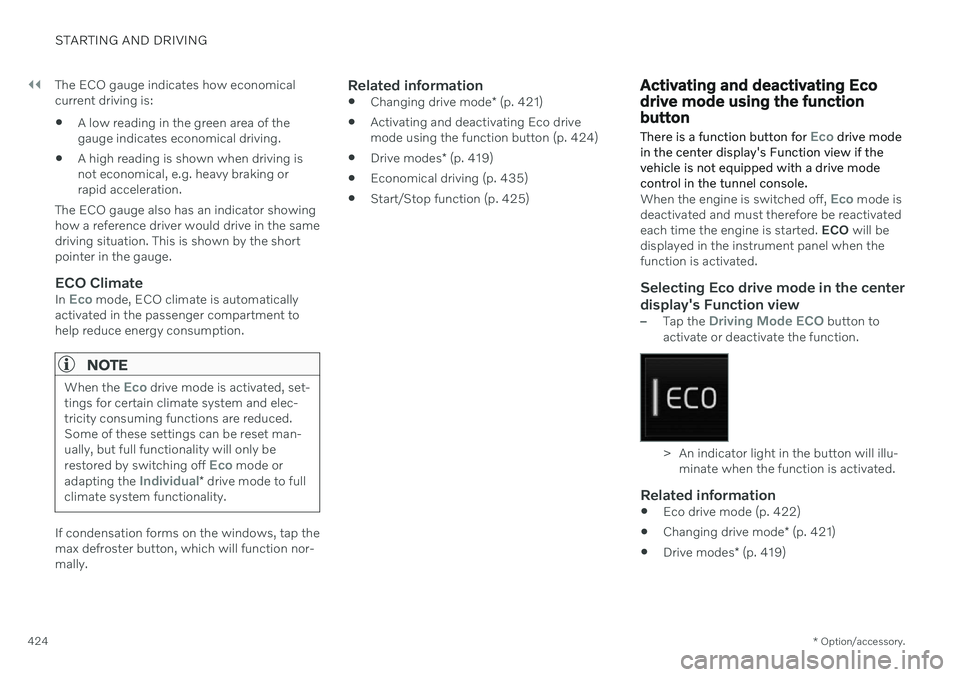
–Tap the Driving Mode ECO button to
activate or deactivate the function.
> An indicator light in the button will illu- minate when the function is activated.
Related information
Eco drive mode (p. 422)
Changing drive mode
* (p. 421)
Drive modes
* (p. 419)
Page 457 of 683
STARTING AND DRIVING
}}
* Option/accessory.455
Programming HomeLink ®
*27
Follow these instructions to program HomeLink ®
, reset all programming, or pro-
gram individual buttons.
NOTE
In some vehicles, the ignition must be on or in the "accessory position" before HomeLink ®
can be programmed or used. It
can be a good idea to put new batteries in the remote control being replaced by HomeLink ®
for faster programming and
better radio signal transmission. TheHomeLink ®
buttons should be reset before
programming.
WARNING
While HomeLink ®
is being programmed,
the garage door or gate being programmed may be activated. Make sure that no one isnear the door or gate during programming.When programming a garage door opener,it is advised to park outside of the garage. 1. Point the remote control at the
HomeLink ®
button to be programmed and
hold it about 2-8 cm (1-3 inches) from the button. Do not obstruct the HomeLink ®
indicator light. Note: Some remote controls are more
effective at programming HomeLink ®
from
a distance of about 15-20 cm (6-12 inches). Keep this in mind if you experi-ence any programming difficulties.
2. Press and hold both the remote control button and the HomeLink ®
button to be
programmed. 3. Do not release the buttons until the indica-
tor light has stopped flashing slowly(about once a second) and either flashesquickly (about 10 times a second) orglows steadily. >If the indicator light glows steadily: Indication that programming is com-plete. Press the programmed buttontwice to activate. If the indicator light flashes quickly: The device being programmed with HomeLink ®
may have a security func-
tion that requires an extra step. Try pressing the programmed button twiceto see whether the programmingworks. Otherwise, continue with thefollowing steps.
27 Certain markets only.
Page 458 of 683
||
STARTING AND DRIVING
* Option/accessory.
456
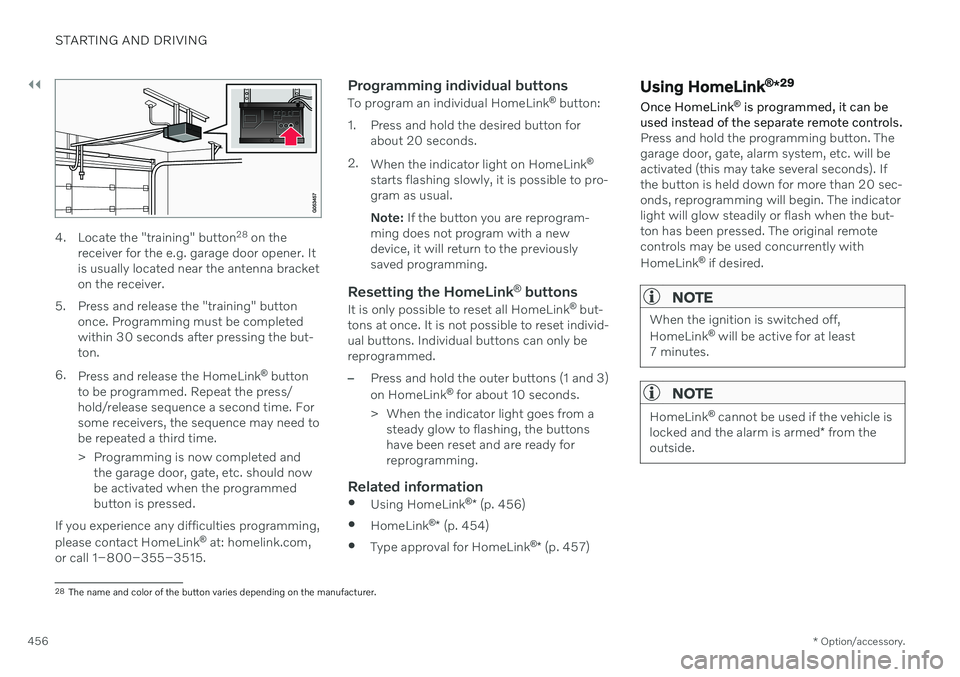
4. Locate the "training" button 28
on the
receiver for the e.g. garage door opener. It is usually located near the antenna bracketon the receiver.
5. Press and release the "training" button once. Programming must be completedwithin 30 seconds after pressing the but-ton.
6. Press and release the HomeLink ®
button
to be programmed. Repeat the press/hold/release sequence a second time. Forsome receivers, the sequence may need tobe repeated a third time.
> Programming is now completed and the garage door, gate, etc. should now be activated when the programmedbutton is pressed.
If you experience any difficulties programming, please contact HomeLink ®
at: homelink.com,
or call 1–800–355–3515.
Programming individual buttons
To program an individual HomeLink ®
button:
1. Press and hold the desired button for about 20 seconds.
2. When the indicator light on HomeLink ®
starts flashing slowly, it is possible to pro- gram as usual. Note: If the button you are reprogram-
ming does not program with a new device, it will return to the previouslysaved programming.
Resetting the HomeLink ®
buttons
It is only possible to reset all HomeLink ®
but-
tons at once. It is not possible to reset individ-ual buttons. Individual buttons can only bereprogrammed.
–Press and hold the outer buttons (1 and 3) on HomeLink ®
for about 10 seconds.
> When the indicator light goes from a steady glow to flashing, the buttons have been reset and are ready forreprogramming.
Related information
Using HomeLink ®
* (p. 456)
HomeLink ®
* (p. 454)
Type approval for HomeLink ®
* (p. 457)
Using HomeLink ®
*29
Once HomeLink ®
is programmed, it can be
used instead of the separate remote controls.
Press and hold the programming button. The garage door, gate, alarm system, etc. will beactivated (this may take several seconds). Ifthe button is held down for more than 20 sec-onds, reprogramming will begin. The indicatorlight will glow steadily or flash when the but-ton has been pressed. The original remotecontrols may be used concurrently with HomeLink ®
if desired.
NOTE
When the ignition is switched off, HomeLink ®
will be active for at least
7 minutes.
NOTE
HomeLink ®
cannot be used if the vehicle is
locked and the alarm is armed * from the
outside.
28 The name and color of the button varies depending on the manufacturer.
Page 464 of 683
AUDIO, MEDIA AND INTERNET
* Option/accessory.
462
Audio, media and Internet
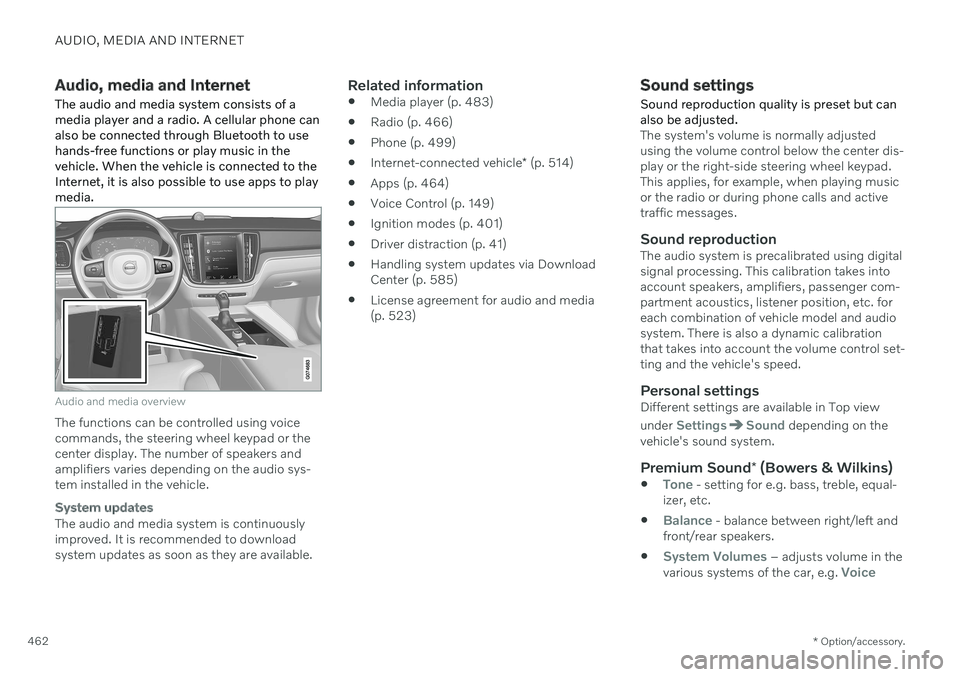
The audio and media system consists of a media player and a radio. A cellular phone canalso be connected through Bluetooth to usehands-free functions or play music in thevehicle. When the vehicle is connected to theInternet, it is also possible to use apps to playmedia.
Audio and media overview
The functions can be controlled using voice commands, the steering wheel keypad or thecenter display. The number of speakers andamplifiers varies depending on the audio sys-tem installed in the vehicle.
System updates
The audio and media system is continuously improved. It is recommended to download system updates as soon as they are available.
Related information
Media player (p. 483)
Radio (p. 466)
Phone (p. 499)
Internet-connected vehicle
* (p. 514)
Apps (p. 464)
Voice Control (p. 149)
Ignition modes (p. 401)
Driver distraction (p. 41)
Handling system updates via DownloadCenter (p. 585)
License agreement for audio and media(p. 523)
Sound settings
Sound reproduction quality is preset but can also be adjusted.
The system's volume is normally adjusted using the volume control below the center dis-play or the right-side steering wheel keypad.This applies, for example, when playing musicor the radio or during phone calls and activetraffic messages.
Sound reproductionThe audio system is precalibrated using digitalsignal processing. This calibration takes intoaccount speakers, amplifiers, passenger com-partment acoustics, listener position, etc. foreach combination of vehicle model and audiosystem. There is also a dynamic calibrationthat takes into account the volume control set-ting and the vehicle's speed.
Personal settingsDifferent settings are available in Top view under
SettingsSound depending on the
vehicle's sound system.
Premium Sound * (Bowers & Wilkins)
Tone - setting for e.g. bass, treble, equal-
izer, etc.
Balance - balance between right/left and
front/rear speakers.
System Volumes – adjusts volume in the
various systems of the car, e.g. Voice
Page 497 of 683
AUDIO, MEDIA AND INTERNET
}}
* Option/accessory.495
Settings for Apple ®
CarPlay ®
*
Settings for an iOS device connected through CarPlay 13
,14
.
Automatic start1. Tap Settings in the Top view.
2. Tap
CommunicationApple CarPlayand select the desired setting: Check the box - CarPlay will start auto- matically when the USB cable is con-nected.
Uncheck the box - CarPlay will not startautomatically when the USB cable isconnected.
A maximum of 20 iOS devices can be storedin the list, which may be worth noting if manypeople share the vehicle, e.g. in a car pool.When the list is full and a new device is con-nected, the oldest one will be deleted. To delete the list, the settings must be rest in the center display (factory reset).
System Volumes1. Tap Settings in the Top view. 2. Tap
SoundSystem Volumes to
change the settings for the following:
Voice Control
Navi Voice Guidance
Phone Ringtone
Related information
Apple ®
CarPlay ®
* (p. 492)
Using Apple ®
CarPlay ®
* (p. 493)
Resetting center display settings (p. 138)
Tips for using Apple ®
CarPlay ®
*
Here are some useful tips for when you use CarPlay ®
15
.
Update your iOS device with the latest version of the iOS operating system andensure that the apps have been updated.
In the event of a problem with CarPlay,unplug the iOS device from the USB portand then plug it in again. Otherwise, try toclose the app on the device that is notworking and then restart the app, or tryclosing all apps and restart your device.
If the apps do not appear when CarPlaystarts (black screen), try minimizing andexpanding the tile for CarPlay.
Using apps that are not compatible withCarPlay may sometimes cause the con-nection between the iOS device and thevehicle to be broken. Information aboutsupported apps and compatible devicescan be found on Apple's website. You canalso search for CarPlay in the App Store tofind information about apps that are com-patible with CarPlay in your market.
You can use Siri to write or dictate mes-sages or have them read aloud. Messagesare read aloud and dictated in the lan-guage selected in the Siri settings. When
13
Apple and CarPlay are registered trademarks of Apple Inc.
14 Availability may vary depending on market.
15 Availability may vary depending on market.
Page 500 of 683
AUDIO, MEDIA AND INTERNET
* Option/accessory.
498
Settings for Android Auto *
Settings for Android devices initially con- nected with Android Auto 19
.
Automatic start1. Tap Settings in the Top view.
2. Tap
CommunicationAndroid Autoand select setting: Check the box - Android Auto will start automatically when the USB cable isconnected.
Uncheck the box - Android Auto will notstart automatically when the USB cableis connected.
A maximum of 20 Android devices can bestored in the list. When the list is full and anew device is connected, the oldest one willbe deleted. A factory reset must be performed to delete the list.
System Volumes1. Tap Settings in the Top view. 2. Tap
SoundSystem Volumes to
change the settings for the following:
Voice Control
Navi Voice Guidance
Phone Ringtone
Related information
Android Auto
* (p. 496)
Using Android Auto
* (p. 497)
Resetting center display settings (p. 138)
Tips for using Android Auto
*
Here are some useful tips for when you use Android Auto 20
.
Ensure that your apps are updated.
When starting the vehicle, wait until the center display has started, connect thedevice and then open Android Auto fromthe app view.
In the event of problems with AndroidAuto, unplug your Android device from theUSB port and then plug it in again. Other-wise, try closing the app on the device andthen restarting the app.
When a device is connected to AndroidAuto it is still possible to play media viaBluetooth to another media player. TheBluetooth function is on when AndroidAuto is used.
If the Android Auto icon is grayed out, it means that a device is no longer con- nected. When you connect your device,the icon will light up. If there is no icon atall, the vehicle does not support connect-ing a device for this purpose.
If the device is connected to the vehiclethrough Bluetooth, the connection will bebroken when Android Auto is used.Resume Internet connection in the vehicle
18
Availability may vary depending on market.
19 Availability may vary depending on market.
20 Availability may vary depending on market.
Page 519 of 683
AUDIO, MEDIA AND INTERNET
* Option/accessory.517
3. Tap
CommunicationVehicle Modem
Internet.
4. Activate/deactivate by tapping to check/ uncheck the
Vehicle modem Internetbox.
5. If a different connection is being used, confirm the connection change.
6. Enter the SIM card's PIN code. > The vehicle will connect to the network.
NOTE
Please note that the SIM card used for Internet connection via P-SIM cannot havethe same telephone number as the SIMcard used in the cellular phone. If the samecard is used for both, phone calls will notbe connected properly to the cellularphone. Use a SIM card with a separatephone number for the Internet connectionor a data card that does not handle phonecalls and can therefore not interfere withphone function.
Related information
Internet-connected vehicle
* (p. 514)
No or poor Internet connection (p. 519)
Vehicle modem settings (p. 517)
Vehicle modem settings Your vehicle is equipped with a modem that can be used to connect the vehicle to theInternet. It is also possible to share this Inter-net connection over Wi-Fi.
1.
Tap Settings in the Top view.
2. Tap
CommunicationVehicle Modem
Internet and select settings:
Vehicle modem Internet - select this to
use the vehicle's modem to connect to the Internet.
Data usage. - tap Reset to reset the
counter for the amount of data received and sent.
Network.
Select carrier - select a service provider
manually or automatically.
Data roaming - if the box is checked, the
vehicle modem will attempt to connect to the Internet when the vehicle is outside itshome network (e.g. if you are in anothercountry). Please note that this could entailadditional charges. Consult with your serv-ice provider for data roaming terms underyour contract.
SIM card PIN.
Change PIN - a maximum of 4 digits can
be entered.
Disable PIN - select whether a PIN code
will be required to access the SIM card.
Send request code - used to e.g. down-
load or check the balance remaining on a prepaid phone card. This function is spe-cific to your service provider.
NOTE
Please note that the SIM card used for Internet connection via P-SIM cannot havethe same telephone number as the SIMcard used in the cellular phone. If the samecard is used for both, phone calls will notbe connected properly to the cellularphone. Use a SIM card with a separatephone number for the Internet connectionor a data card that does not handle phonecalls and can therefore not interfere withphone function.
Related information
Connecting the vehicle to the Internet via vehicle modem (SIM card) (p. 516)
No or poor Internet connection (p. 519)
Page 521 of 683
AUDIO, MEDIA AND INTERNET
* Option/accessory.519
No or poor Internet connection Factors affecting the Internet connection.
The amount of data transmitted depends on the services or apps currently in use in thevehicle. Streaming music, for example,involves the transmission of a large amount ofdata, and this requires a good connection anda strong signal.
Phone to vehicleInternet connection speed may vary depend-ing on the location of the cellular phone in thevehicle. Move the phone closer to the centerdisplay to increase signal strength. Make surethat nothing is between the phone and centerdisplay that could be blocking the signal.
Phone to network operatorThe speed of the mobile network variesdepending on the coverage in the vehicle'scurrent location. Coverage may be poorer ine.g. tunnels, mountainous areas, deep valleysor indoors. Connection speed is also depend-ent on the subscription you have with yourservice provider.
NOTE
If you experience any problems with data traffic, contact your network service pro-vider.
Restarting the phoneIf you experience any Internet connection problems, it may help to restart your phone.
Related information
Internet-connected vehicle
* (p. 514)
Wi-Fi technology and security (p. 520)
Deleting Wi-Fi networks
Networks that are not needed can be deleted.
1. Tap Settings in the Top view.
2. Proceed to
CommunicationWi-FiSaved networks.
3. Tap
Forget to delete the network.
4. Confirm the selection. > The vehicle will no longer connect tothe deleted network.
Deleting all networksAll networks can be deleted at once by per- forming a factory reset. Please note that alluser data and system settings will be restoredto original default factory settings.
Related information
Internet-connected vehicle
* (p. 514)
No or poor Internet connection (p. 519)
Resetting center display settings (p. 138)
Connecting the vehicle to the Internet viaa phone (Wi-Fi) (p. 515)