2021 VOLVO V90 CROSS COUNTRY reset
[x] Cancel search: resetPage 174 of 683
WINDOWS, GLASS AND MIRRORS
* Option/accessory.
172
Windows, glass and mirrors The vehicle is equipped with several different types of windows, glass and mirrors. Some ofthe windows in the car are laminated.
The windshield has laminated glass. Lamina- ted glass is also available as on option forsome other glass surfaces. Laminated glass isreinforced, which provides better protectionagainst break-ins and improved soundproofingin the passenger compartment. The panoramic roof * also has laminated glass.
The symbol shows the windows containing lamina- ted glass. 1
Related information
Pinch protection for windows and sun cur- tains (p. 172)
Panoramic roof
* (p. 179)
Power windows (p. 174)
Rearview/door mirrors (p. 176)
Using sun curtains
* (p. 176)
Head-up display
* (p. 146)
Using the windshield wipers (p. 183)
Using the windshield and headlight wash-ers (p. 186)
Activating and deactivating the heatedrear window and door mirrors (p. 227)
Pinch protection for windows and sun curtains All power windows and sun curtains
* have a
pinch protection function that is triggered if anything blocks them while they are openingor closing.
If pinch protection is activated, movement will stop and then retract automatically to approx.50 mm (2 inches) from the point at which itwas blocked (or to full ventilation position). It is still possible to override pinch protection when closing is interrupted (e.g. due to ice) bypressing and holding down the control in thesame direction. If there is any problem with the pinch protec- tion, a rest procedure can be tested.
WARNING
If the starter battery is disconnected, the function for automatic opening and closingmust be reset to function correctly. A resetis required in order for the pinch protectionto work.
Related information
Reset procedure for pinch protection (p. 173)
Operating the power windows (p. 174)
1
Does not apply to windshield and panoramic roof *, which are always laminated and therefore do not have this symbol.
Page 175 of 683
WINDOWS, GLASS AND MIRRORS
* Option/accessory.173
Using sun curtains
* (p. 176)
Operating the panoramic roof
* (p. 180)
Reset procedure for pinch protection
If you experience any problems with the elec- trical functions for the power windows, youcan try to perform a reset.
WARNING
If the starter battery is disconnected, the function for automatic opening and closingmust be reset to function correctly. A resetis required in order for the pinch protectionto work.
Consult a workshop if you experience any problems with the panoramic roof. 2
Resetting a power window
1. Start with the window in the closed posi-
tion.
2. Then move the control in manual mode three times upward toward the closed position.
> The system will be automatically acti-vated.
If the problem persists, contact a workshop.
Related information
Pinch protection for windows and sun cur- tains (p. 172)
Operating the power windows (p. 174)
Using sun curtains
* (p. 176)
2
An authorized Volvo workshop is recommended.
Page 176 of 683
WINDOWS, GLASS AND MIRRORS
* Option/accessory.
174
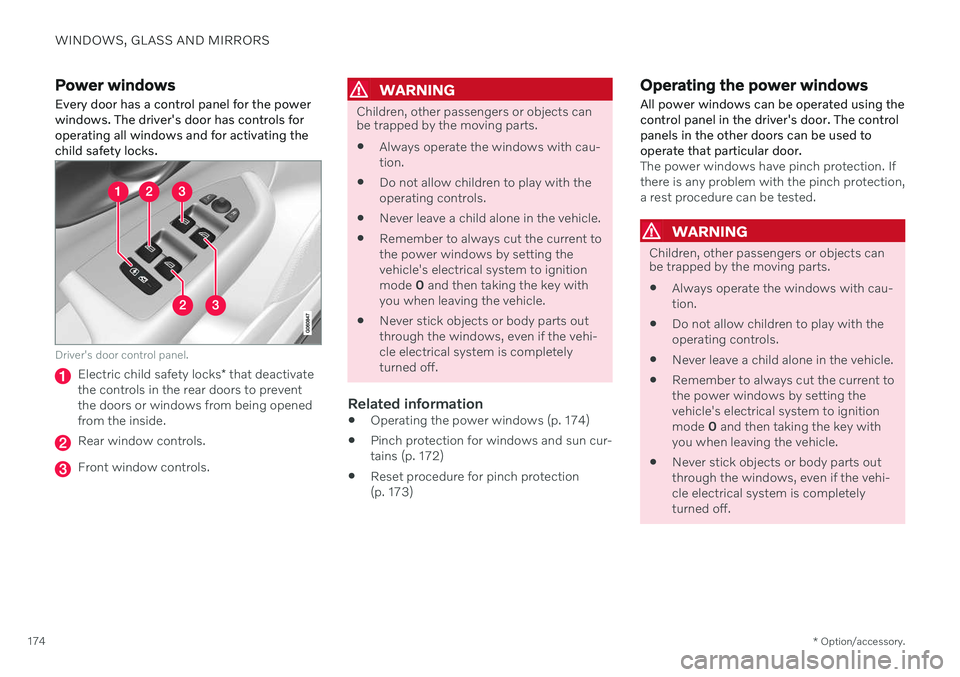
Power windows Every door has a control panel for the power windows. The driver's door has controls foroperating all windows and for activating thechild safety locks.
Driver's door control panel.
Electric child safety locks * that deactivate
the controls in the rear doors to prevent the doors or windows from being openedfrom the inside.
Rear window controls.
Front window controls.
WARNING
Children, other passengers or objects can be trapped by the moving parts.
Always operate the windows with cau- tion.
Do not allow children to play with theoperating controls.
Never leave a child alone in the vehicle.
Remember to always cut the current tothe power windows by setting thevehicle's electrical system to ignitionmode
0 and then taking the key with
you when leaving the vehicle.
Never stick objects or body parts outthrough the windows, even if the vehi-cle electrical system is completelyturned off.
Related information
Operating the power windows (p. 174)
Pinch protection for windows and sun cur-tains (p. 172)
Reset procedure for pinch protection(p. 173)
Operating the power windows
All power windows can be operated using the control panel in the driver's door. The controlpanels in the other doors can be used tooperate that particular door.
The power windows have pinch protection. If there is any problem with the pinch protection,a rest procedure can be tested.
WARNING
Children, other passengers or objects can be trapped by the moving parts.
Always operate the windows with cau- tion.
Do not allow children to play with theoperating controls.
Never leave a child alone in the vehicle.
Remember to always cut the current tothe power windows by setting thevehicle's electrical system to ignitionmode
0 and then taking the key with
you when leaving the vehicle.
Never stick objects or body parts outthrough the windows, even if the vehi-cle electrical system is completelyturned off.
Page 177 of 683
WINDOWS, GLASS AND MIRRORS
* Option/accessory.175
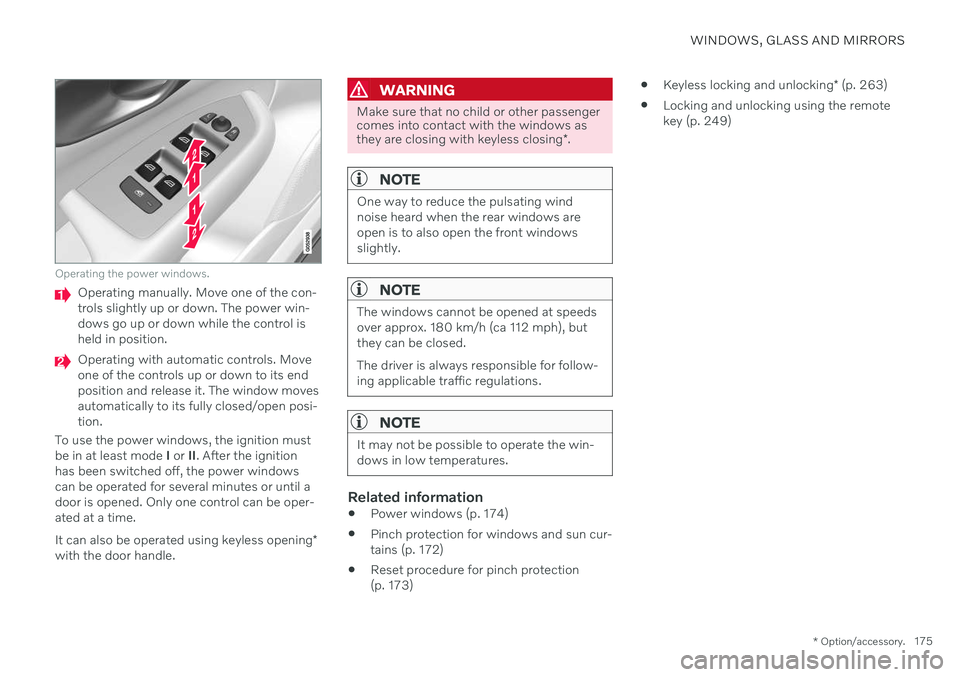
Operating the power windows.
Operating manually. Move one of the con- trols slightly up or down. The power win-dows go up or down while the control isheld in position.
Operating with automatic controls. Move one of the controls up or down to its endposition and release it. The window movesautomatically to its fully closed/open posi-tion.
To use the power windows, the ignition mustbe in at least mode I or II. After the ignition
has been switched off, the power windowscan be operated for several minutes or until adoor is opened. Only one control can be oper-ated at a time. It can also be operated using keyless opening *
with the door handle.
WARNING
Make sure that no child or other passenger comes into contact with the windows as they are closing with keyless closing *.
NOTE
One way to reduce the pulsating wind noise heard when the rear windows areopen is to also open the front windowsslightly.
NOTE
The windows cannot be opened at speeds over approx. 180 km/h (ca 112 mph), butthey can be closed. The driver is always responsible for follow- ing applicable traffic regulations.
NOTE
It may not be possible to operate the win- dows in low temperatures.
Related information
Power windows (p. 174)
Pinch protection for windows and sun cur- tains (p. 172)
Reset procedure for pinch protection(p. 173)
Keyless locking and unlocking
* (p. 263)
Locking and unlocking using the remotekey (p. 249)
Page 178 of 683
WINDOWS, GLASS AND MIRRORS
* Option/accessory.
176
Using sun curtains *
There are integrated sun curtains in each rear door.
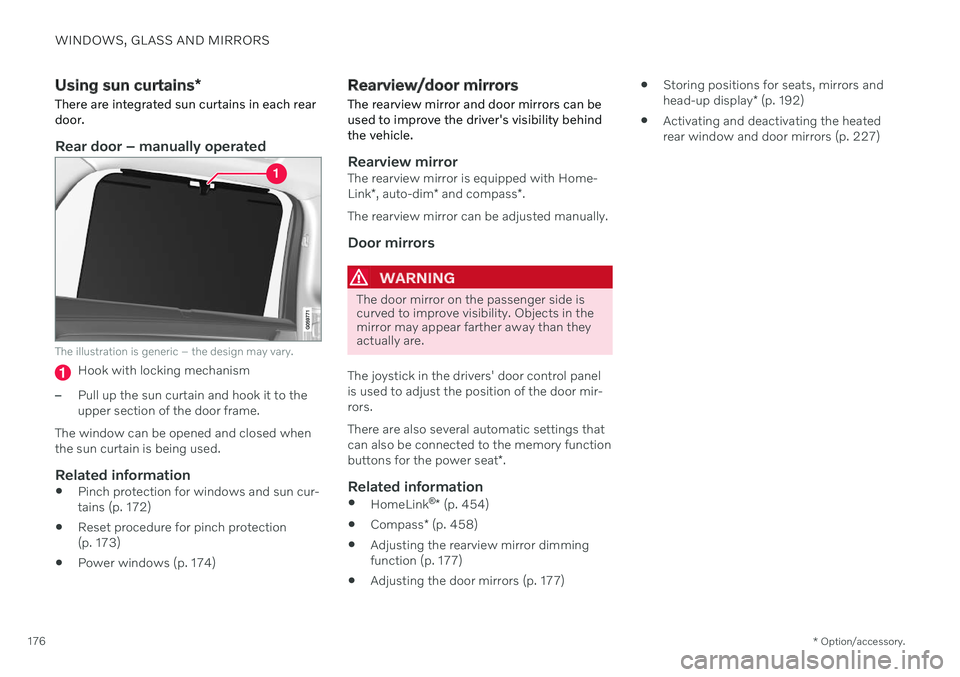
Rear door – manually operated
The illustration is generic – the design may vary.
Hook with locking mechanism
–Pull up the sun curtain and hook it to the upper section of the door frame.
The window can be opened and closed whenthe sun curtain is being used.
Related information
Pinch protection for windows and sun cur-tains (p. 172)
Reset procedure for pinch protection(p. 173)
Power windows (p. 174)
Rearview/door mirrors
The rearview mirror and door mirrors can be used to improve the driver's visibility behindthe vehicle.
Rearview mirrorThe rearview mirror is equipped with Home- Link *, auto-dim * and compass *.
The rearview mirror can be adjusted manually.
Door mirrors
WARNING
The door mirror on the passenger side is curved to improve visibility. Objects in themirror may appear farther away than theyactually are.
The joystick in the drivers' door control panel is used to adjust the position of the door mir-rors. There are also several automatic settings that can also be connected to the memory function buttons for the power seat *.
Related information
HomeLink ®
* (p. 454)
Compass
* (p. 458)
Adjusting the rearview mirror dimming function (p. 177)
Adjusting the door mirrors (p. 177)
Storing positions for seats, mirrors and head-up display
* (p. 192)
Activating and deactivating the heated
rear window and door mirrors (p. 227)
Page 180 of 683
||
WINDOWS, GLASS AND MIRRORS
* Option/accessory.
178 3. Press the
L or R button again. The light in
the button will go out.
Automatically folding door mirrors *The door mirrors can be automatically folded when driving or parking in tight spaces.
1. Press the L and R buttons at the same
time.
2. Release the buttons after about 1 second. The mirrors will automatically stop when they are completely folded in.
Open the mirrors by pressing L and R at the
same time. The mirrors will automatically stopwhen they reach the last-used setting.
Resetting the mirrors' positionA mirror that has been moved out of positionmanually (e.g. hit or bumped into) must beelectrically returned to its original position for automatic folding * to function properly.
1. Fold in the mirrors by pressing the L and R
buttons at the same time.
2. Open them again by pressing the L and R
buttons at the same time.
3. Repeat the above procedure as needed. The mirrors return to their original positions.
Tilting when parking 3The door mirrors can be tilted down to help give the driver a better view along the sides ofthe vehicle, e.g. of the curb when parking.
–Select reverse gear and press the
L or R
mirror button.
Please note that the button may need to be pressed twice depending on settings. Whenthe door mirror is tilted down, the light in thebutton will flash. When reverse gear isengaged, the door mirrors will automaticallystart to move after 3 seconds and will reachtheir original position after about 8 seconds.
Automatically tilting when parking 3With this setting, the door mirrors will auto-matically tilt down when reverse gear isengaged. The folded position is preset andcannot be adjusted. 1.
Tap
Settings in the center display's Top
view.
2. Tap
My CarMirrors and Convenience.
3. Under
Exterior Mirror Tilt at Reverse,
select Off, Driver, Passenger or Both to
activate/deactivate and to select which mirror to tilt.
To immediately return the door mirrors to theiroriginal position, press the L or R button
twice.
Automatic folding when the vehicle is locked *
In the center display, you can set the door mir- rors to retract/extend automatically when thevehicle is locked/unlocked with the key. 1.
Tap
Settings in the center display's Top
view.
2. Tap
My CarMirrors and Convenience.
3. Select
Fold Mirror When Locked to acti-
vate/deactivate.
NOTE
If the door mirrors are folded in manually using the L and R buttons and then the
vehicle is locked, the mirrors will not auto-matically fold out when the vehicle isunlocked, even if this preference has beenset. In this case, the mirrors must be foldedout manually.
Related information
Rearview/door mirrors (p. 176)
Adjusting the rearview mirror dimming function (p. 177)
Storing positions for seats, mirrors and head-up display
* (p. 192)
Activating and deactivating the heated rear window and door mirrors (p. 227)
3
Only on models equipped with a power driver's seat with memory buttons *.
Page 196 of 683
||
SEATS AND STEERING WHEEL
* Option/accessory.
194
Front door closed
–Press and hold one of the memory buttons 1 (
) or 2 () until the seat, door mirrors
and head-up display stop in the positions stored in that memory button.
If the memory button is released, the seat,door mirrors and head-up display will stopmoving.
WARNING
This list point needs to be translated exactly to: "Because the driver's seatcan be adjusted with the ignition off,children should never be left unatten-ded in the vehicle.
Movement of the seat can be STOP-PED at any time by pressing any but-ton on the power seat control panel.
Do not adjust the seat while driving.
The seat should be adjusted so that thebrake pedal can be depressed fully. Inaddition, position the seat as far rear-ward as comfort and control allow.
The seat rails on the floor must not beobstructed in any way when the seat isin motion.
NOTE
For the stored positions to work, all driver profiles need to be in Protect Profilemode.
Related information
Manual front seats (p. 190)
Power
* front seats (p. 191)
Adjusting the power
* front seats (p. 191)
Storing positions for seats, mirrors and head-up display
* (p. 192)
Adjusting front seat massage settings
*
(p. 195)
Adjusting
* front seat cushion length
(p. 196)
Front seat massage
* settings (p. 194)
Adjusting front seat side bolster settings
*
(p. 197)
Adjusting front seat lumbar support
*
(p. 197)
Adjusting the passenger seat from thedriver's seat
* (p. 199)
Adjusting the door mirrors (p. 177)
Head-up display settings
* (p. 148)
Front seat massage * settings
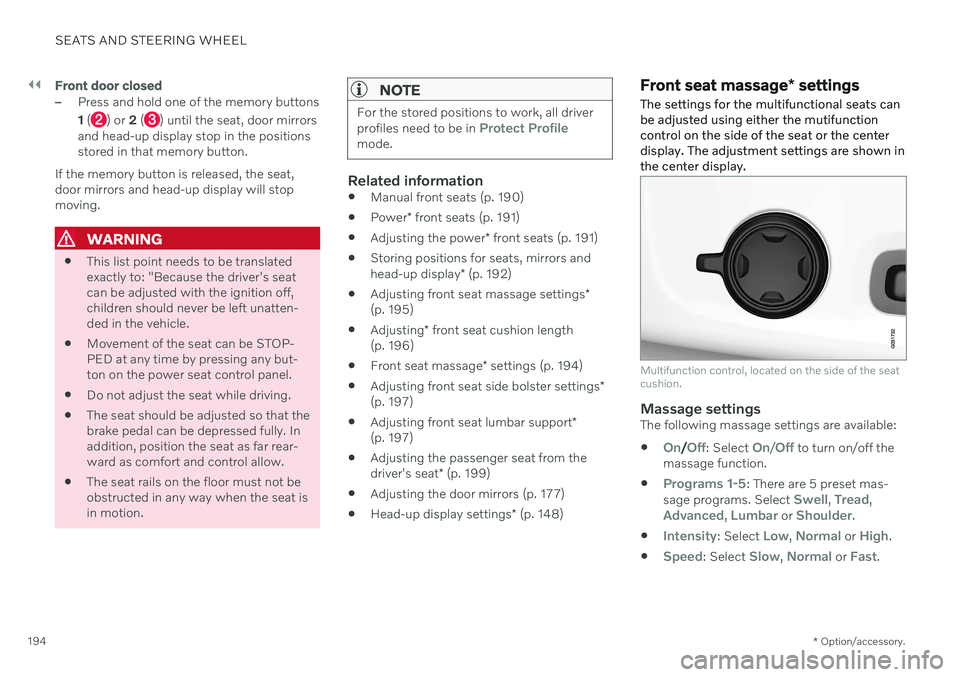
The settings for the multifunctional seats can be adjusted using either the mutifunctioncontrol on the side of the seat or the centerdisplay. The adjustment settings are shown inthe center display.
Multifunction control, located on the side of the seat cushion.
Massage settingsThe following massage settings are available:
On/Off: Select On/Off to turn on/off the
massage function.
Programs 1-5: There are 5 preset mas-
sage programs. Select Swell, Tread,Advanced, Lumbar or Shoulder.
Intensity: Select Low, Normal or High.
Speed: Select Slow, Normal or Fast.
Page 236 of 683
CLIMATE CONTROL
* Option/accessory.
234
Parking climate *
Parking climate is an umbrella term for vari- ous functions that improve the passengercompartment climate when the vehicle isparked, e.g. preconditioning.
Parking climate functions are con- trolled from the Parking climate tab
in the center display's Climate view. Tap the symbol in the center of the
climate bar to open Climate view.
Related information
Climate (p. 206)
Preconditioning
* (p. 234)
Pre-cleaning
* (p. 238)
Climate comfort retaining function
*
(p. 239)
Parking climate symbols and messages
*
(p. 241)
Preconditioning *
Preconditioning is a climate function that, if possible, attempts to achieve a comfortabletemperature in the passenger compartmentbefore driving.
Preconditioning can be started immediately or started at a preset time using a timer. In warm weather, the climate system venti- lates the passenger compartment by blowingair in from outside. The function cannot heatthe passenger compartment.
NOTE
During preconditioning of the passenger compartment, the vehicle works to reach acomfortable temperature and not the tem-perature set in the climate system.
NOTE
Pre-cleaning * starts automatically when
preconditioning is complete.
Related information
Parking climate
* (p. 234)
Starting and stopping preconditioning
*
(p. 234)
Preconditioning timer
* (p. 235)
Pre-cleaning
* (p. 238)
Starting and stopping preconditioning *
Preconditioning ventilates the passenger compartment, if possible, before driving. Thefunction can be started in the center displayor from a cellular phone.
Starting and stopping from the vehicle
1. Tap the symbol in the center of the climate bar to open Climate view in the center dis- play.
2. Select the
Parking climate tab.
3. Tap
Start Pre-con. & Cleaning.
> Preconditioning starts/stops and the button lights up/goes out.
NOTE
The vehicle doors and windows should be closed during preconditioning of the pas-senger compartment.
NOTE
Pre-cleaning * starts automatically when
preconditioning is complete.