2021 VOLVO V90 CROSS COUNTRY key
[x] Cancel search: keyPage 404 of 683
||
STARTING AND DRIVING
402
Related information
Starting the vehicle (p. 398)
Adjusting the steering wheel (p. 203)
Jump starting using another battery (p. 444)
Selecting ignition mode (p. 402)
Selecting ignition mode
The vehicle's ignition can be put in various modes (levels) to make different functionsavailable.
Selecting an ignition mode
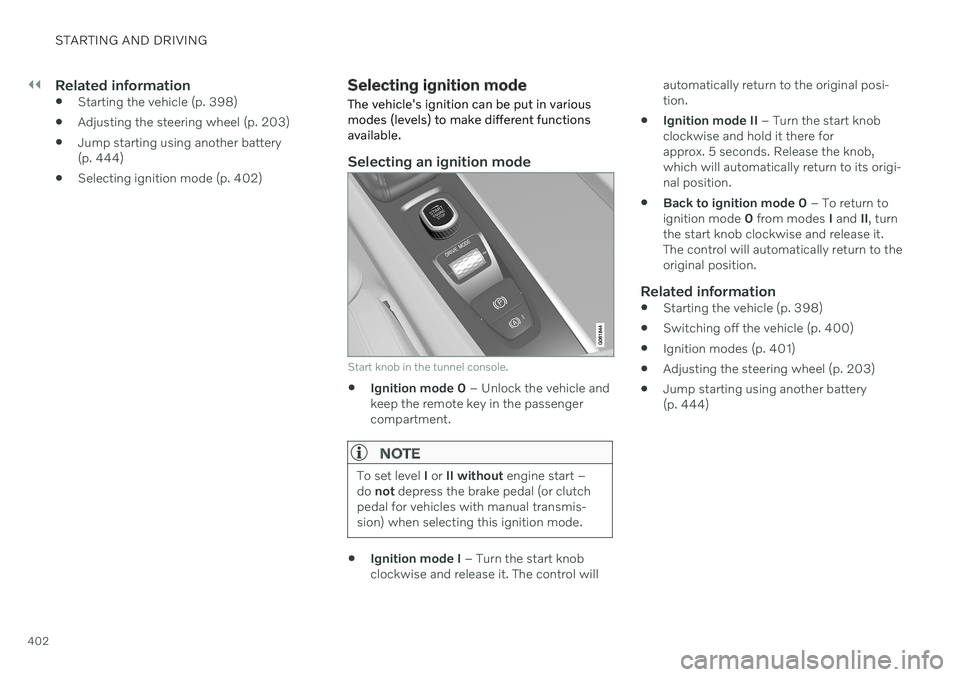
Start knob in the tunnel console.
Ignition mode 0
– Unlock the vehicle and
keep the remote key in the passenger compartment.
NOTE
To set level I or II without engine start –
do not depress the brake pedal (or clutch
pedal for vehicles with manual transmis- sion) when selecting this ignition mode.
Ignition mode I
– Turn the start knob
clockwise and release it. The control will automatically return to the original posi- tion.
Ignition mode II
– Turn the start knob
clockwise and hold it there forapprox. 5 seconds. Release the knob,which will automatically return to its origi-nal position.
Back to ignition mode 0
– To return to
ignition mode 0 from modes I and II, turn
the start knob clockwise and release it.The control will automatically return to theoriginal position.
Related information
Starting the vehicle (p. 398)
Switching off the vehicle (p. 400)
Ignition modes (p. 401)
Adjusting the steering wheel (p. 203)
Jump starting using another battery(p. 444)
Page 422 of 683
||
STARTING AND DRIVING
* Option/accessory.
420
Comfort
Comfort is the vehicle's default mode. This
setting offers driving comfort, light steering and soft suspension. In
Comfort mode, no tachometer will be dis-
played in the instrument panel 10
.
Eco
Adapt the vehicle for more fuel-efficient and eco-friendly driving with Eco mode.
In this mode, the Start/Stop function is acti- vated and certain climate settings arereduced. When driving in
Eco mode, an ECO gauge
indicating how economical the driving is will be displayed in the instrument panel.
Off Road
Helps maximize the vehicle's ability to tra- verse difficult terrain or poor roads.
Steering is light and all-wheel drive and thelow-speed function with assistance for driving downhill (HDC 11
) are activated. The Start/Stop
function is deactivated. This mode can only be activated at low speeds. The permitted speed range will beshown in the speedometer. If this speed is exceeded,
Off Road mode will be deactivated
and another drive mode activated. In
Off Road mode, a compass will be dis-
played between the speedometer and the tachometer in the instrument panel.
NOTE
This drive mode is not designed to be used for normal street driving.
Dynamic
Dynamic mode is designed to help pro-
vide sportier driving characteristics and a faster acceleration response.
Gear shifting will be faster and more distinctand the transmission will prioritize gears witha higher traction force. Steering response is faster and suspension is stiffer 12
to help reduce body roll when corner-
ing. The Start/Stop function is deactivated.
Dynamic mode is also available in a Polestar
Engineered* version.
Individual
Customizes drive mode to personal prefer- ences. Select one of the drive modes as a basis andadjust the settings to achieve your preferreddriving characteristics. These settings will bestored in the active driver profile and will beavailable every time the vehicle is unlockedwith that remote key. Individual drive mode is only available if it has been activated in the center display.
9
All Wheel Drive
10 Only applies to vehicles with 8-inch instrument panels.
11 Hill Descent Control
12 Vehicles with Four-C.
Page 427 of 683
STARTING AND DRIVING
}}
* Option/accessory.425
Start/Stop function Start/Stop is a function that temporarily switches off the engine when the vehicle hasstopped, e.g. at a traffic light or in heavy traf-fic, and then starts it again automaticallywhen needed.
The Start/Stop function reduces fuel con- sumption, which helps to reduce exhaustemissions. The system makes it possible to drive more economically and climate-smart by letting theengine auto-stop when appropriate.
Related information
Driving with the Start/Stop function(p. 425)
Conditions for the Start/Stop function(p. 427)
Drive modes
* (p. 419)
Driving with the Start/Stop function
Start/stop is a function that temporarily turns off the engine when the vehicle is stationaryand then automatically starts it when needed.
The Start/Stop function is available when the ignition is started and can be activated if cer-tain conditions are met. The instrument panel indicates when the func- tion is
Available
active
not available.
All of the vehicle's ordinary systems, such aslighting, radio, etc. function normally when theengine has been auto-stopped. Certain func-tions may be temporarily reduced howeversuch as the climate system's blower speed orextremely high audio system volume.
Auto-stopTo auto-stop the engine: Stop the vehicle by applying the brakes and keep the brake pedal depressed. Theengine will auto-stop.
In
Comfort or Eco drive mode, the engine
may auto-stop before the vehicle has com- pletely stopped. With Adaptive Cruise Control or Pilot Assistactivated, the engine will auto-stop aboutthree seconds after the vehicle has stopped.
Auto-startThe following conditions must be met for theengine to auto-start.
Release the brake pedal. The engine willauto-start and the vehicle can be driven.On an uphill gradient, Hill Start Assist (HSA 14
) will activate to help prevent the
vehicle from rolling backward.
When the Auto-hold function is activated, auto-start will be delayed until the acceler-ator is pressed.
When Adaptive Cruise Control or PilotAssist are activated, the engine will auto-start when the accelerator pedal is depressed or the
button on the left-
side steering wheel keypad is pressed.
Maintain pressure on the brake pedal and press the accelerator pedal. The enginewill auto-start.
On a downhill gradient: Release the brakepedal slightly so that the vehicle begins toroll. The engine will auto-start after a slightincrease in speed.
14
Hill Start Assist
Page 440 of 683
STARTING AND DRIVING
* Option/accessory.
438
Opening/closing the fuel filler door
The vehicle must be unlocked before the fuel filler door can be opened 20
.
An arrow next to the fuel pump symbol in the instru-ment panel indicates the sideof the vehicle on which thefuel filler door is located.
1. Open the fuel filler door by pressing lightly
on its rear edge.
2. After refueling, press the fuel filler door lightly to close it.
Related information
Refueling (p. 438)
Refueling
The fuel tank is equipped with a fuel filling system without a cover.
Refueling the vehicle at a service station
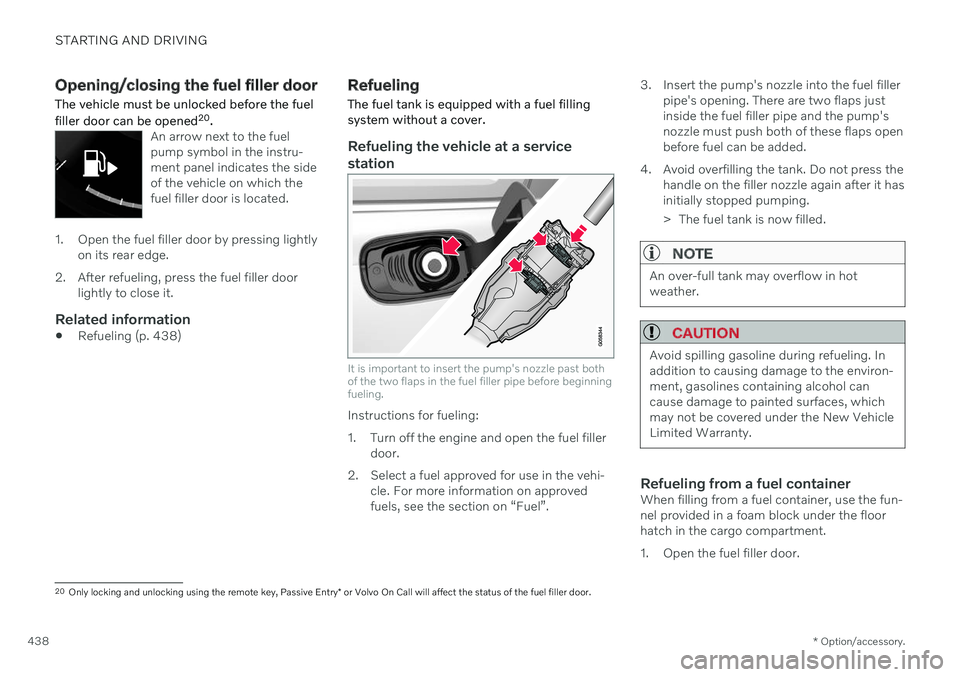
It is important to insert the pump's nozzle past both of the two flaps in the fuel filler pipe before beginningfueling.
Instructions for fueling:
1. Turn off the engine and open the fuel filler door.
2. Select a fuel approved for use in the vehi- cle. For more information on approved fuels, see the section on “Fuel”. 3. Insert the pump's nozzle into the fuel filler
pipe's opening. There are two flaps justinside the fuel filler pipe and the pump'snozzle must push both of these flaps openbefore fuel can be added.
4. Avoid overfilling the tank. Do not press the handle on the filler nozzle again after it hasinitially stopped pumping.
> The fuel tank is now filled.
NOTE
An over-full tank may overflow in hot weather.
CAUTION
Avoid spilling gasoline during refueling. In addition to causing damage to the environ-ment, gasolines containing alcohol cancause damage to painted surfaces, whichmay not be covered under the New VehicleLimited Warranty.
Refueling from a fuel containerWhen filling from a fuel container, use the fun- nel provided in a foam block under the floorhatch in the cargo compartment.
1. Open the fuel filler door.
20Only locking and unlocking using the remote key, Passive Entry * or Volvo On Call will affect the status of the fuel filler door.
Page 452 of 683
||
STARTING AND DRIVING
* Option/accessory.
450
Checking trailer lights *
Automatic check
When the trailer has been connected to the vehicle's electrical system, its lights can bechecked by automatically activating them.This function helps the driver check that thetrailer's lights are functioning correctly beforestarting to drive. In order to perform this check, the vehicle must be switched off.
1. When a trailer is connected to the towbar,
the message
Automatic Trailer Lamp
Check will appear in the instrument panel.
2. Acknowledge the message by pressing the O button on the right-side steering
wheel keypad.
> The light check will begin.
3. Get out of the vehicle to perform the check.
> All of the lights on the trailer will beginflashing, and then illuminate separately one at a time.
4. Visually check that all of the trailer's lights are functioning correctly.
5. After a short time, all of the trailer's lights will start flashing again.
> The light check is completed.
Disabling the automatic check
The automatic light check can be disabled in the center display. 1.Tap
Settings in the Top view.
2. Tap
My CarLights and Lighting.
3. Deselect
Automatic Trailer Lamp
Check.
Manual check
If the automatic check has been disabled, the check can be started manually. 1. Tap
Settings in the Top view.
2. Tap
My CarLights and Lighting.
3. Select
Manual Trailer Lamp Check.
> The light check will begin. Get out of the vehicle to perform the check.
Related information
Driving with a trailer (p. 446)
Towing using a towline
This section refers to one vehicle being towed behind another using a towline.
Before towing another vehicle, check applica- ble speed limit regulations.
Preparations and towing
CAUTION
For some transmission variants, it is not possible to shift from P position if theengine is switched off. Contact an author-ized Volvo workshop for assistance towingor call a professional towing service.
CAUTION
Note that the vehicle must always be towed with the wheels rolling forward.
Do not tow a vehicle with automatictransmission at a speed greater than80 km/h (50 mph) or for a distancegreater than 80 km (50 miles).
Page 453 of 683
STARTING AND DRIVING
}}
451
WARNING
Ignition mode
II must be active – all
airbags are deactivated in ignition mode I.
Always have the remote key in thevehicle when it is towed.
WARNING
The brake and steering servos do not work when the engine is off – it takesabout 5 times more pressure on the brakepedal and steering requires much moreeffort than normal.
1. Turn on the hazard warning flashers.
2. Attach the towline to the towing eyelet.
3. Put the vehicle in ignition mode II – with-
out pressing the brake pedal, turn the start knob clockwise and hold it there for about4 seconds. Release the knob, which willautomatically return to its original position.
4. Move the gear selector to neutral (N) and release the parking brake. If the battery charge level is too low, it may not be possible to release the parkingbrake. Connect an auxiliary battery to thevehicle if the battery is discharged.
> The towing vehicle can now start driv-ing. 5. Keep the towline taut when the towing
vehicle slows down by applying light pres- sure to the brake pedal. This will helpavoid jarring movements.
6. Be prepared to apply the brakes to stop the vehicle.
Jump startingDo not tow the vehicle to start the engine. Usean auxiliary battery if the start battery's chargelevel is so low that the engine cannot bestarted.
CAUTION
Attempting to tow with the engine running could result in damage to the three-waycatalytic converter.
Related information
Attaching and removing the towing eyelet (p. 451)
Hazard warning flashers (p. 165)
Recovery (p. 453)
Jump starting using another battery(p. 444)
Selecting ignition mode (p. 402)
Transmission (p. 412)
Attaching and removing the towing eyelet
Use the towing eyelet when towing. Screw the towing eyelet securely into place in thethreaded outlet behind the cover on the right-hand side of the front and rear bumpers.
NOTE
If the vehicle is equipped with a towbar, there is no rear attachment for the towingeye.
Attaching the towing eyelet
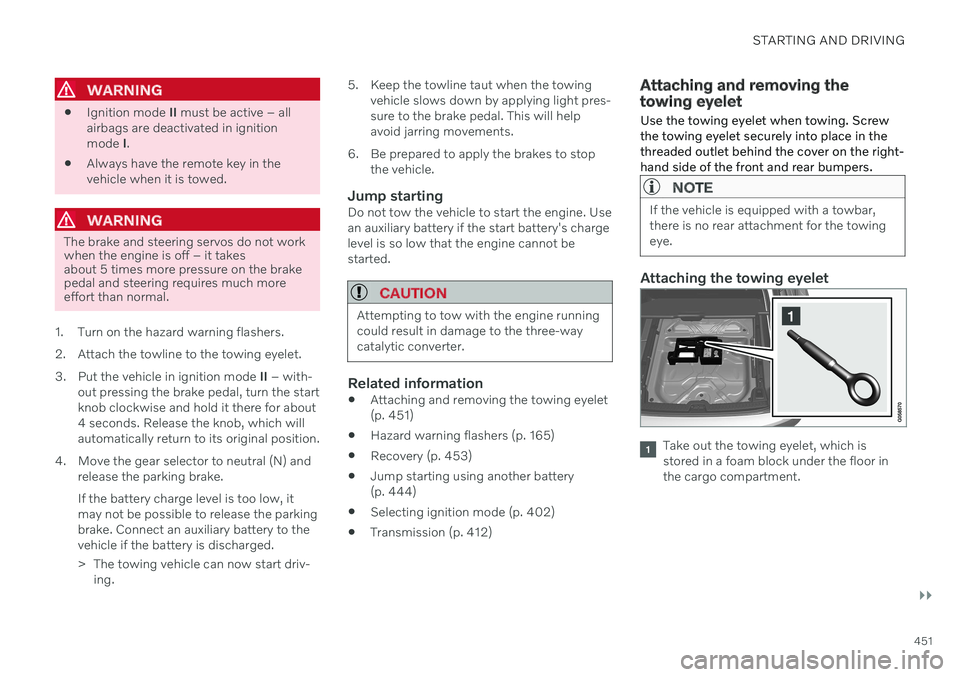
Take out the towing eyelet, which is stored in a foam block under the floor inthe cargo compartment.
Page 464 of 683
AUDIO, MEDIA AND INTERNET
* Option/accessory.
462
Audio, media and Internet
The audio and media system consists of a media player and a radio. A cellular phone canalso be connected through Bluetooth to usehands-free functions or play music in thevehicle. When the vehicle is connected to theInternet, it is also possible to use apps to playmedia.
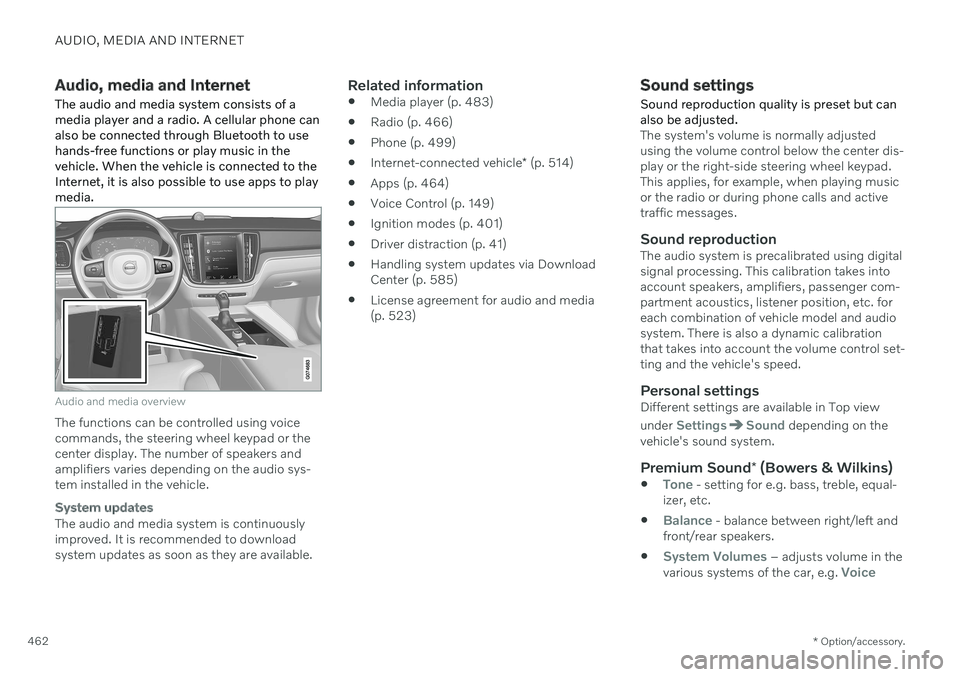
Audio and media overview
The functions can be controlled using voice commands, the steering wheel keypad or thecenter display. The number of speakers andamplifiers varies depending on the audio sys-tem installed in the vehicle.
System updates
The audio and media system is continuously improved. It is recommended to download system updates as soon as they are available.
Related information
Media player (p. 483)
Radio (p. 466)
Phone (p. 499)
Internet-connected vehicle
* (p. 514)
Apps (p. 464)
Voice Control (p. 149)
Ignition modes (p. 401)
Driver distraction (p. 41)
Handling system updates via DownloadCenter (p. 585)
License agreement for audio and media(p. 523)
Sound settings
Sound reproduction quality is preset but can also be adjusted.
The system's volume is normally adjusted using the volume control below the center dis-play or the right-side steering wheel keypad.This applies, for example, when playing musicor the radio or during phone calls and activetraffic messages.
Sound reproductionThe audio system is precalibrated using digitalsignal processing. This calibration takes intoaccount speakers, amplifiers, passenger com-partment acoustics, listener position, etc. foreach combination of vehicle model and audiosystem. There is also a dynamic calibrationthat takes into account the volume control set-ting and the vehicle's speed.
Personal settingsDifferent settings are available in Top view under
SettingsSound depending on the
vehicle's sound system.
Premium Sound * (Bowers & Wilkins)
Tone - setting for e.g. bass, treble, equal-
izer, etc.
Balance - balance between right/left and
front/rear speakers.
System Volumes – adjusts volume in the
various systems of the car, e.g. Voice
Page 468 of 683
||
AUDIO, MEDIA AND INTERNET
* Option/accessory.
466
Update certain apps
1.
Open the Download Center app in App
view.
2. Select
Application updates to open a list
of all available updates.
3. Find the desired app and select
Install.
> The update will begin.
Related information
Apps (p. 464)
Download apps (p. 465)
Deleting apps (p. 466)
Handling system updates via Download Center (p. 585)
Internet-connected vehicle
* (p. 514)
Deleting apps
When the vehicle is connected to the Inter- net, it is possible to uninstall apps.
If the app is being used, it must be closed before it can be uninstalled. 1. Open the
Download Center app in App
view.
2. Select Application updates to open a list
of all installed apps.
3. Find the desired app and select
Uninstallto begin uninstalling the app.
> When the app has been uninstalled, it
will be removed from the list.
Related information
Apps (p. 464)
Download apps (p. 465)
Updating apps (p. 465)
Handling system updates via Download Center (p. 585)
Internet-connected vehicle
* (p. 514)
Radio
The radio can receive broadcasting from the FM waveband with HD Radio ™ Technology
and SiriusXM ®
Satellite radio *. When the
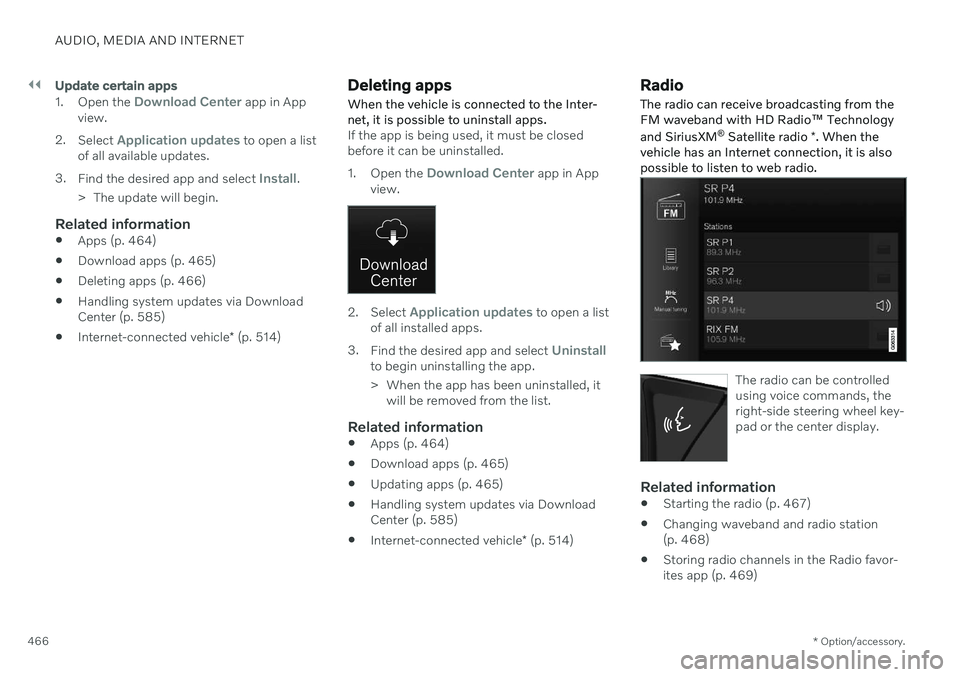
vehicle has an Internet connection, it is alsopossible to listen to web radio.
The radio can be controlled using voice commands, theright-side steering wheel key-pad or the center display.
Related information
Starting the radio (p. 467)
Changing waveband and radio station (p. 468)
Storing radio channels in the Radio favor-ites app (p. 469)